
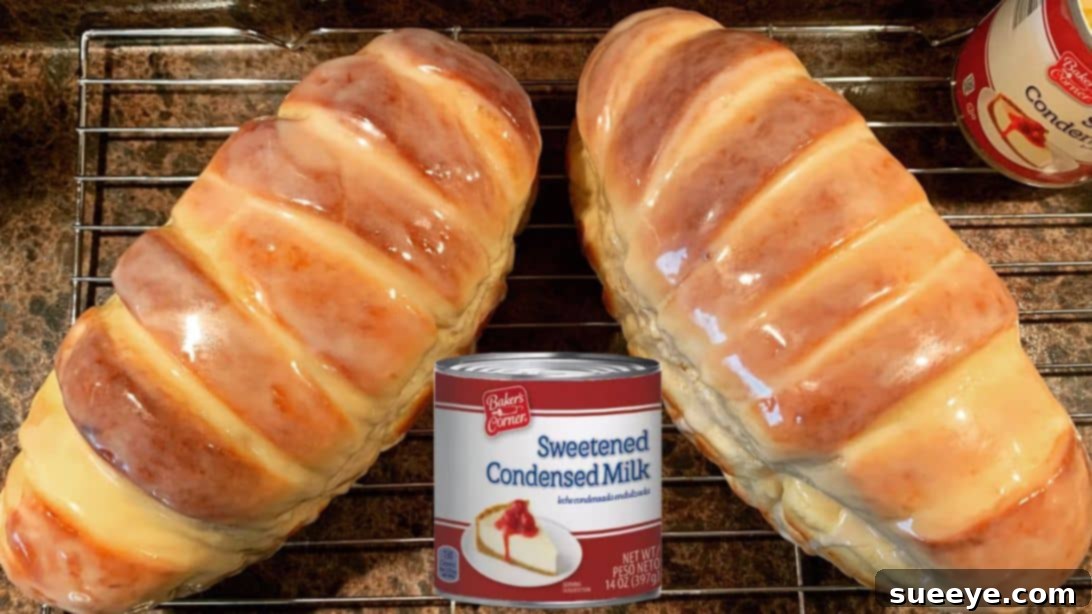
Ultimate Soft & Fluffy Condensed Milk Bread Recipe: Your Go-To Homemade Delight
There’s nothing quite like the aroma of freshly baked bread filling your home, and when it comes to a truly comforting and irresistible treat, condensed milk bread stands out. This particular recipe, inspired by the brilliant creators at Yeast Mode on YouTube, has quickly become a firm favorite in my kitchen. It’s an unbelievably simple and straightforward method that yields a bread so soft, so fluffy, and so utterly delicious, you’ll find it hard to stop at just one slice. Whether you’re a seasoned baker or just starting your bread-making journey, this recipe promises a delightful experience and results that will impress everyone. Forget complicated techniques; prepare to master the art of baking a perfect loaf with minimal fuss, ensuring a sweet, tender, and incredibly satisfying homemade bread every time.
My first attempt at a condensed milk bread was an absolute revelation. The unique sweetness and moisture that condensed milk imparts to the dough create a texture that’s unparalleled – light, airy, and incredibly tender. The sheer joy of pulling a warm, golden-brown loaf from the oven, knowing you’ve created something so exquisite, is truly unmatched. This homemade bread isn’t just a snack; it’s an experience. Its rich flavor and heavenly texture are so addictive that I found myself baking a second loaf the very next day, eager to relive the deliciousness. It’s the kind of bread that elevates a simple breakfast, makes for an extraordinary afternoon tea, or can even be a delightful dessert. Get ready to embark on a baking adventure that will undoubtedly become a staple in your culinary repertoire for its simplicity and exceptional results.
Essential Ingredients for Your Heavenly Soft and Fluffy Condensed Milk Bread
Crafting this super soft and fluffy bread requires a few simple ingredients, each playing a crucial role in achieving that perfect texture and flavor. Quality ingredients make a noticeable difference, so choose fresh options where possible. Here’s what you’ll need to create this incredibly tender homemade delight:
For the Dough:
- 1 cup (240ml) fresh milk: Whole milk is highly recommended for its richness, which contributes significantly to a softer crumb and more indulgent flavor in your milk bread.
- 1 large egg: Acts as a powerful binder, adds richness to the dough, and helps achieve that beautiful, golden-brown crust.
- ¼ cup (60ml) sweetened condensed milk: The star ingredient of this recipe! It provides essential sweetness, moisture, and is key to the bread’s signature incredibly tender and soft texture.
- 2 tsp instant yeast: The crucial leavening agent that makes your bread rise beautifully. Instant yeast is convenient as it can be added directly to dry ingredients without needing to be proofed first.
- 3¼ cups (approximately 400g) all-purpose flour: The primary structural component of the bread. Accurate measurement, preferably by weight, is vital for achieving the desired consistency and preventing a dense loaf.
- ½ tsp salt: Balances the sweetness from the condensed milk, enhances all the other flavors, and helps to regulate the yeast activity for an optimal rise.
- 3 tbsp unsalted butter, softened: Incorporating butter adds incredible richness, tenderness, and contributes to a wonderfully soft and flavorful homemade bread.
- 1 large egg, beaten: Reserved specifically for the egg wash, which will give your baked condensed milk bread a beautiful, shiny, and appetizing golden-brown finish.
For the Irresistible Glaze:
- 2 tbsp unsalted butter, melted: Forms the luxurious base of our glossy glaze, adding an extra layer of richness and flavor to the warm bread.
- 1 tbsp sweetened condensed milk: This second addition of condensed milk to the glaze enhances the bread’s sweetness and provides that signature milky flavor and beautiful shine to the warm crust.
Step-by-Step Guide to Baking Perfect Soft & Fluffy Condensed Milk Bread
Follow these detailed instructions carefully to ensure your homemade condensed milk bread turns out perfectly soft, fluffy, and utterly delicious every time. Precision, patience, and attention to detail are key to mastering this delightful bread recipe!
Step 1: Mixing the Dough and Initial Kneading for Optimal Texture
Begin your bread-making journey by combining the wet ingredients in a large mixing bowl. Pour in the fresh milk, followed by the generous quarter cup of sweetened condensed milk, and then gently sprinkle in the instant yeast. Give these liquids a good, gentle whisk to ensure the yeast begins to dissolve and activate effectively. This initial mixing step helps to distribute the yeast evenly throughout the mixture, setting the stage for a consistent and robust rise. Next, add the measured all-purpose flour and salt to the bowl. Using a sturdy spoon, a dough whisk, or the paddle attachment of a stand mixer, mix everything together until a shaggy dough forms. At this point, it doesn’t need to be perfectly smooth; the key is to ensure all the dry ingredients are fully moistened. Now, incorporate the softened unsalted butter. This addition is crucial for enhancing the bread’s flavor, tenderness, and overall richness. Continue to mix and fold the dough until the butter is completely absorbed, and the dough starts to come together into a more cohesive mass. Transfer the dough onto a clean, lightly floured counter or a silicone mat. Knead the dough vigorously for approximately 10-15 minutes by hand, or 8-10 minutes with a stand mixer equipped with a dough hook. The objective here is to fully develop the gluten, which is essential for giving your bread its characteristic elasticity, chewiness, and ability to hold its shape. You’ll know the dough is perfectly kneaded when it becomes smooth, pliable, and springs back slowly when gently poked with a finger. Once the dough has reached this ideal state, shape it into a smooth, tight ball. Lightly grease a clean bowl with a neutral oil (such as vegetable or canola oil), place the dough ball into it, and turn it around a few times to ensure it is completely coated with oil. This important step prevents the dough from drying out and sticking during the crucial first proofing.
Step 2: First Proofing and Expertly Shaping Your Soft Bread Loaf
Once your dough is properly oiled, cover the bowl tightly with plastic wrap or a clean kitchen towel. This creates a warm, humid environment ideal for yeast activity. Set the covered bowl aside in a warm, draft-free place to proof. This first rise is a critical step for developing both the complex flavors and the signature light, airy texture of your condensed milk bread. Allow the dough to proof for approximately 1 hour, or until it has visibly doubled in size. A reliable test for sufficient proofing is the “poke test”: gently poke the dough with a floured finger; if the indentation remains, it’s ready. If it springs back immediately, it needs more time. Once risen, gently punch down the dough to “degas” it, releasing the accumulated carbon dioxide. This step helps to create a finer, more even crumb structure in your finished bread. Transfer the dough back to your lightly floured work surface. Using a rolling pin, flatten the dough into a rectangular shape, aiming for an even thickness of about 1 centimeter (roughly 0.4 inches). Crucially, ensure the width of your dough rectangle is approximately the same as the length of your loaf pan; this will ensure a perfect fit. Carefully, and with even pressure, begin rolling the dough tightly into a log, starting from one of the longer sides. This tight rolling technique is essential for creating those beautiful, swirled layers that make milk bread so visually appealing and texturally delightful. Place the formed dough roll onto a piece of parchment paper. Using a sharp knife or a dough cutter, slice the dough log into uniform 1-inch thick pieces. These individual rolls will form the charming, distinct segments of your finished bread. Gently lift the parchment paper with the dough pieces and carefully transfer them into a greased or oiled loaf pan. Arrange them snugly together, ensuring there are no large gaps between the pieces. To give your bread a clean, professional finish, gently tuck in any loose edges of the dough. Cover the loaf pan with plastic wrap or a kitchen towel once more and let it rest for a second proofing, lasting about 45 minutes. This final rise allows the dough to relax and rise again, guaranteeing a supremely light and airy final product before baking.
Step 3: Baking to Golden Perfection and Applying the Signature Glaze
While your dough is undergoing its crucial second rise, it’s time to preheat your oven. Set your oven to 180°C (356°F). Proper preheating is absolutely essential for ensuring your bread bakes evenly and develops a beautiful crust from the moment it enters the oven. Once the dough has rested for the full 45 minutes and appears visibly puffy and well-risen, it’s ready for the egg wash. In a small bowl, whisk one large egg until it’s well beaten and uniform. Gently brush the top of the dough with this egg wash, ensuring an even and thorough coating over all the exposed surfaces. This simple step will give your condensed milk bread a beautiful, rich golden-brown crust and a lovely, appetizing sheen. Carefully place the loaf pan into the preheated oven. Bake for approximately 25 to 30 minutes. It’s important to keep a close eye on your bread, especially during the last few minutes of baking, as oven temperatures can vary significantly. The bread should turn a rich, inviting golden brown on top, indicating it’s thoroughly cooked. For an extra check, you can lightly tap the bottom of the loaf pan; if it sounds hollow, your bread is likely done. Once baked to perfection, carefully remove the bread from the oven and let it cool in the pan for a few minutes. This initial cooling helps the bread firm up before you unmold it. Then, carefully unmold it onto a wire rack to cool further. While the bread is still warm, prepare the glaze. In a small bowl, combine the melted butter and the remaining condensed milk. Whisk them together until you have a smooth, uniform, and slightly glossy mixture. Immediately brush this glorious glaze generously over the entire top of your warm condensed milk bread. The residual warmth of the bread will allow the glaze to melt slightly and seep into the crust, adding an extra layer of delicious sweetness and a beautiful, irresistible gloss. Serve your freshly baked, super soft, and fluffy condensed milk bread warm, perhaps with a touch of extra butter or your favorite jam. Enjoy every delectable bite of this easy homemade delight!
Expert Tips for Achieving the Perfect Soft & Fluffy Condensed Milk Bread Every Time
To ensure your condensed milk bread consistently turns out incredibly soft, fluffy, and absolutely delicious, consider these helpful and easy-to-implement baking tips:
- Measure Accurately, Especially Flour: Precision is paramount in baking. When measuring flour, it’s highly recommended to use a kitchen scale (1 cup of all-purpose flour is approximately 125g). Scooping directly from the bag can lead to too much flour, which will result in a dense, dry, and less soft bread.
- Optimal Warmth for Yeast Activation: Yeast is a living organism that thrives in warmth. Ensure your fresh milk is lukewarm (ideally between 105-115°F or 40-46°C) for optimal activation. Also, choose a warm, draft-free spot for proofing your dough to encourage a strong, consistent rise.
- Don’t Skimp on Kneading: Proper kneading is absolutely fundamental for developing gluten, the protein network essential for the bread’s elastic texture and its ability to trap gas, ultimately leading to a light and airy crumb. If using a stand mixer, knead for 8-10 minutes. If kneading by hand, it may take a bit longer, usually 15-20 minutes, until the dough is smooth and elastic.
- Reliable First Proofing Check: The “poke test” is your best friend here. Gently press a floured finger into the dough; if the indentation slowly springs back halfway, your dough is perfectly proofed. If it springs back immediately, it needs more time. If it collapses completely, it’s unfortunately over-proofed.
- Gentle Dough Handling: After the first rise, it’s crucial to handle the dough gently. Avoid deflating it too much when punching it down or shaping it. The goal is to release large gas bubbles while maintaining the overall structure, which contributes to a soft and fluffy texture.
- Calibrate Your Oven Temperature: Oven temperatures can vary significantly from the dial setting. Investing in an inexpensive oven thermometer can help you ensure your oven is at the correct temperature, which directly impacts baking time and the success of your bread.
- The Importance of Cooling: While it’s incredibly tempting to slice into a fresh, warm loaf immediately, allowing the bread to cool slightly on a wire rack after baking is vital. This prevents the bottom from becoming soggy and allows the internal structure of the bread to set properly, ensuring that perfect soft texture.
- Experiment with Flavor Enhancements: For an extra layer of deliciousness, you could try adding a teaspoon of pure vanilla extract to the dough or a sprinkle of ground cinnamon for a delightful variation that complements the sweet milk flavor.
Delicious Variations, Creative Serving Suggestions, and Smart Storage Solutions
This soft and fluffy condensed milk bread is utterly delicious on its own, but its versatile nature allows for many creative adaptations and serving ideas that can elevate your culinary experience:
- Chocolate Swirl Bread: For a decadent treat, before rolling the dough into a log, spread a thin, even layer of melted chocolate or chocolate-hazelnut spread over the flattened dough. This creates a beautiful, rich chocolate swirl when sliced.
- Fruity Sweet Bread: Incorporate about ½ cup of dried fruits like raisins, cranberries, or chopped apricots into the dough during the last few minutes of kneading. These additions provide a wonderful burst of fruity sweetness and texture.
- Sweet & Savory Toast Delight: Slice your baked bread, lightly toast it, and then spread with a generous knob of butter and a sprinkle of flaky sea salt. The combination of sweet bread with savory salt is surprisingly addictive and incredibly delicious.
- Perfect Breakfast Companion: Serve warm slices of this soft bread with your favorite homemade jam, marmalade, or a dollop of fresh cream cheese. It pairs wonderfully with a freshly brewed cup of coffee or a comforting mug of tea.
- Luscious Bread Pudding: If, by some miracle, you happen to have any leftover condensed milk bread (which is highly unlikely given its deliciousness!), it makes an excellent base for a rich, comforting, and incredibly moist bread pudding.
Smart Storage Tips to Keep Your Bread Fresh:
To maintain the incredible freshness and softness of your homemade condensed milk bread, store it in an airtight container or a dedicated bread bag at room temperature. It will remain wonderfully fresh for up to 3-4 days. For longer storage, you can slice the cooled bread and freeze it in a single layer within an airtight freezer bag for up to 2-3 months. When ready to enjoy, thaw individual slices at room temperature or pop them directly into a toaster for a warm, delicious treat straight from frozen.
Baking homemade bread is an incredibly rewarding experience, and this condensed milk bread recipe makes it exceptionally accessible and enjoyable for everyone. The unparalleled softness, the delicate sweetness, and the rich, milky flavor will undoubtedly make it an instant hit with your family and friends. So, gather your ingredients, set aside some time, and prepare to fill your home with the inviting, comforting aroma of a truly special homemade treat. Happy baking, and get ready to enjoy the most delicious soft and fluffy bread you’ve ever made!
*All image credit belongs to Yeast Mode via YouTube. Follow and subscribe to her channel for more amazing and inspiring recipes!