
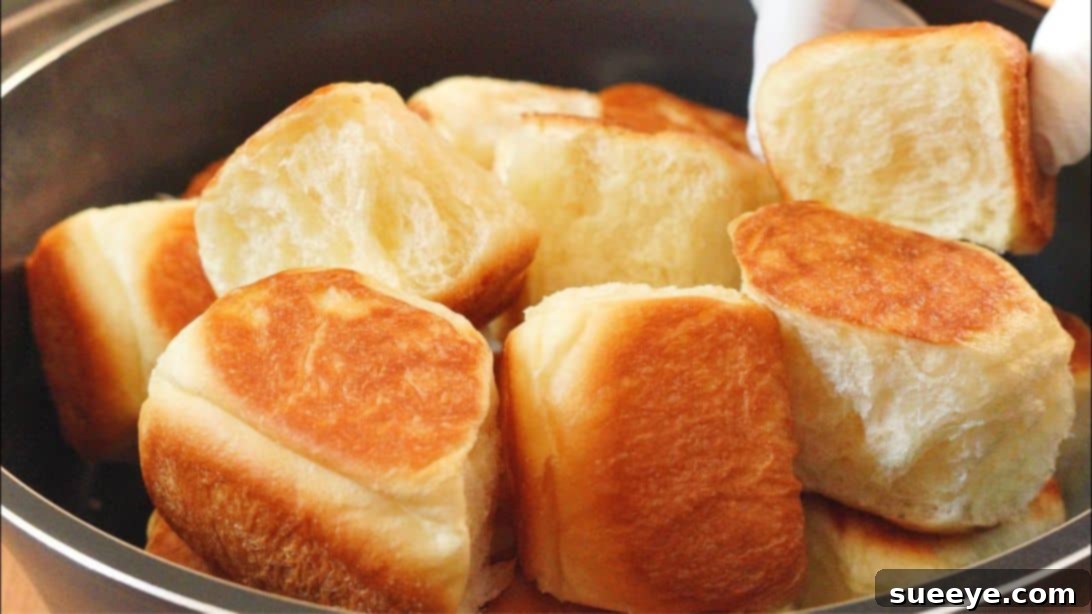
Imagine waking up to the irresistible aroma of freshly baked bread, even if you don’t own an oven. With this incredible no-bake fluffy milk bread recipe, that dream becomes a delicious reality! Discover how to create unbelievably soft, airy, and mouth-watering homemade bread using just your stovetop. This innovative method, inspired by the culinary expertise of 집밥요리 Home Cooking, proves that artisanal bread is accessible to everyone. Perfect for breakfast with a dollop of butter and a hot cup of coffee, or as a delightful side to any meal, this stovetop milk bread will quickly become a household favorite. Say goodbye to store-bought bread and hello to the simple joy of baking without an oven!
No-Bake Fluffy Milk Bread: The Ultimate Stovetop Recipe
Embark on a culinary adventure that brings the comforting warmth of homemade bread to your kitchen without the need for an expensive oven. This guide walks you through every step of making a remarkably soft and fluffy milk bread right on your stovetop. Prepare to be amazed by the simplicity and delicious results!
Ingredients for Your Stovetop Milk Bread
Gathering the right ingredients is the first step to success. Ensure all your ingredients are at room temperature unless otherwise specified, as this helps with dough consistency and yeast activation.
- 1 1/2 cups (approx. 180g) Bread Flour: Essential for its higher protein content, which develops strong gluten for a chewy yet soft texture. All-purpose flour can be used in a pinch, but bread flour yields superior results for this fluffy milk bread.
- 2 1/2 tablespoons (approx. 30g) Granulated Sugar: Not just for sweetness, sugar feeds the yeast, encouraging robust activity and a beautiful golden crust. It also contributes to the bread’s tender crumb.
- 1/2 teaspoon (approx. 3g) Salt: Balances the flavors and helps control yeast activity, preventing the dough from over-fermenting. Don’t skip the salt, as it’s crucial for taste!
- 1 teaspoon (approx. 3g) Instant Yeast: The magic behind the rise! Instant yeast is convenient as it can be added directly to the dry ingredients without prior proofing. Ensure it’s fresh for optimal results.
- 1 Large Egg: Adds richness, color, and helps bind the dough, contributing to the bread’s soft interior and slightly enriched flavor.
- 1/3 cup (approx. 80ml) Milk (lukewarm): Milk adds moisture and tenderness, resulting in a richer, softer dough than water alone. Lukewarm (around 105-115°F or 40-46°C) is key for activating the yeast without killing it.
- 1/8 cup (approx. 28g) Salted Butter (softened): Incorporating softened butter into the dough enriches it, makes it more pliable, and contributes significantly to the final bread’s fluffy texture and delightful flavor. If using unsalted butter, add an extra pinch of salt to the recipe.
Equipment You’ll Need:
- Large mixing bowl
- Whisk or spatula
- Fine-mesh sifter
- Clean work surface
- Non-stick pan with a tight-fitting lid (oven-safe pan or cast iron skillet also works)
- Cling wrap or a clean kitchen towel
- Measuring cups and spoons
Step-by-Step Instructions for No-Bake Milk Bread
Follow these detailed steps to create your perfect stovetop fluffy milk bread. Patience is key, especially during the proofing stages!
Step 1: Activate the Yeast Mixture
In a spacious mixing bowl, crack one large egg. Add 2 1/2 tablespoons of granulated sugar and 1 teaspoon of instant yeast. Vigorously whisk these ingredients together until they are thoroughly combined and the sugar begins to dissolve. This initial mixing step helps to distribute the yeast evenly and starts the activation process, laying the foundation for a well-risen dough.
Step 2: Incorporate Liquid and Salt
Gently warm 1/3 cup of milk until it’s lukewarm – it should feel warm to the touch but not hot (around 105-115°F or 40-46°C). Pour this lukewarm milk into the egg and sugar mixture. Follow this by adding 1/2 teaspoon of salt. Stir everything well to ensure all components are fully integrated. The salt is crucial for flavor and regulating yeast activity, while the warm milk provides the ideal environment for the yeast to thrive.
Step 3: Begin Dough Formation with Flour
Position a fine-mesh sifter directly over your bowl containing the wet ingredients. Carefully sift 1 1/2 cups of bread flour into the mixture. Sifting is an important step as it aerates the flour, removes any lumps, and ensures a smoother, more consistent dough. Gradually mix the ingredients using a spatula or spoon until they come together to form a shaggy, cohesive dough. Avoid overmixing at this stage.
Step 4: Add Butter and Knead for Smoothness
Once your dough has formed, add the 1/8 cup of softened, salted butter directly into the bowl. Begin to fold and work the butter into the dough until it is completely incorporated. Then, transfer the dough to a lightly floured surface and start kneading. This is a critical step for developing gluten, which gives the bread its structure and elasticity. Knead for 8 to 10 minutes until the dough transforms into a smooth, elastic, and non-sticky ball. A good test is the “windowpane test”: you should be able to stretch a small piece of dough thinly enough to see light through it without tearing.
Step 5: First Proofing (Bulk Fermentation)
Form the kneaded dough into a neat ball and place it back into the clean mixing bowl. Cover the bowl tightly with cling wrap or a damp kitchen towel to prevent it from drying out. Allow the dough to ferment at room temperature for approximately 1 hour, or until it has visibly doubled in size. The duration may vary depending on your room’s temperature and humidity. A warm, draft-free spot is ideal for efficient proofing. This bulk fermentation builds flavor and creates the airy texture of the bread.
Step 6: Degassing and Shaping the Loaves
After the first proof, gently punch down the dough to release the accumulated gas. This process, known as degassing, ensures a finer crumb structure. Transfer the dough to a lightly floured work surface. Stretch or roll the dough into a long, rectangular shape. Divide the dough into equal pieces – typically 3 to 4 for a standard pan. Take one piece, flatten it slightly, pinch the ends inwards, and then roll it tightly into an oval or cylindrical shape. Repeat this shaping process for all remaining pieces. Arrange the shaped dough pieces side by side in a well-greased non-stick pan (ensure it has a tight-fitting lid). Cover the pan again with cling wrap or a towel and let them ferment for a second proofing, lasting 40 to 50 minutes, or until noticeably puffy.
Step 7: The Stovetop Baking Process
Place the pan containing your proofed dough with its lid securely on your stovetop burner. Set the heat to the lowest possible setting. This gentle heat is crucial for slowly cooking the bread without burning the bottom. Cook for 11 to 13 minutes. During this time, the bread will continue to rise and begin to bake. Once the first side is cooked and golden brown, carefully open the lid and use a heat-proof spatula or tongs to gently flip the bread upside down within the pan. Replace the lid and continue to cook for an additional 5 to 7 minutes to ensure the other side is also evenly baked and beautifully golden. Keep a close eye on the heat to prevent scorching.
Step 8: Cool and Serve Your Homemade Stovetop Bread
Once both sides of your fluffy milk bread are perfectly golden and cooked through, carefully remove the pan from the heat. Transfer the freshly baked bread from the pan to a wire cooling rack immediately. This allows air to circulate around the bread, preventing it from becoming soggy and ensuring a crisp crust. While it’s tempting to dive in right away, allowing the bread to cool for at least 15-20 minutes on the rack improves its texture and makes it easier to slice. Serve warm with your favorite toppings – butter, jam, or simply plain to savor its delicate flavor. Enjoy the fruits of your labor!
Why Choose No-Bake Fluffy Milk Bread?
This stovetop milk bread recipe is a game-changer for several reasons. Firstly, it democratizes baking, making it accessible to anyone without an oven or even those looking to save energy. Secondly, the result is truly exceptional: a bread that rivals its oven-baked counterparts in terms of softness, flavor, and visual appeal. The gentle, even heat of the stovetop, when managed correctly, creates a wonderfully tender crumb and a delicately browned exterior. It’s a testament to the fact that delicious, homemade bread isn’t just for professional bakers or those with fully equipped kitchens.
Tips for Stovetop Baking Success
- Consistent Low Heat: This is the single most important factor. If your stovetop runs hot, lift the pan periodically to prevent the bottom from burning.
- Tight-Fitting Lid: A good lid traps steam, which helps the bread cook evenly and stay moist, mimicking the environment of an oven.
- Don’t Rush Proofing: Patience during the first and second rise is crucial for light and airy bread. Cold temperatures will slow it down, so find a warm spot.
- Quality Ingredients: Fresh yeast and good quality bread flour make a noticeable difference in the final product.
- Know Your Dough: Learning to feel the dough’s texture (smooth, elastic) during kneading comes with practice. It shouldn’t be too sticky or too stiff.
- Grease Your Pan Well: This prevents sticking and ensures your beautiful bread comes out easily.
Serving and Storage Suggestions
This no-bake fluffy milk bread is incredibly versatile. Enjoy it simply sliced with butter, honey, or jam. It also makes fantastic toast, complements a hearty breakfast, or can be used for delicate sandwiches. To keep your homemade bread fresh, store it in an airtight container or bread bag at room temperature for up to 3 days. For longer storage, slice the bread and freeze it in an airtight bag for up to a month. Thaw individual slices as needed for quick enjoyment.
Troubleshooting Common Bread-Making Issues
- Dough didn’t rise: Your yeast might be old or the milk was too hot/cold. Ensure ingredients are fresh and at the right temperature.
- Bread is dense: This can be due to not enough kneading (gluten didn’t develop), insufficient proofing time, or not enough moisture.
- Bottom of bread burnt: Your stovetop heat was too high. Always use the lowest possible setting.
- Bread is still doughy inside: Not cooked long enough. Ensure both sides are golden and cooked through. You can use a thermometer; the internal temperature should reach around 200-210°F (93-99°C).
Mastering this no-bake fluffy milk bread recipe is a rewarding experience. It opens up a world of possibilities for those who crave the comfort of homemade bread without the traditional constraints of oven baking. So, roll up your sleeves, gather your ingredients, and prepare to impress yourself and your loved ones with this incredible stovetop creation. Happy baking!