
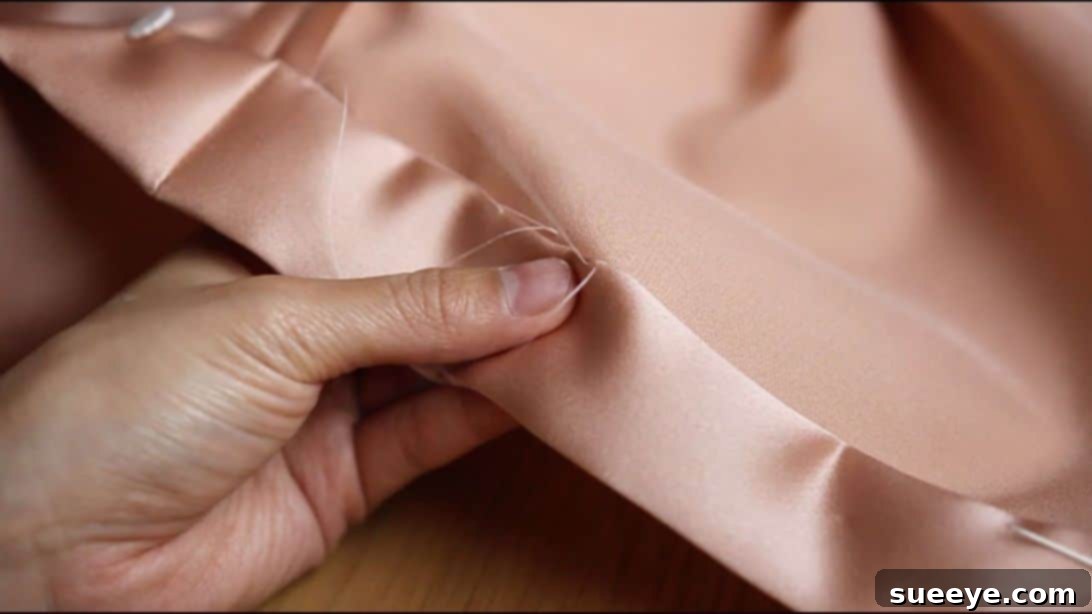
Mastering the Invisible Hem: Your Guide to the Catch Stitch
Achieving a professional finish on your sewing projects often comes down to the details, and few details are as crucial yet overlooked as a perfectly executed hem. Whether you’re working on a flowing dress, a tailored skirt, or smart trousers, the goal is often to create a hem that is strong, durable, and, most importantly, invisible from the outside. If you’ve ever wondered how to hem a garment without any stitches showing, the answer lies in mastering the catch stitch.
The catch stitch, also widely known as the herringbone stitch, is a fundamental hand-sewing technique that creates a zigzag pattern on the inside of a garment hem. Its unique construction allows it to secure two folded edges together while remaining virtually undetectable on the right side of the fabric. This method is celebrated for its strength and permanence, making it an ideal choice for hems that need to withstand regular wear and washing. This comprehensive guide will walk you through everything you need to know to create beautiful, invisible hems using the catch stitch, transforming your sewing skills and the overall quality of your finished garments.
RELATED: Tackling Common Sewing Machine Problems: Troubleshooting Guide
What is a Catch Stitch and Why Is It Invisible?
At its core, a catch stitch is a hand stitch characterized by its distinctive zigzag pattern. Unlike a simple running stitch or whipstitch that might show through thinner fabrics, the catch stitch is designed to be discreet. It works by taking tiny, almost imperceptible “catches” of the main fabric and securing them to the folded edge of the hem allowance. The key to its invisibility lies in the minimal penetration of the needle through the main fabric layer, often just a few threads, making the resulting stitch mark minuscule and practically unnoticeable.
This method is highly favored for its flexibility and durability. The zigzag nature allows for a slight stretch, which is excellent for garments that require movement or are made from stretch fabrics. It creates a robust bond between the hem allowance and the garment body, preventing the hem from sagging or coming undone over time. Historically, the catch stitch has been a staple in couture and fine tailoring, valued for the clean, polished look it imparts. Learning this technique is a significant step towards achieving professional-grade sewing results, even if you’re relatively new to hand sewing.
For a visual demonstration of the technique, consider watching the detailed tutorial by Tailor Crazed, which complements these written instructions beautifully.
You might also enjoy this clever sewing trick: A Clever Sewing Hack Using Dental Floss
Why Choose an Invisible Hem for Your Garments?
The decision to use an invisible hem technique like the catch stitch often stems from a desire for a superior finish. Here are several compelling reasons why an invisible hem is often the preferred choice:
- Aesthetics and Professionalism: Visible stitches, even if neatly done, can detract from the overall look of a garment, making it appear less polished. An invisible hem provides a clean, seamless edge that screams professionalism and attention to detail.
- Versatility: This technique is suitable for a wide range of fabrics, from delicate silks and chiffons to heavier wools and denims. It’s particularly useful for garments where an exposed stitch would be undesirable, such as formal wear, unlined jackets, or tailored trousers.
- Durability: The interlocking nature of the catch stitch creates a strong, yet flexible, hem that stands up well to washing and wear. It prevents the hem from unraveling or detaching, extending the life of your garment.
- Comfort: For some fabrics, a bulky machine-stitched hem can cause chafing or discomfort. A hand-stitched invisible hem lies flatter against the fabric, contributing to greater comfort, especially in garments worn close to the skin.
- Preserving Fabric Integrity: By minimizing the number of times the needle penetrates the main fabric, an invisible hem reduces the risk of damaging delicate materials.
Embracing the invisible hem allows you to elevate your sewing projects from handmade to handcrafted, adding a touch of elegance and quality that truly makes a difference.
Essential Tools and Materials for an Invisible Hem
Before you begin, gathering the right tools is crucial for a smooth and successful hemming experience. You don’t need a vast array of specialized equipment, but quality tools will make a significant difference in the outcome.
- Thread: Always choose a high-quality all-purpose polyester or cotton thread that closely matches the color of your fabric. If an exact match isn’t possible, opt for a shade slightly darker rather than lighter, as darker threads tend to blend in more effectively. Consider silk thread for very delicate fabrics as it glides smoothly and is strong yet fine.
- Needle: Select a sharp, fine hand-sewing needle. A “sharps” needle is a good all-rounder, but a “betweens” needle, which is shorter, can offer more control for tiny stitches. The finer the needle, the smaller the hole it makes, contributing to invisibility.
- Pins: Fine, sharp dressmaker’s pins are essential for holding your hem in place before stitching. Ensure they are rust-free to avoid staining your fabric.
- Iron and Ironing Board: A well-pressed hem is the foundation of a good invisible hem. An iron with a steam function will be invaluable for creating crisp, accurate folds.
- Measuring Tape or Hem Gauge: Accuracy is key. Use a flexible measuring tape or a specialized hem gauge to ensure your hem allowance is even all the way around.
- Fabric Scissors: Sharp scissors are needed to trim any excess fabric from the hem allowance neatly.
- Thimble (Optional but Recommended): A thimble can protect your finger when pushing the needle through thicker fabrics and can help maintain steady pressure.
- Tailor’s Chalk or Fabric Marker (Optional): Useful for marking your hemline precisely, especially on dark fabrics.
Note: The golden rule for invisible hems is to use a thread that closely matches your fabric color. This minimizes visibility even if a tiny part of the stitch peeks through.
Preparing Your Garment for Hemming
Proper preparation is half the battle when it comes to hemming. Rushing this stage can lead to uneven, ill-fitting hems. Take your time to ensure your garment is ready for stitching.
Step 1: Determine and Press the Hemline
First, decide on your desired finished length. Put on the garment and have someone mark the hemline for you, or do it yourself in front of a mirror, ensuring it’s level all around. Once the desired length is marked, you’ll need to create the hem allowance. Typically, this involves two folds:
- First Fold: Fold the raw edge of the fabric towards the wrong side by about 1/4 to 1/2 inch (0.6 to 1.3 cm). Press this fold crisply with your iron. This initial fold encloses the raw edge, preventing fraying and creating a clean finish.
- Second Fold: Now, fold the hem up again by your desired hem thickness. This second fold will be the main hem allowance. For skirts and dresses, this might be 1.5 to 2 inches (3.8 to 5 cm), while for pants, it could be slightly less. Measure consistently all the way around to ensure an even hem. Press this fold firmly. The better you press, the easier and more accurate your stitching will be. Use steam for a sharp crease, but be mindful of your fabric type.
Secure this double-folded hem with pins, placing them perpendicularly to the hem edge every few inches. Make sure the pins only go through the hem allowance and not the outer layer of the garment, to avoid leaving marks.
How to Hem Using a Catch Stitch (Invisible Hem) – Step-by-Step Guide
Now that your hem is perfectly prepared and pressed, it’s time to learn the elegant catch stitch. This hand stitch creates a strong, flexible, and truly invisible hem when done correctly.
Step 2: Thread Your Needle and Prepare Your Thread
For the catch stitch, you will typically use a single strand of thread. This helps keep your stitches as fine and invisible as possible. Cut about 18-24 inches (45-60 cm) of thread – too long and it tangles, too short and you’ll be re-threading often. Thread your needle and tie a small, secure knot at one end of the single strand. To make the knot more secure, you can wrap the thread around the needle twice, then pull the needle through the loops, tightening it to form a small knot. This prevents the knot from slipping through the fabric.
Step 3: Anchor Your Stitch Securely
To begin, you need to anchor your thread without the knot showing on the outside of your garment. With the garment wrong side out, insert your needle into the folded edge of the hem allowance from behind, ensuring the knot is hidden within the fold. Make a couple of tiny stitches in the same spot, working only within the folded edge. This securely anchors your thread. It is crucial that these initial anchoring stitches do not penetrate the outer layer of your skirt or garment; they should be entirely confined within the hem allowance.
Step 4: Execute the Catch Stitch Zigzag
The catch stitch involves alternating between the main garment fabric and the hem allowance in a zigzag motion. Position your work so the hem allowance is facing you, and you are working from left to right if you are right-handed (or right to left if left-handed, adjusting the needle direction accordingly).
- First Catch (Main Fabric): Move approximately 1/4 to 1/2 inch (0.6 to 1.3 cm) along your hem to the right from your anchor point. Point your needle slightly to the left (towards the starting point) and pick up just one or two threads from the main fabric of the skirt. Aim to make this stitch as tiny as possible – it should barely be visible on the outer side of the fabric. Pull the thread through, but do not pull too tight; maintain a gentle tension.
- Second Catch (Hem Allowance): Now, move another 1/4 to 1/2 inch to the right along the top edge of your hem allowance. Again, point your needle slightly to the left and make a small stitch, this time only on the folded edge of the hem allowance. This stitch should also be small, securing the thread within the hem. Pull the thread through.
Continue this alternating pattern:
Move another half inch along your hem to the right. With the needle pointing to the left again, make a small stitch, this time only on the folded edge of the hem.
Repeat the two stitches all along your hem. Consistently alternate between picking up a few threads from the main fabric and then a small stitch on the folded hem allowance. Maintain even spacing and consistent stitch size for the best results. The thread will create a diagonal line between the stitches on the inside, forming the “herringbone” pattern.
Step 5: Securing the End of Your Stitching
Once you have stitched all the way around your hem and reached your starting point (or the end of your segment if working in sections), it’s time to secure the thread. Make a couple of small, overlapping stitches in the same spot, again working only within the folded edge of the hem allowance. This reinforces the end of your stitching, just as you did at the beginning, ensuring the hem remains robust.
Step 6: Finish and Trim Excess Thread
To complete the process, tie a knot to secure your thread. Do this by making a small loop with your thread close to your last stitches within the hem allowance. Pass your needle through this loop, pull tight to form a knot, and repeat once or twice more to create a secure double or triple knot. Ensure the knot is pulled snuggly into the folded edge of the hem, making it invisible. Finally, use your sharp fabric scissors to carefully cut the excess thread, leaving a small tail of about 1/4 inch. Your invisible hem is now complete!
Tips for a Flawless Invisible Hem
Achieving perfection with the catch stitch requires practice and attention to detail. Here are some invaluable tips to help you get the best results:
- Practice on Scraps: Before working on your final garment, practice the catch stitch on a fabric scrap of the same type. This allows you to perfect your tension and stitch size without fear of error.
- Use a Single Thread: While it might feel less secure, a single strand of thread is paramount for invisibility. A double strand creates too much bulk and is more likely to show.
- Maintain Consistent Tension: Pull your thread just enough to secure the stitch, but not so tightly that it puckers the fabric or causes an indentation on the right side. The thread should lie flat and smoothly.
- Small, Even Stitches: The smaller and more consistent your stitches are, the more invisible your hem will be. Focus on catching only one or two threads from the main fabric.
- Good Lighting is Key: Work in a well-lit area to clearly see the individual threads of your fabric, helping you make those tiny, precise catches.
- Use a Thimble: A thimble can protect your finger and help you push the needle through the fabric more easily, especially with denser materials.
- Press After Stitching: Once you’ve completed your hem, give it a final press. This helps to set the stitches, flatten any slight puckering, and give your hem a crisp, professional finish.
- Consider Fabric Type: For very delicate or sheer fabrics, you might need an even finer needle and silk thread. For thicker fabrics, ensure your needle is robust enough to pass through multiple layers without bending.
Common Mistakes to Avoid
Even experienced sewers can make mistakes. Being aware of common pitfalls can help you avoid them:
- Pulling the Thread Too Tight: This is a classic mistake that causes puckering and makes the hem visible. Keep the tension gentle and even.
- Inconsistent Stitch Size or Spacing: Uneven stitches draw attention to the hem. Strive for uniformity in both the size of your catches and the distance between them.
- Picking Up Too Much Fabric: Catching too many threads from the main garment will result in visible dots or lines on the right side of the fabric. Be precise and pick up minimal fabric.
- Wrong Thread Color: Using a thread that doesn’t match closely will instantly make your hem visible. Always prioritize a perfect or near-perfect match.
- Not Pressing Properly: Skipping the pressing steps before and after stitching can lead to a less crisp, less professional-looking hem. Pressing sets the folds and helps to blend the stitches.
- Working with an Unstable Hem Edge: If your initial fold isn’t well-pressed or secured, your stitches will be inconsistent. Take time to prepare your hem correctly.
Caring for Your Hand-Hemmed Garments
A well-executed catch stitch hem is durable, but proper care will ensure it lasts for years. Always follow the garment’s specific care instructions. For most fabrics, gentle washing cycles and air drying are recommended. If machine washing, consider placing the garment in a mesh laundry bag to protect delicate hems. When ironing, press the hem from the wrong side to avoid flattening the stitches or creating shine on certain fabrics.
Conclusion: Embrace the Art of the Invisible Hem
Learning how to sew an invisible hem using the catch stitch is a rewarding skill that significantly elevates the quality and professionalism of your sewing projects. It transforms a functional necessity into an art form, allowing you to create garments that look impeccably finished, both inside and out. While it requires patience and attention to detail, the steps are straightforward and accessible to sewers of all levels. By following this guide, practicing diligently, and choosing the right tools, you will soon master the art of the invisible hem, adding a touch of tailored elegance to all your creations.
So, grab your needle and thread, and get ready to impress with your flawlessly hemmed garments!