
Craft Your Own Adorable Patchwork Penguin: Free Pattern & Step-by-Step Video Tutorial
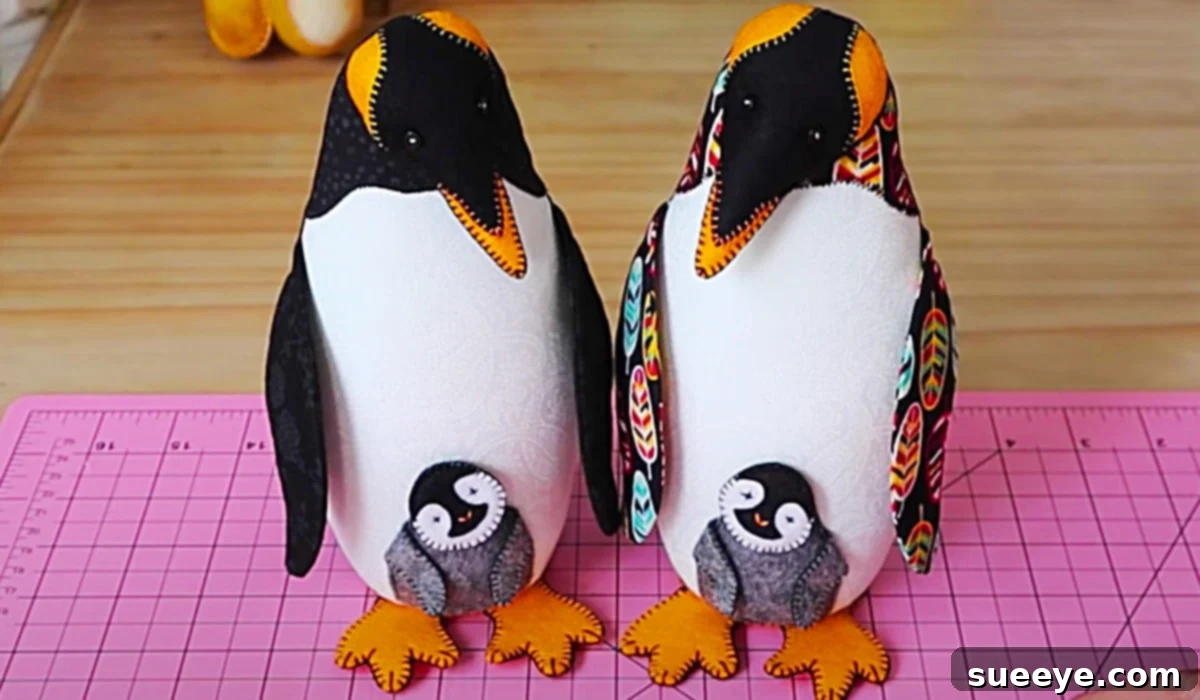
Do you love unique, handmade gifts, or perhaps, like my daughter, have a special fondness for charming penguins? Finding the perfect DIY project that combines creativity with simplicity can be a quest. After much searching for an engaging and fun DIY penguin project suitable for a birthday gift, I finally discovered an absolute gem: this patchwork penguin video tutorial by Pay It Forward, on YouTube. From the moment I saw it, I knew it was the ideal project. What makes this particular penguin project truly stand out is that it comes complete with a free pattern download, coupled with an incredibly clear and easy-to-follow tutorial that guides you through every single step. Whether you’re a seasoned crafter or a complete beginner looking for a rewarding sewing experience, this charming patchwork penguin promises a delightful journey from fabric scraps to a lovable, huggable friend.
Creating handmade gifts carries a special kind of warmth and personal touch that mass-produced items simply cannot replicate. This DIY felt penguin project not only allows you to express your creativity but also results in a tangible, heartfelt item that will be cherished. Imagine the joy on a loved one’s face when they receive a beautiful, unique patchwork penguin crafted by your own hands! It’s an excellent way to use up fabric remnants, explore basic sewing techniques, and create something truly unique.
Essential Materials for Your Adorable Patchwork Penguin
Before diving into the creative process, gathering your materials is the first exciting step. This project is surprisingly accessible, requiring only a few basic crafting supplies. Here’s what you’ll need to bring your charming patchwork penguin to life:
- Free Pattern Download: This is your blueprint! Ensure you download and print it accurately to size. The precision of your pattern pieces will greatly influence the final shape of your penguin.
- Various Colors of Felt: Felt is the star fabric for this project. It’s wonderfully forgiving for beginners as it doesn’t fray, making raw edges neat and easy to manage. You’ll typically want black or a dark color for the main body, white or a light color for the belly, and perhaps orange or yellow for the beak and feet. Consider adding other vibrant colors for decorative patchwork elements on the wings or body to make your penguin truly unique. Acrylic felt is budget-friendly and widely available, while wool-blend felt offers a softer, more luxurious feel.
- Dacron or Cotton Stuffing: This will give your penguin its plump, huggable form. Dacron, a type of polyester fiberfill, is common for stuffed animals as it’s fluffy, resilient, and hypoallergenic. Cotton stuffing also works well. Ensure you have enough to fill your penguin firmly but softly, avoiding any lumpy spots.
- Embroidery Floss: Perfect for adding charming details like eyes (if not using buttons), eyebrows, or a stitched smile. Choose colors that complement your felt, such as black for features or vibrant hues for decorative stitches. Embroidery floss is thicker and more visible than regular sewing thread, adding character to your finished piece.
- Buttons: Small buttons can make wonderful eyes, giving your penguin personality. Consider black buttons for a classic look, or colorful ones for a more whimsical touch. If the penguin is intended for a very young child, embroidered eyes are a safer alternative to buttons to prevent choking hazards.
- A Needle: A standard hand-sewing needle will suffice. Make sure it’s sharp enough to easily pass through multiple layers of felt.
- Thread: All-purpose sewing thread, matching the dominant colors of your felt, will be used for stitching the main pieces together. Choose a strong, durable thread that won’t easily break.
- A Pair of Scissors: A good pair of fabric scissors is essential for clean, precise cuts. Avoid using them on paper, as this can dull the blades, making it harder to cut fabric cleanly.
Having all your materials organized before you start will make the crafting process much smoother and more enjoyable. Each item plays a crucial role in transforming simple supplies into an adorable, handcrafted companion.
Embarking on Your Patchwork Penguin Journey: A Step-by-Step Overview
The beauty of this project lies in its straightforward approach, especially with the expert guidance provided by the Pay It Forward video tutorial on YouTube. This comprehensive tutorial walks you through every single step, ensuring that even if you’re new to sewing, you’ll be able to create a beautiful patchwork penguin with confidence. While the video is your ultimate guide, here’s a general overview of the delightful process you can expect:
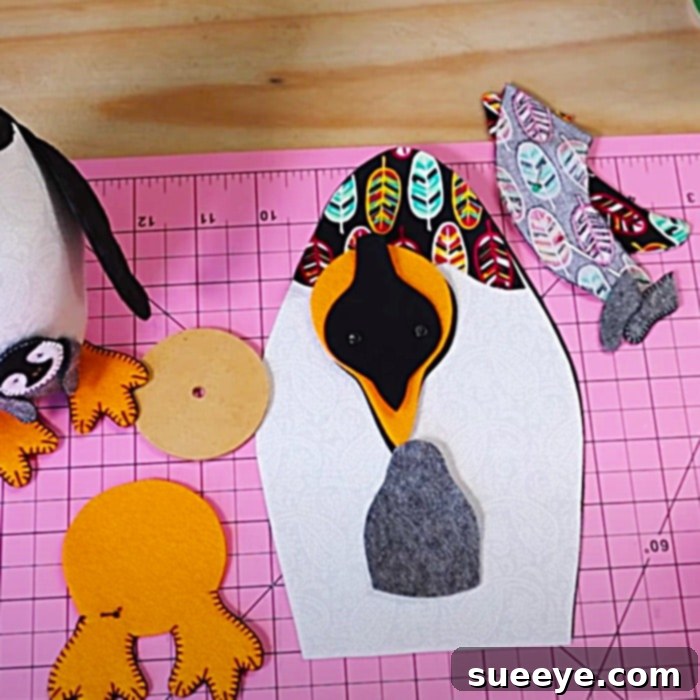
1. Pattern Preparation and Fabric Cutting:
Your journey begins by downloading and printing the free pattern. Carefully cut out all the paper pattern pieces. Then, lay these pieces onto your chosen felt colors, pin them securely, and cut out your fabric shapes. Precision here is key, as accurately cut pieces will fit together much better during sewing, ensuring a neat and professional-looking finished penguin. The video tutorial demonstrates exactly how to position your pattern pieces to maximize your fabric and achieve the best results.
2. Assembling the Main Body:
The tutorial will guide you through stitching together the primary body sections of your penguin. This often involves attaching the white belly piece to the main dark-colored body, creating the iconic penguin silhouette. You’ll learn simple hand-sewing stitches that are perfect for felt, ensuring strong and tidy seams. The video clearly illustrates which edges to align and how to maintain consistent stitches for a smooth finish.
3. Adding Charming Details:
This is where your penguin truly starts to come to life! You’ll attach the wings, which can be made from a solid color of felt or feature a patchwork design for added flair. The tutorial then moves on to crafting and attaching the beak and feet, typically using orange or yellow felt. Finally, you’ll add the most expressive elements: the eyes. Whether you opt for securely stitched buttons or embroidered eyes, this step defines your penguin’s unique personality. Pay It Forward’s video offers excellent tips for symmetrical placement and secure attachment of these smaller components.
4. Stuffing Your Penguin:
Once the main body and details are stitched, it’s time to give your penguin its plump, cuddly form. The video will show you how to properly stuff your penguin with Dacron or cotton filling. The trick is to stuff evenly, pushing the fiberfill into all crevices (like the tips of the wings and feet) to avoid any empty or lumpy spots. Stuff until your penguin is firm yet soft and huggable, without overstuffing to the point of distorting its shape.
5. The Finishing Touches:
After stuffing, you’ll close the opening left for stuffing, using a ladder stitch or another invisible stitch technique. This final seam blends seamlessly into the rest of the penguin, making it look professionally finished. The tutorial provides clear instructions on how to achieve an almost invisible closure, perfecting your handmade creation.
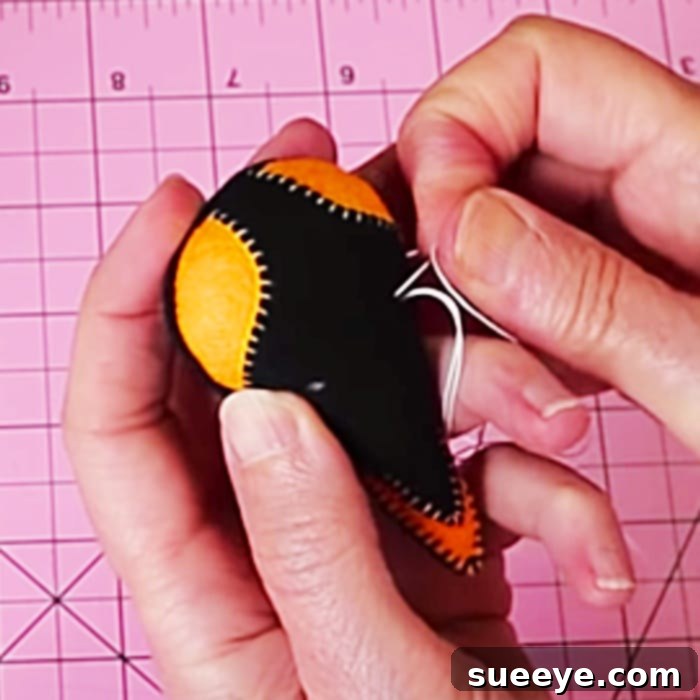
Following the simple instructions in the video tutorial will result in a gorgeous, handmade penguin that you’ll absolutely adore. The visual nature of the tutorial makes learning easy and ensures a successful outcome, even for those with minimal sewing experience. This is such a charming and beautiful penguin, I really love the outcome!
Personalize Your Patchwork Penguin: Creative Customization Ideas
While the provided pattern and tutorial will guide you to a perfect penguin, part of the joy of DIY projects is the freedom to personalize. Here are some ideas to make your patchwork penguin truly unique:
- Color Schemes: Don’t feel limited to traditional black and white! Experiment with vibrant blues, soft grays, or even multi-colored “patchwork” bodies for a whimsical effect. Imagine a pastel rainbow penguin!
- Fabric Textures: While felt is highly recommended, consider adding small accents of patterned cotton fabric, faux fur for a fluffy chest, or a touch of glitter felt for a whimsical sparkle.
- Accessories: Dress your penguin up! A tiny felt scarf, a miniature top hat, a cute little bow tie, or even a small backpack can add immense character. These can be easily hand-stitched on.
- Facial Expressions: Beyond simple button eyes, use embroidery floss to create different expressions – a sleepy penguin with half-closed eyes, a cheerful penguin with an embroidered smile, or even a mischievous wink.
- Weighted Base: For a penguin that stands upright, consider adding a small bag of poly-pellets or rice to the base of the stuffing before fully filling the body.
- Sound Elements: For younger recipients, you could insert a small rattle or crinkle paper inside before stuffing, creating an engaging sensory toy.
- Monogramming: Embroider the recipient’s initial on a wing or the back of the penguin for an extra personal touch.
Why Choose This DIY Patchwork Penguin Project?
This particular project stands out for several compelling reasons, making it an excellent choice for anyone looking to embark on a crafting adventure:
- Beginner-Friendly: The clear video tutorial and free pattern are specifically designed to be accessible to those new to sewing. You don’t need advanced skills to create something beautiful.
- Affordable & Sustainable: Felt is generally inexpensive, and this project is perfect for utilizing fabric scraps you might already have on hand, promoting a sustainable crafting habit.
- Heartfelt Gift: A handmade penguin is a gift filled with love and effort, far more meaningful than anything bought from a store. It’s ideal for birthdays, holidays, or just because.
- Therapeutic and Rewarding: The act of creating with your hands can be incredibly calming and satisfying. Seeing your project take shape from simple materials to a finished product brings immense joy.
- Versatile Use: Once completed, your patchwork penguin can serve as a delightful children’s toy, a charming piece of home decor, or a unique collectible.
- Skill Development: It’s a fantastic way to practice basic hand-sewing stitches, learn how to follow a pattern, and develop your eye for detail – skills that can be applied to countless other crafting projects.
Your Next Favorite Crafting Adventure Awaits!
Whether you’re crafting a special gift for a penguin enthusiast, looking for a calming and creative outlet, or simply eager to try a new DIY project, this patchwork penguin with its free pattern and detailed video tutorial is an absolute winner. The satisfaction of creating something beautiful and tangible with your own hands is truly unparalleled. The comprehensive guidance from Pay It Forward ensures a smooth and enjoyable crafting experience from start to finish.
Don’t hesitate to dive into this wonderful project. Download the free penguin pattern, gather your colorful felt and other materials, and press play on the video tutorial. Unleash your creativity and bring an adorable, unique patchwork penguin into the world. Happy crafting!