
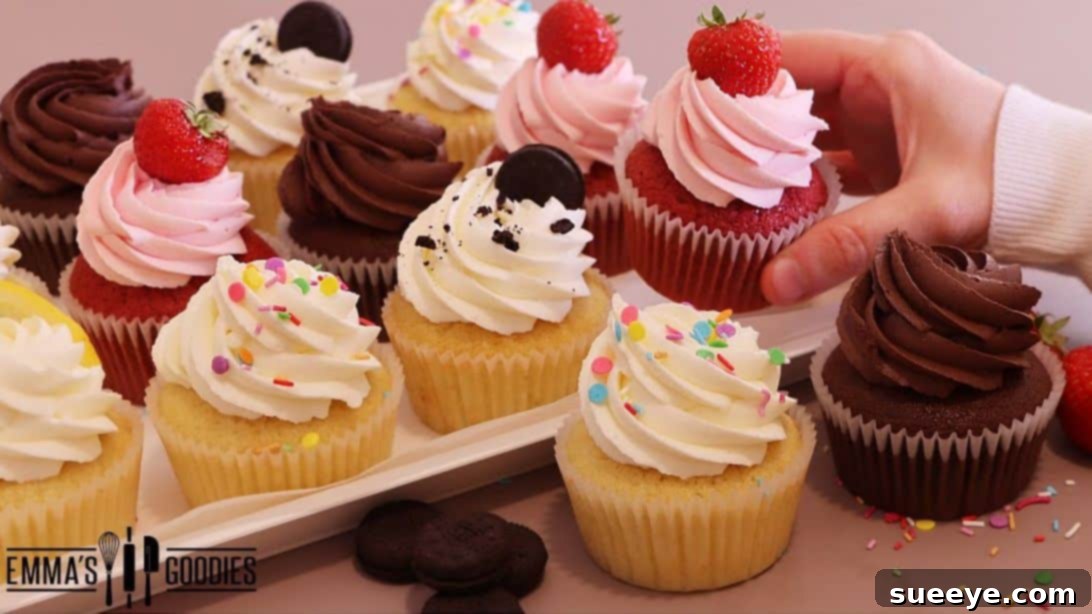
Master the Art of Assorted Cupcakes: One Batter, Endless Flavors!
Imagine being able to whip up a delightful assortment of cupcakes, each with its own unique flavor profile, all from a single, foundational batter. This dream becomes a delicious reality with this brilliant recipe from Emma’s Goodies on YouTube. Renowned for its incredible versatility and ease, this recipe empowers bakers of all skill levels to craft a diverse range of cupcakes, perfect for any occasion. Whether you’re hosting a grand holiday feast, a lively birthday party, or simply craving a sweet treat on an ordinary day, these cupcakes are sure to impress. They also make thoughtful and charming giveaways or gifts, showcasing your baking prowess and personal touch.
What sets this recipe apart is its genius in providing a robust base that can be effortlessly transformed into numerous flavors. Forget the hassle of preparing multiple batters for different varieties; with Emma’s Goodies’ method, you’ll create a single, moist, and tender cupcake base that serves as a canvas for your culinary creativity. From classic vanilla to decadent chocolate, refreshing lemon, and even playful Oreo-infused delights, the possibilities are virtually endless. The process is remarkably straightforward, making it an accessible project for beginners, while offering seasoned bakers ample room for artistic decoration and flavor experimentation. Get ready to elevate your baking game and surprise your friends and family with a stunning array of homemade cupcakes – you’ll wonder why you didn’t try it sooner!
Essential Ingredients for Your Versatile Cupcakes
Creating these delightful assorted cupcakes begins with a selection of fresh, high-quality ingredients. Pay attention to the details, as each component plays a crucial role in achieving the perfect texture and flavor. For the best results, ensure your perishable ingredients are at room temperature where specified, as this greatly aids in proper emulsification and a smooth batter.
For the Cupcake Batter:
- 1 stick (113g) unsalted butter, softened to room temperature. Using unsalted butter gives you control over the salt content, and softened butter creams beautifully with sugar for a light texture.
- 2 tbsp vegetable oil. Adding oil alongside butter contributes to a more moist and tender crumb, and keeps the cupcakes fresher for longer.
- 2 tsp pure vanilla extract. A generous amount of vanilla is key for the classic, comforting base flavor that complements all variations.
- ¾ cup (150g) granulated sugar. Provides sweetness and helps create a tender crumb when creamed with butter.
- 3 large eggs, at room temperature. Eggs add structure, moisture, and richness. Room temperature eggs emulsify better with the other ingredients.
- 1½ cups (180g) all-purpose flour. The foundational dry ingredient, providing structure. Sifting can help prevent lumps.
- 2 tsp baking powder. A leavening agent that helps the cupcakes rise and become fluffy.
- ¼ tsp baking soda. Works with acidic ingredients (like lemon juice and cocoa) to provide extra lift and tenderness.
- ¼ tsp salt. Balances the sweetness and enhances all the other flavors.
- ¾ cup (180ml) milk, at room temperature. Adds moisture and helps create a smooth batter. Full-fat milk often yields richer results.
- 1½ tsp lemon juice. This acid activates the baking soda and adds a subtle brightness, especially for the lemon-flavored variation.
- 1¾ tbsp unsweetened cocoa powder (for chocolate variation). Choose a good quality cocoa for rich chocolate flavor.
- 1 tbsp milk (additional, for chocolate batter adjustment). Helps maintain batter consistency when cocoa is added.
- 1 tsp unsweetened cocoa powder (additional, for red velvet variation). Adds depth and a hint of chocolate to the red velvet.
- Red food coloring, as needed (for red velvet variation). Gel food coloring provides more vibrant color with less liquid.
- Mini Oreo cookies, as needed (optional, for Oreo variation). Crushed or whole mini Oreos add a delightful crunch and classic flavor.
For the Velvety Frosting:
No cupcake is complete without a luscious frosting! This cream cheese frosting is rich, tangy, and perfectly complements the diverse cupcake flavors.
- 1 stick (113g) unsalted butter, softened. Essential for a smooth, spreadable frosting.
- 16-18oz (450-510g) cream cheese, chilled. Using chilled cream cheese helps the frosting hold its shape better, preventing it from becoming too runny.
- 2 cups (240g) powdered sugar (confectioners’ sugar), sifted. Sifting prevents lumps and ensures a silky-smooth frosting.
- 2-3 tsp pure vanilla extract. Enhances the classic cream cheese flavor. Adjust to your preference.
- 2 tbsp unsweetened cocoa powder (optional, for chocolate frosting). Transforms a portion of your frosting into a rich chocolate delight.
Step-by-Step Guide to Assorted Cupcake Perfection
Follow these detailed instructions carefully to ensure your cupcakes turn out perfectly moist, flavorful, and beautifully varied. The key to success lies in proper ingredient preparation and careful mixing.
Step 1: Prepare the Oven, Pans, and Base Batter
Begin by preheating your oven to 160°C (320°F). This lower temperature ensures an even bake and prevents the cupcakes from drying out. Line each cup of your cupcake pan with paper liners and set the pan aside. In a large mixing bowl, combine your dry ingredients for the batter: all-purpose flour, baking powder, baking soda, and salt. Whisk them together thoroughly until they are well combined and there are no visible lumps. Setting these aside ensures they are ready when needed.
In a separate, larger mixing bowl, begin preparing your wet ingredients. Add the softened butter, vegetable oil, granulated sugar, and vanilla extract. Using an electric mixer, beat these ingredients together on medium speed until the mixture is light, creamy, and smooth. This creaming process incorporates air, which contributes to the cupcakes’ fluffy texture. Scrape down the sides of the bowl as needed to ensure everything is well combined. Next, add the eggs one at a time, beating well after each addition until fully incorporated. Avoid overmixing once the eggs are in, just combine until smooth.
Now, it’s time to bring the wet and dry ingredients together. Gradually add the dry ingredient mixture to the wet mixture, alternating with the milk and lemon juice. Start and end with the dry ingredients. For example, add about a third of the dry ingredients, mix briefly, then add half of the milk and lemon juice mixture, mix again, and repeat until all ingredients are incorporated. Mix only until just combined; overmixing can lead to tough cupcakes. The batter should be smooth and cohesive.
Once your versatile base batter is ready, fill the first three cupcake liners in your prepared pan about ¾ of the way full. These will be your plain vanilla or lemon-zest infused cupcakes.
Step 2: Infuse Your Batter with Distinct Flavors
This is where the magic of assorted flavors truly comes to life! For your first set of flavored cupcakes, take a lemon and zest a generous amount directly over the remaining cupcake batter in the mixing bowl. Using a fork, gently mix the lemon zest into the batter. The fork helps distribute the zest evenly without overmixing the batter. Clean off the edges of the bowl to ensure all zest is incorporated.
Now, fill the next few cupcake liners with this lemon-infused batter, again about ¾ full. For a playful twist, dedicate a row (e.g., the third row) to Oreo cupcakes. Fill these liners with the plain or lemon-infused batter, and then gently push down 3 to 4 mini Oreo cookies into the batter in each cup. The Oreos will sink slightly and create a delightful surprise in the finished cupcake.
Next, give the remaining batter a quick, gentle mix to ensure everything is uniform. Divide this remaining batter evenly into two separate mixing bowls. To one bowl, add 1¾ tablespoons of unsweetened cocoa powder. For the second bowl, add 1 tablespoon of milk. These additions are crucial for creating your chocolate and red velvet variations, respectively. The milk in the second bowl helps to maintain a consistent batter thickness before adding the color and extra cocoa for red velvet.
Step 3: Crafting Chocolate and Red Velvet, Then Baking
Continue your flavor journey. To the second bowl (the one with added milk), add 1 teaspoon of unsweetened cocoa powder. This small amount of cocoa is characteristic of red velvet cupcakes, giving them a subtle chocolate note. Now, add red food coloring, starting with a few drops and adding more gradually until you achieve your desired vibrant red hue. Gel food coloring works best for intense colors without thinning the batter too much. Mix gently until the color is uniform throughout the batter.
Carefully fill the remaining cupcake liners with your chocolate batter and your red velvet batter, ensuring each is about ¾ full. Once all your liners are filled with their respective flavors, it’s time to bake! Place the cupcake pan into your preheated oven. Bake for approximately 20 to 22 minutes. Baking times can vary slightly depending on your oven, so keep an eye on them. To test for doneness, insert a toothpick into the center of a cupcake; if it comes out clean, they are ready. Avoid opening the oven door too frequently during the baking process to prevent the cupcakes from sinking.
Once baked, remove the pan from the oven and let the cupcakes cool in the pan for about 5 minutes. This allows them to firm up slightly before handling. After 5 minutes, carefully transfer the cupcakes to a wire rack to cool down completely. Cooling completely is essential before frosting, as warm cupcakes will melt the frosting.
Step 4: Prepare and Pipe Your Luscious Frosting
While your cupcakes are cooling, prepare the star of the show: the creamy, dreamy frosting! In a large mixing bowl, beat the softened butter until light and fluffy. Gradually add the sifted powdered sugar, a cup at a time, mixing on low speed until combined, then increasing to medium until smooth. In a separate bowl, lightly beat the chilled cream cheese until just smooth. Do not overbeat the cream cheese, as this can make it too soft and runny. Gently fold the cream cheese into the butter and sugar mixture. Finally, add the vanilla extract and mix until just combined and smooth. If you desire chocolate frosting for some of your cupcakes, separate a portion of this frosting and mix in the 2 tablespoons of unsweetened cocoa powder until fully incorporated.
Once your cupcakes are completely cool and your frosting is ready, it’s time for the fun part: decorating! Transfer your frosting to a piping bag fitted with your favorite nozzle (a star tip or round tip works wonderfully for cupcakes). Pipe the frosting elegantly onto each cupcake. Get creative with swirls, rosettes, or simple domes. You can also garnish with sprinkles, chocolate shavings, or extra mini Oreos, depending on the cupcake flavor. Serve immediately and enjoy the fruits of your labor!
Tips for Baking Flawless Assorted Cupcakes
Achieving bakery-quality cupcakes at home is absolutely possible with a few key techniques:
- Room Temperature Ingredients are Key: Ensure butter, eggs, and milk are at room temperature. This allows them to emulsify properly, creating a smoother, more uniform batter and a lighter crumb.
- Don’t Overmix: Overmixing develops gluten in the flour, resulting in tough, chewy cupcakes. Mix only until the ingredients are just combined.
- Measure Accurately: Especially with flour and leavening agents, precise measurements are crucial. Use a kitchen scale for the most accurate results, or the ‘spoon and level’ method for flour (spoon flour into a measuring cup, then level off with a straight edge).
- Preheat Your Oven Fully: A properly preheated oven ensures that the leavening agents activate correctly from the start, leading to an even rise.
- Avoid Overfilling Liners: Filling cupcake liners more than ¾ full can cause them to overflow or create large, uneven domes.
- Cool Completely Before Frosting: Frosting warm cupcakes will inevitably lead to a melted, messy glaze. Patience is a virtue here!
- Quality Ingredients Matter: Good quality vanilla extract, fresh eggs, and butter can make a noticeable difference in the final taste.
Creative Customization and Flavor Variations
While this recipe provides fantastic starting points with vanilla, lemon, chocolate, red velvet, and Oreo, don’t stop there! This versatile base invites endless experimentation:
- Fruity Fun: Swirl in fruit purees (raspberry, strawberry) or finely chopped fresh fruit (blueberries, diced apple) into portions of the batter.
- Nutty Indulgence: Add chopped nuts like pecans or walnuts, or a swirl of nut butter.
- Spice It Up: Incorporate cinnamon, nutmeg, or pumpkin spice for seasonal variations.
- Extract Explorations: Beyond vanilla, try almond extract, peppermint extract, or coconut extract to create entirely new flavor profiles.
- Filled Surprises: After baking, core the center of a cooled cupcake and fill it with jam, fruit curd, or even a dollop of caramel before frosting.
- Garnish Galore: Beyond sprinkles, consider toasted coconut flakes, mini chocolate chips, edible flowers, or custom fondant toppers to match your theme.
Storing Your Delicious Creations
To keep your assorted cupcakes fresh and delightful:
- At Room Temperature: Cupcakes without cream cheese frosting can be stored in an airtight container at room temperature for up to 2-3 days.
- Refrigerated: Due to the cream cheese in the frosting, these cupcakes are best stored in an airtight container in the refrigerator. They will last for up to 5 days. Allow them to come to room temperature for about 15-30 minutes before serving for the best texture and flavor.
- Freezing: Unfrosted cupcakes can be frozen for up to 3 months in an airtight container or freezer bag. Thaw them at room temperature before frosting. Frosted cupcakes can also be frozen, but it’s best to flash-freeze them first until the frosting is firm, then wrap individually before placing in an airtight container.
Conclusion: Your Go-To Recipe for Every Cupcake Craving
This remarkable recipe by Emma’s Goodies is truly a game-changer for anyone who loves to bake. It simplifies the process of creating a diverse and delicious assortment of cupcakes, turning what could be a complex task into an enjoyable and rewarding experience. From the moment you whisk the batter to the final flourish of frosting, you’ll appreciate the ease and flexibility this method offers. Imagine the joy of presenting a tray of beautifully varied cupcakes, each a testament to your newfound baking prowess, and knowing they all originated from one fantastic base recipe!
Whether you’re celebrating, gifting, or simply indulging, these assorted cupcakes are guaranteed to bring smiles. So gather your ingredients, follow these detailed steps, and unleash your inner baker. You’ll be amazed at the professional-quality, mouth-watering results you can achieve. Happy baking, and get ready to enjoy some of the most versatile and delicious homemade cupcakes you’ve ever tasted!
*All image credit belongs to Emma’s Goodies via YouTube. Follow and subscribe to her channel for more incredible recipes and baking inspiration!