
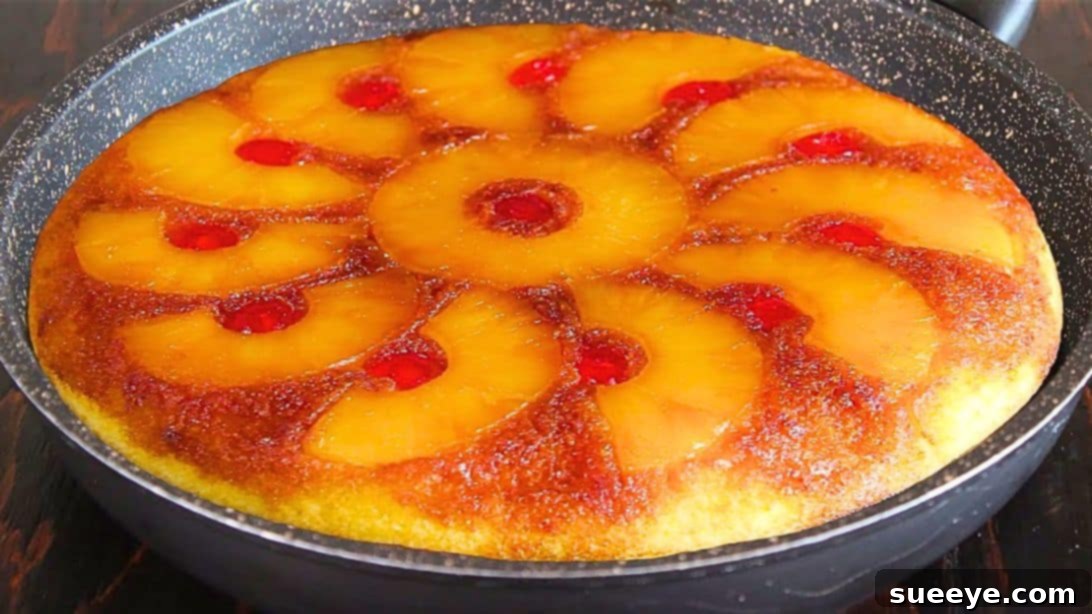
Effortless Frying Pan Pineapple Upside-Down Cake: A No-Oven Delight
Transform your dessert game with this incredibly simple and utterly delicious Frying Pan Pineapple Upside-Down Cake. A beloved classic, the pineapple upside-down cake is celebrated for its caramelized fruit topping and moist, tender crumb. Traditionally baked in an oven, this iconic dessert can now be enjoyed by everyone, regardless of whether they own an oven, thanks to a brilliant frying pan adaptation. Inspired by a fantastic recipe from How Tasty on YouTube, this method is not only more convenient but also yields a cake that is just as flavorful and visually stunning as its baked counterpart. Get ready to impress your friends and family with a dessert that’s surprisingly easy to make and guaranteed to disappear quickly!
The Irresistible Charm of Pineapple Upside-Down Cake
Few desserts capture the hearts quite like a classic pineapple upside-down cake. Its unique appeal lies in the dramatic reveal when the cake is flipped, showcasing a beautiful mosaic of golden pineapple rings and vibrant candied cherries nestled in a glistening caramel sauce. This visual spectacle is matched only by its incredible taste – the tangy sweetness of pineapple perfectly complementing the rich, buttery cake, all enhanced by the deep, complex notes of homemade caramel. It’s a nostalgic treat that evokes warmth, comfort, and the simple joys of home baking. Whether served warm with a scoop of vanilla ice cream or enjoyed on its own, this cake remains a perennial favorite, a testament to its timeless charm and irresistible flavor profile.
Why Choose the Frying Pan Method?
The frying pan method for preparing pineapple upside-down cake is a game-changer for several compelling reasons, making it an ideal choice for both novice bakers and seasoned dessert enthusiasts alike. Foremost, it eliminates the need for an oven, making this delicious cake accessible to anyone with a stovetop. This is particularly beneficial for those living in apartments with compact kitchens, students in dorms, campers, or simply anyone looking to save energy or avoid heating up their home on a hot day. Beyond accessibility, the frying pan offers a faster cooking time compared to traditional baking, allowing you to whip up a gourmet-quality dessert in a fraction of the time. The direct heat from the stovetop also ensures a perfectly golden and evenly caramelized pineapple layer, which is crucial for that signature upside-down cake perfection. Cleanup is often simpler, as you’re primarily using one pan. This innovative approach proves that you don’t need fancy equipment to create extraordinary desserts; sometimes, the simplest tools yield the most delightful results.
Ingredients for Your Stovetop Masterpiece:
Crafting this delightful cake requires a handful of common pantry staples. Each ingredient plays a vital role in achieving the perfect balance of flavor, texture, and visual appeal. Be sure to gather all your ingredients before you begin, as this will ensure a smooth and enjoyable cooking process.
- 2 tbsp of unsalted butter: This is essential for creating the rich, buttery caramel base that gives the cake its signature flavor and prevents sticking.
- 3½ tbsp of caster sugar: Also known as superfine sugar, caster sugar dissolves quickly, making it ideal for a smooth, even caramel. Granulated sugar can also work.
- 3 large eggs, at room temperature: Room temperature eggs emulsify better with other ingredients, resulting in a lighter, fluffier cake batter.
- ¼ cup of caster sugar: This is for the cake batter itself, contributing to its sweetness and tender texture.
- ½ cup + 1 tbsp of pineapple juice, unsweetened, from the canned pineapple: This juice not only adds a lovely tropical flavor to the cake but also provides essential moisture, keeping the cake from drying out.
- ¼ cup of vegetable oil: A neutral-flavored oil like vegetable or canola oil contributes moisture and tenderness to the cake without imparting any additional flavors.
- 1 cup + 2 tbsp of all-purpose flour: The primary structural component of the cake. Ensure it’s measured correctly for the right consistency.
- 1 tsp of baking powder: A leavening agent that helps the cake rise and achieve a light, airy texture.
- ¼ tsp of baking soda: Another leavening agent that works in conjunction with the acidic pineapple juice to create a tender crumb.
- 6½ slices of canned pineapple: Pineapple rings are the star of the show. Using canned slices ensures consistent size and sweetness, and provides the necessary juice.
- 6 candied cherries, halved: These vibrant cherries add a beautiful pop of color and a touch of extra sweetness to the pineapple topping.
Step-by-Step Directions to a Perfect Frying Pan Pineapple Upside-Down Cake:
Follow these detailed instructions carefully to ensure your cake turns out beautifully caramelized, moist, and utterly delicious. Each step is designed to be straightforward, even for those new to stovetop baking.
Step 1: Preparing the Caramel and Fruit Base
Begin by placing a non-stick frying pan (preferably one with a tight-fitting lid, around 9-10 inches in diameter) on your stove over a low heat setting. Add the unsalted butter to the pan and allow it to melt slowly and completely. Once melted, carefully tilt and swirl the pan to ensure the entire bottom and the lower sides are thoroughly coated and greased with the butter. This crucial step prevents the caramel and cake from sticking later. Next, sprinkle the 3½ tablespoons of caster sugar evenly over the melted butter. Continue to cook on low heat, stirring occasionally, until the sugar has completely dissolved and transformed into a beautiful, golden-amber caramel. This process requires a little patience to ensure even melting and prevent burning. Once the caramel is ready, immediately turn off the heat and carefully remove the pan from the stove to prevent further cooking and potential scorching. Now, take your canned pineapple slices. Cut five of the six slices in half, leaving one slice whole. Artfully arrange the pineapple pieces in the pan, pressing them gently into the warm caramel. The whole slice can go in the center, surrounded by the halves, creating a visually appealing pattern. Finally, place the halved candied cherries into the gaps between the pineapple pieces. Set the pan aside to allow the caramel to cool and slightly set while you prepare the cake batter.
Step 2: Mixing the Cake Batter and Cooking
In a large mixing bowl, combine the room temperature eggs and the ¼ cup of caster sugar. Whisk them together vigorously until the mixture is well combined, pale yellow, and slightly foamy on top. This aeration is key for a light cake. Next, add the vegetable oil and the measured pineapple juice (½ cup + 1 tbsp) from your canned pineapple. Continue to whisk until all the wet ingredients are thoroughly incorporated and smooth. In a separate bowl, or directly over the wet ingredients using a fine-mesh sieve, sift together the all-purpose flour, baking powder, and baking soda. Sifting helps to remove lumps and aerate the dry ingredients, leading to a finer crumb. Gently fold or whisk the dry ingredients into the wet mixture until just combined. It’s crucial not to overmix the batter; overmixing can develop the gluten in the flour, resulting in a tough, dense cake. A few small lumps are acceptable. Once the batter is ready, carefully pour it over the pineapple and cherry arrangement in the frying pan, spreading it gently and evenly to cover all the fruit. Return the pan to the stove, setting the heat to medium-low. This moderate heat is vital for cooking the cake thoroughly without burning the bottom. Immediately cover the pan with its lid. The lid traps heat and steam, creating an environment similar to an oven, which allows the cake to cook evenly. Let it cook undisturbed for approximately 15 minutes. Resist the urge to lift the lid frequently, as this releases steam and heat, prolonging the cooking time and affecting the cake’s texture.
Step 3: Checking for Doneness, Cooling, and Serving
After 15 minutes, or when you notice the top of the cake appears dry and set, gently lift the lid to perform a doneness check. The top should be dry to the touch but still very soft. To confirm it’s cooked through, insert a toothpick into the center of the cake. If it comes out clean, your cake is ready. If it comes out with wet batter, replace the lid and cook for another 2-5 minutes, checking again. Once done, turn off the heat and remove the pan from the stove. Leave the pan covered for about 5 minutes; this allows residual heat to finish cooking the cake and helps it set further, ensuring a moist result. After 5 minutes, remove the lid completely. Allow the cake to cool in the pan for at least 15 minutes. This cooling period is important because it allows the caramel to firm up slightly, making the cake easier to unmold without breaking apart. Once cooled sufficiently, pour the remaining 2 tablespoons of pineapple juice evenly over the top of the cake and gently brush it all over. This adds extra moisture, enhances the pineapple flavor, and gives the cake a lovely sheen. To unmold, carefully slide a thin spatula or knife around the sides of the cake, separating it from the pan. Place a serving plate upside down over the pan, then confidently flip the pan and plate together. The cake should release cleanly onto the plate, revealing its beautiful caramelized pineapple and cherry topping. Serve your delicious Frying Pan Pineapple Upside-Down Cake warm or at room temperature. It’s truly a treat on its own or elevated with a dollop of whipped cream or a scoop of vanilla ice cream. Enjoy every delightful bite!
Tips for Frying Pan Cake Perfection
Achieving a flawless frying pan pineapple upside-down cake is simple with a few key considerations. First, a high-quality non-stick pan is paramount to ensure the cake releases easily without sticking. Secondly, consistent heat management on medium-low is crucial; too high, and your caramel will burn; too low, and the cake won’t cook through. Always use room temperature eggs for a lighter, more uniform batter. Be mindful not to overmix the cake batter, as this can result in a tough texture. Finally, patience during the cooling and unmolding stages is key. Allowing the cake to cool slightly and the caramel to firm up will guarantee a smooth, beautiful flip and a perfect presentation.
Variations and Customizations for Your Stovetop Treat
While the classic pineapple upside-down cake is undeniably delicious, don’t hesitate to experiment with variations to suit your taste or what you have on hand. For a different fruit profile, consider using thinly sliced apples, peaches, or even a mix of berries at the bottom. Spice up your batter with a pinch of cinnamon, nutmeg, or cardamom for a warm, aromatic twist. A sprinkle of chopped pecans or walnuts over the caramel layer before adding the batter can add a delightful crunch and nutty flavor. For a tropical flair, try adding a tablespoon of shredded coconut to the batter. You can also experiment with different extracts, such as almond or coconut, to subtly alter the cake’s flavor profile. These simple modifications allow you to personalize this easy recipe, making it uniquely yours every time.
Embrace the Ease and Enjoy Your Culinary Creation!
This Frying Pan Pineapple Upside-Down Cake recipe proves that delicious, impressive desserts don’t require an oven or extensive baking experience. It’s a testament to ingenuity in the kitchen, offering a convenient, accessible, and utterly delightful way to enjoy a classic. From the luscious, golden caramel to the moist, tender cake and the vibrant fruit topping, every element comes together for an unforgettable treat. Whether you’re short on time, lacking an oven, or simply looking for a fun new method, this stovetop cake is sure to become a beloved staple in your recipe collection. Don’t wait – gather your ingredients, follow these simple steps, and prepare to savor a truly remarkable dessert that’s as easy to make as it is to enjoy. Happy cooking!
All image credit belongs to How Tasty via YouTube. Follow and subscribe to their channel for more inspiring recipes!