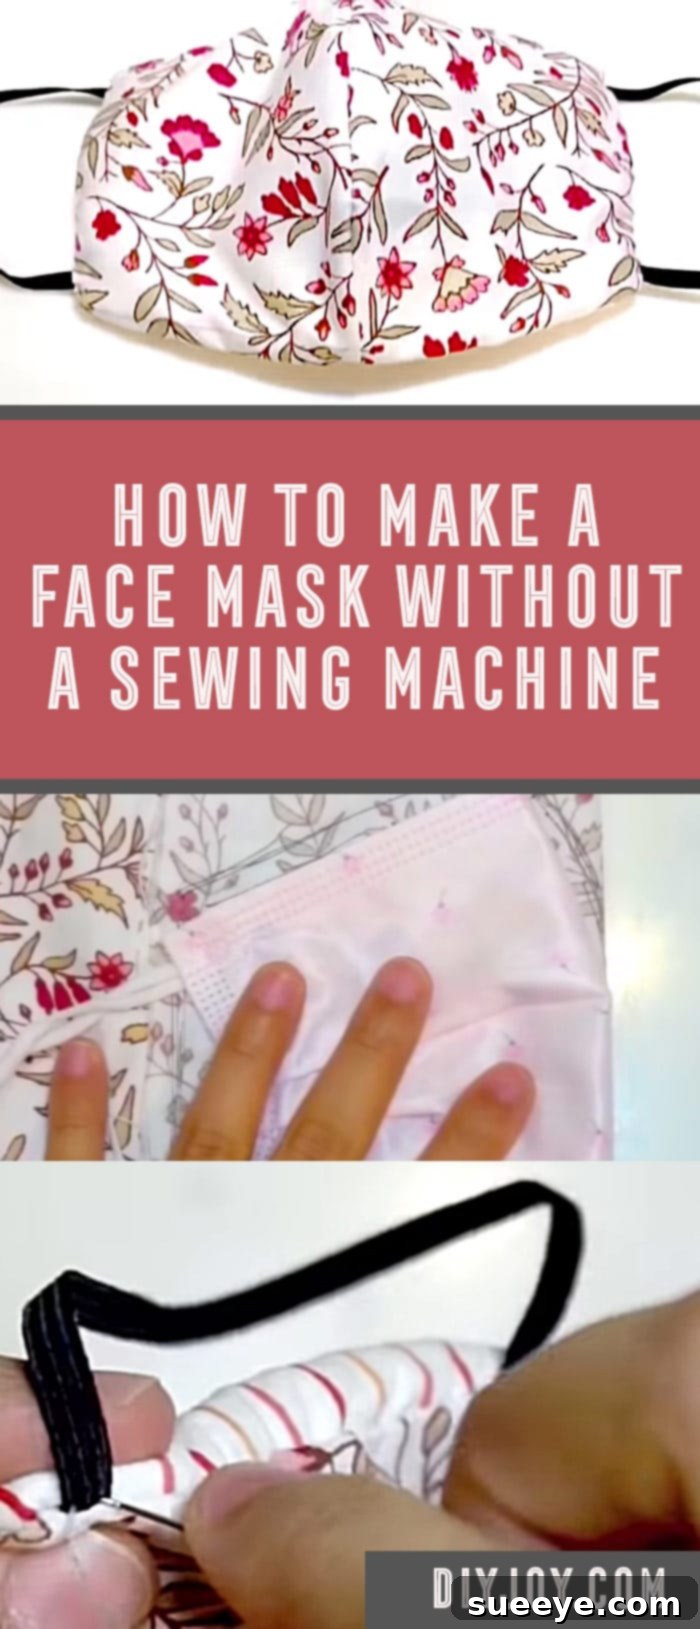
In times when access to protective face coverings is crucial, but specialized equipment like a sewing machine isn’t readily available, knowing how to craft your own becomes an invaluable skill. This comprehensive guide will walk you through creating a sturdy and reusable fabric barrier mask without needing a single stitch from a sewing machine. Whether you’re looking for a reliable mask to wear on its own for general protection or a durable cover to extend the life and add an extra layer of defense over a disposable paper mask, this no-sew method offers a practical solution. We’ll delve into the benefits of cloth masks, including their reusability and ease of sterilization, making them a preferred choice for many. Furthermore, we’ll explore how simple additions like a few drops of essential oil can enhance your masking experience by providing a refreshing aroma, acting as a subtle sensory barrier between your airways and the outside world. A unique aspect of this particular design is the inclusion of a cotton batting layer, significantly boosting its protective qualities.
For parents, there’s also a brilliant, quick tutorial demonstration towards the end of the video by Nanay Express, illustrating how to adapt this design for infants or small children. The materials required for this project are intentionally kept simple and straightforward, ensuring accessibility for everyone. It is crucial to emphasize, however, that while homemade masks provide a physical barrier, they are not proven to offer the same level of protection against viruses like COVID-19 as medical-grade personal protective equipment (PPE). We have developed these instructions for personal use and as a supplementary layer when other options are limited. For in-depth, authoritative information regarding how to best protect yourself and others against COVID-19, please consult the official guidelines and resources provided by the Centers for Disease Control and Prevention (CDC) Website, which outlines all recommended safe practices during outbreaks.
Why Opt for a No-Sew Face Mask?
The concept of a no-sew face mask is incredibly appealing for several reasons, especially in situations demanding immediate solutions or when resources are limited. Firstly, it offers unparalleled convenience. You don’t need any specialized equipment, just basic household items, making it an accessible project for almost anyone. This accessibility means that even if you’re not typically crafty, you can still create a functional mask quickly and effectively. Secondly, it’s a testament to emergency preparedness; having the knowledge to fashion a protective face covering out of common materials can be crucial when store-bought masks are scarce or unavailable. Thirdly, homemade masks are often a cost-effective alternative. By repurposing fabric from old clothes or towels, you can save money while still creating a useful item. Lastly, a no-sew design allows for a degree of customization, letting you choose fabrics that appeal to you and potentially fit your face better than generic disposable options. This method empowers individuals to take a proactive step in their personal safety with minimal fuss.
The Enduring Benefits of Reusable Cloth Masks
Beyond the immediate need for a protective barrier, reusable cloth masks offer a wealth of advantages, making them a smart, long-term choice for many. Their primary benefit lies in their reusability, which translates directly to environmental sustainability. Unlike disposable masks that contribute significantly to landfill waste, cloth masks can be washed and worn repeatedly, reducing your ecological footprint. This aspect alone makes them an eco-friendly option for daily use.
Effortless Washability and Sterilization
One of the most compelling reasons to choose a cloth mask is its ability to be thoroughly cleaned and sterilized after each use. This ensures hygiene and extends the life of your mask. You can easily integrate mask washing into your regular laundry routine. For effective sterilization, consider these natural and potent substances alongside your favorite laundry detergent:
- Distilled White Vinegar: A natural disinfectant and deodorizer. Add about half a cup to your washing machine’s rinse cycle for an extra sanitizing boost. It helps break down bacteria and eliminates odors without harsh chemicals.
- Hydrogen Peroxide: Known for its powerful antiseptic properties, a small amount (e.g., a quarter cup of 3% hydrogen peroxide) can be added to your wash cycle with caution, especially for white fabrics. Always test on a small, inconspicuous area first.
- Clorox Bleach: For white or colorfast fabrics, a diluted bleach solution (following product instructions carefully, typically about 1/3 cup per gallon of water for soaking, or per load in the washing machine) is highly effective at killing germs. Exercise extreme caution and ensure proper ventilation when using bleach.
Always wash your cloth mask in hot water (at least 140°F / 60°C) with laundry detergent to effectively remove germs. After washing, tumble dry on high heat or allow it to air dry completely in direct sunlight, which also has natural sanitizing properties. Ensure the mask is fully dry before wearing to prevent microbial growth.
Enhanced Protection with Cotton Batting
A distinctive feature of this particular mask design is the inclusion of a layer of cotton batting. This addition is not merely for comfort but significantly contributes to the mask’s protective barrier. Cotton batting, with its dense and interwoven fibers, creates an additional filtration layer that can help trap respiratory droplets and small particles more effectively than a single or double layer of fabric alone. This enhanced barrier layer makes the mask more robust and potentially more effective at reducing exposure to environmental contaminants. If cotton batting isn’t available, you can improvise with other materials that offer similar thickness and breathability, such as a clean, disposable napkin, a section cut from an old but clean towel, or even a piece of non-fusible interfacing. The key is to select a material that adds density without compromising your ability to breathe comfortably.
Aromatic Comfort with Essential Oils
For an added touch of comfort and a refreshing sensory experience, a couple of drops of essential oil can be applied to your cloth facemask. While essential oils do not offer direct protection against viruses, they can create a pleasant aromatic barrier, making extended wear more enjoyable. Certain essential oils are also known for their purifying or invigorating properties. Consider these options:
- Oregano Essential Oil: Known for its potent herbaceous aroma.
- Thyme Essential Oil: Offers a warm, slightly spicy, and herbaceous scent.
- Lavender Essential Oil: Renowned for its calming and soothing floral aroma.
- Lemon Essential Oil: Provides an uplifting, clean, and fresh citrus scent.
- Orange Essential Oil: Offers a sweet, cheerful, and refreshing citrus fragrance.
Always apply essential oils to the outer layers of the mask, ensuring they don’t come into direct contact with your skin or mucous membranes, especially if you have sensitive skin. A little goes a long way; one or two drops are usually sufficient to provide a subtle, lasting fragrance.
Crucial Disclaimer: Understanding Mask Efficacy and Safety
It is paramount to reiterate that any homemade mask, including the one described in this tutorial, cannot prevent the transmission of viruses such as COVID-19, nor will it provide the same level of protection as a certified N-95 respirator mask. This tutorial for a fabric mask and the information contained within this article are provided solely for educational and entertainment purposes. These masks are intended for personal, general public use and should be considered as a physical barrier for source control (helping to prevent the wearer from spreading respiratory droplets) or as an additional layer over disposable masks, rather than primary medical-grade protection.
For accurate and up-to-date information on COVID-19 and the most effective protective measures, please visit the CDC website. The CDC explicitly states, “In settings where facemasks are not available, HCP (healthcare personnel) might use homemade masks (e.g., bandana, scarf) for care of patients with COVID-19 as a last resort. However, homemade masks are not considered PPE, since their capability to protect HCP is unknown. Caution should be exercised when considering this option. Homemade masks should ideally be used in combination with a face shield that covers the entire front (that extends to the chin or below) and sides of the face.” This guidance underscores the importance of understanding the limitations of homemade masks and prioritizing medical-grade PPE when available, especially in healthcare settings.
Materials: Crafting Your No-Sew Barrier Mask
Gathering your materials is the first step towards creating your functional no-sew face mask. Most items can be found around your home or are easily obtainable, reinforcing the accessibility of this DIY project.
- Two sections of cloth (approximately 12 inches by 12 inches each): Choose tightly woven cotton fabric, such as an old t-shirt, a pillowcase, or a clean dish towel. Cotton is preferred for its breathability and ability to be washed at high temperatures. These dimensions provide ample material for a standard adult mask and allow for trimming.
- One section of 12-inch cotton batting: This will serve as your crucial inner filtration layer, adding density and protective qualities to your mask. If commercial batting isn’t available, creative alternatives include a clean, unused paper napkin, a piece cut from an absorbent kitchen towel, or even a section of non-fusible interfacing.
- A disposable mask to use as a pattern: This is your template! An existing disposable mask provides the perfect shape and contours for a comfortable fit around the nose and chin. If you don’t have one, don’t worry – you can certainly improvise by freehand drawing a mask shape, perhaps referencing images or the drawing presented in the tutorial video.
- Strong thread: Opt for a durable all-purpose sewing thread, preferably cotton or polyester blend, to ensure the longevity of your hand-sewn seams.
- A hand-sewing needle: A sharp, medium-sized needle will work best for piercing through multiple layers of fabric and batting.
- A fabric pen or marker: Essential for tracing your pattern onto the fabric. A regular pen or pencil can work in a pinch, especially on lighter fabrics.
- Elastic bands or fabric strips for ear loops/ties (approximately 10-12 inches each): *This crucial item was previously implied but not explicitly listed.* You will need two pieces. You can use thin elastic cord, hair ties, or even strips of stretchy fabric cut from an old t-shirt (about 1 inch wide and stretched to create a cord) to create comfortable and secure ear loops or ties.
Step-by-Step Directions: Creating Your No-Sew Barrier Mask
Follow these detailed steps carefully to construct your effective and durable no-sew barrier mask. Remember to take your time and reinforce your stitches for a long-lasting product.
Step 1: Preparing Your Pattern
First, use the disposable mask to draw the pattern. Lay one of your 12×12 inch fabric sections flat. Place a disposable mask on top of it. Carefully trace around the edges of the disposable mask with your fabric pen. For a better fit and to account for seams, draw your outline about 0.5 to 1 inch larger than the disposable mask’s edge. This creates a margin for turning the fabric and for a more substantial mask. If you don’t have a disposable mask, you can draw the pattern freehand. Visualize a shape that covers your nose and mouth, curving gently under your chin and flaring out towards your ears. The video tutorial provides an excellent visual guide for improvising this shape. Once you have your initial pattern outline, carefully cut out this shape. This will be your master template.
Step 2: Cutting Your Fabric Layers
Using your newly cut master template from Step 1, place it on your remaining fabric section and on your cotton batting. Trace around the template on both the second piece of fabric and the cotton batting. Carefully cut out these two additional layers. You should now have three identical mask-shaped pieces: two from your chosen cloth fabric and one from cotton batting. Ensure your cuts are as precise as possible for a neat finish.
Step 3: Assembling the Layers
Stack your layers in the following order: First, lay one fabric piece face-up. Then, place the cotton batting layer directly on top of it. Finally, place the second fabric piece face-down on top of the batting. This arrangement means the “right” sides of your outer fabric pieces will be facing each other, with the batting sandwiched in the middle. Carefully align all the edges. You may wish to use small pins or clips around the edges to hold the layers together securely, preventing them from shifting while you sew.
Step 4: Hand-Sewing the Mask Body
Then, sew layers together as directed in the video. Thread your needle and knot the end of the thread. Starting from one edge, begin sewing around the perimeter of the mask, approximately 0.5 inches from the raw edge. Use a strong, small stitch like a backstitch for durability, or a running stitch for quicker progress, reinforcing it with a second pass. Make sure to leave a 2-3 inch opening along one of the straight edges (e.g., the bottom) of the mask. This opening is crucial for turning the mask right-side out later. As you sew around the curved sections, make small, neat stitches to maintain the mask’s shape. Once you’ve sewn all sides except for the opening, trim any excess fabric close to your stitch line, especially around the curves. For smoother curves, make small snips into the seam allowance (without cutting through your stitches). This helps the fabric lay flat when turned.
Step 5: Turning and Finishing the Mask Body
Carefully turn the mask right-side out through the opening you left. Gently push out all the seams, using a blunt object like a chopstick or the eraser end of a pencil to achieve crisp edges, particularly around the curves. Once turned, press the entire mask with an iron if possible, paying special attention to the opening. Fold the raw edges of the opening inwards so they align with the sewn seam, then press them flat. Now, hand-sew this opening closed using a neat slip stitch or ladder stitch, which will be nearly invisible. Alternatively, you can topstitch around the entire perimeter of the mask, about 1/8 inch from the edge. This not only closes the opening but also gives the mask a finished, professional look and adds extra durability, preventing the layers from shifting.
Step 6: Attaching the Ear Loops/Ties
Then sew on the elastic ear pieces. Take your two elastic bands or fabric strips. On each side of the mask, measure about 0.5 to 1 inch down from the top corner and 0.5 to 1 inch up from the bottom corner. Insert one end of an elastic piece into the mask’s side seam at the top mark, and the other end into the mask’s side seam at the bottom mark, on the same side. This creates a loop. Using strong backstitches, securely sew each end of the elastic to the mask. Repeat this process for the other side of the mask with the second elastic piece. Ensure the elastic is securely fastened, as this will bear the tension of wearing the mask. If using fabric ties, you might create small fabric channels on the sides of the mask by folding the fabric in and sewing, then threading your ties through, or simply sew the ends of the fabric strips directly to the corners of the mask for ties that can be tied behind the head.
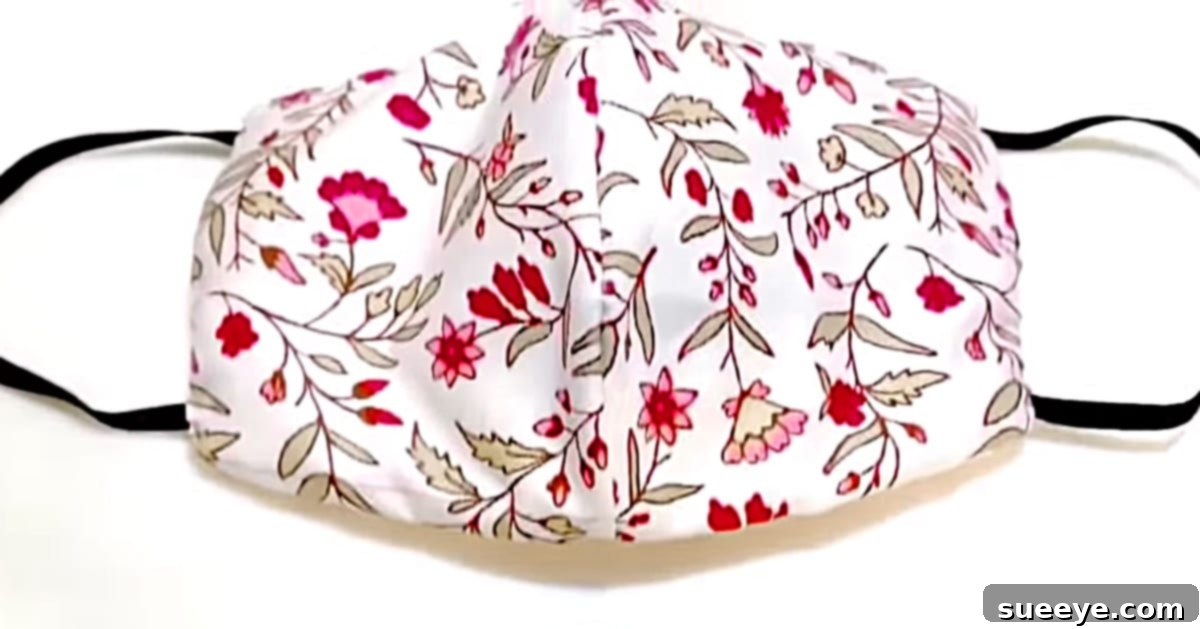
This is a great mask design; I really like the way it protrudes at the front, offering more breathing room and reducing contact with the mouth, which can enhance comfort during wear.
Care and Maintenance of Your Cloth Mask
Proper care is essential to ensure your reusable cloth mask remains hygienic and effective. After each use, especially if worn in public or for an extended period, your mask should be washed. Machine wash your mask on the hottest setting suitable for the fabric, using your regular laundry detergent. This high temperature is crucial for killing germs and bacteria. Tumble dry on high heat until completely dry, or air dry in direct sunlight. Sunlight can act as a natural disinfectant and helps in thoroughly drying the mask, preventing mildew. Store your clean, dry mask in a clean, breathable bag or container to protect it from contamination until its next use. Regular cleaning not only prolongs the life of your mask but also maintains its effectiveness as a barrier.
Customization and Personalization: Make Your Mask Uniquely Yours
One of the joys of making your own mask is the freedom to customize it to your personal style and comfort preferences. While the core design is functional, there are many ways to personalize your creation. Choose fabrics with fun patterns, vibrant colors, or textures that resonate with your personality. You can also consider adding a flexible nose wire (like a pipe cleaner or a strip of craft wire wrapped in fabric) to the top edge of the mask for a more secure fit around the nose, preventing glasses from fogging up and improving overall seal. Adjustable ear loops, made with small beads on elastic, can also enhance comfort and fit. These personal touches not only make wearing a mask more enjoyable but also encourage consistent use.
A Note on Children’s Masks and Safety
The tutorial by Nanay Express at the end of the video is invaluable for adapting this mask design for babies or small children. However, extreme caution and strict guidelines must be followed when considering masks for children. It is critical to emphasize that masks should NEVER be placed on infants or children under two years old due to the risk of suffocation. For older children, ensure the mask fits properly, covering their nose and mouth without gaps, but also allowing for comfortable breathing. Parental supervision is essential to ensure children wear their masks correctly and safely. Prioritize their comfort and ability to breathe without obstruction. Opt for soft, breathable fabrics, and consider simpler designs for younger wearers. Always consult pediatric health guidelines regarding mask use for children in your region.
Conclusion: Empowering Yourself with a Homemade Solution
Learning how to make a no-sew barrier mask is a fantastic way to take personal preparedness into your own hands. This detailed guide has shown you that creating a functional, reusable, and sterilizable fabric mask doesn’t require specialized skills or equipment, just a few common household items and a willingness to follow simple steps. This robust design, enhanced with cotton batting, offers a comforting layer of protection for everyday use or as an intelligent overlay for disposable masks. Remember the importance of proper cleaning and maintenance to ensure your mask remains hygienic and effective. While these homemade solutions offer significant benefits in terms of reusability and personal comfort, they serve as a complement to, not a replacement for, medical-grade personal protective equipment (PPE).
By empowering yourself with this DIY skill, you contribute to a more sustainable lifestyle and ensure you have a barrier mask ready whenever you need it. Always stay informed and follow the guidance from reputable health organizations like the CDC for the most accurate and up-to-date information on public health and safety. Stay safe, stay prepared, and breathe a little easier knowing you’ve crafted a solution for yourself and your loved ones.