
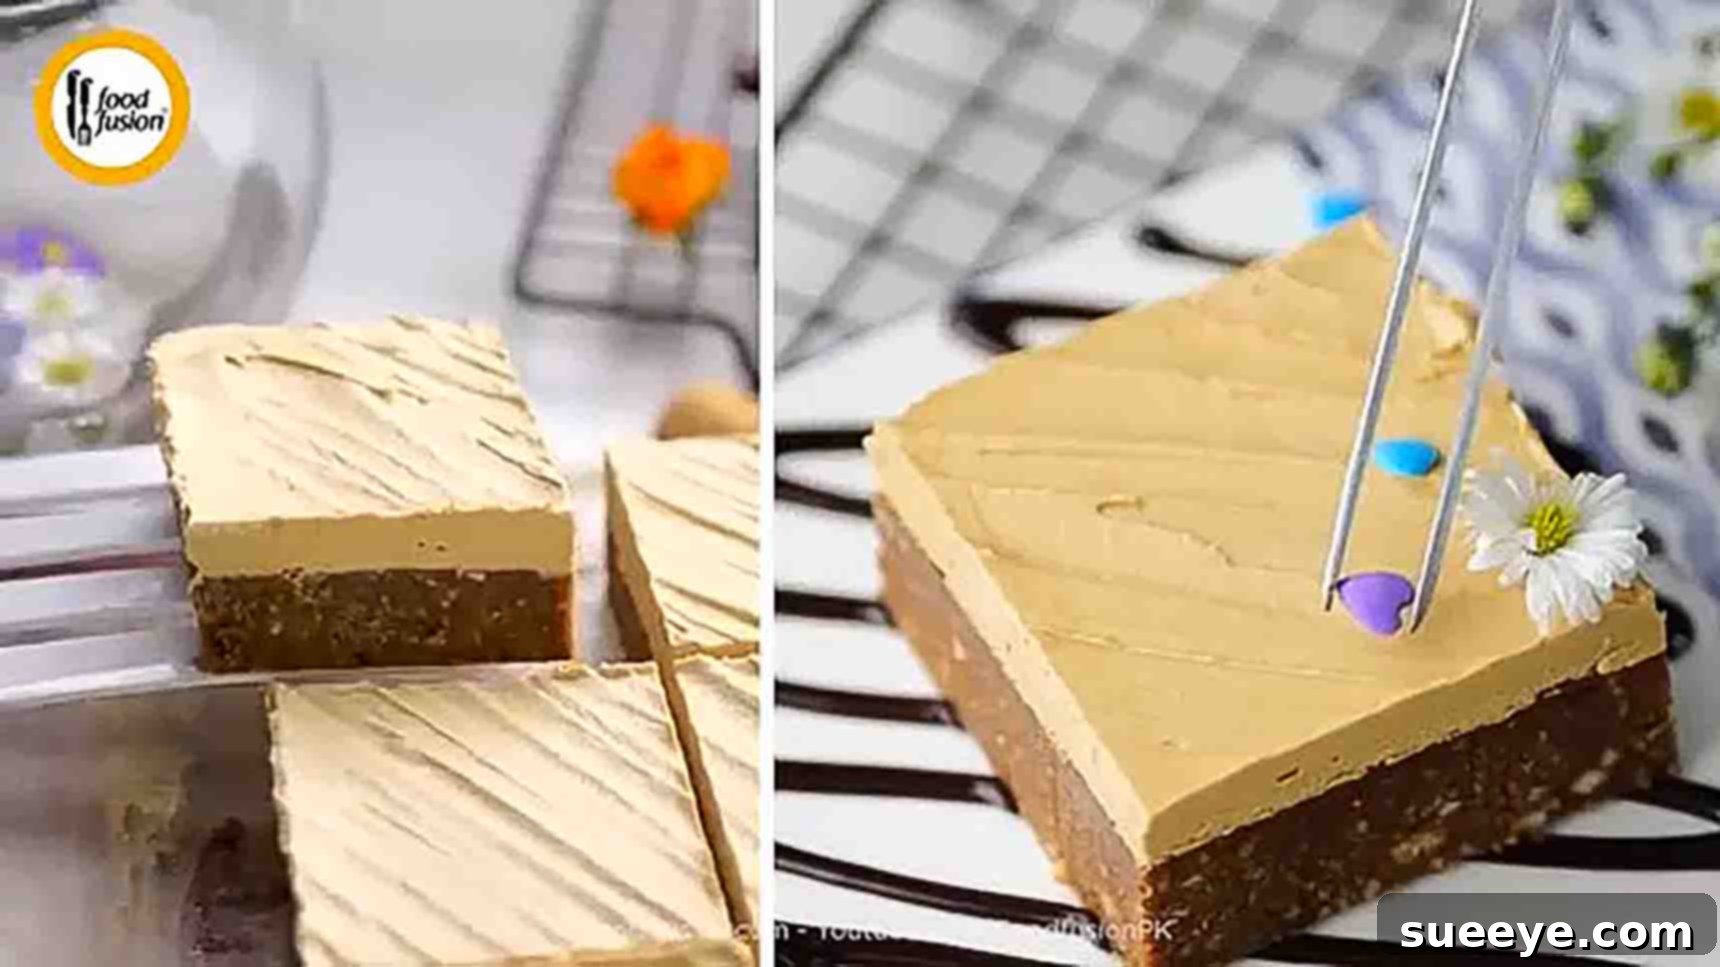
Irresistible No-Bake Coffee Slices: The Ultimate Easy Dessert for Coffee Lovers
Are you a devoted coffee enthusiast constantly searching for new ways to infuse that beloved flavor into every part of your day? Look no further! This incredible no-bake coffee slices dessert, inspired by the culinary wizards at Food Fusion on YouTube, is precisely what your taste buds have been craving. Imagine a rich, crunchy biscuit base, generously topped with a velvety smooth, coffee-infused frosting – all without ever turning on your oven!
This recipe is an absolute game-changer for anyone who loves the deep, aromatic notes of coffee combined with the sweet indulgence of a decadent dessert. It’s not just easy to make; it’s astonishingly simple, requiring minimal effort and no baking skills whatsoever. The result? Perfect, bite-sized pieces of coffee heaven that are so addictively delicious, you’ll find yourself reaching for ‘just one more’ again and again. As a fellow coffee lover, I can attest to their undeniable charm; these little treats have become a staple in my home, delighting friends and family alike at every gathering. Prepare to impress everyone with this delightful creation – it’s truly that good. Ready to embark on a sweet journey? Dive into the full recipe below and discover your new favorite dessert.
Why You’ll Love These No-Bake Coffee Slices
- Effortlessly Delicious: No baking required means less time in the kitchen and more time enjoying! Perfect for beginners or busy schedules.
- A Coffee Lover’s Dream: Packed with rich coffee flavor in both the base and the frosting, satisfying every craving.
- Perfectly Portioned: Easily sliced into individual pieces, making them ideal for sharing, parties, or a quick snack.
- Make-Ahead Marvel: Prepare them in advance and store them in the refrigerator, ready to serve whenever a craving strikes.
- Crowd-Pleaser: Their unique flavor and delightful texture make them a guaranteed hit at any social event or family gathering.
- Simple Ingredients: Made with readily available pantry staples, ensuring convenience and accessibility.
Essential Ingredients for Your Coffee Slices Dessert
Crafting these delectable coffee slices requires a handful of simple, easy-to-find ingredients that combine to create an extraordinary flavor profile and texture. Here’s what you’ll need to gather:
For the Irresistible Coffee Biscuit Base:
- Digestive Biscuits (at least 450 g): These provide the perfect crumbly, slightly savory base that beautifully complements the sweet coffee flavors. Their sturdy texture holds up well, creating a satisfying foundation for your no-bake treat.
- 1 tbsp Cocoa Powder: Adds a subtle depth and a hint of chocolate, enhancing the coffee without overpowering it. It contributes to the rich, dark appearance of the base, making it even more appealing.
- 2 tbsp Instant Coffee: The star ingredient, delivering that authentic, robust coffee flavor. Ensure it’s good quality instant coffee for the best taste, as its essence will shine through.
- 2 tbsp Hot Water: Essential for dissolving the instant coffee and cocoa powder, creating a concentrated, flavorful paste that blends seamlessly into the base.
- 1/4 cup Salted Butter, softened: Binds the biscuit crumbs together and adds a rich, buttery taste. Using salted butter subtly balances the sweetness of the other ingredients, preventing the dessert from being overly cloying.
- 3/4 cup Condensed Milk: Provides sweetness, creaminess, and acts as a crucial binding agent, ensuring the base is perfectly moist, holds its shape, and has a delightful chewiness.
- 1/2 tsp Vanilla Essence: A classic flavor enhancer that rounds out the sweetness and adds a warm, aromatic note to the base, elevating its overall complexity.
- 1/3 cup Chopped Almonds: Adds a delightful crunch and nutty texture, providing a pleasant contrast to the smooth base. You can lightly toast them before chopping for an intensified flavor.
For the Velvety Coffee Frosting:
- 1/4 cup Salted Butter, room temperature: Crucial for a smooth, creamy frosting. Ensure it’s soft enough to beat easily but not melted, as this will affect the frosting’s texture.
- 1 1/2 cup Icing Sugar (Powdered Sugar): Provides the bulk and sweetness for the frosting, dissolving quickly for a silky-smooth texture that melts in your mouth.
- 2 tbsp Cream (Heavy or Whipping Cream): Adds richness and helps achieve that light, fluffy consistency for the frosting, making it spreadable and luxurious.
- 1 tbsp Instant Coffee: Infuses the frosting with a vibrant coffee flavor, creating a perfect balance with the sweetness and complementing the base beautifully.
Step-by-Step Guide: Crafting Your No-Bake Coffee Slices
Follow these straightforward steps to create a dessert that will earn you rave reviews. Precision and a little patience are key to achieving perfect coffee slices every time.
Step 1: Preparing the Rich Coffee Biscuit Base
Begin by preparing the foundation of your dessert – the rich, flavorful biscuit base. Take at least 450 grams of digestive biscuits and process them in a food processor until they form fine, even crumbs. Aim for a texture similar to coarse sand. If you don’t have a food processor, simply place the biscuits in a sturdy Ziploc bag, seal it, and crush them with a rolling pin or the bottom of a heavy pan until finely textured. Set these delicious crumbs aside in a large mixing bowl, ready for the next additions.
Next, in a small, heatproof bowl, combine 1 tablespoon of cocoa powder with 2 tablespoons of instant coffee and 2 tablespoons of hot water. Stir this mixture vigorously using a small spoon or whisk until the coffee granules and cocoa powder are completely dissolved. You should have a smooth, concentrated, and intensely aromatic coffee and chocolate paste. This ensures even flavor distribution throughout your base without any gritty bits. Set this fragrant mixture aside for a moment while you prepare the wet ingredients.
Now, gently melt 1/4 cup of salted butter in a small pan over low heat. It’s important to keep the heat low to prevent the butter from browning or burning; you just want it to be fully liquid and clear. Once melted, immediately remove the pan from the heat. To this warm, melted butter, add 3/4 cup of condensed milk, your previously prepared coffee and cocoa powder mixture, and 1/2 teaspoon of vanilla essence. Whisk everything together thoroughly until all the ingredients are beautifully combined, and the mixture is smooth, glossy, and emits a wonderful coffee aroma. The residual warmth from the butter will help all the ingredients emulsify perfectly, creating a cohesive liquid.
Finally, it’s time to bring the base together. Pour the warm, wet mixture into the large mixing bowl containing your reserved biscuit crumbs. Add 1/3 cup of chopped almonds. Using a strong wooden spoon, a sturdy spatula, or even your clean hands (wearing food-safe gloves is recommended for easier mixing), mix everything thoroughly. Ensure all the biscuit crumbs are evenly coated with the rich coffee-infused liquid, and the mixture comes together into a cohesive, slightly sticky dough. This thorough mixing is crucial for ensuring your base holds its shape beautifully once chilled, preventing it from crumbling.
Step 2: Assembling and Frosting Your Coffee Slices
With your base mixture ready, it’s time for assembly. Line a 7″ x 7″ baking dish with parchment paper, allowing some overhang on all sides. This thoughtful step will make it incredibly easy to lift the entire dessert out of the pan once it’s set and firm, preventing any sticking or breakage. Transfer your coffee biscuit mixture into the lined dish. Using the back of a spoon, a flat spatula, or your clean hands, spread the mixture evenly across the bottom of the pan. Press down firmly and consistently to create a compact, smooth, and even base. The more firmly you press, the better your slices will hold together when cut. Once flattened and uniform, place the dish in the refrigerator for at least fifteen minutes. This initial chilling period is vital for allowing the base to firm up and set, creating a stable foundation for the frosting.
While your base is chilling, prepare the exquisite coffee frosting. In a medium-sized mixing bowl, add 1/4 cup of room temperature salted butter. The butter’s temperature is crucial here; it should be soft enough to indent easily but not melted. Using an electric mixer (or a stand mixer with the paddle attachment), beat the butter on medium-high speed for 2-3 minutes until it becomes noticeably pale in color, wonderfully light, and fluffy. This aeration is key to achieving a smooth, creamy, and delightful frosting texture.
Next, gradually add 1 1/2 cups of icing sugar (also known as powdered sugar or confectioners’ sugar) to the beaten butter. Add it a little at a time, continuing to beat after each addition. This gradual process prevents a cloud of sugar from forming and ensures the sugar is fully incorporated, resulting in a perfectly creamy, lump-free, and silky-smooth frosting. In a separate tiny bowl, combine 2 tablespoons of cream (heavy or whipping cream works best) and 1 tablespoon of instant coffee, stirring until the coffee is completely dissolved and no granules remain. Add this concentrated coffee-cream mixture to your frosting and beat until everything is well combined and the frosting is smooth, light, airy, and infused with a delicious, invigorating coffee aroma. Taste and adjust sweetness or coffee strength if desired.
Now, retrieve your chilled crust from the refrigerator. It should be firm to the touch. Carefully transfer the prepared coffee frosting over the firm biscuit base. Using an offset spatula or the back of a spoon, gently spread the frosting evenly and nicely across the entire surface, ensuring it reaches all edges for a complete and professional-looking finish. Aim for a smooth, inviting, and uniform top layer of coffee goodness.
Once frosted, return the dish to the refrigerator for at least 2-3 hours, or ideally, overnight. This crucial second chilling time allows both the base and the frosting to set completely, ensuring the slices are firm, stable, and incredibly easy to cut. When ready to serve, use the parchment paper overhang to carefully lift the entire dessert out of the pan and onto a clean cutting board. Using a very sharp knife that has been warmed slightly under hot water and wiped clean between each cut, slice the dessert into perfect bite-sized squares or rectangles. The warm knife helps create clean, crisp edges. Serve immediately and watch these irresistible no-bake coffee slices disappear!
Tips for Perfect No-Bake Coffee Slices Every Time
Achieving the perfect no-bake coffee slices is simple with a few expert tips:
- Quality Instant Coffee Matters: Since coffee is the star of this dessert, using a good quality, flavorful instant coffee will significantly impact the final taste. Choose a brand you enjoy drinking!
- Don’t Overlook Chilling: Adequate chilling time is paramount for this no-bake recipe. Rushing this step will result in a soft, messy, and difficult-to-slice dessert. Overnight chilling is always best for firm, clean cuts and optimal texture.
- Press the Base Firmly: When pressing the biscuit mixture into the pan, apply firm, even pressure. This compacts the base, preventing it from crumbling and ensuring your slices hold together beautifully when served.
- Room Temperature Butter for Frosting: Ensure your butter for the frosting is truly at room temperature. This allows it to cream properly with the icing sugar, creating a smooth, light, and airy frosting without lumps or a greasy texture.
- Sharp Knife for Slicing: For clean, professional-looking slices, use a very sharp knife. For even crisper edges, you can warm the knife under hot water, wipe it dry, and clean it between each cut to prevent sticking and achieve perfectly neat squares or rectangles.
- Parchment Paper is Your Friend: Don’t skip lining the pan with parchment paper, leaving an overhang on the sides. It makes lifting the entire dessert out incredibly easy and mess-free, saving you from any frustration.
Creative Variations and Customizations
While the classic no-bake coffee slices are delightful as is, feel free to experiment and personalize them to your taste. These variations can add exciting new dimensions to your dessert:
- Nutty Alternatives: Instead of almonds, try chopped walnuts, pecans, or hazelnuts for a different nutty crunch that complements coffee beautifully. For an extra boost of flavor, lightly toast the nuts before adding them to the base.
- Chocolate Boost: For an added layer of indulgence, fold in some mini chocolate chips or finely chopped dark chocolate into the biscuit base mixture. A elegant drizzle of melted dark or white chocolate over the finished slices can also be a stunning and delicious touch.
- Espresso Kick: For an even more intense coffee flavor, consider using a high-quality espresso powder instead of regular instant coffee, especially in the frosting. Adjust the amount to your preferred strength for a bolder taste.
- Spice It Up: A pinch of warm spices like cinnamon, cardamom, or even a tiny dash of nutmeg in the biscuit base can add a wonderfully inviting complexity that pairs exceptionally well with coffee.
- Coconut Delight: For a tropical twist, add some shredded coconut to the biscuit base mixture. You can also toast some shredded coconut and sprinkle it on top of the frosting for both texture and flavor.
- Decorative Toppings: Elevate the visual appeal of your slices by finishing them with a sprinkle of high-quality cocoa powder, a dusting of finely grated chocolate, a few perfectly roasted whole coffee beans, or even some edible gold dust for an extra touch of elegance.
Storage Tips for Freshness
These no-bake coffee slices are excellent for making ahead, making them perfect for parties or meal prepping your weekly treats. Store any leftovers in an airtight container in the refrigerator for up to 5-7 days. To prevent them from drying out or absorbing other odors from your fridge, ensure the container is sealed tightly. For longer storage, you can freeze individual slices in a single layer on a baking sheet until firm, then transfer them to an airtight freezer-safe container or bag for up to 1 month. Thaw them in the refrigerator for a few hours or overnight before serving. Enjoying them chilled enhances their texture and flavor.
This irresistible no-bake coffee slices dessert truly embodies convenience and deliciousness. It’s a versatile, easy-to-make treat that promises to be a favorite among coffee lovers and dessert enthusiasts alike. Whether you’re hosting a gathering, looking for a quick pick-me-up, or simply indulging in a sweet moment, this recipe delivers on all fronts with its rich flavors and delightful textures. Give it a try, experiment with your own twists and customizations, and get ready to savor every single bite of this coffee-infused delight. Don’t forget to share your creations and tell us how much you loved them in the comments!
No-Bake Coffee Slices Dessert Recipe Summary
For your convenience, here’s a concise summary of this fantastic, easy-to-follow recipe:
Yields: Approximately 16-25 slices (depending on your preferred cut size)
Prep time: Approximately 25 minutes of active preparation
Chill time: Minimum 2-3 hours (overnight for best results)
Ingredients:
- Digestive biscuits (at least 450 g), finely crushed
- 1 tbsp cocoa powder
- 2 tbsp instant coffee
- 2 tbsp hot water
- 1/4 cup salted butter, softened
- 3/4 cup condensed milk
- 1/2 tsp vanilla essence
- 1/3 cup chopped almonds
Coffee Frosting:
- 1/4 cup salted butter, room temperature
- 1 1/2 cup icing sugar
- 2 tbsp cream (heavy or whipping cream)
- 1 tbsp instant coffee
Directions:
- Prepare Coffee & Cocoa Mixture: In a small bowl, combine 1 tbsp cocoa powder, 2 tbsp instant coffee, and 2 tbsp hot water. Mix well until all powders are dissolved, forming a smooth paste. Set aside.
- Crush Biscuits: Process at least 450g of digestive biscuits until finely crushed. Transfer the crumbs to a large mixing bowl.
- Melt Butter & Combine Wet Ingredients: In a pan over low heat, melt 1/4 cup salted butter. Remove from heat and stir in 3/4 cup condensed milk, the prepared coffee-cocoa mixture, and 1/2 tsp vanilla essence. Whisk until smooth and well combined.
- Combine Base Ingredients: Pour the wet mixture over the crushed biscuits and add 1/3 cup chopped almonds. Mix thoroughly until all biscuit crumbs are evenly coated and the mixture forms a cohesive dough.
- Press into Pan: Line a 7″ x 7″ baking dish with parchment paper (leaving an overhang). Transfer the coffee biscuit mixture into the dish and press it down evenly and very firmly to create a compact base. Refrigerate for at least 15 minutes.
- Prepare Frosting: In a clean bowl, beat 1/4 cup room temperature salted butter with an electric mixer until light and pale. Gradually add 1 1/2 cups icing sugar, beating after each addition until creamy and smooth. In a separate small bowl, combine 2 tbsp cream and 1 tbsp instant coffee, then stir this into the frosting mixture until smooth and well incorporated.
- Frost & Chill: Spread the prepared coffee frosting evenly over the chilled biscuit base. Return the dish to the refrigerator for at least 2-3 hours, or ideally, overnight, until both the base and frosting are fully set and firm.
- Slice & Serve: Use the parchment paper overhang to carefully lift the entire dessert from the pan. Place it on a clean cutting board and, using a sharp knife, slice it into perfect bite-sized squares or rectangles. Serve chilled and enjoy this delightful coffee treat!