
Master Your Fabric: Smart Cutting & Fabric Saving Tips for Budget-Friendly Sewing
Embarking on a sewing journey is an exciting venture, especially when a primary goal is to cultivate a more sustainable and economical lifestyle by crafting your own wardrobe. For many beginners, the cost of fabric can quickly add up, making efficient material usage a top priority. My own adventure into the world of sewing began with a similar aspiration: to save money and create unique garments without breaking the bank. That’s why I was thrilled to discover an insightful video tutorial from Thoughtful Creativity on YouTube, which outlined three brilliant strategies to maximize fabric and reduce waste. These ingenious tips promised to transform my approach to fabric handling, ensuring I get the most out of every purchase and sew more smartly.
The Art of Thrifty Sewing: Why Fabric Optimization Matters
Sewing offers immense creative freedom, but it also comes with practical considerations, particularly the cost of materials. Fabric, often the most significant expense, can quickly diminish your budget if not managed wisely. Learning how to optimize your fabric usage isn’t just about saving money; it’s also about reducing textile waste, contributing to a more sustainable hobby, and developing sharper sewing skills. By adopting mindful cutting techniques and clever fabric hacks, you can extend your fabric stash, tackle more projects, and feel a greater sense of accomplishment knowing you’ve made the most of your resources.
The strategies we’ll explore empower you to make conscious decisions at every stage, from purchasing fabric to the final cut. Whether you’re a novice sewer or have some experience, these tips will equip you with valuable knowledge to transform your sewing habits into more economical and eco-friendly practices. Let’s dive into these game-changing fabric-saving methods inspired by Thoughtful Creativity and expand upon them to provide a comprehensive guide.
Strategy 1: Unfold Your Potential – Cutting Fabric Flat Instead of On The Fold
Most commercial sewing patterns instruct you to “cut on the fold.” This common method involves folding your fabric in half lengthwise, aligning the pattern piece’s designated edge with this fold, and then cutting. This creates a mirrored piece, perfect for garment sections like the front or back of a shirt that need to be symmetrical. While convenient for achieving symmetry, this method often leads to significant fabric waste, especially around the edges or when dealing with irregular pattern shapes.
The Flat Cutting Advantage
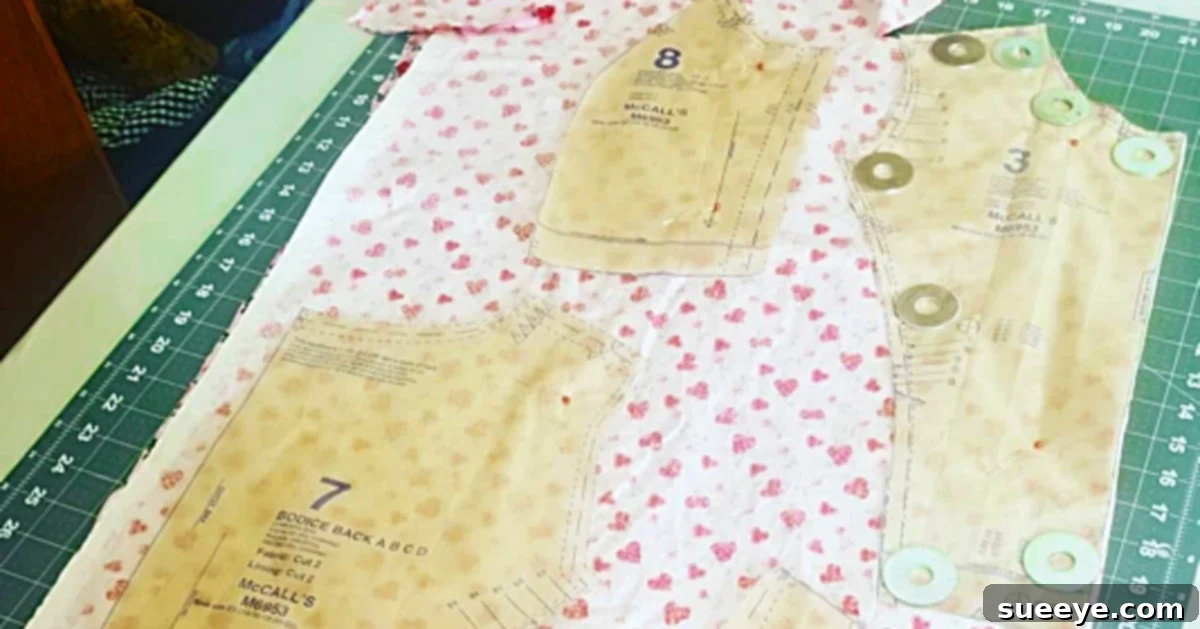
A smart alternative, particularly beneficial for those looking to conserve fabric, is to cut your pattern pieces on a single layer of fabric laid flat. This technique involves taking a pattern piece designed to be cut on the fold, placing it on your flat fabric, tracing one half of the piece, then carefully flipping the pattern piece over along its center line (where the fold would have been) and tracing the other half. This creates a complete, symmetrical piece without needing to fold and potentially waste a large section of your fabric.
The benefits of this flat cutting method are numerous. Firstly, it allows for more precise placement of your pattern pieces, enabling you to “tetris” them together more efficiently on the fabric. This significantly reduces dead space and allows you to utilize smaller scraps that might otherwise be discarded. Secondly, it’s ideal for directional prints or fabrics with a nap (like velvet or corduroy) where folding could result in one side having an incorrect direction. Thirdly, it provides a clearer visual of your entire fabric yield, helping you make more informed decisions about future cuts. This method is a game-changer for maximizing every precious inch of your material, ensuring less fabric ends up in the scrap bin.
Strategy 2: Shop Smart – Pre-Planning Your Fabric Purchase
One of the easiest ways to waste fabric (and money) is by simply buying too much. Pattern envelopes provide fabric yardage recommendations, but these are often generous to account for various fabric widths, shrinkage, and potential errors. However, with a little foresight, you can avoid overbuying and ensure you only purchase precisely what you need.
The Fabric Store Lay-Out Method
A brilliant tip, especially if you have a non-busy fabric store and understanding staff, is to bring your pattern pieces with you. Before the fabric is cut from the bolt, you can carefully lay out your paper pattern pieces directly onto the fabric. This allows you to visually confirm the minimum amount of fabric required for your project. You might find that you need half a yard less than the pattern suggests, especially if you’re using wider fabric or employing efficient cutting techniques like the flat cutting method mentioned above.
If laying out patterns in the store isn’t feasible, a highly effective alternative is to conduct this “fabric map” exercise at home before your shopping trip. Measure your pattern pieces and sketch out a layout on paper, keeping in mind the fabric width you intend to buy. This pre-visualization helps you calculate the exact yardage required, preventing impulse over-purchases. Always add a small buffer (perhaps a few inches) for safety, but this method will drastically reduce the chances of buying significantly more fabric than necessary, saving you money and minimizing your stash of unused remnants.
Strategy 3: Crafting Your Own – DIY Bias Tape from Scraps
Bias tape is a versatile sewing notion used for finishing raw edges, creating decorative accents, or forming straps and ties. While readily available in various colors at craft stores, buying pre-made bias tape can become surprisingly expensive, especially if your project requires a lot of it or if you need specific colors or patterns that aren’t available commercially. This is where making your own bias tape from fabric scraps becomes an incredibly valuable skill.
How to Make Bias Tape from Leftovers
The beauty of making your own bias tape lies in its cost-effectiveness and the ability to perfectly match or contrast your project’s main fabric. You can use leftover fabric from your current project, coordinating scraps from previous endeavors, or even inexpensive fabric acquired specifically for this purpose. The key to successful bias tape is cutting strips on the “true bias,” which is a 45-degree angle to the fabric’s selvage (finished edge) or grainline. Cutting on the bias allows the fabric to stretch and conform smoothly around curves, which is crucial for neat finishes.
The process generally involves cutting several strips of fabric at the desired width (e.g., 1.5 to 2 inches for single-fold bias tape). These strips are then joined together end-to-end to create a continuous length. Once sewn, the raw edges are pressed inwards towards the center, either using an iron alone or with the aid of a bias tape maker tool, which neatly folds the fabric for you. This simple technique not only saves you money but also gives you complete control over the color, pattern, and quality of your bias tape, making your projects truly unique and professional-looking. It’s a fantastic way to utilize those smaller, otherwise unusable fabric pieces.
Beyond the Basics: Advanced Fabric-Saving Techniques
To further enhance your fabric optimization skills and truly become a savvy sewer, consider these additional tips:
The Scrap Buster Challenge
Don’t dismiss small fabric scraps as useless. Instead, embrace them! Keep an organized scrap bin, perhaps sorted by size or fabric type. These smaller pieces are perfect for a myriad of projects: patchwork designs, quilting blocks, adorable doll clothes, small pouches, headbands, keychains, or even appliques to embellish larger items. They are also excellent for testing stitches or machine settings before working on your main project. Challenging yourself to use up scraps fosters creativity and further minimizes waste.
Smart Pattern Placement (The Fabric Tetris)
Think of your fabric layout like a game of Tetris. Before making any cuts, spend time arranging all your pattern pieces on the fabric. Rotate pieces (if the grainline and print direction allow) to find the most compact arrangement. Nestle smaller pieces within the negative space of larger ones. For non-stretch fabrics, adhering strictly to the grainline is crucial, but for some knit fabrics, slight adjustments might be permissible if they don’t impact the drape or fit. Always consider the directionality of prints and naps to ensure consistency in your finished garment.
Upcycling and Repurposing Fabric
Expand your fabric sources beyond the retail store. Thrift stores are treasure troves of potential fabric! Old sheets, curtains, duvet covers, or even oversized garments can be repurposed into new sewing projects. This is an incredibly cost-effective way to acquire unique fabrics and contribute to a circular economy. Always remember to thoroughly wash and prepare any upcycled fabric before cutting to ensure cleanliness and pre-shrinkage.
Understanding Fabric Widths and Grainlines
Fabric comes in various standard widths (e.g., 44 inches, 60 inches). Always check the width of your chosen fabric against the pattern’s recommendations, as a wider fabric might significantly reduce the yardage you need. Additionally, a deep understanding of grainlines is paramount. The grainline dictates how fabric drapes and behaves. While you might be tempted to disregard it for saving space, doing so can lead to distorted garments. Learn when you can deviate slightly (rarely) and when it’s absolutely crucial to follow the pattern’s grainline markings, especially for structural garment pieces.
Pre-Washing and Shrinkage
Before you even think about cutting, always pre-wash your fabric as you intend to wash the finished garment. Most natural fibers will shrink during their first wash. If you cut and sew before washing, your garment could end up smaller than intended. Pre-washing ensures that any shrinkage happens beforehand, preserving the fit and dimensions of your finished project. It also helps remove any manufacturing chemicals that might cause skin irritation.
Essential Tools for Efficient Fabric Cutting
Having the right tools can make all the difference in achieving precise cuts and maximizing your fabric. Here’s a detailed look at the necessary items:
- A Fabric Marker: Essential for transferring pattern markings, outlines, and details onto your fabric. Choose a marker that is suitable for your fabric type and color. Options include chalk, disappearing ink pens (air or water soluble), or even a fine pencil for light-colored fabrics. Always test on a scrap first to ensure it disappears completely.
- Sharp Fabric Scissors: A good pair of dressmaking shears is a sewing investment. Dedicate them solely to fabric to keep their blades sharp. Sharp scissors ensure clean, precise cuts, preventing frayed edges and distorted pattern pieces. Keep a smaller pair of snips handy for detailed work and clipping threads.
- A Rotary Cutter: For speed and precision, especially with straight lines and large pieces, a rotary cutter is invaluable. It works like a pizza cutter for fabric, providing clean edges. It’s particularly useful when cutting multiple layers of fabric simultaneously or when used with a quilting ruler for bias tape.
- A Measuring Tape or Clear Ruler: Accuracy is key in sewing. A flexible measuring tape is perfect for body measurements and curved lines, while a rigid clear ruler (preferably with grid lines) is indispensable for marking straight lines, checking grainlines, and cutting strips with a rotary cutter.
- Cutting Mat (Highly Recommended for Rotary Cutter): A self-healing cutting mat protects your work surface and prolongs the life of your rotary cutter blades. It often comes with grid lines, aiding in straight cuts and precise measurements.
- Pattern Weights: Instead of pins, pattern weights (which can be anything from purpose-made weights to heavy washers or even large stones) hold your pattern pieces securely in place without distorting the fabric, especially useful for delicate or slippery materials.
Detailed Directions for Maximizing Your Fabric
Method 1: Achieving Full Pattern Pieces Without the Fold
- Prepare Your Pattern: Identify the pattern piece that typically requires cutting on the fold. This edge is usually marked with a double-headed arrow or text indicating “place on fold.”
- Lay Out Fabric Flat: Spread your fabric out in a single layer on a large, flat surface. Ensure it is smooth, without wrinkles or folds, and that the grainline is aligned correctly.
- Place and Trace First Half: Position one half of your pattern piece (aligning the “on fold” edge where the center of the finished piece would be) onto the fabric. Use pattern weights or pins to secure it. Trace around the perimeter of this half accurately with your fabric marker.
- Flip and Align: Carefully lift the pattern piece, making sure not to move your fabric. Flip the pattern piece horizontally along the imaginary center line you just traced. Align the “on fold” edge precisely with the previously traced line, ensuring the two halves will create a seamless full piece.
- Trace Second Half: Secure the flipped pattern piece and trace the remaining half. Double-check that all edges align perfectly to avoid any discrepancies in your final piece.
- Cut Out: Once both halves are traced and you’re confident in the alignment, carefully cut out your complete, single pattern piece from the flat fabric.
Method 2: Crafting Custom Bias Tape from Fabric Scraps
- Select Suitable Scraps: Gather fabric scraps that are large enough to yield strips of your desired bias tape width (e.g., 1.5-2 inches wide). Consider coordinating or contrasting colors for aesthetic effect.
- Determine the Bias: Lay your fabric scrap flat. The true bias runs at a 45-degree angle to the selvage or grainline. Fold a corner of your fabric so the selvage edge aligns with the cut edge to easily find this 45-degree angle.
- Cut Bias Strips: Using a ruler and rotary cutter (or fabric marker and scissors), cut strips of your chosen width along the bias. Cut as many strips as needed to achieve the required length for your project.
- Join Strips (If Necessary): If you need a continuous length, place two bias strips right sides together at a 90-degree angle, forming an “L” shape. Sew a diagonal seam from corner to corner. Trim the seam allowance to 1/4 inch and press open. Repeat until all strips are joined.
- Press the Bias Tape: This is where the magic happens. For single-fold bias tape, press both long raw edges towards the center line on the wrong side. You can do this with just an iron, carefully folding and pressing as you go, or use a bias tape maker tool for a perfectly uniform fold. For double-fold bias tape, you would then fold the entire strip in half lengthwise and press again.
Final Thoughts: Embrace Sustainable and Savvy Sewing
These fabric cutting and saving tips are not just practical; they are transformative for any sewer. By incorporating them into your regular sewing practice, you’ll experience significant financial savings, a reduction in textile waste, and a boost in your overall sewing efficiency and skill. The satisfaction of knowing you’ve maximized every piece of fabric, created something beautiful from remnants, or purchased exactly what you needed is incredibly rewarding. Thoughtful Creativity’s insights provided a fantastic starting point, and with these expanded details, you’re now equipped to approach your projects with greater confidence and a more sustainable mindset.
Don’t be afraid to experiment with these techniques, practice on scrap fabric, and integrate them into your workflow. Over time, these habits will become second nature, turning you into a truly savvy sewer who values every thread and every inch of fabric. Happy sewing!