
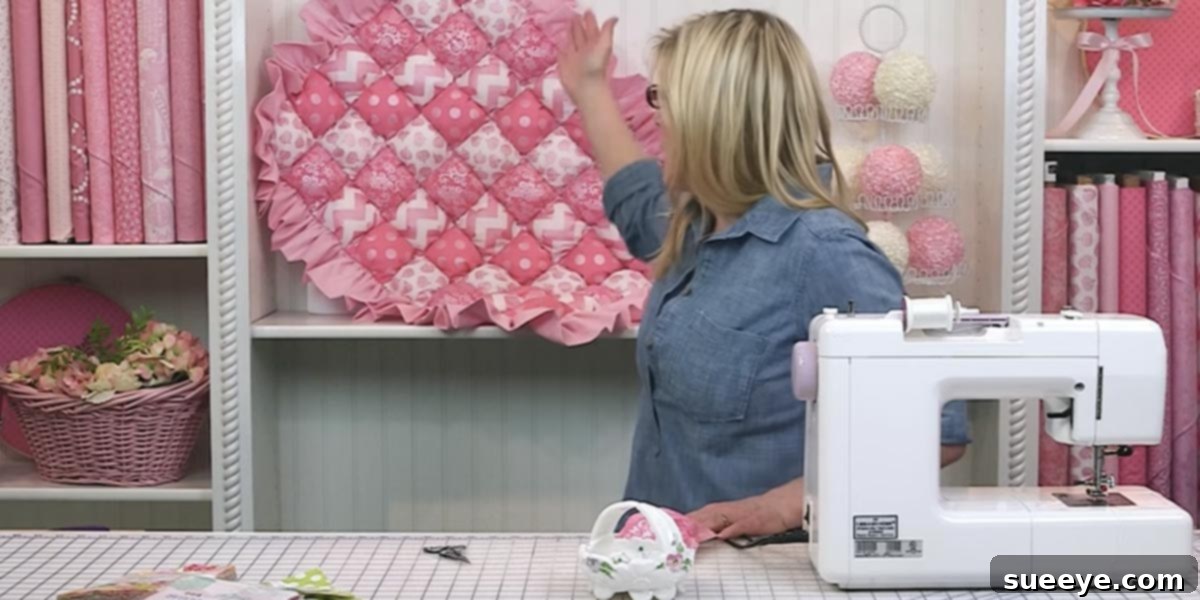
The Ultimate Guide to Crafting Your Own Cozy Bubble Quilt (Biscuit Quilt)
Imagine snuggling under a cloud of unparalleled softness and warmth – that’s the experience a bubble quilt delivers. Also affectionately known as a biscuit quilt or puff quilt, this delightful creation is a testament to handmade comfort. Its unique three-dimensional design, characterized by individual fabric “puffs” or “biscuits” filled with soft batting, creates a tactile and visually appealing texture that simply invites you to relax. Whether you’re a seasoned seamstress or a complete sewing novice, the process of crafting a bubble quilt is surprisingly straightforward, offering immense satisfaction and a truly remarkable finished product. From cherished baby shower gifts to luxurious queen-sized bedspreads, the versatility of the bubble quilt makes it an ideal project for anyone seeking to add a touch of handmade coziness to their life or the lives of loved ones.
What Exactly is a Bubble Quilt?
At its core, a bubble quilt is a type of patchwork quilt distinguished by its raised, puffed sections. Unlike traditional flat quilts, each individual fabric square on a bubble quilt is meticulously sewn, lightly stuffed with fiberfill or batting, and then sewn again, creating a soft, pillowy pocket. These pockets are then thoughtfully joined together, row by row, to form a larger, dimensional blanket. This innovative construction gives the quilt its signature “bubbly” or “biscuity” appearance and makes it exceptionally plush, warm, and comforting. The technique allows for endless creative possibilities in terms of fabric choices, colors, and patterns, enabling you to design a quilt that perfectly suits its intended recipient or your home decor. Its inherent softness and tactile appeal make it particularly popular for infants and children, providing a safe, comfortable, and stimulating surface for playtime, tummy time, and restful sleep.
Why Should You Make a Bubble Quilt? The Enduring Appeal of This Unique Creation
Beyond its undeniable charm, a bubble quilt offers a multitude of benefits that make it a truly rewarding and worthwhile project for crafters of all levels:
- Unrivaled Comfort and Warmth: The individual stuffed pockets are not just decorative; they create countless small air pockets. These air pockets provide exceptional insulation, making the quilt wonderfully warm for chilly winter months, yet breathable enough for cooler evenings. It genuinely feels like being wrapped in a soft, gentle cloud.
- Perfect for All Skill Levels: If you’re new to the world of sewing, do not be intimidated! The bubble quilt is often highly recommended for beginners because it primarily relies on repetitive straight stitching. You won’t need to master complex quilting patterns, intricate appliqué, or advanced binding techniques right away. It’s a fantastic way to familiarize yourself with your sewing machine, build confidence, and see tangible results quickly.
- Incredibly Versatile for Every Occasion and Space:
- Cherished Baby Gifts: These quilts are an absolute favorite for baby showers, and for good reason. They serve multiple practical purposes: a warm blanket for the crib or stroller, a soft playmat for tummy time on the floor, or a comforting surface for naps. Their handmade nature and washability make them invaluable for new parents.
- Engaging Toddler Play Mats: For slightly older children, a bubble quilt creates a soft, inviting, and stimulating space for imaginative play, reading books, or simply lounging comfortably on the floor. The textured surface can also be a sensory delight.
- Cozy Throws for Any Room: A medium-sized bubble quilt makes an exquisite and eye-catching throw for a sofa, armchair, or even a reading nook. It instantly adds a pop of texture, color, and undeniable coziness to any living space, transforming it into a more inviting area.
- Luxurious Bedspreads: As many experienced crafters can attest, scaling up your bubble quilt to a twin, full, queen, or even king size is entirely achievable. This transforms your bed into a haven of plush comfort, providing exceptional warmth during colder seasons, just as you might desire for your own winter bedspread.
- Pampering Pet Beds: Even your beloved furry companions will adore the luxurious softness and warmth of a handmade bubble quilt! It makes for a truly special and comfortable spot for them to rest.
- Highly Customizable and Personal: With an endless array of fabric prints, solids, and textures available, you have complete creative freedom to tailor your quilt to any aesthetic or preference. Choose vibrant, playful patterns for a child’s room, sophisticated solids and muted tones for a modern living area, or a charming mix of prints for a whimsical, eclectic touch. The possibilities are boundless.
- Durable and Long-Lasting: When constructed with quality materials and given proper care, a bubble quilt is designed to withstand years of regular use and countless washes. These unique blankets often become treasured family heirlooms, passed down through generations, each stitch holding a story.
- A Thoughtful and Heartfelt Handmade Gift: There is something profoundly special and deeply personal about a handmade gift. A bubble quilt demonstrates immense care, effort, and love, making it an incredibly meaningful present for birthdays, holidays, housewarmings, or simply to show someone you care. It’s a tangible expression of affection that will be cherished.
Materials You’ll Need to Begin Your Bubble Quilt Journey
Gathering your supplies is the exciting first step towards creating your beautiful bubble quilt. Here’s what you’ll typically require, ensuring you’re well-prepared for your project:
- Fabric: This is where your creativity truly shines and the personality of your quilt emerges! You’ll generally need two different types of fabric for the front and back of your individual puffs, plus a single large piece of fabric for the overall quilt backing.
- Top Fabric Squares: A delightful variety of cotton prints or solids work beautifully for the visible top of each puff. Consider coordinating colors and patterns that appeal to you or the recipient.
- Bottom Fabric Squares: Often, a soft solid cotton is chosen for the bottom of each puff, as it will be less visible once assembled. However, contrasting prints or complementary patterns can also create a fun and unique effect.
- Backing Fabric: You’ll need a single large piece of soft, durable fabric (such as cozy flannel, plush minky, or a sturdy broadcloth cotton) for the entire underside of your finished quilt.
Important Tip: Always pre-wash all your fabrics before cutting and sewing. This crucial step helps to prevent shrinking and potential color bleeding after the quilt is finished, ensuring your masterpiece remains vibrant and true to size.
- Stuffing/Batting: Polyester fiberfill is the most common and ideal choice for stuffing the individual puffs. It provides excellent loft, softness, and resilience, giving your quilt that signature puffy look. Alternatively, you can use a thin cotton batting cut into small squares for a slightly denser feel.
- Matching Thread: Select a high-quality, durable polyester thread that either matches or harmonizes beautifully with your chosen fabrics.
- Sewing Machine: A basic sewing machine capable of performing a reliable straight stitch is all you need for this project. No fancy features are required.
- Essential Basic Sewing Tools:
- Sharp fabric scissors or a rotary cutter with a self-healing mat (for precise and efficient cutting)
- A clear quilting ruler or measuring tape for accurate dimensions
- Fabric marker or tailor’s chalk for marking your cutting lines
- Plenty of high-quality sewing pins to hold your fabric pieces securely
- A seam ripper (an invaluable tool, just in case a stitch goes awry!)
- An iron and ironing board (for pressing seams, which is critical for a professional finish)
Crafting Your Own Bubble Quilt: A Step-by-Step Overview
While specific dimensions and minor techniques may vary slightly between different tutorials (such as the highly praised step-by-step tutorial offered by Shabby Fabrics, which many crafters find incredibly useful), the fundamental steps for making a bubble quilt remain consistent across most methods. This general guide will provide you with a clear and comprehensive understanding of the entire process, empowering you to start your own project:
Step 1: Prepare Your Fabric Squares with Precision
The first step involves determining the desired finished size of your individual puffs. For a charming baby quilt, finished squares of 4-inch or 5-inch are typically common and create a lovely proportion. For larger quilts, such as a throw or a bedspread, you might opt for more substantial 6-inch or 7-inch finished squares. It is crucial to remember to add a consistent seam allowance (e.g., 1/2 inch or 1/4 inch, depending on your preference and pattern) to all four sides when cutting your fabric. Once your size is determined, cut an equal number of top fabric squares and bottom fabric squares.
Step 2: Create the Individual Puffs
Take one top fabric square and one bottom fabric square. Place them together with their right sides facing each other, ensuring all edges are aligned. Sew around three and a half sides of the square, leaving a deliberate small opening (approximately 1-2 inches in length) unstitched on one side. This opening is vital for two subsequent steps: turning the fabric right side out and then stuffing the puff. Before turning, carefully clip the corners of the sewn square to reduce bulk, which will help create crisp, sharp corners. Turn the fabric right side out through the opening, gently pushing out the corners with a point turner or a blunt tool. Finally, press all the seams flat with an iron, meticulously tucking in the raw edges of the opening so they are neat and flush with the pressed seam.
Step 3: Stuff and Seal Each Puff
Now comes the fun part: carefully insert a small, even amount of polyester fiberfill into each fabric pocket through the opening you left. The key here is not to overstuff; you want the puffs to be plump, soft, and invitingly squishy, not rigid or lumpy. The goal is to achieve a gentle, consistent “bubble” or “biscuit” effect. Once you are satisfied with the stuffing amount and distribution, hand-sew the opening closed using an invisible stitch (like a ladder stitch) or machine-stitch it neatly, creating a completely sealed and finished “biscuit” or “puff.” Repeat this entire process for all your fabric squares until you have a beautiful collection of individual, perfectly puffed biscuits.
Step 4: Assemble the Rows of Puffs
Once all your individual puffs are complete, lay them out on a large flat surface in your desired design or pattern. This is an exciting stage where you can arrange colors, prints, and textures to create a visually stunning and harmonious effect. Once you are absolutely happy with your layout, take the puffs from your very first row and begin to sew them together, side by side, using your consistent seam allowance. Be sure to align the edges carefully before stitching. Repeat this process methodically for all subsequent rows, creating distinct strips of connected puffs.
Step 5: Join the Completed Rows to Form the Quilt Top
Once all your individual rows of puffs are complete and ready, it’s time to join them together to form the full quilt top. Place two finished rows right sides together, carefully aligning the seams of the puffs as precisely as possible. This alignment is crucial for a neat and continuous pattern. Stitch along the entire length where the two rows meet. Continue this process, joining one row after another, until your entire bubble quilt top is fully assembled. After joining, press all your seams open or to one side with an iron; this helps to create a flatter, more professional-looking finished surface.
Step 6: Add the Backing and Finish Your Quilt
For a straightforward and beginner-friendly finish, you can employ the “pillowcase” method: place your finished bubble quilt top and your large backing fabric piece right sides together, ensuring all edges are aligned. Sew around all four sides of the perimeter, leaving a generous opening (typically 10-12 inches) unstitched on one side. Trim the corners of the sewn quilt to reduce bulk. Carefully turn the entire quilt right side out through the opening, gently pushing out all the corners so they are crisp. Press the edges of the quilt flat, meticulously ensuring that the raw edges of the opening are tucked neatly inside. Finally, hand-sew the opening closed with an invisible stitch or machine-stitch it very close to the edge for a clean finish. For a more traditional quilt finish, you would typically baste the quilt top, a layer of batting (optional for extra warmth and structure), and the backing together, then quilt through all layers (often by “stitching in the ditch” between the puffs), and finally add a separate binding strip around the perimeter. However, for beginners, the pillowcase method is significantly simpler and yields beautiful results.
Tips for a Flawless and Enjoyable Bubble Quilt Project
- Consistency is Paramount: Strive for consistent seam allowances and stuffing amounts for each individual puff. This dedication to uniformity will ensure your finished quilt has a beautifully even texture and a professional, cohesive appearance.
- Accurate Cutting Saves Time: Precision in cutting your fabric squares is incredibly important and will make the entire assembly process much smoother and more accurate. Consider investing in a rotary cutter and a self-healing mat for efficient and precise cuts.
- Even Stuffing for Perfect Puffs: Distribute the fiberfill evenly within each puff. Use a chopstick, a specialized stuffing tool, or even a blunt pencil to gently push the stuffing into all four corners of each puff, preventing any lumpy areas.
- Pressing Matters Significantly: Ironing seams flat after each sewing step is not merely an optional extra; it is a critical technique. Pressing creates crisp edges, helps the pieces fit together more accurately, and ultimately contributes to a much neater and more polished final product.
- Work in Manageable Sections for Larger Quilts: As mentioned by experienced crafters, for larger quilts like a queen size or a generously sized throw, it is often far easier and less daunting to break the project into smaller, manageable “blanket” sections. For example, you could create several sections of 6×7 puffs or 8×7 puffs each. Complete these smaller sections individually and then carefully sew them together to form your grander design. This approach not only makes the project feel less overwhelming but also makes it much easier to maneuver through a standard home sewing machine.
- Embrace the Creative Process: Don’t be afraid to experiment with different fabric combinations, colors, and patterns. The unique charm and beauty of a handmade item lie in its individual character and the personal touch you infuse into it.
Caring for Your Handmade Treasure: Ensuring Longevity
To ensure your bubble quilt remains wonderfully soft, delightfully puffy, and beautifully vibrant for many years to come, proper care is absolutely essential. Most bubble quilts, particularly those made with cotton fabrics and polyester fiberfill, can be safely machine washed. It is highly recommended to wash them on a gentle cycle using cold water. Always use a mild, gentle detergent to protect the fabric and colors. When it comes to drying, tumble dry on a low heat setting, or ideally, air dry the quilt flat. Air drying helps immensely in maintaining the loft and original shape of the individual puffs. Avoid using harsh chemicals, bleach, or excessive heat, as these can severely damage the delicate fabric and the integrity of the fiberfill stuffing, compromising the quilt’s comfort and appearance.
Beyond Baby Quilts: Scaling Up for Any Space
While bubble quilts have undeniably become iconic and beloved baby shower gifts, their creative potential and practical application extend far beyond the confines of the nursery. The ingenious method of creating individual puffs and then seamlessly joining them together means you can easily scale your project to virtually any desired size. Do you envision a super cozy throw for your living room sofa? Plan for approximately 50-70 puffs, depending on your preferred dimensions. Are you dreaming of a magnificent queen-sized bedspread to combat those intense winter chills? You might need several hundred puffs, but the result will be a luxurious haven of warmth! As suggested by experienced and savvy crafters, one incredibly effective strategy for tackling these larger-scale quilts is to break the project down into more manageable segments. Instead of thinking about one single, massive quilt, envision it as several smaller “mini-quilts” or sections, perhaps comprising 6×7 or 8×7 puffs each. Complete these more manageable sections individually, and then carefully and meticulously sew those finished sections together to form your grander, expansive design. This intelligent approach not only makes the overall project feel significantly less daunting but also makes it much easier to maneuver through a standard home sewing machine, preventing frustration and ensuring a more enjoyable crafting experience.
The Joy of Giving: A Bubble Quilt as the Perfect Heartfelt Present
Few gifts in life carry the profound warmth, personal touch, and genuine sentiment of a lovingly handmade bubble quilt. Whether it’s destined for a precious newborn, a child’s special birthday, a housewarming celebration, or simply to show someone dear to you how much you care, a bubble quilt is far more than just a blanket – it is, in essence, a comforting hug made of soft fabric and stitches. Each stitch meticulously placed holds a piece of your effort, your creativity, and your heartfelt affection, culminating in a treasured item that will be appreciated not only for its incredible comfort and inherent beauty but, most importantly, for the thoughtful intention and love behind its creation. It is a gift that eloquently says, “I made this just for you,” a powerful sentiment that resonates deeply with the recipient and helps to forge lasting, cherished memories. So, if you are actively searching for a truly unique, profoundly meaningful, and wonderfully heartfelt present that stands apart from mass-produced items, look no further than this delightful and rewarding sewing project. A handmade bubble quilt is a gift that keeps on giving, offering warmth, comfort, and a tangible reminder of your care.
Ready to Start Your Bubble Quilt Project?
We’ve embarked on a comprehensive exploration of the undeniable charm, remarkable versatility, and relative ease of making a bubble quilt. The journey from a simple stack of fabric squares to a plump, irresistible, and luxuriously soft blanket is an incredibly rewarding and fulfilling one. If you’re now feeling inspired and ready to dive into this delightful crafting adventure, rest assured that many fantastic and detailed tutorials are available to expertly guide you through each and every stitch. For instance, the widely acclaimed step-by-step tutorial offered by Shabby Fabrics is highly regarded and many crafters find it incredibly helpful, providing clear visual instructions. Watching an expert demonstrate the techniques can provide invaluable insights, clarify any uncertainties, and significantly boost your confidence, especially if you are a visual learner or new to sewing. So, choose your favorite fabrics, thread up your sewing machine, and prepare to embark on the creation of a unique masterpiece of comfort that will bring immense joy and coziness for countless years to come. Happy sewing and enjoy every moment of your creative journey!