
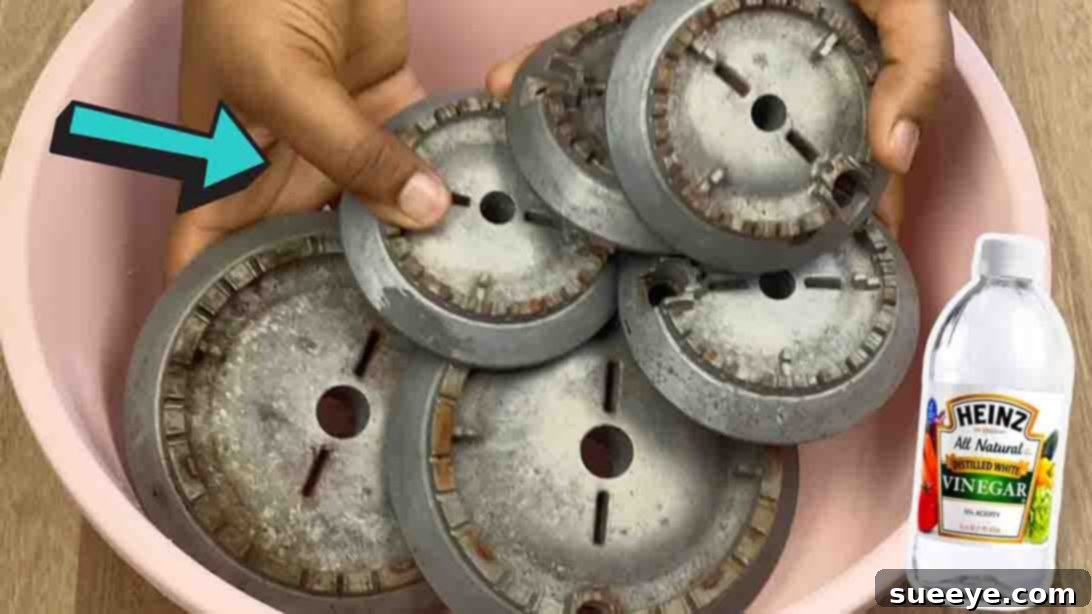
Your stove burners are the unsung heroes of your kitchen, working tirelessly to bring countless home-cooked meals to life. However, with daily use, they inevitably accumulate a stubborn mix of grease, grime, and food residue. These unsightly buildups not only detract from your kitchen’s appearance but can also impact cooking efficiency and even harbor unwanted bacteria. While tackling this mess might seem daunting, restoring your burners to their sparkling best is simpler than you think. Drawing inspiration from expert tips, such as those shared by Jennifer’s Tips on YouTube, this comprehensive guide will equip you with the techniques and knowledge to achieve impeccably clean stovetop burners effectively and effortlessly.
RELATED: How To Clean Greasy Stovetop Burners
In this article, we’ll delve into the techniques that promise to restore your burners’ pristine condition. From breaking down tough, cooked-on messes to banishing persistent grease buildup, we’ll guide you through step-by-step methods and provide invaluable tips to ensure your stove burners gleam like new. Say goodbye to unsightly stains and lingering odors that can permeate your kitchen, and hello to a cooking space that radiates cleanliness and efficiency. Prepare to roll up your sleeves and uncover the secrets to effortlessly cleaning stove burners, ensuring they are always ready to fuel your culinary adventures with ease and optimal performance. For a visual demonstration, consider watching the video tutorial linked above; otherwise, continue reading for our detailed written instructions.
Why Clean Your Stove Burners? The Importance of Regular Maintenance
Beyond mere aesthetics, regularly cleaning your stove burners is crucial for several compelling reasons that impact your cooking, your health, and the longevity of your appliance. A clean burner isn’t just about a sparkling kitchen; it’s about optimizing your cooking experience and maintaining a hygienic environment.
Enhanced Cooking Efficiency and Performance
When burners are coated with grease and food debris, the flames or heating elements can become obstructed. For gas stoves, this means uneven flame distribution, leading to inconsistent heating of your pots and pans. This can result in food that’s cooked unevenly, with some parts burnt and others undercooked. For electric coil burners, residue can prevent direct contact with cookware, reducing heat transfer efficiency and forcing your stove to work harder to reach the desired temperature. By keeping them clean, you ensure optimal heat distribution, leading to more predictable and efficient cooking outcomes.
Improved Kitchen Hygiene and Safety
Food spills and grease deposits left on burners can become breeding grounds for bacteria, posing a potential health risk in your kitchen. Regular cleaning eliminates these contaminants, contributing to a more hygienic food preparation area. Moreover, excessive grease buildup, especially around gas burners, can become a fire hazard. Grease is highly flammable, and a stray spark or high heat could ignite accumulated oil, leading to dangerous flare-ups. A clean stove significantly reduces this risk, making your kitchen a safer place to cook.
Extended Appliance Lifespan
Just like any appliance, your stove benefits from routine care. Allowing grime to accumulate can lead to corrosion, blockages, or damage to the burner components over time. For instance, blocked gas ports can affect the burner’s ability to ignite properly or sustain an even flame, potentially requiring costly repairs or premature replacement. Regular cleaning prevents this wear and tear, helping to extend the lifespan of your stove and protect your investment.
Aesthetic Appeal and Odor Control
Let’s not forget the immediate visual impact. A grimy stovetop can make an entire kitchen look neglected, regardless of how clean the rest of the space is. Sparkling burners instantly elevate the appearance of your kitchen, creating a more inviting and pleasant environment. Furthermore, cooked-on food and stale grease can emit unpleasant odors, especially when heated. Cleaning your burners eliminates these odor sources, contributing to a fresher-smelling home.
Understanding these benefits underscores why cleaning your stove burners isn’t just a chore, but an essential part of responsible kitchen maintenance. Now, let’s get into how you can effectively achieve this.
You’ll Need: The Right Tools and Ingredients
Before you begin, gather these simple yet powerful cleaning agents and tools. Many of these are likely already in your pantry or under your sink, making this method both accessible and budget-friendly.
- A large basin or container (for soaking the burners)
- A medium basin or container (for mixing the cleaning solution)
- A bottle of 70% isopropyl alcohol (a powerful degreaser and disinfectant)
- 1/2 cup white vinegar (an acidic agent that helps cut through grease and mineral deposits)
- 2 tbsp dishwashing liquid soap (to break down grease and lift food particles)
- 2 tbsp baking soda (a mild abrasive that scours away grime and neutralizes odors)
- 1/2 cup of water (to dilute the mixture slightly)
- A sponge (preferably with an abrasive side for scrubbing)
- Rubber gloves (to protect your hands from the cleaning solution)
- Old towel or paper towels (for drying)
Directions: A Step-by-Step Guide to Sparkling Burners
Follow these instructions carefully to ensure a safe and effective cleaning process. This method leverages the chemical properties of each ingredient to tackle even the most stubborn grime.
Step 1: Prepare the Cleaning Solution and Soak the Burners
Safety first! Ensure your stove is completely cool before you begin, and if it’s an electric stove, unplug it from the wall outlet. For gas stoves, make sure all burner knobs are in the “off” position. Remove the burner grates and burner caps, and if applicable, the actual burner heads from your stove. Place them gently into the large basin, making sure they are not stacked too tightly.
Next, in your medium basin, combine the cleaning powerhouses: pour in half a bottle of 70% isopropyl alcohol, add 1/2 cup of white vinegar, introduce 2 tablespoons of dishwashing liquid soap, and finally, 2 tablespoons of baking soda. Stir the mixture thoroughly until the baking soda is mostly dissolved and all ingredients are well incorporated. This creates a potent solution designed to break down grease and lift stubborn residue. Now, carefully pour this homemade cleaning mixture over the burners in the large basin, ensuring they are well-coated. Add 1/2 cup of water to the basin to help submerge the burners and activate the solution.
Step 2: Allow Soaking and Thorough Scrubbing
Once the burners are submerged in the solution, leave them to soak for approximately ten to fifteen minutes. This soaking period is critical, as it gives the alcohol, vinegar, baking soda, and soap time to penetrate and loosen the cooked-on grime and grease. You’ll often notice a visible change during this time, with a significant amount of dirt and residue beginning to separate from the burners and settle at the bottom of the basin.
After the soaking period, don your rubber gloves. Take each burner piece individually and, using a sponge (the abrasive side works wonders for tougher spots), begin to scrub them thoroughly. Focus on areas with visible caked-on food or heavy grease. The combination of the pre-soak and the gentle abrasive action of the baking soda in the mixture will make quick work of even stubborn spots. For intricate crevices or burner ports, a small brush (like an old toothbrush) can be incredibly useful to dislodge any trapped debris.
Step 3: Rinse, Dry, and Reassemble
Once you’re satisfied that all the dirt and grease have been removed, it’s time for a thorough rinse. Wash each burner piece well under clean, running water. Ensure that all traces of the cleaning solution and dislodged grime are completely washed away. Any residual soap or cleaning agent could affect burner performance or create an unpleasant smell when heated.
After rinsing, the drying process is crucial to prevent water spots and, more importantly, rust, especially for cast iron grates or burner caps. Pat them thoroughly dry with a clean cloth or paper towels. For best results, allow them to air dry completely for several hours, or even overnight, before reassembling. Ensure all burner ports are clear and dry before placing them back on the stove. Once they are perfectly dry, carefully put them back on your stove, reversing the removal process. Check that everything is seated correctly and securely. If it’s a gas stove, ensure the burner caps are properly aligned over the burner heads to ensure an even flame when you turn it on.
The Best Way To Clean Stovetop Burners: Additional Tips for Long-Lasting Shine
While the method above is incredibly effective for deep cleaning, consistent maintenance will keep your stovetop looking pristine and prevent future heavy buildups. Here are some extra tips to integrate into your kitchen routine:
Prevention is Key: Wipe Spills Immediately
The easiest way to deal with grime is to prevent it from setting in. Make it a habit to wipe up spills and splatters as soon as they occur, provided the stove is cool enough to do so safely. Fresh spills are much easier to clean than baked-on messes that have had time to harden and bond to the burner surfaces. Keep a damp cloth or sponge handy for quick clean-ups after cooking.
Regular Light Cleaning
In addition to deep cleaning, aim for a lighter clean more frequently. Wiping down your burner grates and the stovetop surface with a general kitchen cleaner or a simple solution of soap and water after each significant cooking session can make a huge difference. This prevents daily accumulation from becoming a weekly scrubbing challenge.
Tackling Stubborn Stains and Rust
For extremely stubborn, baked-on stains that resist the soaking method, you might need a little extra effort. A paste made from baking soda and a little water can be applied directly to the stain, left to sit for 15-30 minutes, and then scrubbed. For rust spots on cast iron grates, a fine steel wool pad (used gently) or specialized rust remover can be effective, but always test on an inconspicuous area first. Remember to re-season cast iron grates after deep cleaning to prevent future rust.
Consider Specialized Cleaners for Heavy Duty
While our homemade solution is powerful, some commercial oven and grill cleaners are specifically formulated for extremely heavy grease and carbon buildup. If you choose to use these, always follow the manufacturer’s instructions carefully, ensure good ventilation, and wear appropriate protective gear, as they can contain strong chemicals.
Don’t Forget the Burner Drip Pans/Bowls
If your stove has removable drip pans or bowls under the burners (common for electric coil stoves), these also accumulate a lot of grime. They can often be cleaned using the same soaking method described for the burners, or by scrubbing them with hot soapy water and a scouring pad.
The Power of Ventilation
Always ensure good ventilation when cooking to minimize grease and oil particles from settling on your stovetop. Using your range hood effectively can significantly reduce the rate at which your burners get dirty.
By incorporating these tips into your routine, you’ll not only maintain sparkling clean stovetop burners but also ensure a more hygienic, efficient, and aesthetically pleasing kitchen. Enjoy your cooking adventures with confidence, knowing your stove is always at its best!