
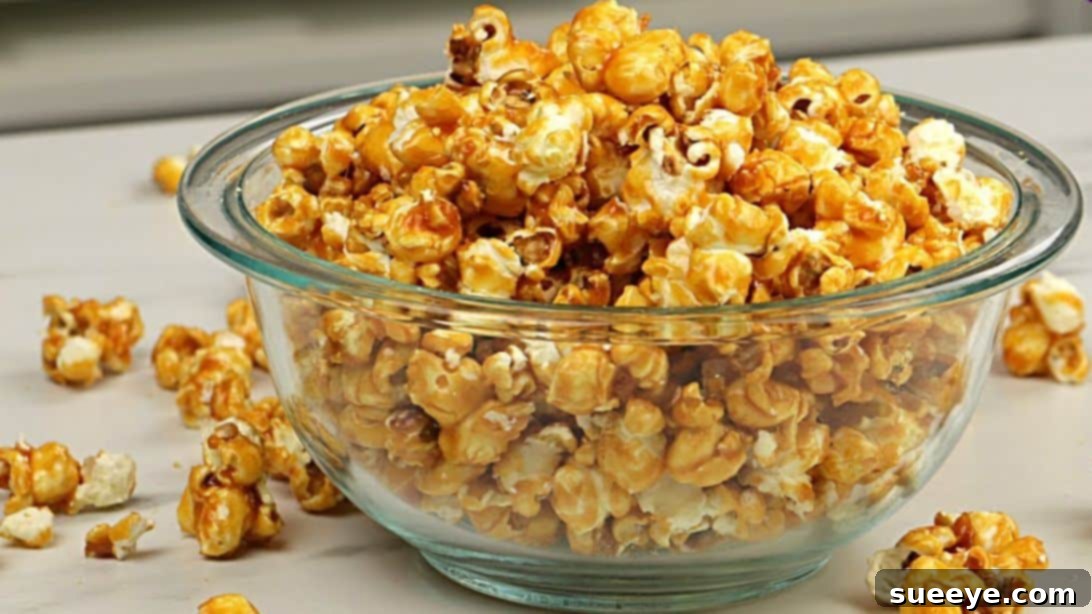
Irresistible Homemade Caramel Popcorn: Your Ultimate Guide to Sweet Perfection
Imagine a cozy movie night, a lively gathering with friends, or simply a craving for a delightful sweet treat. What could possibly make these moments even better? Without a doubt, a generous bowl of perfectly crafted caramel popcorn! While store-bought options are readily available, there’s an unparalleled magic in creating this golden, crunchy confection right in your own kitchen. It’s a simple pleasure that elevates any occasion, transforming ordinary popcorn into an extraordinary gourmet experience.
Forget bland, sticky, or unevenly coated popcorn. This comprehensive guide will walk you through every step to achieve flawless homemade caramel popcorn that rivals any specialty shop. You’ll discover the secrets to a rich, buttery caramel sauce that coats each kernel with a delightful crunch, ensuring every bite is pure bliss. We’ll use a straightforward method, requiring just a handful of pantry staples, to deliver consistently amazing results. Get ready to impress your taste buds and your guests!
Why Homemade Caramel Popcorn is a Must-Try
Opting for homemade caramel popcorn offers numerous advantages over its pre-packaged counterparts. First and foremost, you have complete control over the quality of ingredients, ensuring freshness and avoiding artificial additives, preservatives, or high-fructose corn syrup often found in commercial products. This means a healthier and undeniably more delicious snack. Secondly, it’s incredibly cost-effective. A small investment in basic ingredients yields a large batch, saving you money compared to buying gourmet popcorn.
Beyond the practical benefits, there’s a unique satisfaction in preparing food from scratch. The aroma of popping corn followed by the sweet fragrance of simmering caramel will fill your home, creating a warm and inviting atmosphere. It’s also a fantastic activity to do with family, especially children (with adult supervision for the hot caramel). The customization possibilities are endless, allowing you to tailor the flavors to your exact preferences, from a pinch of sea salt to a sprinkle of cinnamon.
The Secrets to Achieving Perfect Caramel Popcorn
While the process is simple, a few key techniques can elevate your caramel popcorn from good to absolutely perfect. The goal is a light, airy popcorn base, coated evenly with a luscious, non-sticky caramel that hardens to a satisfying crunch. Understanding the role of each ingredient and the critical timing of the steps is crucial. Pay close attention to the caramel’s temperature and color, and be ready to work quickly when combining it with the popcorn. We’ll explore these nuances in detail to ensure your success.
Essential Ingredients for Your Sweet Creation
The beauty of this recipe lies in its simplicity. You likely have most, if not all, of these ingredients in your pantry already. Each component plays a vital role in achieving that signature caramel popcorn texture and flavor. We’ll be following a fantastic recipe from Kosher Pastry Chef, known for their culinary expertise.
- 0.4 oz (approx. 12ml) Peanut Oil: Ideal for popping corn due to its high smoke point and neutral flavor, ensuring your popcorn tastes clean and crisp.
- 2.6 oz (approx. 74g) Popcorn Kernels: The foundation of our snack. Choose high-quality kernels for optimal popping and fewer unpopped “old maids.”
- 3.5 oz (approx. 100ml) Water: Used to dissolve the sugar and create the initial syrup for our caramel.
- 7 oz (approx. 200g) Granulated Sugar: The star of the caramel, providing the essential sweetness and structure.
- 0.5 oz (approx. 14g) Unsalted Butter: Adds richness, depth of flavor, and a smooth mouthfeel to the caramel.
- 1/8 Teaspoon Salt: A crucial ingredient that balances the sweetness of the caramel, enhancing all the flavors and preventing it from being cloyingly sweet.
- 1/8 Teaspoon Baking Soda: This might seem unusual, but it’s the secret to tender, non-rock-hard caramel. It reacts with the sugar to create tiny carbon dioxide bubbles, making the caramel softer, chewier, and easier to break apart.
Step-by-Step Guide: Crafting Your Perfect Caramel Popcorn
Follow these detailed instructions carefully, paying attention to the timing and visual cues, and you’ll soon be enjoying a batch of the best homemade caramel popcorn.
Step 1: Popping the Kernels to Perfection
The first step is to create a batch of beautifully popped corn. Place a large, heavy-bottomed pot or Dutch oven over medium heat. Pour in the 0.4 oz of peanut oil. Allow the oil to heat up thoroughly; you can test it by adding 2-3 kernels – if they pop, the oil is ready. Once hot, add the remaining popcorn kernels, ensuring they form a single layer at the bottom of the pot. Immediately place the lid firmly on the pot and reduce the heat to low. This method helps to ensure maximum popping with fewer burnt kernels.
As the kernels begin to pop, gently shake the pot occasionally, moving it back and forth over the burner. This prevents the bottom kernels from burning and helps unpopped kernels find their way to the hot oil. Listen for the popping to slow down; once you hear pauses of several seconds between pops, remove the pot from the heat. Don’t wait until popping stops completely, as residual heat can burn the popped corn.
Step 2: Preparing Your Popcorn Base
Once your popcorn is popped, remove it from the hot pot immediately to prevent overcooking or steaming. Transfer the freshly popped corn into a large, heat-resistant bowl. Make sure the bowl is large enough to allow for easy stirring once the caramel sauce is added. Set this bowl aside for now, keeping it ready for the next crucial step.
Step 3: Crafting the Golden Caramel Sauce
This is where the magic happens! In a separate small, heavy-bottomed saucepan, combine the 3.5 oz of water and 7 oz of granulated sugar. Place the pot over medium-high heat. Stir gently at first, just enough to dissolve the sugar in the water. Once the sugar is dissolved and the mixture begins to boil, stop stirring. Stirring after this point can cause sugar crystals to form, leading to grainy caramel.
Allow the sugar syrup to boil, watching it closely. It will go through various stages: clear, then bubbling, and gradually changing color. You’re looking for a beautiful transformation from clear to a light golden brown. Continue to cook until it reaches a rich, deep golden amber color. This intense color indicates a complex, toasted sugar flavor. As soon as it reaches this desired deep golden hue, immediately remove the pot from the heat to prevent burning, as sugar can go from perfect to burnt very quickly.
Once off the heat, carefully and quickly add the 0.5 oz of butter to the hot caramel. Stir continuously until the butter is completely melted and fully incorporated into the sauce, creating a smooth, glossy mixture. Next, add the 1/8 teaspoon of salt and the 1/8 teaspoon of baking soda. Stir vigorously until all ingredients are well combined. You’ll notice the caramel will bubble up and become lighter in color and slightly foamy due to the baking soda reacting – this is perfectly normal and desired, as it creates that signature tender texture.
Step 4: The Art of Coating
Working quickly is essential here! Immediately pour the hot, bubbly caramel sauce over the prepared popcorn in the large bowl. Using a sturdy spatula or a heat-resistant spoon, begin to stir and fold the popcorn, ensuring every kernel is thoroughly coated with the delicious caramel sauce. The caramel will begin to thicken and cool rapidly, so speed and thoroughness are key to achieving an even coating without excessive clumping.
Step 5: Cooling and Enjoying Your Treat
Once all the popcorn is coated, transfer the caramel-coated popcorn onto a large baking sheet lined with parchment paper. Parchment paper is crucial here as it prevents sticking. Using your hands (which can be protected with gloves or by lightly greasing them), spread the popcorn out into a thin, even layer. This allows it to cool quickly and helps prevent large, unmanageable clumps.
Allow the caramel popcorn to cool completely at room temperature. This can take anywhere from 30 minutes to an hour, depending on the thickness of the layer and the ambient temperature. As it cools, the caramel will harden and become wonderfully crunchy. Once completely cooled, break the popcorn apart into individual pieces or smaller clusters. Transfer it to a serving bowl and get ready to enjoy! It’s the ultimate snack for movie nights, game days, or simply a delightful treat to share with friends and family.
Expert Tips for Caramel Popcorn Success
- Use a Heavy-Bottomed Pot: This distributes heat evenly, preventing the caramel from burning in spots.
- Don’t Stir the Caramel (After Dissolving Sugar): Once the sugar is dissolved and boiling, resist the urge to stir. This prevents crystallization, which can make your caramel grainy.
- Watch the Color, Not the Clock: Caramel making is more about visual cues than exact timing. A rich, deep amber color is what you’re aiming for – not too light, not too dark.
- Have Ingredients Ready: Mise en place is vital, especially for the caramel. Have your butter, salt, and baking soda measured and ready to add quickly once the sugar reaches the correct color.
- Work Quickly with Hot Caramel: Once the caramel is ready and poured over the popcorn, it will start to set almost immediately. Stir efficiently and quickly for an even coat.
- Parchment Paper is Your Friend: Do not skip lining your baking sheet with parchment paper. It makes cleanup a breeze and ensures your delicious caramel popcorn doesn’t stick.
- Safety First: Hot sugar can cause severe burns. Exercise extreme caution when making the caramel. Keep children and pets away from the stovetop.
Delicious Variations and Serving Ideas
While classic caramel popcorn is divine, you can easily customize it to create unique flavor profiles:
- Sea Salt Caramel Popcorn: Sprinkle a touch of flaky sea salt over the coated popcorn before it cools for an irresistible sweet and salty combination.
- Nutty Caramel Popcorn: Fold in toasted pecans, walnuts, or peanuts with the popcorn before adding the caramel.
- Chocolate Drizzle: Once cooled and broken apart, melt some chocolate (milk, dark, or white) and drizzle it over the caramel popcorn for an extra indulgent treat.
- Spiced Caramel Popcorn: Add a pinch of cinnamon, nutmeg, or even a tiny amount of cayenne pepper to the caramel sauce along with the salt for a warm or spicy kick.
- Gifting: Pack cooled caramel popcorn into decorative bags or jars for a thoughtful homemade gift.
Storing Your Homemade Caramel Popcorn
To keep your homemade caramel popcorn fresh and crunchy, store it in an airtight container at room temperature. Avoid refrigerating it, as this can make it sticky and lose its crispness. Properly stored, it will remain delicious for up to a week, though it rarely lasts that long!
The Ultimate Movie Night Snack Awaits You!
Now that you have all the knowledge and tips, you’re ready to create the most incredible homemade caramel popcorn. This recipe is not just about making a snack; it’s about crafting an experience. From the satisfying pop of the kernels to the rich, golden gleam of the caramel and the delightful crunch with every bite, you’ll find joy in every step. So, gather your ingredients, follow these simple steps, and prepare to indulge in a truly irresistible treat that will become a staple in your home. Enjoy the process, and most importantly, savor every delicious, sweet, and crunchy moment!