
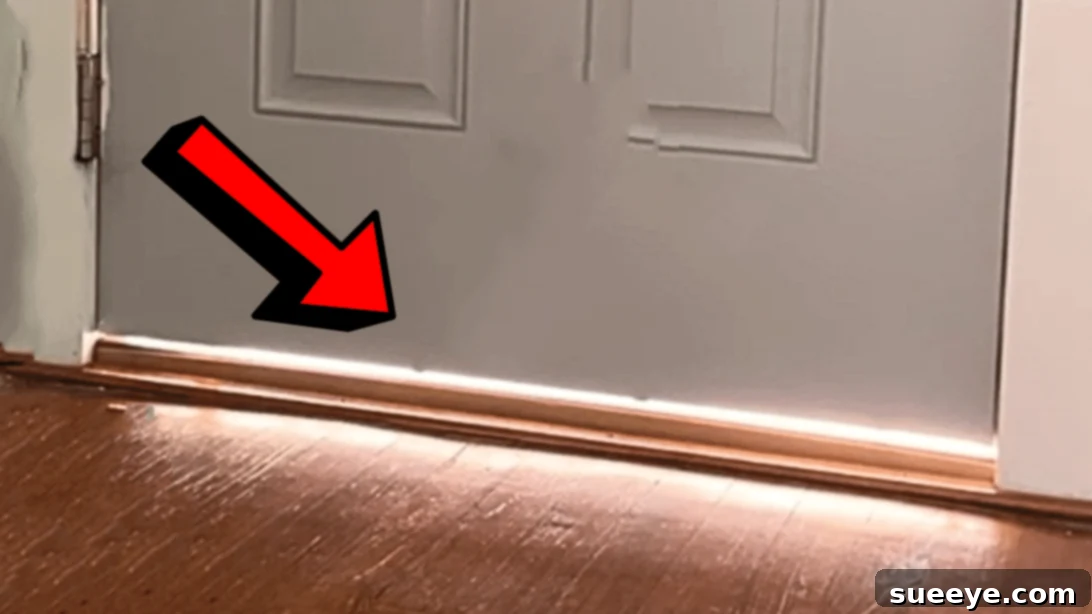
How to Fix a Door Gap Like a Pro: The Ultimate Guide to Eliminating Drafts, Pests, and Water
A persistent gap beneath your door can be far more than a minor annoyance; it’s a direct pathway for unwelcome drafts, bothersome pests, and even damaging water to infiltrate your home. Fortunately, addressing these common issues is surprisingly straightforward and doesn’t typically require a professional. With a few simple tools and a bit of DIY spirit, you can easily restore comfort, improve energy efficiency, and secure your living space. This comprehensive guide will walk you through the essential steps to identify and fix door gaps, focusing on two key components: the threshold and the door sweep.
RELATED: 6 Genius Home Improvement Tips and Hacks That You Should Try for a Smarter Home
For a visual demonstration of these techniques, we highly recommend The Honest Carpenter on YouTube. His clear tutorial will show you exactly how to easily and quickly repair a gap underneath your door and customize it according to your preference. After following these steps, you won’t ever have to suffer with light intrusion, irritating bugs, or water coming in from the gap on your door. Watch the video tutorial for more details, and then dive into our detailed instructions to become a pro at door gap repair.
Why You Need to Address Door Gaps Immediately
Ignoring a gap under your door can lead to a cascade of problems that affect your home’s comfort, energy consumption, and structural integrity. Understanding these potential issues highlights the importance of a prompt repair:
- Energy Inefficiency: Gaps allow heated or air-conditioned air to escape, forcing your HVAC system to work harder and increasing your energy bills significantly. Sealing these gaps can lead to noticeable savings on utility costs.
- Pest Infestation: Even a small gap is an open invitation for insects like ants, spiders, and cockroaches, as well as rodents like mice, to enter your home, seeking shelter, food, and water. Preventing their entry is crucial for a hygienic living space.
- Water Damage: During heavy rain or snowmelt, water can seep under the door, causing damage to flooring, carpets, and even the door frame itself. This can lead to costly repairs, subfloor rot, and insidious mold growth.
- Drafts and Discomfort: Unwanted cold or hot air currents can make rooms uncomfortable, especially near exterior doors. These drafts reduce your home’s overall thermal comfort, making you feel colder in winter and warmer in summer.
- Noise Pollution: Gaps can act as conduits for outside noises to permeate your home, disrupting peace and quiet, particularly in urban or noisy environments.
- Dust and Allergens: Outdoor dust, pollen, and other environmental allergens can easily enter through unsealed gaps, diminishing indoor air quality and potentially triggering allergies or respiratory issues.
- Light Leakage: While seemingly minor, light seeping through a gap can compromise privacy and be disruptive, especially in bedrooms or home offices where darkness is desired.
Understanding Your Door’s Anatomy: Thresholds and Door Sweeps
To effectively fix a door gap, it’s crucial to understand the two primary components involved in sealing the bottom of your door, and how they interact:
The Door Threshold: The Foundation of Your Seal
The threshold is the hard, protective sill that sits on the floor at the bottom of your door frame. It serves multiple purposes: it covers the seam between two different flooring types, provides a durable surface for foot traffic, and most importantly, it works in conjunction with the door sweep to create a tight, weather-resistant seal. Thresholds come in various materials, including durable wood, resilient aluminum, and flexible vinyl. They can be fixed or, more commonly, adjustable. Adjustable thresholds often feature a raised insert that can be moved up or down via strategically placed screws, allowing you to fine-tune the seal against the door sweep for optimal performance.
The Door Sweep: The Flexible Sealant
Mounted underneath the door slab itself, the door sweep is a flexible gasket designed to press firmly against the threshold when the door is closed, preventing air, moisture, and pests from entering. Sweeps are available in several designs and materials, each suited for different conditions and preferences:
- Vinyl or Rubber Fin Sweeps: These are common and highly effective, featuring one or more flexible fins that create a multi-layer seal against the threshold. They are excellent for general weather protection.
- Brush Sweeps: Composed of dense bristles, these sweeps are particularly excellent for uneven surfaces, providing a good seal even when the threshold isn’t perfectly flat. They are also highly effective at dust and pest control.
- U-shaped or Under-Door Sweeps: These types of sweeps slide onto the bottom edge of the door, often made from aluminum or plastic channels with integrated vinyl or rubber fins. They offer a clean look and good performance.
- Automatic Door Bottoms: These are more advanced devices that lift up when the door opens to prevent drag and then drop down to create a tight seal against the threshold when the door is closed. They offer superior performance but are more complex to install.
Over time, constant friction, exposure to elements, and repeated door closings can cause door sweeps to become worn, flattened, cracked, or damaged, losing their effectiveness and leading directly to noticeable gaps.
How to Fix a Gap Under Your Door: A Step-by-Step Guide
Addressing a door gap is often a two-pronged approach, starting with the threshold and then, if necessary, moving to the door sweep. Here’s how to tackle it like a seasoned professional:
Step 1: Optimizing Your Door Threshold’s Height for a Perfect Seal
The most common and often simplest method to fix a door gap is to adjust the height of your threshold. Many modern thresholds are intelligently designed with an adjustable cap or sill, usually located at the back, which is precisely what catches the sweep when you close the door.
Tools You’ll Need:
- Phillips head or flathead screwdriver (depending on your screw type)
- Small pry tool or awl (optional, for stubborn adjustment plugs)
- A thin piece of paper or a business card (for testing the seal)
Detailed Adjustment Process:
- Locate the Adjustment Plugs: Begin by carefully examining the top surface of your threshold. You will typically find two or more small, round, or sometimes oval plugs embedded in the cap, usually along the edge closest to the inside of the door. These plugs conceal the adjustment screws.
- Remove the Plugs: Use your small pry tool or the tip of your screwdriver to gently pop off these plugs. They might be snug, so apply firm but careful pressure to avoid damaging them or the surrounding threshold. Beneath each plug, you will reveal the head of an adjustment screw.
- Adjust the Screws: These screws are directly connected to the adjustable cap. The direction you turn them will determine whether the cap moves up or down:
- To raise the threshold cap (thereby reducing the gap under the door), turn the screws clockwise.
- To lower the threshold cap (this might be necessary if the sweep is too tight and causing excessive drag or difficulty closing the door), turn the screws counter-clockwise.
It is crucial to make small, incremental adjustments to each screw, working your way down the line, and ensuring the cap remains level. Avoid over-tightening or loosening any single screw too much at once.
- Test the Seal: After making adjustments, close the door slowly and observe the contact between the door sweep and the threshold. Then, slide a thin piece of paper or a business card under the door from the outside. If the paper slides through easily with no resistance, the threshold needs to be raised more. If there’s slight resistance, and you can just barely pull the paper out, you’ve likely found the optimal height. The goal is a snug fit that prevents air leakage without causing excessive drag on the door.
- Replace the Plugs: Once you’ve achieved the perfect height and seal, simply press the plugs firmly back into their respective holes. This protects the adjustment screws from dirt and moisture and restores the threshold’s clean, finished appearance.
This simple adjustment can often miraculously eliminate drafts, prevent light from entering, and effectively block pests without needing any parts replacement. It’s often the first, most effective, and most cost-efficient solution.
Step 2: Inspecting and Replacing Worn Door Sweeps for Enhanced Protection
If adjusting the threshold doesn’t fully resolve the gap, or if your door sweep is visibly damaged, cracked, or flattened beyond repair, it’s time to inspect and potentially replace the sweep. Door sweeps are subjected to constant friction and environmental wear, making them a common culprit for gaps and compromised seals.
Tools You’ll Need:
- New door sweep (ensure it matches your door’s width and type – measure carefully!)
- Tape measure
- Hacksaw or robust utility knife (for cutting new sweep to size, if necessary)
- Phillips head or flathead screwdriver (for screw-on sweeps)
- Pliers (optional, for stubborn sweep removal)
- Cleaning supplies (for adhesive sweeps)
Detailed Inspection and Replacement Process:
- Examine the Existing Sweep Thoroughly: Open your door and look closely at the condition of the sweep. Is it flattened, torn, cracked, or missing sections? Does it appear too short to cover the entire width of the door, leaving gaps at the sides? Any of these signs are a clear indication that it’s time for a replacement.
- Remove the Old Sweep: The removal method will depend entirely on the type of sweep currently installed:
- U-shaped/Slide-on Sweeps: These often slide off the bottom edge of the door, usually from one end. You might need to gently pry it to get it started or apply a little pressure to slide it out.
- Screw-on Sweeps: If your sweep is attached with screws along the bottom or side edge of the door, simply unscrew them all and carefully pull the old sweep away.
- Adhesive Sweeps: These can be peeled off. You may need a plastic scraper to remove any stubborn residual adhesive, and then clean the door bottom thoroughly with rubbing alcohol for optimal adhesion of the new sweep.
- Measure and Prepare the New Sweep: Accurately measure the width of your door from edge to edge. If your new sweep is longer than necessary, use a hacksaw (for metal or rigid plastic sweeps) or a heavy-duty utility knife (for vinyl or rubber) to carefully cut it to the correct length. Always double-check your measurements before making any cuts to avoid mistakes.
- Install the New Sweep:
- U-shaped/Slide-on: Carefully slide the new sweep onto the bottom edge of the door. Ensure it’s centered and sits flush against the door. You might need to tap it gently with a rubber mallet or a block of wood to fully seat it.
- Screw-on: Position the new sweep against the bottom of the door, ensuring it’s straight and covers the entire width. Mark your screw holes, pre-drill pilot holes if necessary, and then secure it with the provided screws or by reusing the old ones if they are in good condition.
- Adhesive: After cleaning and drying the door bottom, peel off the backing paper from the adhesive strip. Carefully align the sweep with the bottom edge of the door, ensuring it’s perfectly straight, and then press it firmly into place. Apply consistent pressure across the entire length to ensure strong, lasting adhesion.
- Test the New Seal: Close the door and perform the paper test again. The new sweep should create a firm, consistent seal across the entire threshold, effectively blocking light, drafts, and potential intruders.
Note: Different kinds of sweeps require varying installation approaches. For visual guidance on installing various types of sweeps and advanced tips, refer to the full video tutorial by The Honest Carpenter.
Advanced Solutions & Comprehensive Door Sealing for Total Home Comfort
While threshold and sweep adjustments solve most bottom-of-door gaps, a truly airtight and secure entryway often requires looking at the bigger picture and addressing other potential leakage points.
Beyond the Gap: Checking and Replacing Weatherstripping Around the Frame
The bottom of your door isn’t the only place where drafts and pests can enter. The sides and top of your door frame are also crucial points of entry. Weatherstripping forms a crucial seal around the entire perimeter of the door frame, complementing the threshold and sweep to prevent air leakage from all sides.
Common Types of Weatherstripping:
- Foam Tape: Self-adhesive strips, easy to install, and good for minor, irregular gaps. It’s an affordable and quick fix.
- V-Strip (Spring Metal or Plastic): Flexible strips that create a spring-like seal when the door closes. These are durable and can adapt to slight variations in the door frame.
- Tubular Gaskets: Hollow tubes (made of rubber, vinyl, or silicone) that compress against the door when closed, providing an excellent, resilient seal.
- Compression Weatherstripping: These are more rigid strips (often wood, metal, or vinyl) with a flexible gasket attached. They are screwed or nailed into the door frame and offer a very durable and effective seal by compressing the gasket when the door shuts.
Inspection and Replacement Process:
Inspect your existing weatherstripping by closing the door and carefully checking for any light coming through the perimeter or feeling for drafts with your hand. If the material is cracked, brittle, torn, flattened, or no longer resilient, it’s time for replacement. Remove the old material, thoroughly clean the surface to ensure proper adhesion or fit, and then install the new weatherstripping according to the manufacturer’s specific instructions. For adhesive types, ensure the surface is perfectly clean and dry. For nailed or screwed types, properly align and secure them to achieve a consistent seal around the entire door frame.
Addressing Door Alignment and Hinge Issues
Sometimes, a gap isn’t just about the bottom seal; the entire door might be out of alignment. If your door sags, rubs against the frame, or doesn’t sit squarely in its opening, it can create uneven gaps around the entire perimeter, including the crucial bottom section, making other fixes less effective.
Check your door hinges for any signs of looseness, stripped screws, or wear. Tightening loose hinge screws can often lift a sagging door and improve its alignment significantly. If screws are stripped, consider using longer screws or repair kits. In more severe cases, shimming the hinges (placing thin pieces of cardboard or wood behind the hinge plate to adjust its position) or even replacing worn-out or bent hinges might be necessary to properly realign the door within its frame. Proper door alignment ensures the door makes consistent and adequate contact with both the threshold and the weatherstripping, allowing all sealing components to perform optimally.
Benefits of a Perfectly Sealed Door: A Smart Home Investment
Investing a little time and effort into properly sealing your doors yields numerous significant long-term advantages for your home, your wallet, and your overall well-being:
- Significant Energy Bill Savings: By effectively preventing conditioned air from escaping and outdoor air from entering, you drastically reduce the workload on your heating and cooling systems. This translates directly into lower utility costs and a more sustainable home year-round.
- Enhanced Indoor Comfort: Eliminate chilly drafts in winter and block hot, humid air in summer, creating a more consistent, stable, and comfortable indoor environment regardless of the outdoor weather conditions.
- Effective Pest Exclusion: Close off entry points for unwanted insects, spiders, and rodents, making your home a less hospitable environment for pests and reducing the need for chemical pest control.
- Protection Against Moisture and Water Damage: Safeguard your interior flooring, subflooring, and the door frame itself from potential water infiltration during inclement weather, preventing costly repairs, unsightly stains, and insidious mold growth.
- Improved Sound Insulation: A well-sealed door helps to muffle outside noise significantly, contributing to a quieter, more peaceful, and more private living space.
- Better Indoor Air Quality: Reduce the entry of outdoor dust, pollen, and other environmental allergens, leading to cleaner air inside your home and potentially alleviating allergy symptoms.
- Increased Home Value: A well-maintained and energy-efficient home is inherently more attractive to potential buyers, providing a good return on your DIY investment should you decide to sell.
Maintenance Tips for Lasting Door Seals
To ensure your newly fixed door gaps remain sealed and effective for many years to come, incorporate these simple yet crucial maintenance practices into your routine:
- Regular Cleaning: Periodically clean your threshold and door sweep to remove any accumulated dirt, debris, leaves, or pet hair that can compromise the seal. A quick vacuum or a wipe-down with a damp cloth is usually sufficient and takes only minutes.
- Seasonal Inspection: Before the start of heating and cooling seasons (typically fall and spring), make it a habit to thoroughly inspect your door sweeps and threshold for any signs of wear, cracking, flattening, or damage. Addressing minor issues proactively before they escalate into major problems can save you time and money.
- Check for Alignment: Every so often, close your door and check that it still closes snugly and evenly within its frame. If you notice new gaps or increased resistance, re-evaluate the threshold adjustment or hinge alignment as discussed above.
- Lubricate Hinges: While not directly related to bottom gaps, lubricating door hinges with a silicone-based spray or petroleum jelly can prevent squeaking, reduce friction, and ensure the door operates smoothly, which indirectly helps maintain the door’s overall alignment and the integrity of its seals.
- Avoid Harsh Cleaners: When cleaning vinyl or rubber sweeps, always use mild soap and water to prevent material degradation. Harsh chemicals can dry out and crack these materials prematurely.
*All image credit belongs to The Honest Carpenter via YouTube. Follow and subscribe to his channel for more invaluable DIY tips, detailed tutorials, and expert home improvement advice!