
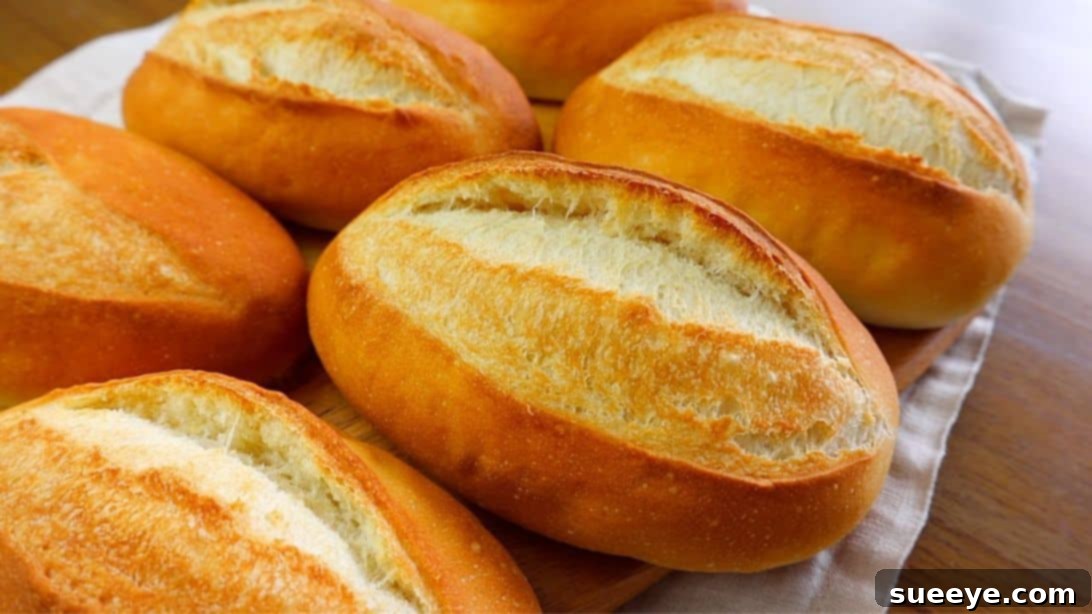
Mastering the Art of Homemade Crusty French Bread Rolls
There’s nothing quite like the comforting aroma and satisfying taste of freshly baked bread. Imagine biting into a roll with a beautifully golden, incredibly crusty exterior that gives way to a soft, airy, and utterly delicious interior. This dream becomes a reality with our easy-to-follow recipe for homemade crusty French bread rolls. Perfect for breakfast with your favorite jam, alongside a hearty soup for lunch, or as an elegant accompaniment to dinner, these rolls are versatile and undeniably delightful. Say goodbye to store-bought bread and embrace the joy of baking your own artisan-quality rolls right in your kitchen.
This recipe, inspired by the incredible techniques shared by 까사윤 CasaYun on YouTube, simplifies the process, making it accessible even for novice bakers. We’ll guide you through each stage, from mixing the initial dough to achieving that perfect crackly crust, ensuring your baking adventure is a success. Get ready to impress your family and friends with these irresistible rolls; they’ll surely be asking for more!
Why Bake Your Own French Bread Rolls?
Baking bread at home offers a multitude of benefits that extend beyond just the delicious taste. It’s a therapeutic process that engages all your senses – the feel of the dough, the intoxicating smell filling your home, and the visual satisfaction of watching your creations transform in the oven. Homemade bread also allows you to control the ingredients, ensuring a wholesome product free from unwanted additives. Plus, the sheer pride of serving something you’ve crafted with your own hands is truly unparalleled. These crusty French bread rolls are a testament to how simple ingredients can create something extraordinary, providing a foundational recipe that every home baker should have in their repertoire.
Essential Ingredients for Perfect Bread Rolls
Creating these delightful crusty French bread rolls requires only a handful of common ingredients. Each plays a crucial role in developing the unique texture and flavor that makes these rolls so special. Accuracy in measurement is key to achieving consistent results, so be sure to measure carefully.
Ingredients List:
- ¼ cup all-purpose flour (for the starter dough)
- 1½ tsp instant dry yeast (ensures quick and efficient rising)
- 2¾ tbsp lukewarm water (activates the yeast in the starter)
- 3 cups + ½ tbsp all-purpose flour (the main structure of your rolls)
- 2⅓ tsp sugar (feeds the yeast and aids in browning)
- 1½ tsp salt (enhances flavor and controls yeast activity)
- 1 tbsp + 1 tsp unsalted butter, softened (adds richness and tenderness to the crumb)
- ¾ cup + 2 tbsp cold water (helps control dough temperature during kneading, vital for French bread)
Step-by-Step Guide to Baking Crusty French Bread Rolls
Follow these detailed instructions to create beautiful, crusty French bread rolls that will be the star of any meal. Pay close attention to the timing and techniques for best results.
Directions:
Step 1: Preparing the Starter and Developing the Dough
Begin by activating your yeast to ensure a lively dough. In a generously sized mixing bowl, combine ¼ cup of all-purpose flour, the instant dry yeast, and the lukewarm water. Mix these ingredients thoroughly until they are well combined, forming a loose, wet mixture. This initial step creates a ‘starter’ or ‘poolish’ that will jumpstart the fermentation process. Cover the bowl with a clean kitchen cloth or plastic wrap and allow it to sit for approximately 30 minutes in a warm spot. During this time, the yeast will become active, and the mixture will show signs of bubbling.
After the starter has rested, add the remaining 3 cups + ½ tbsp of all-purpose flour, sugar, salt, softened unsalted butter, and the cold water to the bowl. Mix all these ingredients together until they are well incorporated and a shaggy dough forms. Transfer this dough to a lightly floured clean counter or a spacious work surface. Now comes the crucial kneading process. Knead and fold the dough for about 10 to 15 minutes. This prolonged kneading is essential for developing the gluten structure, which gives French bread its characteristic chewiness and elasticity. Continue kneading until the dough becomes smooth, supple, and elastic. To check if the dough is ready, perform the “windowpane test”: pull a small piece of dough and gently stretch it into a thin sheet. If you can see light through it without it tearing, your dough has developed sufficient gluten and is ready for the next stage.
Step 2: First Proofing and Shaping the Rolls
Once your dough has reached the desired consistency, gather it into a large, smooth ball. Lightly grease the mixing bowl, place the dough ball inside, and cover it again with a cloth or plastic wrap. Allow the dough to rest and rise (first proofing) in a warm place for approximately 30 minutes. The warmth helps the yeast thrive, causing the dough to expand and develop flavor. You’re looking for a noticeable increase in volume, though it might not fully double at this stage.
Carefully transfer the dough back to your lightly floured work surface. Gently punch the dough down to degas it, releasing the accumulated carbon dioxide. This step helps create a finer crumb structure. Divide the dough evenly into 6 pieces. For consistent results, you might consider using a kitchen scale to ensure each piece is roughly the same weight. Roll out each piece into a uniform shape, then cover them again with a cloth. Let them rest for another 20 minutes; this brief rest allows the gluten to relax, making the dough easier to shape.
Next, carefully shape each individual dough piece into its final roll form. There are various techniques, but a common one involves flattening the dough slightly, folding the edges towards the center, then rolling it tightly to create tension on the surface. Pinch the seams closed underneath. Once shaped, transfer these beautiful rolls to a baking tray lined with parchment paper, leaving ample space between each roll to allow for expansion. Cover the tray loosely and let the rolls proof (second proofing) in a warm place for about 40 to 50 minutes, or until they have nearly doubled in size. This final rise is crucial for light and airy rolls.
Step 3: Baking for that Signature Crust
Approximately 15 minutes before your rolls are ready to bake, prepare your oven for the perfect crust. Place a clean towel into a loaf pan or an oven-safe dish and fill it with about 1 cup of water. Position this pan on the bottom rack of your oven. This setup will create steam during baking, which is vital for developing that signature crusty exterior. Preheat your oven to a high temperature of 250°C (482°F).
Once the oven is preheated and your rolls have proofed, it’s time for the final touches before baking. Using a sharp knife or a bread lame, make a shallow, clean cut along the surface of each dough roll, as demonstrated in the original video. This scoring helps the rolls expand properly and gives them an attractive, rustic appearance. Lightly spray some water over the surface of the proofed dough rolls. Then, quickly open the preheated oven door and spray some water directly into the oven cavity (avoiding the light bulb) to create additional steam. Immediately lower the oven temperature to 200°C (392°F), place the tray of scored rolls inside, and allow them to bake for approximately 13 to 15 minutes. The high initial heat and steam are crucial for the crust to develop properly.
Keep an eye on them; the rolls should turn a beautiful golden brown. Once baked to perfection, carefully transfer the bread rolls to a wire cooling rack. It’s essential to allow them to cool completely before slicing or serving. Cooling on a rack prevents the bottom from becoming soggy and allows the internal structure to set, resulting in a superior texture. Once cooled, serve these delightful rolls with your favorite jam, butter, or alongside a comforting meal. Enjoy the fruits of your labor!
Tips for Achieving Perfectly Crusty Bread Rolls Every Time
- Don’t Rush the Kneading: Gluten development is key for the texture. The full 10-15 minutes of kneading is vital.
- Warmth for Proofing: A consistently warm (but not hot) environment is crucial for yeast activity. A slightly warmed oven (turned off) or a sunny spot can work wonders.
- The Power of Steam: The steam created by the water pan in the oven, combined with spraying water directly, is what gives these rolls their incredible crust. Don’t skip this step!
- Accurate Oven Temperature: Using an oven thermometer can help ensure your oven is at the correct temperature, which is especially important for bread baking.
- Cool Completely: Resist the urge to cut into the rolls immediately. Cooling allows the steam inside to redistribute, preventing a gummy interior.
- Practice Makes Perfect: Bread baking is an art and a science. Don’t be discouraged if your first batch isn’t absolutely perfect. Each bake is a learning experience!
Creative Serving Suggestions for Your Homemade Rolls
These crusty French bread rolls are incredibly versatile and can elevate almost any meal. Beyond simply spreading jam or butter, here are some ideas:
- Breakfast & Brunch: Serve with scrambled eggs, crispy bacon, or dipped in olive oil alongside fresh fruit. They are also fantastic with cream cheese and chives.
- Lunch & Dinner: A perfect accompaniment to hearty soups, stews, or chili. Use them to sop up delicious sauces from pasta dishes or curries. They also make excellent mini sandwiches for a picnic or light lunch.
- Appetizers: Slice them horizontally and toast lightly, then top with bruschetta, tapenade, or a savory cheese spread.
- Sweet Treats: Beyond jam, try them with hazelnut spread, honey, or a sprinkle of cinnamon sugar for a simple dessert.
Frequently Asked Questions About Baking Bread Rolls
Here are answers to some common questions you might have while making your own crusty French bread rolls:
- Can I use active dry yeast instead of instant dry yeast? Yes, you can. However, active dry yeast usually needs to be proofed (dissolved in lukewarm water with a pinch of sugar) for 5-10 minutes until foamy before adding it to the flour. The quantities might also need slight adjustment, usually about 25% more active dry yeast than instant.
- My dough isn’t rising; what went wrong? This is usually due to inactive yeast (expired, too hot/cold water) or a too-cold environment. Ensure your yeast is fresh and your proofing area is warm (around 75-85°F or 24-30°C).
- How do I get a really crispy crust? The steam created in the oven is paramount. Ensure your water pan is full and you’re spraying water into the oven at the beginning of the bake. A high initial oven temperature also contributes to crust development.
- How should I store leftover bread rolls? To maintain their crustiness, store cooled rolls in a paper bag at room temperature for up to 1-2 days. For longer storage, freeze them in an airtight bag for up to 3 months. Reheat frozen rolls in a preheated oven for a few minutes.
- Can I make these into a baguette instead of rolls? Absolutely! Once the dough is divided and rested, you can shape each piece into a baguette form instead of rolls. Adjust baking time accordingly; baguettes may need slightly longer.
Final Thoughts on Your Bread Baking Journey
Baking homemade bread, especially something as satisfying as these crusty French bread rolls, is a rewarding experience. It connects you to a timeless culinary tradition and fills your home with incredible warmth and aroma. Each roll you pull from the oven is a testament to your patience and effort, resulting in a product far superior to anything store-bought. Don’t hesitate to experiment with different flours or add-ins once you master this basic recipe. The world of bread baking is vast and wonderful.
We encourage you to embark on this delicious journey and share your creations with loved ones. Remember, every great baker started with a single recipe, and this one is an excellent foundation. Happy baking, and enjoy your incredibly delicious, homemade crusty French bread rolls!
*All image credit belongs to 까사윤 CasaYun via YouTube. Follow and subscribe to her channel for more inspiring recipes and baking techniques!