
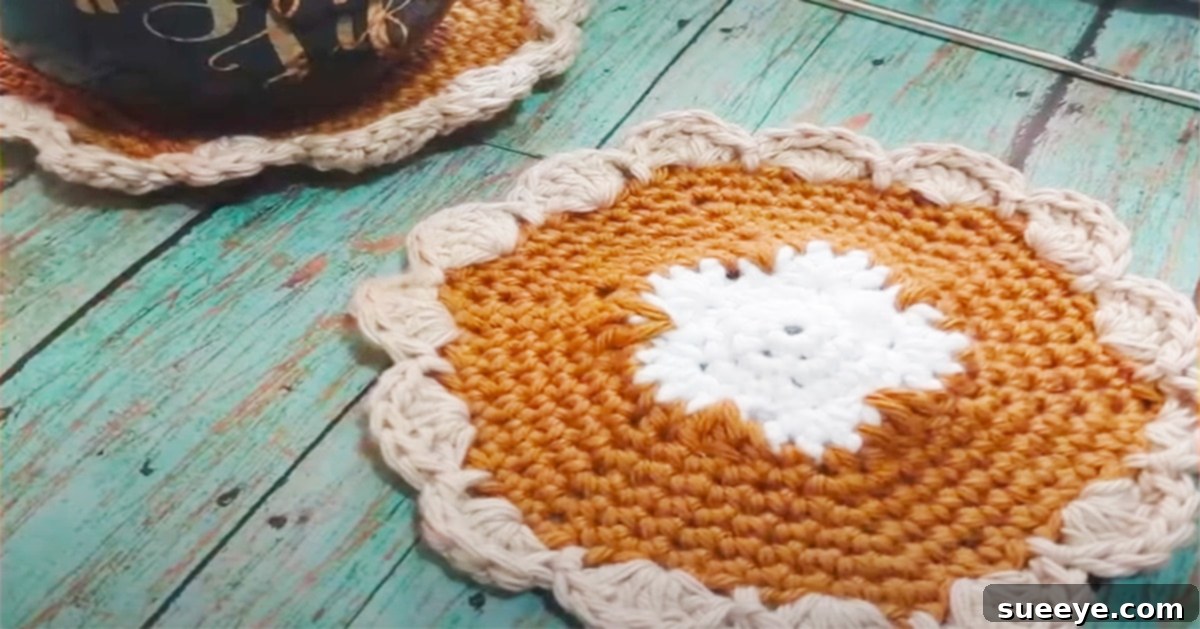
Crochet Pumpkin Pie Coasters & Hot Pads: Your Ultimate DIY Guide for Fall & Thanksgiving
As the leaves begin to turn golden and the air fills with the scent of pumpkin spice, there’s no better way to embrace the cozy spirit of autumn than with charming, handmade decor. This delightful tutorial for DIY Pumpkin Pie Coasters and Hot Pads by Rachel’s Lovely Stitches on YouTube offers a wonderfully creative and accessible project for crafters of all skill levels. Imagine adorning your Thanksgiving table or simply adding a festive touch to your everyday coffee routine with these adorable, pie-slice-inspired creations, complete with a dollop of “whipped cream” and a perfectly textured “crust.”
This project isn’t just a craft; it’s an invitation to infuse your home with warmth and personality. With a free written pattern readily available, getting started is incredibly straightforward. It’s an excellent way to prepare for the festive season, whether you’re hosting a grand Thanksgiving dinner or simply enjoying quiet autumnal evenings. The design beautifully replicates the iconic look of a pumpkin pie, making it a conversation starter and a true testament to the joy of handmade items. Best of all, it’s considered highly beginner-friendly, relying on fundamental crochet stitches like single, half double, and double crochets. This versatility means your finished pieces can serve as protective coasters, functional hot pads for warm dishes, or simply delightful holiday decorations.
Why Embrace This Beginner-Friendly Crochet Project?
Diving into a new craft can sometimes feel daunting, but the pumpkin pie coaster and hot pad project by Rachel’s Lovely Stitches is designed to be approachable and rewarding for everyone. Here’s why this DIY endeavor is perfect for your next creative session:
- Perfect for Novices: If you’re new to the world of crochet, this pattern is an ideal starting point. It uses only the most basic stitches, allowing you to practice and build confidence without feeling overwhelmed. The video tutorial provides clear visual guidance, making complex steps easy to follow.
- Versatile Home Decor: These aren’t just pretty embellishments; they’re functional items! Use them as coasters to protect your furniture from beverage rings, as charming hot pads or trivets to safeguard surfaces from hot dishes, or simply as delightful decorative accents on your mantle, shelves, or festive table settings throughout the Fall season.
- Festive & Seasonal Appeal: Nothing quite says “Fall” or “Thanksgiving” like a delicious pumpkin pie. These crochet pieces capture that essence perfectly, adding a touch of autumnal charm and coziness to any room. They are guaranteed to bring a smile to anyone who sees them.
- Wonderful Handmade Gifts: Looking for a thoughtful, personalized gift? These handmade coasters and hot pads are excellent hostess gifts for holiday gatherings, stocking stuffers, or tokens of appreciation for friends and family. A handmade gift carries a unique sentiment that store-bought items simply can’t match.
- Cost-Effective & Sustainable: Made with readily available worsted weight cotton yarn, this project is budget-friendly. It’s also a great way to use up leftover yarn scraps from previous projects, contributing to a more sustainable crafting practice.
- Quick to Complete: Unlike larger crochet projects, these coasters and hot pads work up relatively quickly. You can whip up a set in an afternoon, making them ideal for last-minute gift ideas or spontaneous decorating impulses.
Essential Supplies for Your Pumpkin Pie Crochet Project
Gathering your materials is the first exciting step in any crafting journey. For these charming pumpkin pie coasters and hot pads, you’ll need a few common crochet supplies. The beauty of this project lies in its simplicity and the minimal investment required to get started.
- Size 4.0mm Crochet Hook: This standard hook size is perfect for working with worsted weight yarn, ensuring your stitches are firm enough for a durable coaster or hot pad, while still allowing for a pleasing texture.
- Any #4 Worsted Weight, Cotton Yarn in 2-3 Colors: Cotton yarn is highly recommended for this project, especially if you intend to use your creations as hot pads. Cotton is heat-resistant and absorbent, making it ideal for protecting surfaces. You’ll need less than 180 yards of each color. Consider classic pumpkin pie colors: an antique gold or light orange for the pie filling, white or antique cream for the whipped topping, and a light brown or tan for the crust. The example projects beautifully utilize “I Love This Cotton” in Antique Gold, Antique Cream, and White, demonstrating excellent color choices.
- Scissors: A sharp pair of craft scissors is essential for cutting yarn ends and tidying up your finished pieces.
- Yarn Needle (or Tapestry Needle): This tool is crucial for weaving in loose ends seamlessly, giving your pumpkin pie coasters a professional and polished finish.
- Free Printable Pattern: While this guide provides an overview, the free written pattern linked here is indispensable for precise stitch counts, detailed round-by-round instructions, and ensuring your finished project perfectly matches the designer’s vision. Make sure to download or print it before you begin!
Basic Crochet Stitches You’ll Master
Even if you’re a complete beginner, you’ll find these stitches easy to pick up, especially with the help of the accompanying video tutorial. This project is a fantastic way to practice these fundamental crochet techniques:
- Single Crochet (SC): The most basic crochet stitch, forming a dense and sturdy fabric. It’s perfect for the initial rounds and creating a solid base.
- Half Double Crochet (HDC): A stitch slightly taller than a single crochet, offering a bit more drape while still maintaining a compact texture.
- Double Crochet (DC): Taller than both SC and HDC, the double crochet works up quickly and creates a looser fabric. It’s often used for expanding circles and creating the main “pie” body.
- Magic Ring (or Magic Circle): A technique used to start crocheting in the round without a hole in the center, ideal for the “whipped cream” topping.
- Slip Stitch (SL ST): Used to join rounds, create neat edges, and move across stitches without adding height.
Step-by-Step Directions to Crochet Your Pumpkin Pie Coaster
Creating these adorable pumpkin pie coasters is a rewarding process. While the free pattern and video tutorial provide the most precise details, here’s an overview of the journey to bring your festive pie to life:
1. Starting with the “Whipped Cream” Topping
Your pumpkin pie adventure begins with the pristine “whipped cream” center. This section uses white or antique cream yarn to create the focal point of your pie slice. Precision here ensures a neat start to your project.
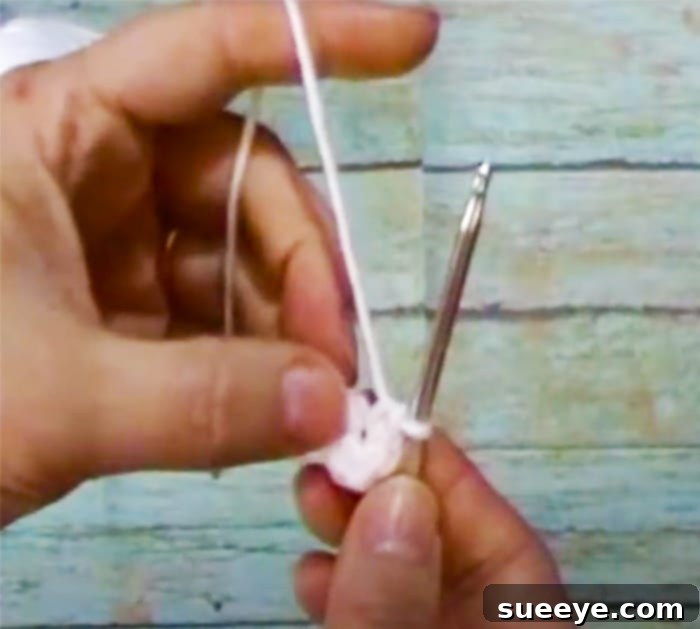
First, take your chosen white or cream yarn and create a magic ring. This technique allows for a tightly closed center, preventing a hole from forming in the middle of your coaster – perfect for a plush topping. Once your magic ring is formed, work 6 single crochets into the ring. After completing these stitches, gently pull the tail of the magic ring to tighten it, closing the center hole. Finish this round by slip stitching into the first single crochet to join the round. This completes your initial “whipped cream” puff and prepares you for the next exciting phase.
2. Transitioning to the “Pumpkin Pie Filling”
Now, it’s time to introduce the rich, warm color of the pumpkin pie filling. This step involves changing yarn colors seamlessly, a common and satisfying technique in crochet.
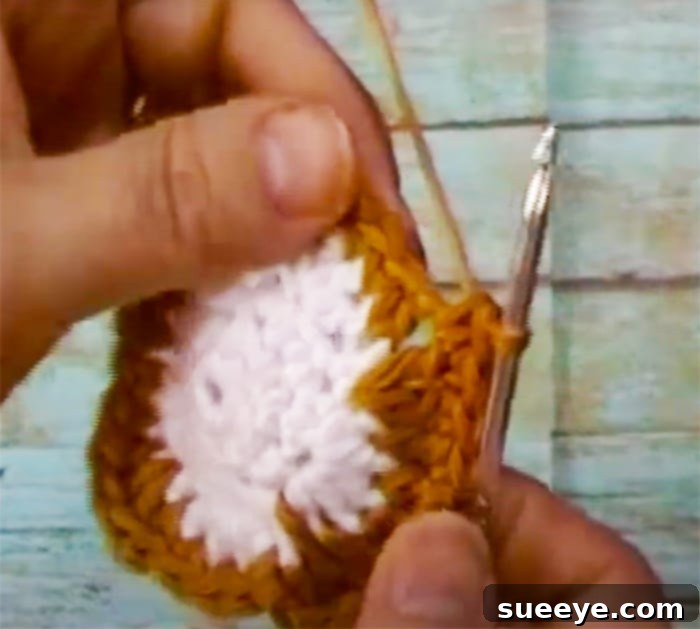
To begin the next round, carefully finish off your white yarn, securing the end. Then, join your antique gold (or pumpkin orange) yarn into your work. This new color will form the main body of your pie. Once joined, chain 2. This chain-2 will count as your first double crochet stitch for the round. Immediately after the chain-2, work one double crochet into the same stitch where you made the chain 2. This initial increase sets the stage for expanding your circle outwards, forming the round shape of the pie. Continue to follow the free pattern for specific increases in subsequent stitches and rounds to ensure your pie base lies flat and expands evenly.
3. Completing Your Pie Slice: Expanding the Body and Adding the Crust
After establishing the initial rounds, the subsequent steps involve systematically increasing your stitches in each round to create a flat, circular shape that forms the main “pie” body. The free written pattern provides precise stitch counts for each round, guiding you on where to place your increases to maintain a perfect circle. You’ll likely continue working in double crochets or a combination of stitches, gradually increasing the diameter of your pie.
Once your “pie filling” has reached the desired size for a coaster or hot pad, the final, delightful touch is adding the “crust.” This is typically achieved by joining a third color of yarn – a light brown or tan – and crocheting a border around the edge of your pie. This border might use stitches like single crochet, half double crochet, or even a decorative shell stitch to mimic the crimped edge of a pie crust. The key is to create a distinct, slightly raised edge that perfectly frames your pumpkin pie. Remember to consult Rachel’s Lovely Stitches’ full tutorial for specific instructions on how to achieve this charming detail and finish your project with a professional look.
Overall, the complete video tutorial by Rachel’s Lovely Stitches will guide you through the full process of how to flawlessly make these cute coasters and hot pads. Paying close attention to the stitch counts and techniques outlined in her free pattern and video will ensure your creations are both beautiful and durable.
Tips for Success and Customization
To ensure your pumpkin pie coasters and hot pads turn out perfectly and to make your crafting experience even more enjoyable, consider these helpful tips:
- Watch the Video First: Before you even pick up your hook, watch Rachel’s Lovely Stitches’ tutorial video entirely. This will give you a clear overview of the entire process and help you visualize each step.
- Practice Basic Stitches: If you’re new to crochet, a quick practice session with single, half double, and double crochets can significantly boost your confidence before starting the project.
- Choose Quality Yarn: Opt for high-quality cotton yarn. Not only is it heat-resistant for hot pads, but it also provides excellent stitch definition, making your finished pie look crisp and professional.
- Maintain Consistent Tension: Keeping an even tension throughout your crocheting will result in a uniform and attractive fabric. If your work starts to ripple or pull, adjust your tension or check your stitch counts against the pattern.
- Don’t Be Afraid to Customize: While classic pumpkin pie colors are charming, feel free to experiment! You could make apple pie coasters with green or red yarn, or even berry pies with purple yarn. Play with different “crust” colors or add small embroidered details.
- Make a Set: These coasters and hot pads look wonderful when displayed as a matching set. Plan to make at least four coasters and one or two hot pads to fully embrace the theme.
- Care Instructions: Since these are likely to be used for hot items, ensure they are machine washable. Cotton yarn generally is, but always check your yarn label for specific care instructions to keep your handmade items looking their best.
Creative Uses and Thoughtful Gifting Ideas
These adorable pumpkin pie crochet creations are more than just simple coasters; they are versatile pieces of functional art that can enhance your home and delight your loved ones. Here are some ideas for how to use and gift your finished pieces:
- Thanksgiving Table Decor: Elevate your holiday feast by using these as individual place setting markers or small trivets under serving dishes. They add an undeniable festive touch to any Thanksgiving spread.
- Everyday Autumnal Charm: Don’t reserve them just for holidays! Place them on your coffee table, bedside stand, or desk to enjoy a continuous touch of Fall cheer throughout the season. They’re perfect for holding your morning coffee or evening tea.
- Hostess Gifts: Attending a Fall dinner party or a Thanksgiving gathering? A handmade set of pumpkin pie coasters or a matching hot pad makes a wonderfully thoughtful and unique hostess gift that will surely be appreciated.
- Holiday Gift Baskets: Pair a set of these crocheted items with a gourmet coffee blend, a selection of teas, or a pumpkin-scented candle to create a beautiful and cozy Fall-themed gift basket.
- Craft Fair Sellers: If you enjoy selling your handmade crafts, these pumpkin pie coasters and hot pads are sure to be popular items at Fall craft fairs and holiday markets due to their seasonal appeal and practicality.
- Teacher Appreciation: As the school year progresses into Fall, a handmade coaster makes a sweet and practical gift for a favorite teacher, especially when paired with a thoughtful note.
- Kitchen Enhancement: Beyond the table, these hot pads can add a touch of whimsy to your kitchen counter, ready to protect surfaces from warm bakeware straight from the oven.
These festive coasters and hot pads are truly a joy to create and an even greater pleasure to use or gift. They capture the essence of Fall and Thanksgiving in a tangible, handmade form. Whether you’re making them for yourself to enhance your home’s autumn ambiance or crafting them as heartfelt gifts for friends and family, this tutorial provides all the inspiration you need. If you have any crochet-loving friends or want to introduce someone to the joy of this craft, share this tutorial with them. They’ll appreciate the easy-to-follow instructions and the delightful outcome. Happy crocheting!