
Discover the Art of DIY Mosaic Coasters: Crafting Stunning Home Decor and Unique Gifts
Are you searching for a captivating craft project that combines artistic flair with practical utility? Look no further than the mesmerizing world of DIY mosaic coasters! These exquisite pieces are not merely functional items to protect your surfaces; they are miniature works of art that can add a vibrant splash of color and unique texture to any home decor. The idea of creating such intricate designs might seem daunting at first glance, but you’ll be pleasantly surprised at how accessible and enjoyable this crafting journey truly is. Imagine transforming simple tiles, broken dishes, or colorful glass pieces into breathtaking mosaic patterns that reflect your personal style. This project is incredibly rewarding, offering a wonderful outlet for creativity and resulting in truly impressive handmade items that you’ll be proud to display or gift to loved ones.
From the moment I first encountered the visual appeal of Mexican art, with its rich colors and intricate details, I was completely captivated. This deep appreciation sparked an immediate desire to try my hand at creating something similar, and DIY mosaic coasters presented the perfect opportunity. There’s an undeniable thrill in bringing a vision to life with your own hands, especially when the outcome is as stunning and unique as these mosaic coasters. What’s even better is that these beautiful creations make incredibly thoughtful and personalized gifts. I immediately started crafting a collection, envisioning the joy they would bring to friends and family during holidays and special occasions. The ease of the process combined with the striking results makes this an ideal craft for anyone looking to add a touch of handmade elegance to their life, whether for personal enjoyment or for spreading cheer through heartfelt presents.
Why Choose DIY Mosaic Coasters? The Allure of Handcrafted Elegance
The appeal of DIY mosaic coasters extends far beyond their primary function. They embody a unique blend of artistry, practicality, and personal expression that makes them a standout craft project. Understanding these facets can further inspire your creative journey and highlight why this particular DIY endeavor is so beloved by crafters of all skill levels.
Aesthetic Appeal: Bringing Art into Everyday Life
One of the most compelling reasons to create mosaic coasters is their undeniable visual charm. Mosaics, with their vibrant colors, dynamic patterns, and varied textures, bring an ancient art form into contemporary home decor. Each small piece of tile, glass, or stone contributes to a larger picture, creating an intricate design that is truly one-of-a-kind. Whether you prefer bold, contrasting hues or subtle, harmonious tones, the possibilities for color combinations and design layouts are virtually limitless. This artistic flexibility allows you to craft coasters that perfectly complement your existing decor or introduce an exciting new element. The mosaic technique also adds a tactile dimension, making these coasters not just beautiful to look at, but also interesting to touch.
Practicality Meets Design: Protecting Surfaces with Style
Beyond their aesthetic value, mosaic coasters serve a crucial practical purpose: protecting your furniture from unsightly rings and spills. Unlike generic store-bought coasters, your handmade mosaic creations offer superior durability and a unique style that mass-produced items simply cannot replicate. Made with sturdy bases, strong adhesives, and resilient grout, these coasters are built to withstand daily use while adding a personalized touch to your coffee table, desk, or bedside stand. They are easy to clean and maintain, ensuring that your beautiful surfaces remain pristine for years to come. This blend of functionality and artistic expression makes them an ideal addition to any home.
Unleash Your Creativity: A Canvas for Personal Expression
The DIY mosaic coaster project is an incredible canvas for personal creativity. It encourages you to experiment with different materials, shapes, and arrangements. You can choose to create abstract designs, geometric patterns, or even attempt more intricate pictorial mosaics. The process of selecting colors, breaking pieces (if using larger tiles), and arranging them offers a meditative and engaging experience. There’s a profound satisfaction in seeing disparate elements come together to form a cohesive and beautiful object. This hands-on approach allows you to infuse each coaster with a piece of your personality, making them genuinely unique and reflective of your artistic vision.
The Perfect Handmade Gift: Thoughtful and Versatile
In a world increasingly filled with mass-produced items, a handmade gift carries immense value and conveys a deep level of thoughtfulness. DIY mosaic coasters are exceptional gifts for a multitude of occasions. Whether it’s for a housewarming, a birthday, an anniversary, or holiday festivities like Christmas, a set of custom-made coasters is sure to impress. You can tailor the designs and color schemes to match the recipient’s taste or home decor, making the gift even more personal and cherished. The effort and care invested in crafting these coasters communicate a message that goes beyond the item itself, making them memorable keepsakes that will be used and admired for years.
Eco-Friendly Crafting: Giving New Life to Old Materials
For those mindful of environmental impact, crafting mosaic coasters offers an excellent opportunity for eco-friendly DIY. This project encourages the use of upcycled and recycled materials, transforming what might otherwise be discarded into something beautiful and functional. Broken ceramic plates, forgotten stained glass scraps, leftover tiles from home renovation projects, or even small pebbles and shells collected from nature can all find a new purpose as mosaic pieces. This sustainable approach not only reduces waste but also adds character and history to your creations, making each coaster tell a unique story.
Essential Materials You’ll Need to Begin Your Mosaic Journey
Embarking on your mosaic coaster adventure requires a few key materials and tools. Gathering these items beforehand will ensure a smooth and enjoyable crafting experience. Most of these can be found at local craft stores, hardware stores, or even through creative scavenging around your home.
- Coaster Blanks: These form the base of your mosaic. Common choices include ceramic tiles (plain white or bisque, usually 4×4 inches), wood squares, cork blanks, or even sturdy pieces of MDF. Ensure they have a flat, smooth surface for optimal tile adhesion. Consider adding felt pads to the bottom of your finished coasters to protect furniture.
- Mosaic Pieces: This is where your creativity truly shines. Options are vast:
- Ceramic Tiles: Small mosaic tiles, or larger tiles that you can break into smaller, irregular pieces (use safety glasses and a tile nipper).
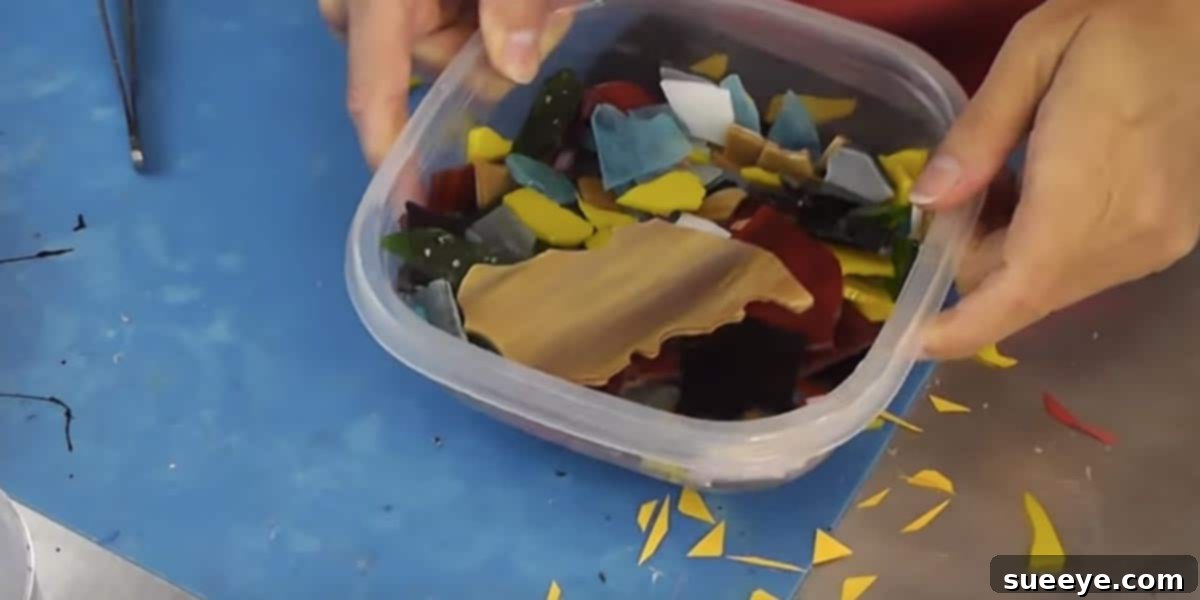
- Stained Glass: Beautiful for translucent effects and vibrant colors, often sold in small sheets or pre-cut pieces.
- Broken China/Dishes: An excellent way to upcycle old tableware, creating unique patterns and textures (again, use safety precautions when breaking).
- Pebbles or Sea Glass: For a more natural, organic look, perfect for coastal or rustic themes.
- Glass Gems/Cabochons: Small, colorful glass pieces that add sparkle and dimension.
- Mirror Pieces: Can add a reflective quality, but handle with extra care.
- Adhesive: A strong, waterproof adhesive is crucial for securing your mosaic pieces. Craft glue like E6000, specialized tile adhesive, or even a good quality PVA glue (ensure it dries clear and strong) are suitable choices.
- Grout: This fills the gaps between your mosaic pieces, binding them together and providing a finished look. Grout comes in various colors, allowing you to complement or contrast your tile colors. Sanded grout is generally used for wider gaps (1/8 inch or more), while unsanded grout is for narrower gaps. White or grey are common, but colored grouts can make a statement.
- Grout Sealer: After the grout has fully cured, a sealer protects it from moisture, stains, and mildew, extending the life and beauty of your coasters.
- Tools:
- Grout Float or Spatula: To spread the grout evenly.
- Sponges: For cleaning excess grout from your mosaic surface.
- Safety Glasses: Absolutely essential if you plan to break tiles or glass.
- Gloves: Protect your hands from grout, which can be irritating.
- Tile Nipper (Optional): If you’re breaking larger tiles into smaller pieces.
- Mixing Container and Stirring Stick: For mixing grout.
- Old Cloths or Paper Towels: For general cleanup.
Your Step-by-Step Guide to Crafting Beautiful Mosaic Coasters
Now that you have all your materials, it’s time to dive into the exciting process of making your own mosaic coasters. This step-by-step tutorial is designed to be clear and easy to follow, ensuring a successful and enjoyable crafting experience. Soon, you’ll have a collection of stunning, unique coasters that are perfect for your home or for thoughtful gift-giving.
Before we delve into the instructions, take a moment to appreciate the potential of your project. The image below showcases the vibrant results you can achieve. This visual inspiration serves as a fantastic starting point for envisioning your own creations. Remember, every mosaic is a unique expression, and there’s no right or wrong way to arrange your pieces – only your artistic vision!
-
Preparation and Design Planning:
Begin by cleaning your coaster blanks thoroughly to ensure proper adhesion. If you’re using larger tiles or glass pieces, now is the time to break them into smaller, manageable sizes using your tile nippers and wearing safety glasses. Once you have your mosaic pieces, arrange them on your coaster blank without glue. This allows you to experiment with different patterns, color combinations, and layouts. Take a photo of your favorite design or sketch it out to remember your arrangement. This step is crucial for visualizing your final product and making any necessary adjustments before committing with adhesive.
-
Adhering Your Mosaic Pieces:
Once you’re satisfied with your design, start gluing the mosaic pieces onto the coaster blank. Apply a small dab of adhesive to the back of each piece and firmly press it onto the coaster base. Work in small sections to ensure the glue doesn’t dry before you’ve placed your pieces. Maintain a consistent gap (grout line) between each piece, typically 1/16 to 1/8 inch, as this space will be filled with grout later. If you’re using very irregular pieces, the gaps might naturally vary, which adds to the charm of a handmade mosaic.
-
Allowing for Ample Drying Time:
Patience is key in this stage. After all your mosaic pieces are glued down, set the coaster aside in a safe, undisturbed place to allow the adhesive to fully cure. Depending on the type of glue you use, this can take anywhere from 12 to 24 hours. Refer to the adhesive manufacturer’s instructions for exact drying times. Rushing this step can lead to pieces shifting or falling off during the grouting process, so ensure everything is completely dry and securely bonded.
-
Mixing and Applying Grout:
Once the adhesive is dry, it’s time to grout. Put on your gloves to protect your hands. In a separate container, mix your grout powder with water according to the manufacturer’s instructions, aiming for a consistency similar to peanut butter or thick paste. Avoid making it too watery. Using a grout float or spatula, apply the mixed grout over the entire surface of your mosaic, pressing it firmly into all the gaps between the pieces. Ensure all spaces are completely filled, but try not to apply an excessively thick layer over the tiles themselves.
-
Cleaning Excess Grout:
Immediately after applying the grout, and while it’s still wet but beginning to set, start removing the excess. Hold your grout float at a 45-degree angle and gently scrape away the excess grout from the surface of your mosaic. You can also use a damp (not soaking wet) sponge to carefully wipe away the remaining grout haze from the tile surfaces. Rinse your sponge frequently and wring it out well. Repeat this process until your mosaic pieces are clean and visible. Be gentle to avoid pulling grout out of the joints.
-
Curing and Sealing for Durability:
Allow the grout to cure for the recommended time, typically 24-72 hours, as specified on the grout packaging. During this period, avoid handling the coasters too much or exposing them to moisture. Once the grout is completely dry and hard, apply a grout sealer. This step is vital for protecting your mosaic from moisture, stains, and mildew, especially since coasters are frequently exposed to liquids. Apply the sealer according to the product’s instructions, usually by wiping it on and allowing it to penetrate. You might need a second coat for maximum protection.
-
Adding Finishing Touches:
Once the sealer has dried, your mosaic coasters are practically complete! For an extra layer of protection for your furniture, consider adhering small felt pads or cork circles to the bottom of each coaster. This prevents scratching and helps the coaster stay in place. Give your finished coasters a final wipe-down with a clean, dry cloth, and they are ready to use or to be lovingly packaged as a special gift.
Tips for Mosaic Success: Enhancing Your Crafting Experience
To ensure your mosaic coaster project is not only successful but also deeply enjoyable, here are some invaluable tips that will help you navigate common challenges and elevate your crafting experience.
Start Simple, Grow Bold
If you’re new to mosaic art, begin with a straightforward design. Simple geometric patterns, stripes, or random arrangements of uniformly sized pieces are excellent starting points. As you gain confidence and familiarity with the materials and process, you can gradually move on to more complex patterns, intricate color gradients, or even incorporate various shapes and sizes of mosaic pieces. Remember, even the simplest designs can yield incredibly beautiful results due to the inherent charm of mosaic work.
Embrace Color and Texture
Don’t be afraid to experiment with a wide array of colors and textures. Mosaics truly come alive when there’s a dynamic interplay between different elements. Combine glossy glass with matte ceramic, smooth pebbles with rough-cut tiles, or vibrant hues with earthy tones. Consider the overall mood you want to create – bright and playful, serene and natural, or bold and dramatic. Looking at color theory charts or taking inspiration from nature, art, or textiles can help you make informed choices that lead to visually stunning coasters.
Safety First: Protect Yourself
Your safety should always be a top priority, especially when working with materials that can be sharp or irritating. Always wear safety glasses when breaking tiles, glass, or china to protect your eyes from flying fragments. Grout can be abrasive and cause skin irritation, so wearing protective gloves throughout the grouting process is highly recommended. Work in a well-ventilated area, particularly when mixing grout or applying sealers, to avoid inhaling fumes.
Patience is a Virtue
The mosaic process involves several drying and curing stages, and attempting to rush these steps can compromise the integrity and longevity of your coasters. Allow ample time for the adhesive to fully set before grouting, and equally, give the grout sufficient time to cure before handling the coasters excessively or applying a sealer. Each stage is crucial for ensuring your mosaic is durable, stable, and truly built to last. A little patience will go a long way in achieving professional-looking results.
Source Materials Creatively
The beauty of mosaic crafting is that you don’t always need to buy brand new, expensive materials. Get creative with your sourcing! Thrift stores are treasure troves for old ceramic plates, broken glassware, or unique trinkets that can be repurposed into stunning mosaic pieces. Leftover tiles from home renovation projects are perfect. Even discarded mirror pieces or pebbles from your garden can find a new life on your coasters. This not only makes your project more sustainable but also adds a unique, eclectic character to your creations.
Beyond the Basics: Customization and Creative Variations
Once you’ve mastered the fundamental techniques, the world of mosaic coaster crafting opens up to endless possibilities for customization and creative variations. Don’t limit yourself to traditional designs; let your imagination soar!
Exploring Shapes and Sizes
While 4×4 inch squares are common, experiment with different coaster blank shapes like circles, hexagons, or even custom-cut forms. You can also scale up your project to create larger mosaic trivets for hot dishes, or wall art pieces. The principles remain the same, but the larger canvas allows for more elaborate designs and a greater visual impact. Consider using a variety of coaster shapes within a single set for an eclectic and modern look.
Thematic Designs for Every Occasion
Personalize your coasters with thematic designs. Create festive holiday coasters for Christmas or Halloween, vibrant floral patterns for spring, or serene beach-inspired mosaics using sea glass and shells for a summer vibe. You can also design coasters to reflect personal interests, hobbies, or even sports teams for a truly bespoke gift. The possibilities are only limited by your imagination and the availability of materials.
Mixed Media Mosaics
Don’t be afraid to incorporate non-traditional mosaic materials. Small beads, charms, metallic elements, or even pressed dried flowers (carefully sealed) can add intriguing textures and focal points to your coasters. Just ensure that the materials are durable enough to withstand grouting and are secured properly. This mixed-media approach can elevate your coasters from simple crafts to sophisticated works of art.
The Enduring Charm of Handmade Gifts
There’s a unique magic woven into every handmade gift. It’s not just about the item itself, but the precious time, thought, and effort invested in its creation. A set of DIY mosaic coasters transcends a mere present; it’s a tangible expression of affection and care. Imagine the delight on a friend’s face as they unwrap a gift knowing that it was crafted specifically for them, with colors chosen to match their home, or a design reflecting their personality. These aren’t just objects; they become cherished memories, functional pieces of art that will be used and admired daily. This holiday season, or for any occasion, consider the profound impact of a gift made by your own hands. It truly speaks volumes.
Conclusion: Start Your Mosaic Adventure Today!
The journey of creating DIY mosaic coasters is an incredibly fulfilling one. From selecting your vibrant mosaic pieces to meticulously applying the grout, each step brings you closer to a beautiful and functional work of art. Not only do these coasters elevate your home decor with their unique charm and practicality, but they also serve as incredibly thoughtful and personalized gifts that are sure to be treasured. The joy of creating something with your own hands, seeing your artistic vision come to life, and knowing you’ve produced a durable and stunning piece is immeasurable.
So, why wait? Gather your materials, unleash your inner artist, and embark on your very own mosaic crafting adventure today. Whether you’re a seasoned crafter or a curious beginner, this project offers a perfect blend of challenge and satisfaction. Share your creations with friends and family, and inspire others to discover the wonderful world of DIY mosaic art. Happy crafting!