
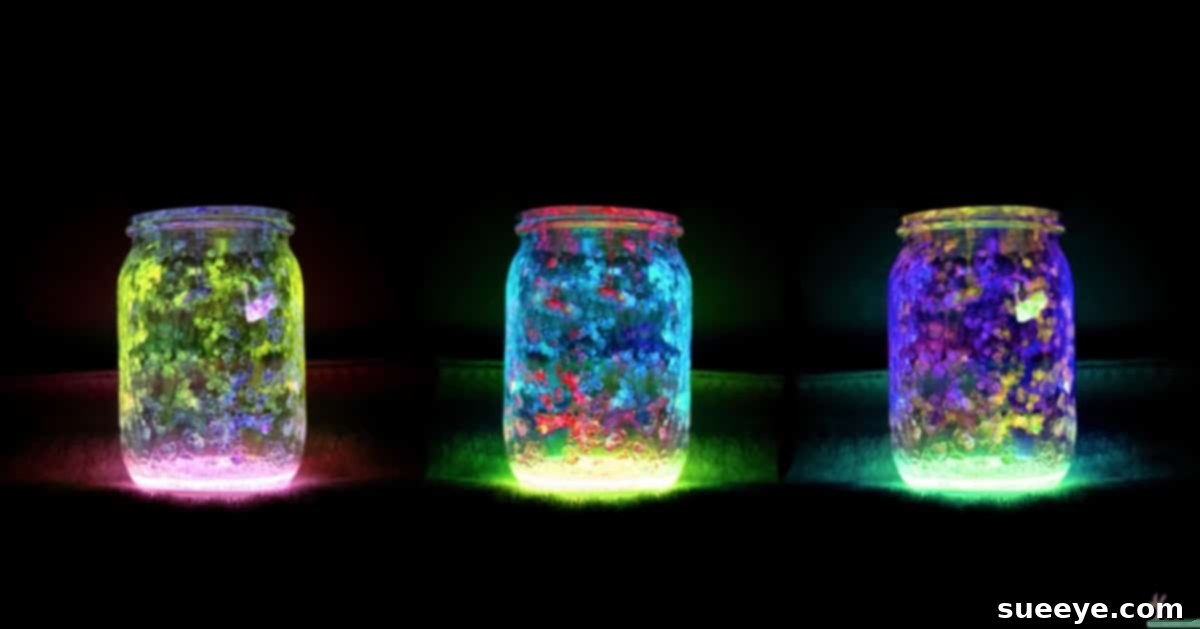
Are you searching for an enchanting, electricity-free, and battery-free small lamp to add a touch of magic to your home decor? Perhaps you need a whimsical night light for a child’s room or a captivating decoration for your porch, patio, or next outdoor gathering? Look no further! This incredibly simple yet stunning DIY project transforms ordinary items into mesmerizing “Fairy Glow Jars” that will captivate anyone who sees them.
When I first encountered the idea of crafting glow stick jars, my initial thought was that it looked complicated, perhaps involving intricate steps or specialized materials. To my delight, I quickly discovered it’s one of the most straightforward and satisfying DIY projects I’ve ever undertaken. The concept is pure genius in its simplicity: combine the radiant liquid from glow sticks with a touch of glitter inside a humble Mason jar, and watch as a truly magical, ethereal glow comes to life. It’s an instant mood-setter, a conversation starter, and a fantastic activity for all ages.
These mesmerizing Fairy Glow Jars offer a unique solution for ambient lighting, completely free from the need for electrical outlets or disposable batteries. They’re perfect for creating a soft, comforting glow in a bedroom, adding a festive touch to outdoor parties, or even serving as a charming, temporary centerpiece for a special occasion. Their versatility is unmatched, making them a must-try craft for anyone looking to infuse a little extra wonder into their surroundings.
The beauty of this project lies in its accessibility. You don’t need any special skills or expensive tools. The core ingredients are readily available at most craft stores, party supply shops, or even online. Once you have your Mason jar, a selection of vibrant glow sticks, and some sparkling glitter, you’re just a few simple steps away from creating your own miniature glowing wonderland. The process itself is as enjoyable as the finished product, making it an ideal activity for a quiet afternoon or a lively family craft session.
Just last Saturday, I found myself in a common predicament many parents face: my kids were restless and desperately needed an engaging activity to keep them occupied for a few hours. I remembered stumbling upon this enchanting Fairy Glow Jar project on YouTube and instantly thought it looked like tremendous fun. To gauge their interest, I showed them photos of the finished glowing jars, and their eyes lit up with excitement. They went wild, eagerly anticipating the chance to create their own magical lamps. Seeing their enthusiasm, we immediately piled into the car and headed to Michael’s Craft Store. There, we gathered our essential supplies: a box of classic Mason Jars, an assortment of colorful glow sticks, and a variety of glitters to add that extra sparkle. We returned home, brimming with anticipation.
To prepare our crafting station, I laid out a large newspaper mat in the garage, ensuring an easy cleanup. Before we began snipping the glow sticks, I made absolutely sure the kids had donned their vinyl gloves. This step is crucial, as glow sticks contain a small, inner glass vial that breaks to release the chemicals. While generally considered non-toxic, the tiny glass shards and the chemical liquid should be handled with moderate caution to prevent skin irritation or accidental ingestion. Safety first is always the motto, especially when crafting with children.
With our safety gear on and workspace ready, the magic truly began. The kids carefully put all the ingredients – the glowing liquid and the sparkling glitter – into the Mason Jars, following the simple steps we’ll detail below. As they secured the lids tightly, that’s when the transformation occurred. With a gentle shake, the contents swirled, mixing the luminous liquid with the glitter, creating an astonishing, ethereal glow. Our DIY Fairy Lamps looked absolutely amazing, exceeding all our expectations! Each jar became a miniature galaxy, twinkling and radiating a soft, captivating light.
To celebrate our successful crafting adventure, we decided to make a special snack: fire pit-roasted S’Mores in the backyard. It was the perfect complement to our glowing creations. We decorated the outdoor table with all the newly crafted Fairy Glow Lamps, which cast a beautiful, festive ambiance over our delicious snack. It was a truly memorable day; our S’Mores were perfect, and the kids had a terrific time, filled with creativity and wonder. When their Moms arrived to pick them up, they were equally enchanted by the new additions to our home decor. Each mom expressed how lovely the Fairy Lamps were and already had the perfect spot in mind to display their child’s beautiful, handmade glowing creation.
DIY Fairy Glow Stick Jars: Your Guide to Creating Magical Ambiance
Crafting your own Fairy Glow Jars is an incredibly rewarding experience, offering both a fun activity and a charming decorative item. Here’s everything you need to know to make your own batch of glowing magic.
Gather Your Magical Supplies:
- Mason Jars: Any size works, from small jelly jars to large canning jars. Wide-mouth jars are often easier for pouring. Ensure they are clean and dry.
- Glow Sticks: Purchase a variety of colors and sizes. Standard party glow sticks (6-8 inches) are ideal. You’ll likely need 3-5 glow sticks per small to medium jar for a vibrant glow, possibly more for larger jars or a brighter effect.
- Glitter: Fine glitter, chunky glitter, or holographic glitter – choose your favorite! White, silver, or iridescent glitter often works best to enhance the glow without overpowering the color.
- Scissors: A sturdy pair to cut the glow stick ends.
- Protective Gear: Vinyl or latex gloves are highly recommended for handling glow stick liquid. A newspaper or plastic drop cloth to protect your work surface is also a good idea.
- Optional Embellishments: Ribbons, twine, decorative tags, or fabric scraps for decorating the outside of the jars.
Step-by-Step Guide to Crafting Your Enchanted Jars:
- Prepare Your Workspace: Lay down newspaper or a plastic sheet in a well-ventilated area. This project can be a bit messy, so preparation is key for easy cleanup. Put on your gloves.
- Activate Your Glow Sticks: One by one, bend each glow stick until you hear a snap. This breaks the internal glass vial, allowing the chemicals to mix and the stick to begin glowing. Shake them gently to ensure they are fully activated.
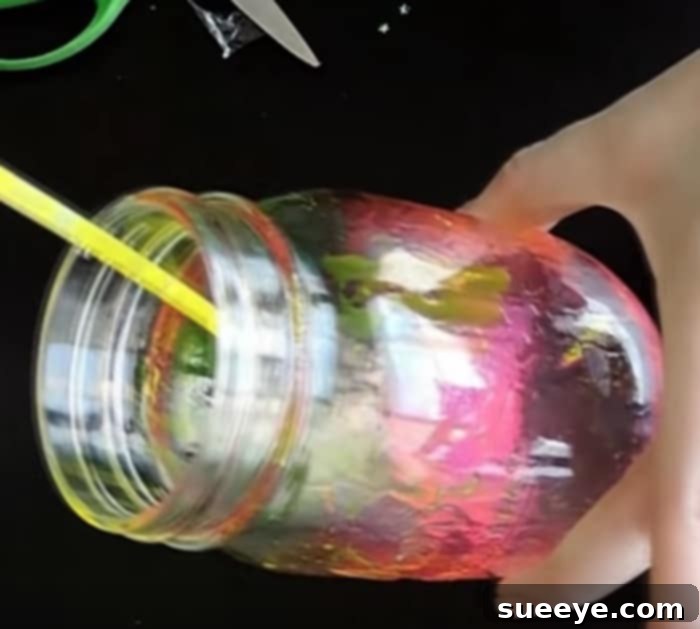
- Carefully Cut and Pour: Holding the activated glow stick over the opening of your Mason jar, carefully snip off one end with your scissors. Gently squeeze the glow stick, allowing the luminous liquid to pour directly into the jar. Repeat this process for all the glow sticks you intend to use for that particular jar. Be cautious not to squeeze too hard, as the tiny glass shards from the internal vial could come out.
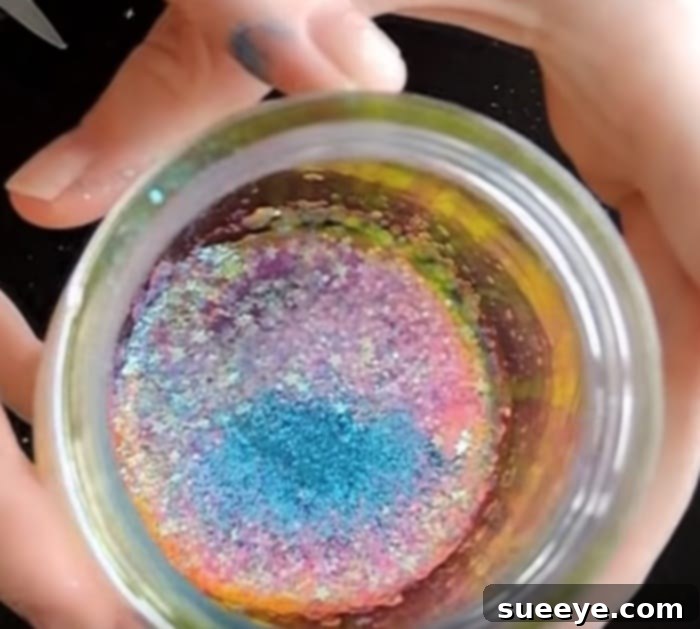
- Add Your Sparkle: Once all the glow liquid is in the jar, it’s time for the glitter! Sprinkle a generous amount of your chosen glitter directly into the liquid. Don’t be shy – more glitter often means a more dazzling effect.
- Secure and Shake: Tightly screw the lid onto your Mason jar. This prevents any leaks and ensures the contents are well mixed. Gently but firmly shake the jar for about 30 seconds. This action will thoroughly mix the glitter with the glow liquid, creating a swirling, sparkling effect that mimics trapped fairy dust.
- Behold the Magic: Turn off the lights and admire your magnificent creation! The glitter will reflect the glow, enhancing the luminosity and creating a truly captivating display.
Important Safety Considerations:
While glow sticks are generally considered safe for their intended use, it’s crucial to exercise caution when opening them. The liquid inside, though non-toxic in small amounts, can cause skin irritation or mild stomach upset if ingested. The primary concern is the tiny glass vial that breaks inside the stick to initiate the glow. Always wear gloves, supervise children closely, and ensure the project is done on a protected surface.
- Protective Gear: Always use gloves to prevent direct skin contact with the glow stick liquid.
- Supervision: Children should always be supervised by an adult during this project, especially during the cutting and pouring steps.
- Avoid Ingestion: Remind everyone involved that the liquid is not for consumption. Wash hands thoroughly after handling.
- Ventilation: Work in a well-ventilated area, although the chemicals typically have no strong odor.
- Disposal: Once the glow fades (typically after 4-6 hours), dispose of the jars appropriately according to local waste guidelines. The jars can be cleaned and reused for other crafts, but the glow stick residue should be rinsed thoroughly.
Creative Variations and Display Ideas:
The beauty of DIY projects like Fairy Glow Jars is the endless potential for customization. Experiment with different elements to make each jar uniquely yours:
- Color Combinations: Mix glow sticks of different colors within a single jar for a multi-hued glow. For instance, blue and green can create an underwater effect, while red and orange might evoke a fiery spirit.
- Glitter Galore: Use various types of glitter – fine for a subtle shimmer, chunky for more defined sparkles, or holographic for a rainbow effect. You can also add tiny sequins or iridescent flakes.
- Themed Jars: Create jars for specific holidays or events. Use orange and purple glow sticks for Halloween, red and green for Christmas, or pastel colors for Easter or a baby shower.
- External Decorations: Enhance the jars further by tying ribbons, twine, or lace around the neck. You can also paint the lids, add stickers, or even stencil designs onto the glass for a personalized touch.
- Multiple Applications: These jars aren’t just for decoration! Use them as enchanting night lights for children’s bedrooms, safe and portable lights for camping trips, whimsical centerpieces for outdoor parties, or even as imaginative props for storytelling during a sleepover.
Embrace the Joy of DIY:
Beyond the stunning visual result, creating Fairy Glow Jars offers numerous benefits. It serves as a fantastic creative outlet for individuals of all ages, promoting imaginative thinking and fine motor skills. It’s also an excellent bonding activity for families and friends, fostering teamwork and shared memories. There’s a profound sense of accomplishment and pride that comes from crafting something beautiful and magical with your own hands. This project proves that with a few simple supplies and a little creativity, you can transform the ordinary into something truly extraordinary.
So, gather your supplies, invite your loved ones, and prepare to embark on a delightful journey of creation. These DIY Fairy Glow Jars are more than just a craft; they are tiny vessels of magic, ready to illuminate your world with their captivating glow and bring a smile to everyone who experiences their charm. Go ahead, make some magic today!