
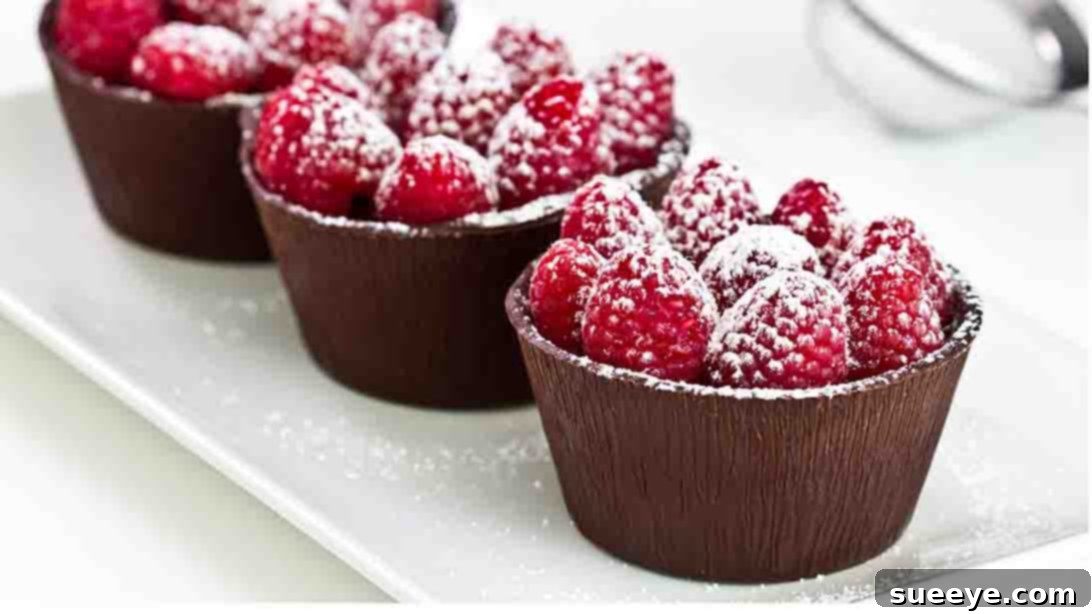
Are you ready to elevate your dessert game and impress your guests with a truly show-stopping treat? These delectable Raspberry Chocolate Cups, inspired by the culinary wizards at Home Cooking Adventure, are an absolute masterpiece. Imagine a rich, dark chocolate shell encasing a luscious, creamy raspberry-chocolate filling, all crowned with vibrant fresh raspberries. It’s a symphony of flavors and textures that promises to be the undisputed star of any party, gathering, or special occasion.
Whether you’re a seasoned baker or just starting your journey in the kitchen, this recipe is surprisingly approachable. This comprehensive, step-by-step guide will walk you through the process of creating these elegant dessert cups, ensuring a perfect outcome every time. Say goodbye to complicated desserts and hello to a simple yet sophisticated treat that tastes as incredible as it looks. Get ready to embark on a delightful culinary adventure that will leave everyone asking for the recipe!
Elegant Raspberry Chocolate Cups: The Ultimate Party Dessert Recipe
There’s something uniquely captivating about the combination of rich chocolate and tart raspberries. This harmonious pairing takes center stage in our exquisite Raspberry Chocolate Cups. Far more than just a dessert, these individual treats offer a gourmet experience in every bite. They are perfectly portioned, visually stunning, and deliver an intense burst of flavor that will leave a lasting impression on your palate. Ideal for dinner parties, holiday celebrations, or simply as a luxurious indulgence, these cups are designed to steal the spotlight and earn you rave reviews.
Inspired by the fantastic tutorial from Home Cooking Adventure, we’ve refined this recipe to be even more accessible and foolproof. Our goal is to empower you to create bakery-quality desserts right in your own kitchen, without the stress often associated with intricate confections. From crafting the perfect chocolate shell to whipping up the velvety smooth raspberry-chocolate ganache, every detail is covered. Prepare to transform simple ingredients into an unforgettable dessert that embodies elegance and pure deliciousness.
Why These Raspberry Chocolate Cups Will Be Your New Favorite Dessert
- Irresistible Flavor Combination: The deep, slightly bitter notes of dark chocolate beautifully complement the bright, tangy sweetness of fresh raspberries, creating a balanced and addictive taste profile.
- Luxurious Texture: Enjoy the satisfying snap of the dark chocolate shell, followed by the smooth, melt-in-your-mouth creaminess of the filling.
- Visually Stunning: These dessert cups are inherently elegant. Their sophisticated appearance makes them perfect for showcasing at any event, instantly elevating your dessert table.
- Perfectly Portioned: Served in individual cups, they eliminate the need for slicing and dicing, making them incredibly convenient for guests to enjoy.
- Beginner-Friendly: Despite their gourmet appearance, the steps are straightforward and designed for success, even for those new to baking.
- Make-Ahead Convenience: Most of the preparation can be done in advance, freeing up your time on the day of your event.
Ingredients for Exquisite Raspberry Chocolate Cups
Gathering your ingredients is the first exciting step towards creating these magnificent dessert cups. Quality ingredients will truly shine through, so opt for good quality dark chocolate and fresh, ripe raspberries for the best results. Here’s what you’ll need:
- Dark Chocolate: 14 oz (approximately 400g), divided. Choose a good quality dark chocolate with at least 60-70% cocoa solids for a rich, intense flavor.
- Fresh (or Frozen) Raspberries: 5 oz (approximately 140g). Fresh raspberries are ideal for the puree, but frozen berries work perfectly too – just ensure they are thawed before use.
- Granulated Sugar: 1/4 cup (approximately 50g). This will sweeten the raspberry puree to perfection, balancing the tartness of the fruit.
- Cold Whipping Cream: 1 1/4 cups (approximately 300ml). Ensure it’s very cold for optimal whipping. Heavy cream or double cream will work best for a stable and airy filling.
- Powdered Sugar: For dusting on top, optional but adds a beautiful finish.
- Fresh Raspberries: For garnish. These add a final touch of freshness and a vibrant pop of color.
Essential Equipment for Success
Having the right tools can make all the difference in ensuring a smooth and enjoyable cooking experience. Here’s a list of equipment that will be helpful for this recipe:
- Double Boiler or Heatproof Bowl over a Saucepan: Essential for melting chocolate gently without scorching.
- Six Aluminum Dessert Cups/Molds: These are crucial for shaping your chocolate shells. Small muffin tins lined with foil cups could also work as an alternative.
- Parchment Paper-Lined Baking Tray: For chilling your chocolate shells without sticking.
- Medium Saucepot: For preparing the raspberry puree.
- Fine-Mesh Sieve: To achieve a silky-smooth raspberry puree by removing seeds.
- Mixing Bowls: Several sizes will be needed for melting chocolate, making puree, and whipping cream.
- Whisk (Hand or Electric Mixer): For whipping cream until foamy and light.
- Rubber Spatula: Ideal for folding ingredients gently to maintain airiness.
- Sharp Knife or Scissors: For carefully removing the aluminum molds from the hardened chocolate.
Step-by-Step: Crafting Your Raspberry Chocolate Masterpieces
Follow these detailed instructions to create stunning Raspberry Chocolate Cups that will delight everyone.
Step 1: Preparing the Dark Chocolate Shells and Raspberry Puree
The foundation of these exquisite cups lies in their perfectly crafted chocolate shells and the vibrant raspberry puree. Attention to detail in this stage will ensure a beautiful presentation and a delicious base.
Begin by setting up your double boiler. If you don’t have one, a heatproof glass or metal bowl placed over a saucepan of simmering water (ensuring the bowl does not touch the water) works perfectly. Carefully melt 5.5 oz (approximately 155g) of your chosen dark chocolate in the double boiler, stirring occasionally until it’s smooth and fully melted. Once melted, remove the bowl from the heat. This is a crucial step to prevent overheating the chocolate. Immediately add another 1.5 oz (approximately 45g) of dark chocolate to the melted chocolate. Stir continuously until this additional chocolate has fully melted and the mixture is silky smooth. This technique, known as “seeding,” helps to temper the chocolate, making it more stable, shiny, and less prone to melting quickly at room temperature.
Next, it’s time to form the chocolate shells. Take each of your six aluminum dessert cups. Spoon a little less than half of the melted chocolate into the bottom of each cup. Working quickly but carefully, rotate each cup to generously coat the entire inner wall with a thick, even layer of chocolate. The goal is to create a robust shell that can hold the filling without cracking. Once the walls are coated, invert the cups slightly and pour any excess chocolate back into your bowl. This ensures a consistent shell thickness and prevents a heavy, overly thick bottom. Use a small spatula or the back of a knife to gently scrape the top edges of the chocolate-coated cups, giving them a neat and professional finish. Place the inverted cups onto a baking tray lined with parchment paper. This prevents them from sticking as they chill. Refrigerate them for at least 30 minutes, or until the chocolate is completely hardened and firm to the touch. This chilling process is vital for easy unmolding later.
While your chocolate shells are firming up in the fridge, turn your attention to the delightful raspberry puree. In a medium saucepot, combine the 5 oz (approximately 140g) of fresh (or thawed frozen) raspberries with 1/4 cup (approximately 50g) of granulated sugar. Place the saucepot over medium-low heat and gently simmer the mixture for five to ten minutes. The raspberries will break down, and the sugar will dissolve, creating a fragrant and slightly thickened sauce. Stir occasionally to prevent sticking. Once the mixture is bubbling gently and the raspberries are soft, remove the pot from the stove. To achieve a perfectly smooth and luxurious puree, carefully press the raspberry mixture through a fine-mesh sieve into a clean bowl, using the back of a spoon or a spatula. This step removes all the tiny seeds, leaving you with a wonderfully smooth, vibrant, and intensely flavored raspberry essence. Set this beautiful puree aside to cool slightly.
Step 2: Creating the Velvety Filling and Assembling Your Dessert Cups
Now that your chocolate shells are ready and your raspberry puree is cooling, it’s time to create the creamy, dreamy filling that brings these dessert cups to life. This step involves combining rich chocolate, aromatic raspberry puree, and airy whipped cream to achieve a perfect balance of flavor and texture.
First, melt the remaining 7 oz (approximately 200g) of dark chocolate in a double boiler until it’s smooth and completely melted. Once melted, remove it from the heat. Gently stir in the prepared, cooled raspberry puree until it is thoroughly combined with the melted chocolate. You’ll notice the mixture transforming into a gorgeously glossy, rich ganache with a distinct fruity aroma. Set this luscious raspberry-chocolate mixture aside to cool slightly. It should be warm but not hot, so it doesn’t melt the whipped cream in the next step.
In a separate, clean, and preferably chilled bowl, add 1 1/4 cups (approximately 300ml) of very cold whipping cream. Using an electric mixer or a hand whisk, beat the cream until it forms soft peaks. You want it to be light and foamy but not yet stiff. Over-whipping at this stage can lead to a grainy texture later. The coldness of the cream and the bowl helps achieve this airy consistency quickly.
Now, it’s time to gently combine these elements. Take approximately one-third of the foamy whipped cream and carefully fold it into the cooled raspberry-chocolate mixture. This initial addition lightens the chocolate mixture, making it easier to incorporate the rest of the whipped cream without deflating it. Once the first third is just combined, gently fold this lightened raspberry-chocolate mixture into the remaining whipped cream. Use a soft, scooping motion with your spatula, bringing the mixture from the bottom of the bowl over the top. Continue folding until no streaks of white cream remain and the mixture is uniform in color and texture. Be careful not to overmix, as this can reduce the volume and lightness of your filling.
With your divine filling ready, retrieve the chocolate shells from the refrigerator. Carefully remove them from their aluminum cups. To do this, you might need to make a small, precise cut with scissors at the top edge of each aluminum mold, then gently tear the foil away from the hardened chocolate. The cold chocolate should release fairly easily, leaving you with perfect, freestanding dark chocolate cups. If any resist, a slight twist of the mold might help, but avoid excessive force.
Divide the creamy raspberry-chocolate mixture evenly among the six prepared chocolate cups. You can spoon it in or, for a neater finish, pipe it in using a piping bag. Once filled, place the cups back on the parchment-lined baking tray and refrigerate them for at least two hours, or until the filling is completely set and firm. This chilling time is essential for the filling to achieve its stable and decadent consistency.
Finally, once the cups are thoroughly chilled and set, it’s time for the crowning glory! Top each cup with a few fresh raspberries for an extra burst of fruitiness and vibrant color. For an elegant finishing touch, lightly dust the tops with a sprinkle of powdered sugar. Your breathtaking Raspberry Chocolate Cups are now ready to be served and enjoyed! Prepare for gasps of delight from your appreciative audience.
Tips for Perfect Raspberry Chocolate Cups Every Time
Achieving perfection in these dessert cups is simple with a few expert tips:
- Quality Chocolate Matters: Investing in good quality dark chocolate (60-70% cocoa) will significantly impact the flavor and texture of your shells and filling. Cheap chocolate can be harder to melt smoothly and may yield a less rich taste.
- Don’t Overheat Chocolate: When melting chocolate, always use a double boiler or a microwave at short intervals (15-30 seconds), stirring well in between. Overheating will cause chocolate to seize and become grainy.
- Ensure Cream is COLD: For whipping cream effectively, both the cream and your mixing bowl should be very cold. You can even chill your whisk attachment for a few minutes.
- Gentle Folding is Key: When incorporating whipped cream into the chocolate mixture, always fold gently. This preserves the air in the cream, ensuring a light and fluffy filling.
- Proper Chilling is Essential: Do not rush the chilling times. Allowing the chocolate shells and the filled cups to set completely is crucial for easy handling and a stable dessert.
- Room Temperature Unmolding (Optional): If you find the chocolate shells are too brittle straight from the fridge, let them sit at room temperature for just a minute or two before attempting to unmold. This can make them slightly more pliable.
- Clean Sieve for Puree: Ensure your fine-mesh sieve is clean and free of debris for the smoothest raspberry puree.
Creative Variations & Customizations
While the classic raspberry and dark chocolate combination is divine, feel free to get creative and personalize your dessert cups:
- Different Chocolates: Experiment with milk chocolate for a sweeter cup or a higher percentage dark chocolate for a more intense bitter note. White chocolate shells with a berry filling could also be a stunning alternative.
- Alternative Fruits: Instead of raspberries, try strawberry, blueberry, or mixed berry puree for the filling. Each fruit will lend its unique flavor profile.
- Add a Crunchy Layer: Before adding the filling, sprinkle a thin layer of crushed cookies (like Oreos or Graham crackers), toasted nuts, or even a hint of toffee bits at the bottom of the chocolate shell for added texture.
- Flavor Infusions: Add a teaspoon of raspberry liqueur, vanilla extract, or a pinch of cinnamon to the chocolate-raspberry filling for an extra layer of complexity.
- Topping Galore: Beyond fresh raspberries and powdered sugar, consider garnishing with chocolate shavings, mini chocolate chips, a drizzle of raspberry coulis, or a sprig of fresh mint for extra visual appeal.
- Nutty Twist: Incorporate finely chopped pistachios or almonds into the chocolate shell mixture for a subtle crunch and nutty flavor.
Serving & Storage Suggestions
These Raspberry Chocolate Cups are best served chilled, making them a refreshing and decadent treat. For optimal flavor and texture, remove them from the refrigerator about 10-15 minutes before serving, allowing the chocolate to soften slightly and the flavors to fully bloom.
Store any leftover cups in an airtight container in the refrigerator for up to 3-4 days. While they will remain delicious, the chocolate shells might lose some of their crispness over time due to moisture from the filling. They are not suitable for freezing once assembled, as the texture of the whipped cream and chocolate can be compromised upon thawing.
Conclusion: Your New Go-To Dessert for Every Celebration
These Raspberry Chocolate Cups are more than just a dessert; they are an experience. Combining the rich depth of dark chocolate with the bright, tangy sweetness of raspberries, these elegant treats are guaranteed to impress. Perfect for parties, special occasions, or simply as a luxurious indulgence, they offer a gourmet appeal that belies their relatively simple preparation. By following this detailed guide, you’ve gained the confidence to create a stunning, delicious, and memorable dessert that will have your guests raving. So go ahead, whip up a batch, share them with loved ones, and savor every exquisite bite. Happy dessert-making!