
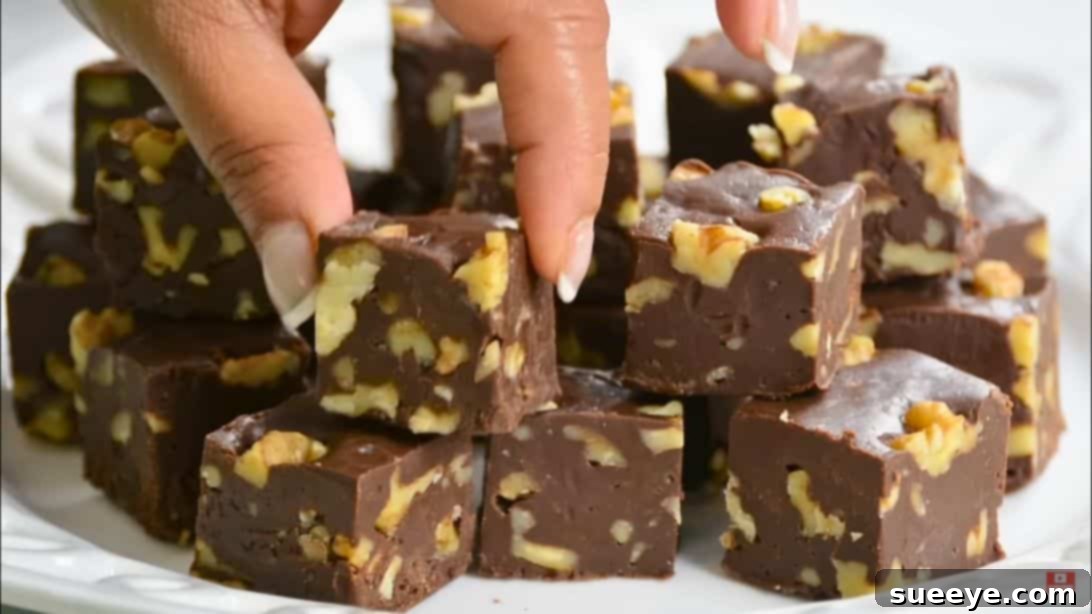
There’s arguably no sweeter embrace during the holiday season than a piece of homemade fudge. Imagine a luxurious, melt-in-your-mouth chocolate confection, studded with crunchy walnuts, delivering pure bliss with every bite. This extraordinary Creamy Chocolate Walnut Fudge, inspired by the delightful recipe from Platin’ It With Wendy, is more than just a dessert; it’s a testament to simple ingredients coming together to create something truly magical. Whether you’re seeking the perfect treat for your family, a thoughtful edible gift, or simply a moment of decadent indulgence, this fudge promises to be a beloved classic in your culinary repertoire.
The beauty of this recipe lies in its elegant simplicity. Requiring only six basic ingredients and no specialized equipment like a stand mixer, it’s accessible to even the most novice bakers. This easy-to-follow guide will walk you through crafting a batch of rich, velvety chocolate fudge that tastes like it came straight from a gourmet confectionery. Prepare to impress everyone with this delectable creation that’s as enjoyable to make as it is to devour.
Why Homemade Chocolate Walnut Fudge is the Ultimate Treat
In a world of store-bought sweets, homemade fudge stands out. Crafting your own chocolate walnut fudge allows for unparalleled freshness, customization, and a personal touch that store-bought versions simply can’t replicate. You control the quality of the ingredients, ensuring a superior flavor and texture that will have everyone asking for your secret recipe. Plus, the satisfaction of creating something so delicious from scratch is incredibly rewarding. It’s a mindful activity that brings joy to both the maker and the recipient.
Beyond the taste, homemade fudge offers a wonderful opportunity for gifting. During Christmas, Thanksgiving, or any special occasion, a beautifully packaged box of this chocolate walnut fudge makes a heartfelt and memorable present. It speaks volumes about the care and effort you’ve put into celebrating your loved ones. Its rich flavor and satisfying texture make it a delightful accompaniment to coffee, an elegant after-dinner treat, or a cherished snack throughout the day.
The Simple Magic of Minimal Ingredients
What makes this chocolate walnut fudge so incredibly good despite its humble ingredient list? It’s the thoughtful combination and interaction of each component. This recipe champions the idea that you don’t need a pantry full of exotic items to create something truly exceptional. Let’s delve into the role each of these six key ingredients plays in achieving fudge perfection:
- Semi-Sweet or Bittersweet Chocolate Chips: The star of the show, high-quality chocolate chips are crucial for the fudge’s depth of flavor. Semi-sweet offers a balanced sweetness, while bittersweet provides a more intense cocoa experience, allowing you to tailor the fudge to your preference. Using good quality chocolate will result in a smoother, richer texture and a superior taste.
- Sweetened Condensed Milk: This magical ingredient is the backbone of no-bake fudge. It provides both sweetness and the necessary liquid to bind the chocolate into that characteristic creamy, dense texture. Its thickness helps the fudge set beautifully without requiring constant stirring or candy thermometers, simplifying the entire process.
- A Pinch of Salt: Often underestimated, a tiny dash of salt is a flavor enhancer. It doesn’t make the fudge salty but rather brightens and balances the sweetness of the chocolate and condensed milk, making the chocolate notes pop.
- Unsalted Butter: Butter adds a luxurious richness and contributes to the incredibly smooth, melt-in-your-mouth texture of the fudge. It also helps prevent the fudge from becoming too stiff, lending a desirable creaminess. Using unsalted butter allows you to control the exact amount of salt in the recipe.
- Pure Vanilla Extract: Vanilla is a universal flavor enhancer, complementing and deepening the chocolate notes without overpowering them. Always opt for pure vanilla extract for the best, most authentic flavor profile.
- Chopped Walnuts (Optional but Recommended): Walnuts introduce a delightful textural contrast, adding a satisfying crunch that beautifully complements the smooth, creamy fudge. Their slightly earthy, nutty flavor pairs wonderfully with chocolate. While optional, incorporating them elevates the fudge to a gourmet level. If walnuts aren’t your preference, feel free to omit them or substitute them with other nuts.
Gathering Your Essential Tools
One of the many appealing aspects of this fudge recipe is that it requires minimal kitchen equipment. You won’t need any fancy gadgets or professional baking tools, just a few everyday items you likely already have. Having everything laid out and ready before you begin will make the process even smoother and more enjoyable.
- 8″ x 8″ Baking Pan: A standard square baking pan is perfect for achieving the ideal fudge thickness.
- Parchment Paper: Crucial for easy removal of the fudge from the pan and effortless cleanup. Don’t skip this step!
- Microwave-Safe Bowl: A large glass or ceramic bowl suitable for melting chocolate chips in the microwave.
- Spatula or Wooden Spoon: For mixing your ingredients until they are perfectly combined.
- Measuring Cups and Spoons: For accurately measuring all your ingredients.
- Sharp Knife: For clean and precise cutting of the set fudge into beautiful pieces.
Easy Chocolate Walnut Fudge Ingredients
Get ready to create an unforgettable treat with these simple yet powerful ingredients:
- 1 pound (approx. 2 ¾ cups) of semi-sweet or bittersweet chocolate chips
- 14 oz (1 can) of sweetened condensed milk
- A generous pinch of salt (about ¼ teaspoon)
- 1 tablespoon of unsalted butter
- 1 teaspoon of pure vanilla extract
- 1 ¾ cups of walnuts, coarsely chopped (optional)
How to Make Creamy Chocolate Walnut Fudge: A Step-by-Step Guide
Follow these straightforward steps to achieve perfectly creamy and delicious chocolate walnut fudge every time. Precision and gentle handling of the chocolate are key to success.
Step 1: Prepare Your Pan for Success
Begin by meticulously lining an 8-inch by 8-inch square baking pan with parchment paper. Ensure the parchment paper extends over the sides, creating a convenient overhang. This overhang will serve as handles later, making it incredibly easy to lift the entire slab of fudge out of the pan once it’s set. A properly lined pan is the first step to a stress-free fudge-making experience, preventing sticking and simplifying cleanup.
Step 2: Gently Melt the Chocolate Mixture
In a microwave-safe bowl, combine the chocolate chips, sweetened condensed milk, and a pinch of salt. Place the bowl in the microwave and heat it in 30-second intervals. After the first 30 seconds, stir the mixture thoroughly. Return it to the microwave for another 30 seconds, then stir again. Continue this process, being careful not to overheat the chocolate, until the mixture is mostly melted and smooth. If a few small lumps remain, they will likely melt as you stir. The goal is a velvety, uniform consistency without scorching the chocolate.
Step 3: Infuse with Butter and Vanilla
Once the chocolate mixture is smooth and glossy, add the unsalted butter and pure vanilla extract directly into the warm chocolate. Stir continuously and vigorously until the butter has completely melted and is fully incorporated into the chocolate. The vanilla should also be evenly distributed. This step enhances the fudge’s richness and adds that signature aromatic depth, transforming the simple chocolate base into something truly decadent.
Step 4: Fold in the Crunchy Walnuts
Before adding all the walnuts, reserve a small handful for topping. Then, gently fold the remaining chopped walnuts into the chocolate mixture. Stir until the walnuts are evenly distributed throughout the fudge. Be careful not to overmix; just ensure they are well incorporated. This step adds the delightful textural contrast that makes chocolate walnut fudge so beloved, providing a satisfying crunch in every bite.
Step 5: Set and Chill to Perfection
Carefully transfer the walnut-infused fudge mixture into the prepared pan, spreading it evenly with your spatula to create a smooth, flat surface. Lightly press the reserved walnuts onto the top of the fudge for a visually appealing finish. Cover the pan loosely with plastic wrap or aluminum foil to prevent it from absorbing any refrigerator odors. Place the fudge in the refrigerator for at least one hour, or until it is completely firm and set. Adequate chilling is crucial for achieving that perfect sliceable texture.
Step 6: Cut and Serve Your Masterpiece
Once the fudge has fully set and is firm to the touch, remove the pan from the refrigerator. Use the parchment paper overhang to gently lift the entire slab of fudge out of the dish. Carefully peel away the parchment paper from all sides. Place the fudge on a cutting board and, using a sharp knife, cut it into your desired size pieces. For clean cuts, you can warm your knife under hot water and wipe it clean between each slice. Arrange your beautiful homemade chocolate walnut fudge on a serving platter and get ready for compliments!
Tips for Success and Delicious Variations
While this recipe is incredibly forgiving, a few pointers can elevate your fudge from great to absolutely exceptional. Furthermore, don’t hesitate to experiment with variations to create your unique signature fudge.
- Quality Chocolate Matters: The quality of your chocolate chips significantly impacts the final taste. Opt for a brand you enjoy eating on its own for the best results.
- Preventing Seizing: When melting chocolate, avoid getting any water into the bowl, as this can cause the chocolate to seize and become grainy.
- Nut Alternatives: If walnuts aren’t your favorite, feel free to substitute them with pecans, almonds, or even peanuts for a different flavor profile. Lightly toasting nuts before adding them can enhance their flavor.
- Flavor Boosters: A pinch of instant espresso powder can deepen the chocolate flavor without making it taste like coffee. For a holiday twist, add a few drops of peppermint extract or a teaspoon of orange zest.
- Extra Add-ins: Consider folding in mini marshmallows, dried cranberries, a sprinkle of sea salt flakes, or even miniature chocolate candies for an extra layer of flavor and texture.
- Storage: Store your chocolate walnut fudge in an airtight container at room temperature for up to a week, or in the refrigerator for up to two weeks. For longer storage, it can be frozen for up to three months; just thaw in the refrigerator before serving.
The Joy of Gifting Homemade Fudge
One of the most heartwarming aspects of making this chocolate walnut fudge is sharing it with others. Homemade treats are always appreciated, and this fudge is particularly well-suited for gifting. Package your fudge pieces in charming decorative boxes, tie them with festive ribbons, and attach a small handwritten tag. It makes an ideal present for neighbors, teachers, colleagues, or as a delightful host/hostess gift during the festive season. The effort and love you pour into making it will surely be felt and cherished by anyone lucky enough to receive it.
Creamy Chocolate Walnut Fudge: Your New Favorite Dessert
This Creamy Chocolate Walnut Fudge recipe from Platin’ It With Wendy is more than just a recipe; it’s an invitation to create joy and indulge in simple pleasures. Its unparalleled creaminess, rich chocolate flavor, and satisfying walnut crunch make it an irresistible treat that will undoubtedly become a staple in your home. Easy to make, delightful to eat, and perfect for sharing, this fudge embodies everything wonderful about homemade desserts. Go ahead, gather your ingredients, and prepare to embark on a sweet adventure that will reward you with truly unforgettable chocolate walnut fudge.
RELATED: Craving more easy chocolate desserts? Try this Easy No-Bake Hot Fudge Marshmallow Pie Recipe for another delightful treat!