
Ultimate Cherry Cheesecake Tacos: A Crispy, Creamy, & Irresistible Dessert Sensation
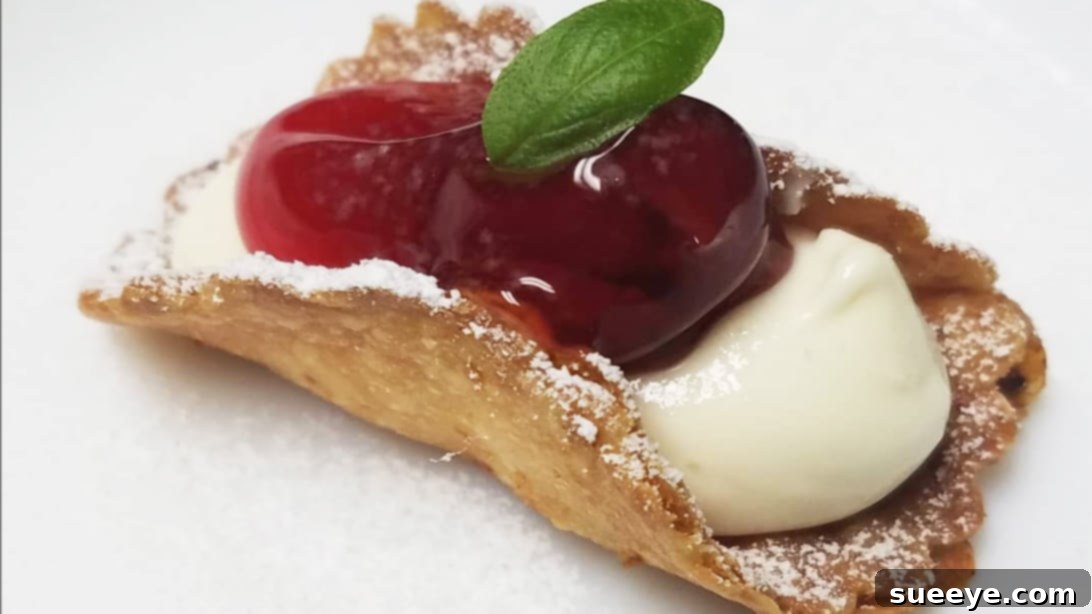
Prepare to elevate your dessert game with a treat that’s as delightful to look at as it is to eat: Cherry Cheesecake Tacos! This innovative dessert concept, inspired by Sweet Pea’s Kitchen on YouTube, combines the familiar comfort of cheesecake with the exciting crunch of a fried tortilla shell. Imagine a perfectly crispy flour tortilla, generously coated in a sweet graham cracker crumb, filled with a luscious, tangy cream cheese mixture, and crowned with a vibrant, fruity cherry pie filling. It’s an explosion of textures and flavors that will tantalize your taste buds and leave everyone asking for more.
These dessert tacos are incredibly versatile, making them a fantastic addition to virtually any gathering. Whether you’re planning a lively family reunion, a festive party, a casual backyard barbecue, or an elegant dinner party, these cherry cheesecake tacos are guaranteed to be a showstopper. And for those moments when you just need a personal indulgence, there’s nothing quite like pairing a few of these delightful tacos with your favorite movie for a midnight snack. Get ready to create a truly memorable dessert experience!
Ingredients for Your Irresistible Cherry Cheesecake Tacos
Gathering your ingredients is the first step to creating these incredible dessert tacos. Each component plays a crucial role in building the perfect balance of flavor and texture.
- Small Flour Tortillas: The foundation of your taco shells. Opt for small, soft flour tortillas for easy shaping and frying.
- Graham Crackers (2 Sleeves): Crushed to perfection, these form the delightful, crunchy coating for your shells.
- Granulated Sugar (3 tablespoons): Adds a touch of sweetness to the graham cracker coating, enhancing its flavor.
- Vegetable Oil: Essential for frying the tortillas to a beautiful golden crispness. Choose a neutral-flavored oil with a high smoke point.
- Cream Cheese (Two 8 oz. packages): The heart of your cheesecake filling. Ensure it’s softened to room temperature for a smooth, lump-free mixture.
- Cool Whip (8 oz.): Lightens the cream cheese mixture, adding an airy texture and subtle sweetness.
- Powdered Sugar (1 cup): Sweetens the cheesecake filling and helps achieve that silky, smooth consistency.
- Cherry Pie Filling (One standard can): The vibrant, fruity crown jewel of these tacos, providing a burst of classic cherry flavor.
Step-by-Step Directions: Crafting Your Cherry Cheesecake Tacos
Follow these detailed instructions to create your own batch of these incredible dessert tacos. Precision and a little patience will ensure perfect results every time.
1. Prepare Your Graham Cracker Coating
Begin by preparing the sweet graham cracker coating for your taco shells. Place two sleeves of graham crackers into a food processor. Pulse until the crackers are finely crushed, resembling a sandy texture. This fine crumb will adhere beautifully to the tortillas. Transfer the crushed graham crackers to a large, shallow plate or baking dish. Sprinkle 3 tablespoons of granulated sugar over the crumbs and mix thoroughly until well combined. Set this mixture aside.
2. Fry and Coat the Tortilla Shells
Now, it’s time to transform your tortillas into crispy taco shells. In a large skillet or deep pot, pour about 1 ½ inches of vegetable oil. Heat the oil over medium-high heat until it reaches a temperature of around 350-375°F (175-190°C). If you don’t have a thermometer, you can test the oil by dropping a small piece of tortilla; it should sizzle immediately. Using tongs, carefully fold a tortilla in half to create a taco shell shape. Hold it in place in the hot oil. Fry for about 30 seconds to 1 minute per side, or until it turns a beautiful golden brown and becomes crisp. Be mindful not to overcrowd the skillet, frying one or two at a time to maintain oil temperature.
Once golden brown and crispy, remove the tortilla from the oil and immediately, while still hot, roll it in the prepared graham cracker and sugar mixture. Ensure the entire surface of the tortilla is fully coated with the sweet crumbs. The heat from the tortilla will help the crumbs adhere. Place the coated tortilla on a paper towel-lined plate or a baking sheet to cool and drain any excess oil. Repeat this process with the remaining tortillas, taking care to maintain the oil temperature.
3. Prepare the Creamy Cheesecake Filling
While your taco shells are cooling, prepare the rich and creamy cheesecake filling. In a large mixing bowl, combine 8 ounces (one package) of softened cream cheese, 1 cup of powdered sugar, and 8 ounces of Cool Whip. Using an electric mixer (or a whisk and some elbow grease), whip the ingredients together until they are well combined, smooth, and fluffy. Make sure there are no lumps of cream cheese. For easier filling, spoon the cheesecake mixture into a piping bag fitted with a wide tip (or a Ziploc bag with a corner snipped off).
4. Assemble Your Cherry Cheesecake Tacos
Now comes the fun part: assembly! Take your cooled, graham cracker-coated taco shells. Gently squeeze or spoon the creamy cheesecake mixture into each fried tortilla shell, filling it generously but not overflowing. Once filled with the cheesecake goodness, top each taco with a spoonful of the vibrant cherry pie filling. You can add as much or as little as you like, depending on your preference.
5. Chill and Serve
For the best flavor and texture, these cherry cheesecake tacos benefit greatly from chilling. Arrange your assembled tacos on a plate or baking sheet and place them in the refrigerator to chill for at least 3 hours. This allows the cheesecake filling to set perfectly and the flavors to meld beautifully. Once thoroughly chilled, your crispy, creamy, and utterly delicious cherry cheesecake tacos are ready to be served and enjoyed as a delightful snack or an impressive dessert!
Tips for Making Perfect Cherry Cheesecake Tacos
Achieving perfection with your dessert tacos is simple with a few helpful pointers:
- Room Temperature Cream Cheese: Always ensure your cream cheese is completely softened to room temperature before mixing. This prevents lumps and ensures a smooth, creamy filling.
- Oil Temperature is Key: Maintain a consistent oil temperature for frying. Too cool, and your tortillas will be greasy; too hot, and they’ll burn before crisping. A cooking thermometer is your best friend here.
- Work Quickly: After frying, immediately roll the hot tortillas in the graham cracker mixture. The residual heat helps the crumbs adhere better.
- Don’t Overfill: While tempting, overfilling the tacos can make them messy and difficult to eat. Fill them generously but allow room for the cherry topping.
- Chilling Time Matters: Do not skip the chilling step! It’s crucial for the cheesecake filling to set and for the flavors to fully develop, providing that classic cheesecake experience.
- Storage: Store any leftover cheesecake tacos in an airtight container in the refrigerator for up to 2-3 days.
Creative Variations and Customizations
While the classic cherry is undeniably delicious, these dessert tacos are incredibly adaptable. Feel free to unleash your creativity and try these exciting variations:
- Different Fruit Fillings: Experiment with other pie fillings like blueberry, apple, peach, or strawberry. A mixed berry compote would also be fantastic.
- Chocolate Lover’s Dream: Drizzle melted chocolate over the cherry filling, or mix mini chocolate chips into the cheesecake filling. You could even use chocolate tortillas if you find them!
- Nutty Crunch: Add finely chopped nuts (pecans, walnuts, or almonds) to the graham cracker coating for an extra layer of crunch and flavor.
- Citrus Zest: Grate a little lemon or orange zest into the cream cheese filling to add a bright, refreshing counterpoint to the sweetness.
- Spiced Twist: A pinch of cinnamon or nutmeg in the graham cracker coating or even the cream cheese filling can add a warm, inviting flavor.
- Caramel Drizzle: A light drizzle of caramel sauce over the top before serving adds a luxurious touch.
- Mini Tacos: Use even smaller tortillas for bite-sized dessert tacos, perfect for catering or a diverse dessert platter.
Serving Suggestions for Any Occasion
These cherry cheesecake tacos are impressive enough to stand alone, but here are some ideas to make them even more special:
- Garnish with Fresh Fruit: A few fresh cherries or a sprig of mint will add visual appeal and freshness.
- A Dollop of Whipped Cream: An extra swirl of whipped cream on top can never go wrong.
- Powdered Sugar Dusting: A light dusting of powdered sugar just before serving adds an elegant finish.
- Coffee or Tea Pairing: They pair wonderfully with a hot cup of coffee, a creamy latte, or a soothing herbal tea.
- Ice Cream Sidekick: Serve alongside a scoop of vanilla bean ice cream for an indulgent dessert experience.
Frequently Asked Questions (FAQ)
Here are answers to some common questions about making these delectable cherry cheesecake tacos:
Can I bake the tortillas instead of frying?
While frying gives the signature crispness and helps the graham cracker crumbs adhere best, you can try baking or air-frying. Brush tortillas lightly with oil, shape them, and bake at 375°F (190°C) until crisp and golden. The texture won’t be identical, but it’s a healthier alternative. You might need a thin egg wash to help the crumbs stick if baking.
Can I use homemade cherry pie filling?
Absolutely! Homemade cherry pie filling would be a fantastic addition, allowing you to control the sweetness and flavor. Just ensure it has a thick enough consistency to stay within the taco shell.
How far in advance can I make these?
You can prepare the fried taco shells up to a day in advance and store them in an airtight container at room temperature. The cheesecake filling can also be made a day ahead and stored in the fridge. Assemble the tacos no more than 3-4 hours before serving to ensure the shells remain crispy after chilling, although they are still delicious the next day.
What if I don’t have a food processor for the graham crackers?
No problem! Place the graham crackers in a Ziploc bag and crush them with a rolling pin or the bottom of a heavy pan until they reach a fine crumb consistency.
Can I use regular whipped cream instead of Cool Whip?
You can, but Cool Whip provides more stability to the cheesecake filling, helping it hold its shape better, especially after chilling. If using homemade whipped cream, stabilize it with a bit of powdered sugar and cream of tartar or an unflavored gelatin to prevent it from deflating.
Conclusion: Your New Favorite Dessert Awaits!
These Cherry Cheesecake Tacos are more than just a dessert; they’re an experience. Combining crispy, sweet shells with a creamy, tangy filling and a burst of fruity flavor, they hit all the right notes for a truly unforgettable treat. They’re surprisingly easy to make, incredibly customizable, and guaranteed to impress anyone who tries them. So, roll up your sleeves, gather your ingredients, and get ready to create a dessert that will bring joy to every bite. Whether for a special occasion or a simple midnight craving, these cheesecake tacos are sure to become a beloved staple in your recipe collection. Happy baking (and frying)!