
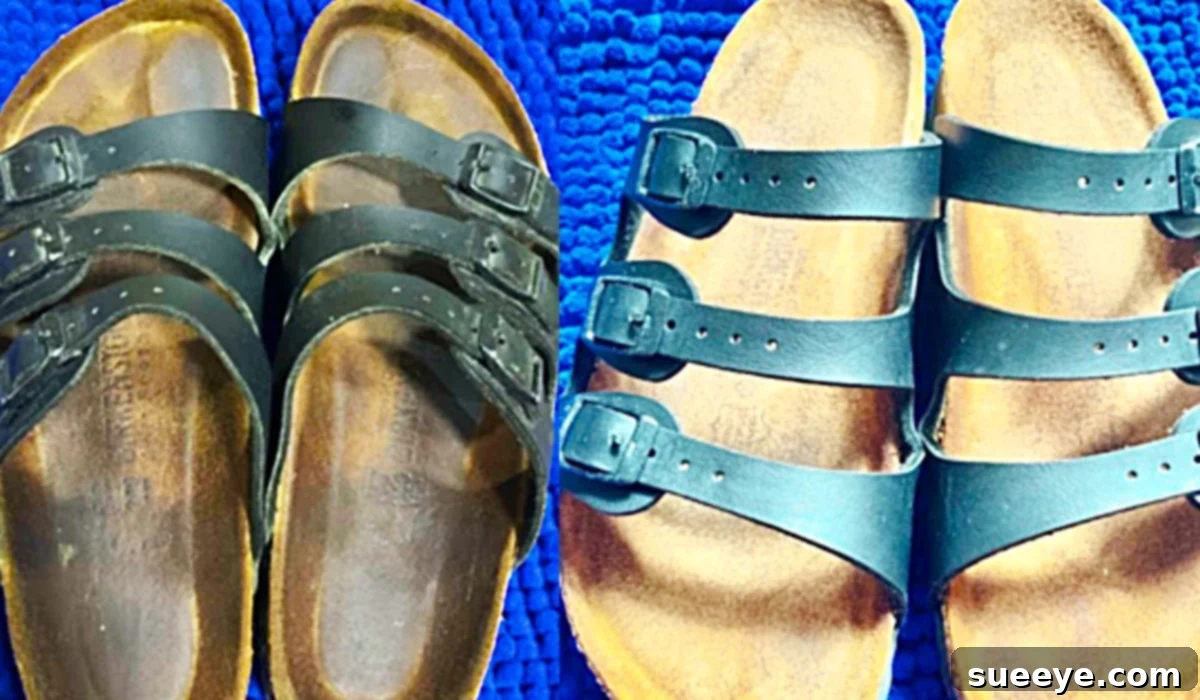
Mastering Birkenstock Care: Restore Your Sandals’ Suede and Comfort with This Easy DIY Hack
Birkenstocks have long been celebrated worldwide for their iconic design, unparalleled comfort, and exceptional durability. These classic German sandals, with their anatomically shaped cork-latex footbeds, have become a staple for multi-purpose wear, effortlessly transitioning from casual outings to long days on your feet. However, like any beloved footwear, Birkenstocks endure daily wear and tear, accumulating dirt, sweat, and grime that can dull their original appeal and compromise their suede texture. Keeping them clean and maintaining their distinctive look, especially the suede footbed, can often feel like a challenging task.
The moment you first slip into a pair of Birkenstocks, you embark on a journey of comfort as the footbed molds to your unique foot shape. This “breaking in” process, while leading to ultimate comfort, also means the footbed absorbs oils and dirt, often resulting in a darkened, matted appearance. Many owners, faced with grimy, tired-looking sandals, might consider them beyond hope, contemplating replacement. But what if there was a simple, effective, and budget-friendly method to restore their pristine condition and extend their lifespan?
Inspired by ingenious cleaning hacks, particularly one shared by Nynfa Day Graza on YouTube, we’re thrilled to share a revolutionary approach to cleaning your Birkenstocks. This method promises to revitalize even the dirtiest of sandals, making them look refreshed and bringing back that coveted fluffy suede texture. If you’ve written off your Birkenstocks as a lost cause, prepare to be amazed by how a few common household ingredients can transform them, breathing new life into your favorite pair.
Why Your Beloved Birkenstocks Need a Deep Clean
The distinctive cork footbed, often lined with suede, is the heart of every Birkenstock sandal. While incredibly supportive and comfortable, this natural material is also highly absorbent. Over time, as you wear your Birkenstocks, the footbed soaks up sweat, skin oils, dirt, and dust. This accumulation leads to several common issues:
- Darkened Footbeds: The most noticeable sign of wear is the gradual darkening of the footbed, often turning a deep brown or black, especially in the heel and toe areas.
- Matted Suede: The soft, fuzzy suede lining can become flat, matted, and hard from prolonged contact with moisture and pressure, losing its original plush texture.
- Unpleasant Odors: The combination of sweat and bacteria can lead to stubborn odors trapped within the footbed, making your sandals less pleasant to wear.
- Stains and Grime: Accidental spills, dirt from various terrains, and general grime can leave unsightly marks and a dirty residue that normal wiping can’t tackle.
These issues not only detract from the aesthetic appeal of your Birkenstocks but can also impact their overall hygiene and comfort. A deep clean isn’t just about making them look good; it’s about maintaining a clean, healthy environment for your feet and preserving the integrity of the materials, ensuring your sandals continue to provide the comfort and support you expect.
The Revolutionary Cleaning Hack: A Simple Solution for Suede Restoration
This clever cleaning hack, popularized by content creators like Nynfa Day Graza, offers a surprisingly effective way to tackle stubborn Birkenstock grime. It relies on a simple, homemade paste that gently yet powerfully lifts dirt and restores the suede. The beauty of this method lies in its accessibility and the use of everyday ingredients, making it a go-to solution for anyone looking to refresh their sandals without harsh chemicals.
Materials You’ll Need for This Birki Revival
Gathering your materials is the first step towards transforming your worn-out Birkenstocks. You’ll likely find most of these items already in your pantry or laundry room.
- 1 tablespoon of baking soda: A natural abrasive and odor absorber, baking soda is key to lifting grime and neutralizing smells.
- 1/2 tablespoon laundry soap powder: Provides essential cleaning power to break down oils and dirt. Ensure it’s a powder, not liquid, for the paste consistency.
- 1 tablespoon water: Used to create the perfect paste consistency, activating the cleaning agents.
- A toothbrush: Ideal for gently scrubbing the footbed and reaching into textured areas without damaging the suede. An old toothbrush works perfectly!
- A small bowl: To mix your cleaning concoction.
- Wet wipes (or a damp cloth): Essential for effectively wiping away the cleaning paste and dissolved dirt without over-saturating the footbed.
Step-by-Step Guide: Bringing Your Birkenstocks Back to Life
1. Prepare Your Workspace and Your Sandals
Before diving into the cleaning process, find a well-ventilated area, preferably outdoors or in a space where spills won’t be an issue. Lay down some old towels or newspaper to protect your surfaces. Next, give your Birkenstocks a preliminary clean. Use a soft brush (a dry toothbrush or an old suede brush works well) to remove any loose dirt, dust, or debris from the footbed and straps. This initial step helps ensure the cleaning paste can directly address the embedded grime.
2. Crafting the Powerful Cleaning Paste
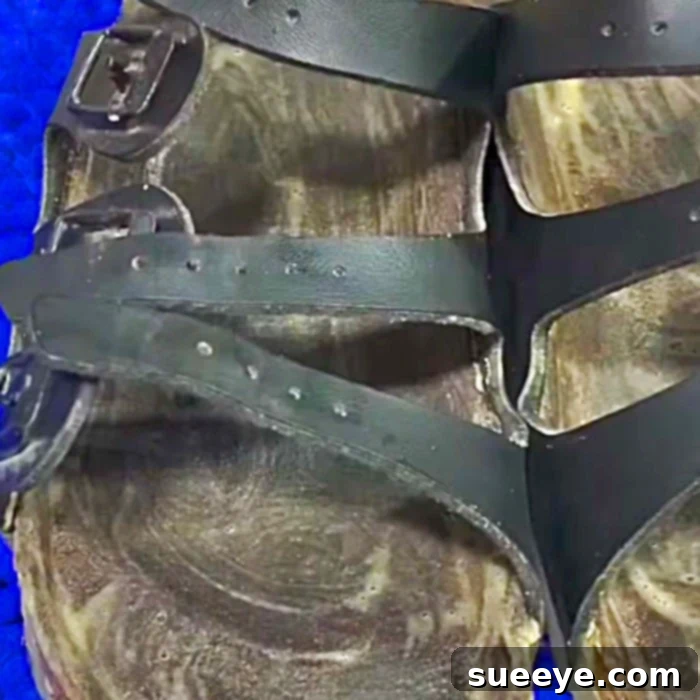
In your small bowl, combine the tablespoon of baking soda, the half tablespoon of laundry soap powder, and the tablespoon of water. Stir the ingredients thoroughly with the toothbrush until they form a smooth, consistent paste. The consistency should be similar to toothpaste – thick enough to cling to the brush but spreadable. If it’s too thick, add a tiny drop more water; if too runny, a pinch more baking soda or laundry powder. This carefully balanced mixture leverages the abrasive power of baking soda with the degreasing and cleaning capabilities of laundry soap, all activated by water.
3. The Gentle Scrub: Targeting Grime and Stains
Dip your toothbrush into the freshly made paste, picking up a small amount. Begin applying the paste directly to the darkened and matted areas of your Birkenstock footbed. Focus on the heel and toe impressions, which typically accumulate the most dirt. Using gentle, circular motions, scrub the entire suede footbed. The goal is to work the paste into the suede fibers, allowing the baking soda to lift the embedded dirt and the laundry soap to break down oils and grime. Be thorough but avoid aggressive scrubbing, which could damage the suede. If your Birkenstock straps are also suede or nubuck and have stains, you can carefully apply a small amount of paste and gently scrub them too, but be cautious not to saturate the material.
4. Wiping Away the Dirt: Revealing the Transformation
Once you’ve scrubbed the entire footbed and any relevant strap areas, it’s time to remove the paste. Take your wet wipes (or a clean, damp cloth) and meticulously wipe away all the cleaning mixture. Work systematically, ensuring no residue is left behind. You’ll notice the wipes picking up a significant amount of grime, turning dark with the dirt lifted from your sandals. Continue wiping with fresh sections of the wipe until the footbed appears cleaner and free of paste. This step is crucial for preventing a film from drying on the suede and for removing all the loosened dirt.
5. The Crucial Drying Process: Patience for Perfection
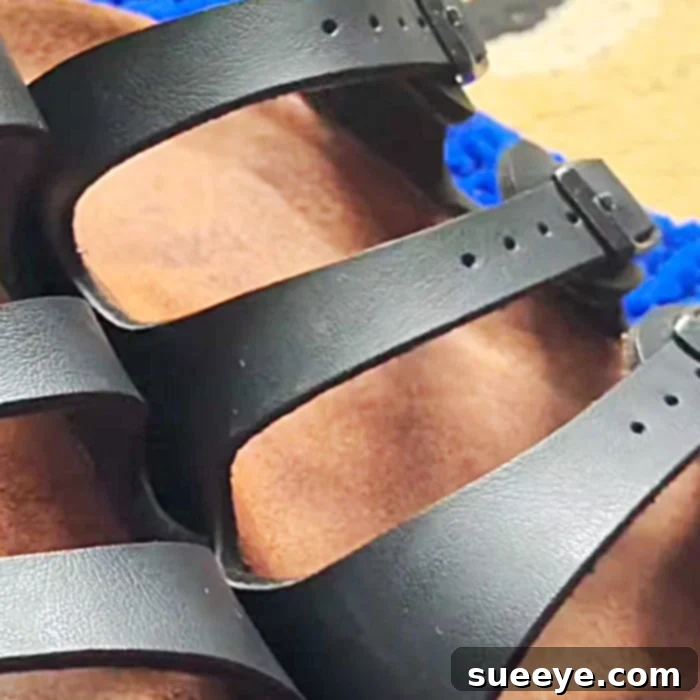
After wiping, your Birkenstocks will still be damp. This is where patience truly pays off. Place your sandals in a cool, dry place at room temperature, away from direct sunlight or any heat sources (like radiators or hair dryers). Artificial heat can cause the cork footbed to dry out too quickly, leading to cracks, and can damage the adhesives holding the shoe together. Allow your Birkenstocks to air dry completely for approximately 3 to 4 days. This extended drying time is essential not only for preventing moisture-related issues but also for allowing the suede fibers to fully dry and naturally lighten and fluff up again. Once completely dry, you’ll be astonished to see the significant improvement – the footbed will be visibly lighter, and the suede will have regained much of its original texture and softness.
Beyond the Clean: Essential Birkenstock Aftercare and Maintenance Tips
Cleaning your Birkenstocks is a great start, but proper aftercare and ongoing maintenance are crucial for extending their life and preserving their refreshed look. Here are some essential tips to keep your revitalized Birkenstocks in top condition:
Fluffing the Suede After Drying
Once your Birkenstocks are completely dry, you might find the suede a bit stiff or still slightly matted. Use a dedicated suede brush (or a clean, dry toothbrush) to gently brush the suede in one direction. This action helps to lift the nap of the suede, restoring its soft, fluffy texture and uniform appearance. It’s a satisfying final step that truly completes the revitalization process.
Protecting the Cork Footbed
The exposed cork edge of your Birkenstocks is vital for their structural integrity. Over time, this cork can dry out and crack. To prevent this, regularly apply a cork sealer. Birkenstock offers its own cork sealer, but other brands are available. Apply a thin layer to the exposed cork using a small brush, allowing it to dry completely. This creates a protective barrier against moisture and wear, significantly extending the life of your sandals.
Water and Stain Protection for Straps
If your Birkenstocks have suede or nubuck straps, consider applying a water and stain protector spray designed for these materials. This will help repel water, oil, and common stains, making future cleaning easier and preventing damage. Always test the spray on an inconspicuous area first to ensure it doesn’t alter the color.
Regular Dry Brushing
To prevent heavy dirt buildup, make it a habit to dry brush your Birkenstocks after every few wears. A quick brush with a suede brush helps remove loose dirt and dust before it has a chance to embed deeply into the footbed or straps. This simple step can significantly reduce the frequency of deep cleaning.
Proper Storage
When not wearing your Birkenstocks, store them in a cool, dry place away from direct sunlight or extreme temperatures. Avoid leaving them in hot cars or near heat sources, as excessive heat can shrink and crack the cork footbed and compromise the adhesive. If you have the original shoe box, it’s an excellent place to store them.
Addressing Other Areas: Soles and Buckles
Don’t forget the outsoles! Use a damp cloth and mild soap to wipe away dirt and grime from the rubber soles. For the buckles, a quick wipe with a clean, damp cloth is usually sufficient to keep them sparkling.
Final Thoughts: Enjoying Your Revitalized Birkenstocks
Investing a little time and effort into cleaning and maintaining your Birkenstocks can make a significant difference in their appearance, comfort, and longevity. This simple yet highly effective DIY cleaning hack offers a practical solution to a common problem, proving that you don’t need expensive specialized products to restore your beloved sandals. By following these steps and incorporating regular care into your routine, you can enjoy the unparalleled comfort and classic style of your Birkenstocks for many more seasons to come.
So, gather your materials, embrace the process, and prepare to fall in love with your “new” old Birkenstocks all over again. The transformation will not only refresh your footwear but also provide a satisfying sense of accomplishment in preserving an item you cherish. Step out with confidence and comfort, knowing your sandals look as good as they feel.