
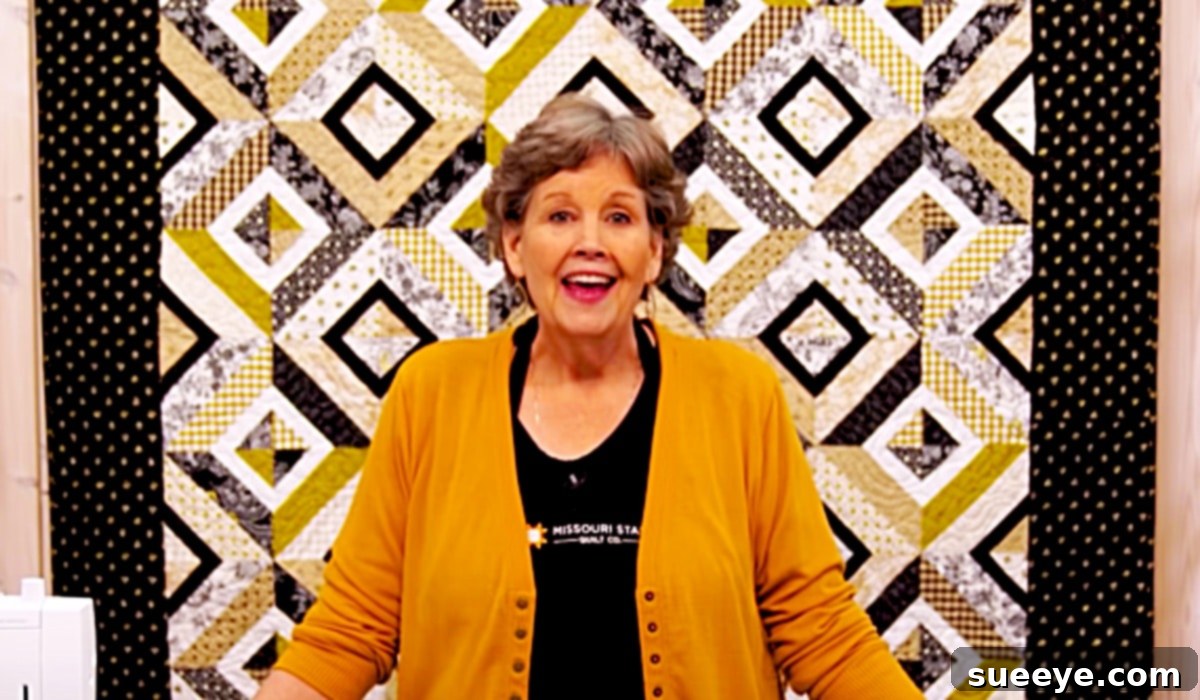
Mastering the Summer Squares Quilt: An Easy Guide for Beginners with Jenny Doan
Embark on a delightful quilting journey with the captivating **Summer Squares Quilt** pattern, an absolute gem for both novice and experienced quilters alike. Brought to life by the esteemed The Missouri Star Quilt Company, this project offers an incredibly accessible and rewarding experience. Led by the beloved Jenny Doan, whose approachable teaching style makes complex techniques seem simple, this video tutorial is a treasure trove of quilting wisdom.
The Summer Squares Quilt isn’t just another pattern; it’s a nostalgic trip to the heart of American craftsmanship. Its charming design, reminiscent of classic Americana and the vibrant spirit of bygone eras, holds a special place in any quilter’s collection. Jenny Doan herself embodies this delightful charm, making every tutorial feel like a friendly chat with a quilting sweetheart. Whether you’re aiming to create a cozy throw, a decorative wall hanging, or even a unique rectangular pillow, this pattern’s versatility and straightforward construction make it an ideal choice.
What truly sets this tutorial apart is its meticulous attention to beginner-friendly details. Jenny generously shares invaluable tips covering essential techniques such as precise pinning, effective pressing, accurate trimming, ensuring consistent seams, and even the best practices for using a seam ripper – an indispensable tool for every quilter. Her step-by-step instructions guide you through measuring and cutting your fabric squares with precision, guaranteeing that the sewing and assembly process is as smooth and enjoyable as possible. With guidance on color coding and trimming your blocks for a perfect fit, you’ll be amazed at how quickly your Summer Squares Quilt comes to life.
Why the Summer Squares Quilt is Perfect for You
The allure of the Summer Squares Quilt lies in its beautiful simplicity and profound impact. It’s a testament to the idea that stunning results don’t always require intricate patterns or years of experience. This quilt pattern is specifically designed to build confidence in new quilters while offering a refreshing, quick project for seasoned sewers. Its modular design, utilizing smaller blocks to construct larger, cohesive units, demystifies the quilting process and makes it highly manageable.
Beyond its ease of creation, the Summer Squares Quilt holds a timeless aesthetic appeal. Its name alone evokes feelings of warm sunshine, leisurely days, and classic charm. The finished project, whether a full-sized quilt or a stylish pillow, will undoubtedly become a cherished item, reflecting the love and effort poured into its creation. It’s an excellent opportunity to experiment with different fabric combinations, from vibrant solids to playful prints, making each Summer Squares Quilt a unique work of art.
Essential Materials For Your Summer Squares Quilt
Gathering your materials is the exciting first step in any quilting project. For the Summer Squares Quilt, Jenny Doan and The Missouri Star Quilt Company have streamlined the process by recommending a convenient jelly roll, making fabric selection and cutting much simpler. Here’s a detailed list of what you’ll need to create your own masterpiece:
- 1 Jelly Roll (or 2 1/2-inch strips): A jelly roll is a curated collection of 40 pre-cut fabric strips, each 2 1/2 inches wide and approximately 44 inches long. This saves significant time on cutting and ensures coordinating fabrics. If you prefer to select your own fabrics, you can cut various prints and solids into 2 1/2-inch strips.
- 1/2 Yard of Black Fabric: This provides a striking contrast and helps define the “squares” in your quilt, adding depth and visual interest. Choose a high-quality quilting cotton.
- 1/2 Yard of White Fabric: Similar to the black fabric, white offers another fundamental contrasting element, creating crisp lines and brightening the overall design.
- 1 & 1/2 Yards of Border Fabric: The border frames your quilt, giving it a finished and polished look. Select a fabric that complements your jelly roll strips and main contrasting fabrics, perhaps a solid that picks up a color from your prints, or a subtle blender.
- 3/4 Yards of Binding Fabric: Binding is the final edge treatment that encloses the raw edges of your quilt sandwich. It can be a matching or contrasting fabric, adding another layer of design.
- 4 & 1/2 Yards of Backing Fabric: The backing forms the underside of your quilt. While it can be a single fabric, many quilters enjoy using a wide-back fabric or piecing together smaller cuts to create an interesting back.
- Clearly Perfect Slotted Trimmer (B2): This specialized ruler is a game-changer for precise trimming, ensuring your blocks are perfectly square and consistent, which is crucial for a professional-looking finish.
- Spray Starch (Recommended): Starch helps to stabilize fabric, making it easier to cut accurately and press flat, reducing stretching and distortion during piecing.
- A Sewing Machine: Any standard sewing machine in good working order will suffice. Ensure it’s clean and well-oiled.
- Thread: High-quality polyester or cotton thread in a neutral color (like white, grey, or ecru) is generally recommended for piecing.
- A Pair of Scissors: Keep a dedicated pair of fabric scissors sharp and only use them for fabric to maintain their edge.
- A Rotary Cutter: This tool, resembling a pizza cutter, is essential for quick and accurate cutting of fabric strips and squares when used with a quilting ruler and mat.
- A Cutting Mat: A self-healing mat protects your work surface and provides grid lines for precise cutting with your rotary cutter.
- An Iron: A good steam iron is vital for pressing seams flat, which contributes significantly to the accuracy and flatness of your finished quilt.
- An Ironing Board: Provides a stable, heat-resistant surface for all your pressing needs.
Having these tools and materials ready before you begin will ensure a smooth and enjoyable quilting experience, allowing you to focus on the creative process.
Step-by-Step Guide: Crafting Your Summer Squares Quilt
Creating the Summer Squares Quilt is a journey of simple steps leading to a magnificent finish. While The Missouri Star Quilt Company’s video tutorial provides the most detailed visual guidance, here’s an overview of the process you’ll follow to bring this gorgeous quilt to life.
1. Preparation and Cutting Your Fabric
Your quilting adventure begins with careful preparation. Lay out your jelly roll strips, black fabric, and white fabric. If you’re not using a pre-cut jelly roll, you’ll first need to cut your chosen fabrics into 2 1/2-inch wide strips. Precision here is key, so take your time and use your rotary cutter, cutting mat, and ruler. Jenny emphasizes the importance of starching your fabric before cutting to prevent stretching and ensure crisp, accurate cuts.
Once your strips are ready, follow Jenny’s instructions to sub-cut them into the necessary square and rectangle units. These smaller pieces will be the building blocks of your quilt. The tutorial provides exact measurements and efficient cutting techniques to minimize waste and maximize accuracy.
2. Piecing the Quilt Blocks
This is where the magic truly starts! You will begin by creating small, foundational quilt blocks by piecing together your freshly cut fabric units. Typically, this involves sewing a colored jelly roll strip to a contrasting black or white strip. Use a consistent 1/4-inch seam allowance throughout your project. Pressing your seams correctly after each stitch is crucial; Jenny offers excellent tips on how to press for flat, accurate blocks.
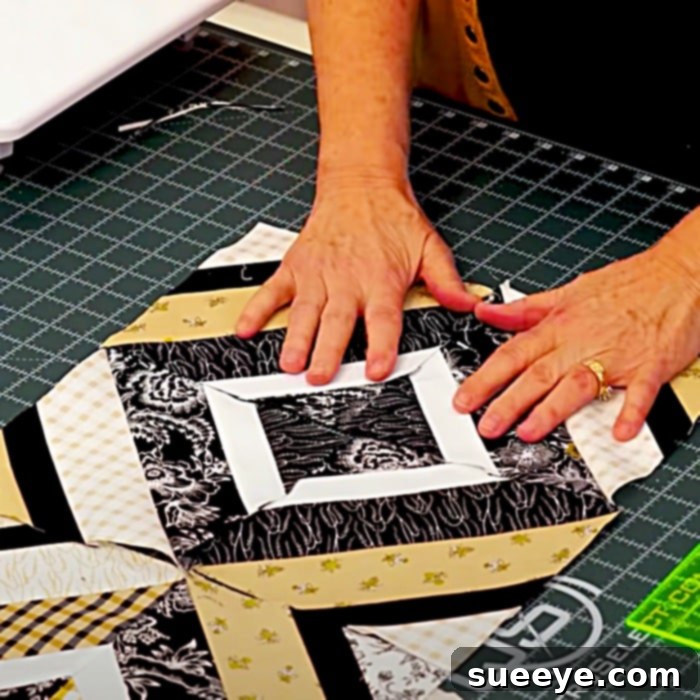
After creating numerous small blocks, the next step involves using these units to construct larger, more intricate blocks. This method allows for a complex-looking design with relatively simple sewing. You’ll combine your pieced units, often squaring them up with your Clearly Perfect Slotted Trimmer (B2) for absolute accuracy before joining them. This trimming tool is invaluable for ensuring all your blocks are the same size, which is vital for a flat, beautiful quilt top.
3. Assembling the Quilt Top
Once all your larger blocks are completed, you’ll arrange them into the desired layout for your quilt top. This is an exciting stage where your quilt’s design truly takes shape. Pinning the blocks together before sewing is highly recommended to ensure seams align perfectly. Sew the blocks into rows, and then join the rows to form the complete quilt top. Again, consistent seam allowances and careful pressing will make all the difference here.
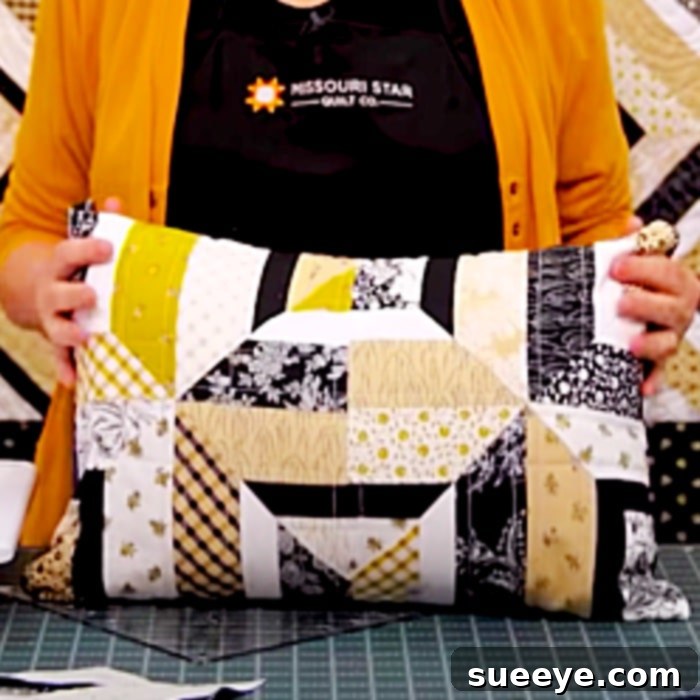
Alternatively, the versatility of this pattern means you could opt to make a decorative rectangular pillow instead of a full quilt. The process for creating the pillow top would be similar, just on a smaller scale, and then finished with backing and a closure method like an envelope back or zipper.
4. Adding Borders, Quilting, and Binding
With your quilt top complete, the next steps involve adding the borders (if desired), preparing for quilting, and finally, binding. The borders are sewn onto the edges of the quilt top, providing a frame and often expanding the quilt to a desired size. Then, you’ll create a “quilt sandwich” by layering your backing fabric (right side down), batting, and quilt top (right side up). This sandwich is then secured (either with pins, basting spray, or fusible batting) and quilted. Quilting can be done on a domestic machine or sent to a longarmer, and involves stitching through all three layers to hold them together and add texture.
The final step is binding. This involves cutting your binding fabric into strips, sewing them together, and then attaching them to the edges of your quilt to create a neat, durable finish. Jenny’s tutorials often include excellent binding techniques that ensure a professional look.
Tips for Quilting Success with the Summer Squares Pattern
- Pinning Power: Don’t underestimate the power of good pinning! Pins help keep your fabric layers aligned, especially when joining long strips or multiple blocks. Use plenty of pins to match seams precisely.
- Pressing, Not Ironing: Remember to “press” your seams, rather than “ironing” them. Pressing involves lifting and placing the iron, which prevents distorting your fabric, while ironing tends to push and pull, leading to wavy seams.
- Trim with Precision: The Clearly Perfect Slotted Trimmer is your best friend for this project. Use it consistently to square up all your blocks to the exact size. This will make your final quilt top lie flat and square.
- Consistency is Key: Maintain a consistent 1/4-inch seam allowance throughout your entire project. This single factor has the biggest impact on the accuracy and overall success of your quilt.
- Embrace the Seam Ripper: Every quilter, even Jenny Doan, uses a seam ripper! Don’t be afraid to unpick stitches if something isn’t quite right. It’s better to fix it early than to regret it later.
- Enjoy the Process: Quilting should be a relaxing and enjoyable hobby. Don’t stress over perfection; embrace the learning curve and celebrate each completed step.
Beyond the Quilt: Versatility of the Summer Squares Pattern
While the Summer Squares design is fantastic for a full quilt, its adaptability means you’re not limited to just one large project. Consider scaling down the pattern to create charming placemats, eye-catching table runners, or even a set of coordinating mug rugs. Each of these smaller projects allows you to practice your piecing and pressing skills without the commitment of a full-sized quilt. The techniques learned for the Summer Squares Quilt are foundational and can be applied to countless other quilting endeavors, making this tutorial an invaluable resource for your quilting journey.