
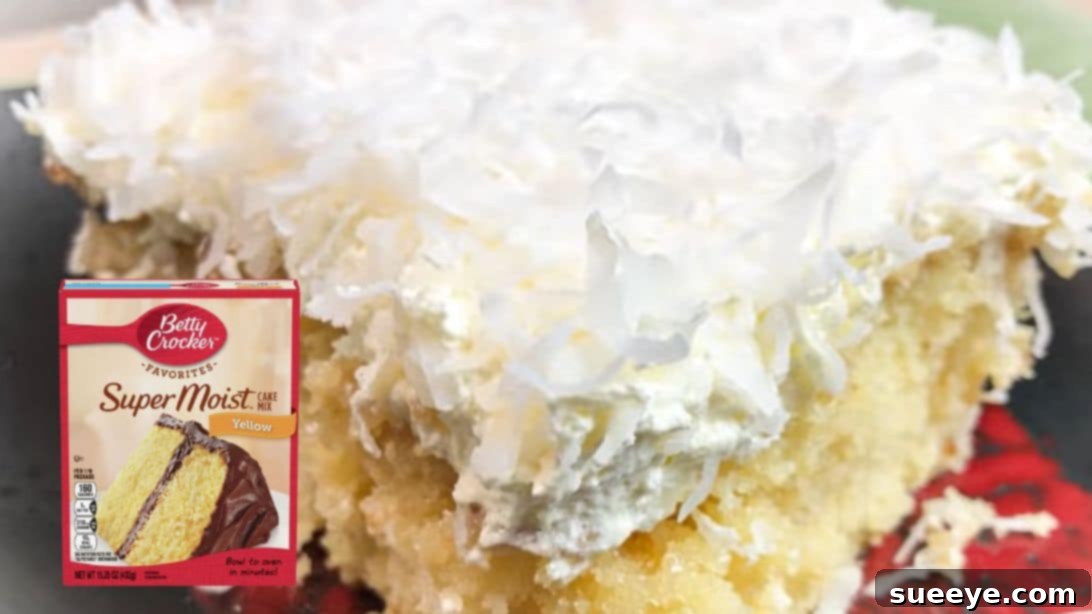
Ultimate Coconut Cream Poke Cake Recipe: Easy & Bakery-Style Indulgence
Imagine the perfect dessert for a hot, sunny day: a slice of pure, tropical bliss that’s impossibly fluffy, incredibly moist, and bursting with creamy coconut flavor. That’s exactly what you’ll get with this sensational **Coconut Cream Poke Cake**! Each bite melts in your mouth, delivering a sweet, exotic taste that is utterly addicting. Forget complicated baking; this recipe shows you how to effortlessly transform a humble box of cake mix into a show-stopping, bakery-style masterpiece. Get ready to delight your family and friends with a dessert that’s both simple to make and truly unforgettable, inspired by the fantastic insights from Catherine’s Plates.
The magic of a poke cake lies in its ingenious design. Once baked, the cake is gently perforated with holes, creating perfect channels for a rich, liquid filling to seep in. This method ensures every single crumb is saturated with flavor and moisture, resulting in a cake that stays tender and delicious for days. Our Coconut Cream Poke Cake takes this concept to the next level, infusing a tender yellow cake with a luxurious blend of coconut cream and sweetened condensed milk. The result is an incredibly moist cake, crowned with a light, airy Cool Whip topping and a generous scattering of toasted coconut flakes, making it a textural and flavorful delight.
Why This Coconut Cream Poke Cake is a Must-Bake Dessert
This isn’t just another cake recipe; it’s a guaranteed crowd-pleaser that combines convenience with gourmet results. Here’s why this tropical poke cake deserves a spot in your recipe collection:
- Unrivaled Moisture: The secret filling deeply penetrates the cake, ensuring an incredibly tender and moist crumb that practically dissolves in your mouth.
- Effortless Elegance: Starting with a simple cake mix drastically cuts down on preparation time, yet the final presentation and taste are undeniably sophisticated and professional.
- Explosion of Tropical Flavor: Layers of rich coconut cream, sweet condensed milk, and crunchy coconut flakes create a symphony of sweet, creamy, and exotic notes.
- Versatile for Any Occasion: Light and refreshing enough for a summer picnic, yet rich and satisfying for a holiday gathering, this cake is adaptable to any event.
- Simple Customization: Easily modify the recipe with different toppings or cake mix flavors to suit your personal preferences.
- Make-Ahead Friendly: This cake tastes even better after it has had time to chill, making it perfect for preparing in advance.
Ingredients for Your Luscious Coconut Cream Poke Cake: Building the Flavor Base
Crafting this heavenly dessert begins with a carefully selected list of ingredients. While we’re leveraging the convenience of a cake mix, certain additions and substitutions are key to achieving that desirable “bakery-style” richness and an authentic tropical flavor profile.
- 15.25-ounce box of yellow cake mix: This forms the base of our cake. Yellow cake provides a classic, buttery canvas that beautifully complements the rich coconut flavors we’ll be adding. Any standard brand will work perfectly.
- Ingredients specified on the back of your cake mix: These typically include water, vegetable oil, and eggs. We’ll be upgrading these basic components to enhance the cake’s texture and flavor significantly.
- 15-ounce can of full-fat coconut cream: This is the star ingredient for our filling. It provides an intense, rich coconut flavor and a luxuriously creamy texture. It’s crucial to use full-fat coconut cream, not light coconut milk or a coconut milk beverage, as the higher fat content is essential for the filling’s consistency and depth of flavor.
- 14-ounce can of sweetened condensed milk: This thick, sweet dairy product is the other critical component of our filling. It contributes a wonderful sweetness, helps saturate the cake with moisture, and gives the filling its iconic lusciousness.
- 8-ounce container of Cool Whip, thawed: A light, airy, and convenient topping that balances the richness of the cake and filling. If you prefer, you can easily substitute this with freshly made whipped cream for an even richer, more homemade touch.
- 1 large bag of sweetened coconut flakes: These are used for garnishing, adding both a delightful chewiness, extra coconut flavor, and an attractive finish. For an even more profound flavor, consider toasting them lightly before sprinkling.
Ingredient Spotlight: Coconut Cream Best Practices:
A vital tip for working with canned coconut cream: it tends to separate into a thick, solid layer at the top and a more watery liquid at the bottom. For a perfectly smooth and consistent filling, make sure to thoroughly blend the coconut cream before mixing it with the sweetened condensed milk. You can do this right in the can with a spoon, or pour it into a separate bowl and whisk until uniform. This step ensures that every part of your cake receives the same rich, creamy infusion.
Step-by-Step Instructions: Baking and Assembling Your Tropical Delight
Follow these detailed instructions carefully to ensure your Coconut Cream Poke Cake turns out perfectly moist, flavorful, and truly bakery-worthy. Precision in each step guarantees a delicious outcome.
Step 1: Prepare and Bake the Enhanced Yellow Cake Base
Begin by preheating your oven to the temperature specified on the back of your yellow cake mix box. Generously grease and lightly flour a 9 x 13-inch baking dish. This crucial step prevents the cake from sticking and ensures it releases cleanly. Now, for the “bakery-style” secret: instead of water, use an equal amount of whole milk, and in place of vegetable oil, use an equal amount of melted unsalted butter. These simple substitutions will significantly improve the cake’s moisture, richness, and overall flavor profile. In a large mixing bowl, combine the cake mix with the substituted milk, melted butter, and the eggs as directed by your cake mix package. Beat the mixture until it’s smooth and well combined, taking care not to overmix. Pour the batter evenly into your prepared baking dish. Bake for the duration recommended on the cake mix box, or until a wooden skewer or toothpick inserted into the center of the cake comes out clean. Once baked, remove the cake from the oven and carefully place it on a wire rack to begin cooling, as we’ll be working with it while it’s still warm.
Step 2: Strategically Poke Holes for Optimal Filling Absorption
This is where the “poke” in poke cake comes into play. Immediately after taking the cake out of the oven, while it’s still warm, grab a standard dinner fork. Using the tines of the fork, systematically poke holes all over the surface of the cake. The goal is to create evenly spaced, small indentations. It’s important not to use anything larger than fork tines, as wider holes might cause the relatively thin liquid filling to seep straight through to the bottom of the pan without properly saturating the cake. Aim for the fork to penetrate about three-quarters of the way through the cake’s depth – you want to create tiny wells for the filling, not tunnels that go completely through. Avoid poking all the way to the bottom to prevent the filling from pooling excessively beneath the cake. Consistent, well-distributed holes are key to an evenly moist and flavorful cake.
Step 3: Whisk Together the Creamy Coconut Filling
In a large mixing bowl, combine the entire 15-ounce can of full-fat coconut cream and the 14-ounce can of sweetened condensed milk. Remember our earlier tip: ensure your coconut cream has been thoroughly blended or whisked to a smooth consistency before adding it to the bowl. Use a whisk to vigorously combine these two ingredients until they are completely uniform and smooth. The sweetened condensed milk provides a luxurious sweetness and thickness, while the coconut cream infuses that distinctive, rich tropical flavor. This simple yet powerful two-ingredient mixture is the heart of your cake’s incredible moisture and sweet, coconut essence.
Step 4: Infuse the Cake with Tropical Goodness
Now for the most satisfying part! Carefully and slowly pour the prepared coconut-condensed milk mixture evenly over the entire surface of the still-warm, poked cake. Distribute the liquid thoroughly, allowing it to gradually seep into each of the holes you created. You can use the back of a spoon or a rubber spatula to gently guide the liquid into any holes that seem resistant. The warmth of the cake will aid in absorption, ensuring that the filling is drawn deep into the cake’s core. Once all the mixture has been poured and absorbed, set the cake aside on the wire rack to cool completely to room temperature. This cooling period is absolutely essential; it allows the cake to fully absorb the rich filling and helps its structure to set before we apply the final topping. Patience here will be rewarded with an exceptionally moist and flavorful cake.
Step 5: Apply the Light and Fluffy Topping with Coconut Flakes
Once your cake has cooled completely to room temperature (this might take anywhere from one to two hours, depending on your kitchen’s temperature), it’s time for the crowning layer. Open your thawed 8-ounce container of Cool Whip. Using an offset spatula or the back of a spoon, gently spread the Cool Whip evenly over the entire top surface of the cake, creating a smooth, cloud-like layer. Next, generously sprinkle the sweetened coconut flakes over the Cool Whip. For an extra dimension of flavor and a beautiful golden hue, you might consider lightly toasting the coconut flakes in a dry skillet over medium-low heat until they are fragrant and slightly golden, then letting them cool before sprinkling. Gently press the coconut flakes into the Cool Whip with your hands or the back of a spoon to ensure they adhere well and create an appealing, textured finish.
Step 6: Chill, Slice, and Savor Your Tropical Masterpiece
This final step is paramount for achieving the perfect texture, flavor, and stability of your Coconut Cream Poke Cake. Loosely cover the cake with plastic wrap or aluminum foil and transfer it to the refrigerator. Allow it to chill for at least a few hours – ideally 4 to 6 hours, or even better, overnight. This extended chilling period is crucial: it allows the filling to fully set, solidifying the cake’s structure and intensifying the flavors as they meld beautifully. When thoroughly chilled, remove the cake from the refrigerator, slice it into generous portions using a sharp knife, and serve immediately. Each delectable bite will offer a delightful combination of moist cake, creamy coconut filling, and a light, airy topping. Enjoy your homemade, bakery-quality tropical indulgence!
Pro Tips for a Flawless Coconut Cream Poke Cake
Unlock the full potential of this recipe with these expert tips and tricks, ensuring your cake is nothing short of perfection every time:
- Embrace the Chill Time: Do not rush the refrigeration step! It’s what transforms a good cake into a spectacular one. A well-chilled poke cake is firmer, more moist, and has a more developed flavor profile.
- Toasted Coconut for Depth: For an irresistible aroma and a deeper, nuttier coconut flavor, take a few minutes to lightly toast your sweetened coconut flakes. Spread them in a single layer on a baking sheet and bake at 300°F (150°C) for 5-10 minutes, stirring occasionally, until golden brown. Watch them carefully, as they can burn quickly!
- Homemade Whipped Cream Alternative: While Cool Whip is convenient, if you desire an even fresher and richer topping, make your own whipped cream. Beat 2 cups of heavy cream with 1/2 cup powdered sugar and 1 teaspoon of vanilla extract until stiff peaks form.
- Full-Fat Coconut Cream is Key: Always choose full-fat coconut cream for the filling. Its higher fat content provides the necessary richness and thickness for the ultimate creamy texture and robust coconut flavor.
- Flavor Enhancers: A few drops of coconut extract can be added to the cake batter or the filling for an even more intense tropical taste. A touch of vanilla or almond extract can also complement the coconut beautifully.
- Clean Poking Technique: To ensure uniform holes and prevent pulling up excess cake crumbs, wipe your fork tines clean occasionally between pokes.
- Serving Temperature: This cake is best served cold, straight from the refrigerator, ensuring the filling remains firm and refreshing.
- Storage Instructions: Store any leftover Coconut Cream Poke Cake tightly covered with plastic wrap in the refrigerator for up to 3-4 days. It often tastes even better the day after it’s made!
Delicious Variations to Customize Your Poke Cake
This Coconut Cream Poke Cake recipe is incredibly versatile! Feel free to experiment with these delicious variations to make it uniquely yours:
- Citrus Burst: For a refreshing tang, add the zest of one lime or lemon to the coconut-condensed milk filling. A splash of lime juice can also brighten the flavors.
- Pina Colada Dream: Layer a thin, well-drained layer of crushed pineapple over the cake before adding the Cool Whip for an authentic tropical cocktail experience.
- Chocolate Lover’s Twist: Drizzle a thin stream of melted dark or milk chocolate over the Cool Whip and coconut flakes for a decadent chocolate-coconut combination.
- Fresh Fruit Garnish: Garnish individual slices or the entire cake with fresh berries (raspberries, strawberries, blueberries) or sliced kiwi for a vibrant burst of color and fresh flavor.
- Alternate Cake Bases: While yellow cake is classic, try using a vanilla, white, or even a lemon cake mix for a different foundational flavor profile. A spice cake could also offer an interesting contrast.
- Nutty Crunch: Sprinkle finely chopped macadamia nuts or pecans along with the coconut flakes for an added layer of crunch and flavor.
The Enduring Appeal of Poke Cakes: A Dessert Sensation
Poke cakes have enjoyed a long-standing and well-deserved popularity, and it’s easy to see why. Their brilliance lies in their ability to transform a relatively simple cake into an extraordinarily moist, flavorful, and visually appealing dessert with minimal fuss. The act of poking holes creates a conduit for a delicious liquid – whether it’s condensed milk, pudding, fruit purees, or a delightful combination like our coconut cream concoction – to permeate every inch of the cake. This technique not only guarantees an unparalleled level of moisture, preventing any hint of dryness, but also ensures that the chosen flavor is deeply infused throughout the entire dessert. For home bakers, it offers a forgiving and endlessly versatile method to produce impressive treats that consistently garner compliments and requests for the recipe. It’s a testament to how a small, clever step can lead to a truly sensational outcome.
Conclusion: Your New Favorite Tropical Indulgence Awaits!
This Coconut Cream Poke Cake recipe is more than just a simple dessert; it’s your ticket to a taste of the tropics, delivered with remarkable ease and impressive results. By following these clear, detailed steps and incorporating a few smart “bakery-style” hacks, you’ll transform a basic cake mix into a moist, intensely flavorful, and utterly irresistible cake that will undoubtedly be the star of any table. The harmonious blend of rich coconut cream, sweet condensed milk, and the airy lightness of Cool Whip creates a perfectly balanced and refreshingly delicious treat. So, gather your ingredients, set aside a little time for chilling, and prepare to delight your taste buds with this incredible, homemade, yet truly bakery-quality coconut creation. Happy baking, and enjoy every blissful, tropical bite!