
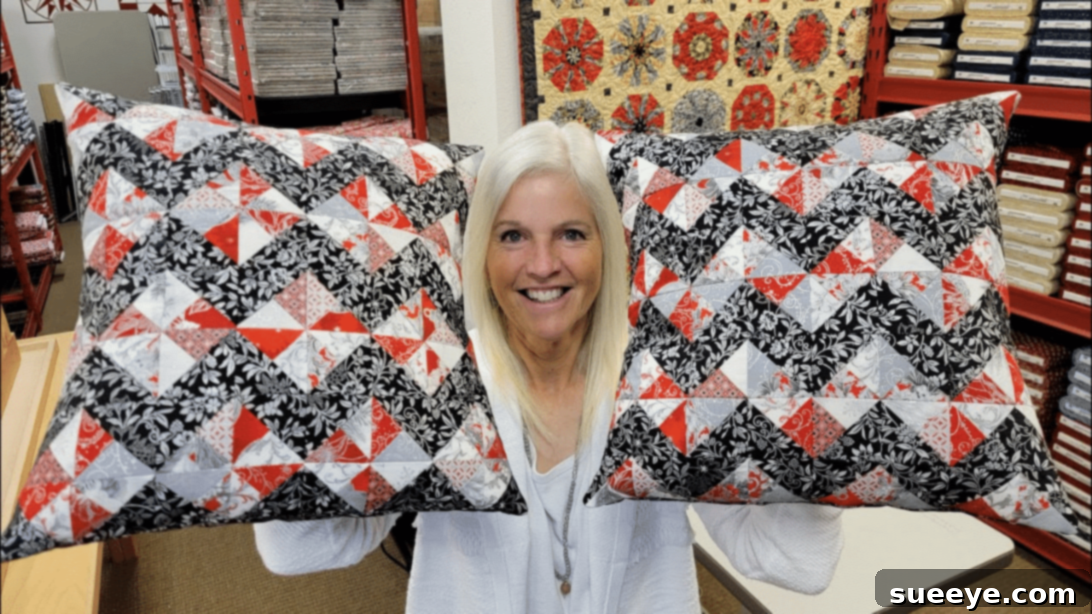
Create a Charming Last-Minute Christmas Pillow: An Easy Sewing Tutorial
The holiday season is a whirlwind of joy, excitement, and, let’s be honest, often a last-minute dash to get everything ready. From decorating your home with festive cheer to finding the perfect gifts for loved ones, the countdown to Christmas can feel incredibly hectic. In the midst of this beautiful chaos, it’s easy to find yourself short on time and ideas for those thoughtful presents that truly express your affection.
If you’re searching for a heartfelt, handmade gift that can be whipped up in a jiffy, look no further! This delightful Christmas pillow, inspired by an excellent tutorial from Jordan Fabric on YouTube, is the ideal solution. It’s quick, easy, and incredibly rewarding to make, ensuring you can still give a personalized touch even at the eleventh hour. Get ready to transform simple fabrics into a cozy, festive masterpiece that will be cherished for years to come.
RELATED: Scrappy Quilted Pillow Sewing Tutorial
Why a Handmade Christmas Pillow is the Perfect Gift
Handmade gifts carry a unique charm and convey a level of care that store-bought items simply cannot match. A Christmas pillow, in particular, serves multiple purposes: it’s a beautiful piece of seasonal decor, a comfortable addition to any couch or armchair, and a tangible reminder of your thoughtfulness. By choosing fabrics that match the recipient’s home decor or their favorite holiday colors, you can personalize this gift even further, making it truly one-of-a-kind. Plus, the process of sewing can be a wonderfully relaxing and creative outlet during the busy holiday season, allowing you to infuse each stitch with love and festive spirit.
Essential Materials for Your Last-Minute Christmas Pillow
Gathering all your supplies before you begin will ensure a smooth and enjoyable sewing experience. This project uses readily available quilting supplies, making it accessible for both seasoned sewers and enthusiastic beginners. A key component here is the “layer cake” — pre-cut fabric squares that save significant time and effort in the cutting phase, allowing you to dive straight into the fun part: piecing.
- Layer Cake Squares: These pre-cut 10-inch fabric squares are perfect for quilting and save a lot of cutting time. Choose festive patterns or colors that evoke the spirit of Christmas.
- Background Fabric: A solid, coordinating fabric (often white, cream, or a light neutral) that will highlight your patterned layer cake squares.
- Backing Fabric: The fabric for the back of your quilted pillow top, providing stability and a finished look.
- Pillow Backing: Separate fabric pieces used to create the envelope closure for your pillow cover. This allows for easy removal and washing.
- Batting Fabric: A layer of soft material (like cotton or polyester) that gives the pillow its quilted texture and provides insulation.
- Pillow Insert: The actual pillow form that will fill your finished pillow cover, usually a standard square size (e.g., 18×18 inches or 20×20 inches).
- Marking Pen, Pencil, or Chalk: For drawing lines on fabric accurately.
- Ruler: A clear quilting ruler is highly recommended for precise measurements and straight lines.
- Scissors or Rotary Cutter and a Cutting Mat: A rotary cutter and mat offer superior precision and speed for cutting fabric squares and strips.
- Fabric Pins or Clips: To hold fabric pieces securely in place while sewing.
- Needle and Thread: High-quality polyester thread is durable and suitable for machine sewing.
- Iron, for Pressing: Crucial for achieving flat seams and a professional finish.
- Sewing Machine: A basic sewing machine is all you need for this project.
Step-by-Step Guide: Crafting Your Festive Pillow
This tutorial simplifies traditional quilting techniques, making it achievable for beginners while still yielding a polished, professional-looking pillow. Precision in cutting and pressing are your best friends in quilting, ensuring all your pieces fit together perfectly.
Preparation is Key: Selecting and Cutting Your Fabrics
Before you even touch your sewing machine, take some time to select your fabrics carefully. The “layer cake” concept means your initial squares are pre-cut, which is a huge time-saver. However, you’ll still need to make a few precise cuts as guided by the video. Always use a sharp rotary cutter for clean edges, and ensure your fabric is pressed flat before cutting to avoid distortion. Visualizing your layout with the different patterns and colors can help you create a balanced and appealing design.
Step 1: Constructing the Half-Square Triangles (HSTs)
Begin by selecting 8 of your layer cake squares that you wish to use for the main design elements. The video will guide you on the specific size adjustments needed for these. Next, take your lighter squares (or any contrasting fabric) and use your marking tool and ruler to draw a diagonal line from corner to corner on the wrong side of each square. This line will serve as a guide for your stitching. Now, pair each light square with a darker or patterned square, ensuring their right sides are facing each other. Stitch a line on either side of your drawn diagonal line, using a consistent ¼-inch seam allowance. This technique is fundamental for creating Half-Square Triangles (HSTs), versatile building blocks in many quilting projects.
Step 2: Building the Quilted Blocks with HSTs
Once stitched, carefully cut each paired square in half along the original diagonal line you drew. You will now have two HST units from each pair. Press these open with the seams directed towards the darker fabric. Pressing towards the darker fabric often helps prevent seam allowances from showing through lighter fabrics. Now, arrange these half-square triangles, taking another background square, and place them right sides together, again drawing a diagonal line across the seams. Repeat the process of stitching on either side of this new line with a ¼-inch seam allowance. This second set of stitches will help create more complex block designs, adding depth and visual interest to your pillow top.
Step 3: Assembling the Pillow Top and Quilting the Layers
After stitching, cut these new units apart along the drawn line, trim any excess fabric for neatness, and press them open. The goal is to create perfectly flat units that will seamlessly fit together. Now comes the exciting part: arranging all your individual pieces into the desired patchwork pattern for your pillow top, as demonstrated in the video. Stitch these pieces together in rows, and then stitch the rows to each other, carefully nesting seams to reduce bulk. Press the entire patchwork piece beautifully flat. Next, create your “quilt sandwich”: lay your pillow backing fabric wrong side up on a flat surface, center your batting on top, and finally, place your pressed quilted patchwork piece right side up on the batting. Stitch all the way around the perimeter of these three layers, securing them together.
Step 4: Finishing Touches: The Pillow Backing and Insert
With your quilted pillow front ready, it’s time to prepare the pillow backing. This usually involves creating an envelope-style opening that allows you to easily insert and remove the pillow form. Arrange the backing pieces on top of your quilted pillow front, ensuring they overlap correctly to form the opening, as demonstrated in the video. Pin these backing pieces securely in place. Flip the entire piece over, and stitch right beside the previous stitching line you made to secure the quilted layers, ensuring you catch all layers of the backing. Carefully cut off any excess fabric around the edges, and trim the corners at an angle. Trimming the corners reduces bulk, allowing for crisper, sharper corners when the pillow is turned right side out. Reach inside the pillowcase, turn it right side out through the opening, gently poke out the corners for a neat finish, smooth out the fabric, and finally, insert your pillow form. You now have a beautiful, handmade Christmas pillow!
Tips for Sewing Success and Personalization
To ensure your last-minute Christmas pillow turns out beautifully, keep these tips in mind:
- Precision is Paramount: Take your time with cutting and stitching. Even small inaccuracies can throw off your entire design in quilting. Use your ruler and marking tools diligently.
- Press, Don’t Iron: When quilting, “pressing” involves lifting and placing the iron rather than sliding it, which can distort your fabric. Press seams flat and open or to one side as needed for a crisp finish.
- Use Quality Thread: A good quality polyester or cotton thread will ensure durable seams that stand the test of time and washing.
- Test Your Machine: Before starting on your main project, do a few test stitches on scrap fabric to check your tension and stitch length.
- Personalize Your Fabric Choices: While festive fabrics are perfect for Christmas, consider the recipient’s personal style. A more subtle color palette can make it a versatile item that’s enjoyed all year round.
- Embrace Imperfections: Especially for beginners, remember that handmade items have character. Don’t stress over minor imperfections; they’re part of the charm!
The Enduring Joy of Handmade Christmas Gifts
In a world of mass-produced goods, a handmade gift stands out. It’s a tangible representation of the time, effort, and love you’ve invested. This easy Christmas pillow sewing tutorial not only provides a practical and beautiful item but also offers you the satisfaction of creating something with your own hands. Imagine the delight on your loved one’s face when they receive this cozy, festive pillow, knowing you made it just for them. It’s more than just a pillow; it’s a warm hug, a decorative accent, and a cherished memory, all wrapped up in one.
So, even if time is short, don’t let it deter you from adding that personal touch this holiday season. Dive into this project, enjoy the creative process, and spread some handmade cheer!
*All these amazing images are thanks to Jordan Fabrics via YouTube. Do visit her channel for more inspiring sewing and quilting videos like this!