
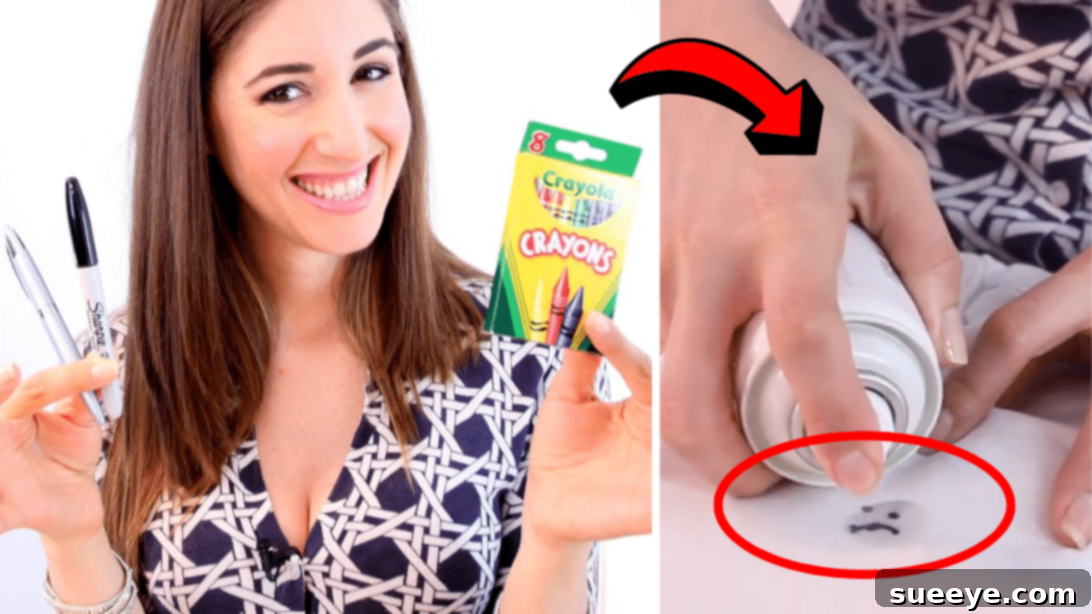
We’ve all been there: a stray pen mark on your favorite shirt or an artistic crayon creation adorning your living room wall. These accidental blemishes can be incredibly frustrating, often seeming impossible to erase no matter how much you scrub or wash. But don’t despair! The secret to banishing these stubborn stains lies not in endless effort, but in employing the right techniques and common household items.
This comprehensive guide, inspired by expert tips from Clean My Space on YouTube, will equip you with the knowledge to easily and quickly remove both ink stains from clothing and crayon marks from various surfaces. Prepare to transform your approach to cleaning, saying goodbye to unsightly marks and welcoming back spotless, pristine areas without breaking a sweat. You won’t need harsh chemicals or specialized cleaners – just a few readily available items and our simple, effective methods.
RELATED: How to Remove Clothes Stain Using Baking Soda
The Ultimate Guide to Erasing Stubborn Ink and Crayon Stains
Dealing with stains can be a test of patience, especially when they seem to set in permanently. Ink, with its concentrated pigments, and crayon, made of wax and color, are notorious for adhering to fabrics and surfaces, leaving behind vivid reminders of an unfortunate mishap. Before you toss that stained garment or consider repainting a wall, understand that effective removal is often simpler than you think. This guide delves into the specifics of tackling these common culprits, offering clear, actionable steps that leverage everyday items for maximum impact.
Why Stubborn Stains Seem So Hard to Remove
Ink stains are particularly challenging because ink is designed to be permanent. Modern inks contain dyes, pigments, and solvents that can penetrate fabric fibers or porous surfaces deeply. Once the solvent evaporates, the pigments bond with the material, making them resistant to water alone. Similarly, crayons are primarily wax-based, and wax melts and spreads when friction is applied, allowing the pigment to transfer and adhere to surfaces. Understanding the composition of these stains is the first step toward effectively breaking them down and lifting them away.
Essential Principles for Effective Stain Removal
Before diving into specific methods, embracing a few universal stain removal principles can significantly improve your success rate and prevent further damage:
- Act Quickly: Fresh stains are always easier to remove than dried, set-in ones. The sooner you address a stain, the less time it has to bond with the material.
- Always Test First: Before applying any cleaning agent to a visible area, always test it on an inconspicuous spot (like an inner seam or a hidden corner of a wall). This ensures the solution won’t cause discoloration, fading, or damage to the material.
- Blot, Don’t Rub: Rubbing a stain can push the particles deeper into the fibers or spread the stain to a larger area. Instead, gently blot the stain from the outside in with a clean cloth, lifting the stain away rather than grinding it in.
- Work from the Outside In: This technique helps prevent the stain from spreading outwards, confining it to its original size as you work.
- Patience is Key: Some stubborn stains require multiple applications or a bit of time for the cleaning agent to work its magic. Don’t rush the process.
What You’ll Need for Effective Stain Removal:
Gathering your supplies beforehand ensures a smooth and efficient cleaning process. Most of these items are likely already in your home:
- A Clean Cloth (Multiple): Essential for blotting stains and absorbing cleaning solutions. Keep several on hand, as you’ll want to switch to a fresh section or cloth frequently to avoid reapplying the stain.
- A Towel: To place underneath stained garments, preventing the stain from transferring to other layers or surfaces. Also useful for drying.
- Rubbing Alcohol (Isopropyl Alcohol): A powerful solvent for many types of ink. Its quick-drying nature makes it ideal for lifting ink pigments.
- Dish Soap: Acts as a degreaser and surfactant, helping to break down stains and lift them from fabric before washing. Opt for a clear, mild variety.
- Sponge: Ideal for applying cleaning solutions and gently buffing surfaces, especially for crayon marks.
- Toothbrush and Non-Gel Toothpaste: An excellent, gentle abrasive for lifting crayon wax from hard surfaces without scratching. Ensure it’s not a gel formula, as gels lack the necessary abrasive particles.
- Baking Soda: A mild abrasive and deodorizer, perfect for gently scrubbing crayon marks off walls and other surfaces.
Step-by-Step Guide to Removing Ink and Crayon Stains:
Removing Pen Stains from Clothing
Ink stains on clothing can seem like the end of a garment’s life, but with the right approach, you can often restore it to its former glory. This method is particularly effective for common ballpoint pen inks.
- Prepare the Area: Lay the ink-stained garment flat on a clean, solid surface. Crucially, place a clean, dry towel or several layers of paper towels directly underneath the stained area. This acts as a barrier, absorbing the ink as it lifts and preventing it from bleeding onto other parts of the fabric or your work surface.
- Apply Rubbing Alcohol: Gently pour or spray a generous amount of rubbing alcohol directly onto the ink stain. You want the stain to be thoroughly saturated, but avoid drenching the entire garment. Rubbing alcohol acts as a powerful solvent that breaks down the ink’s pigments, making them easier to release from the fabric fibers. Allow the alcohol to sit for a few minutes; this gives it time to penetrate the ink and begin dissolving it. You might even observe the ink starting to visibly bleed into the cloth underneath.
- Blot the Stain Away: Take another clean, dry cloth or a fresh section of your existing towel. Begin to blot and press firmly on the ink stain. Apply direct pressure to encourage the dissolved ink to transfer from the garment onto the clean cloth underneath. Avoid rubbing, as this can spread the ink and push it deeper into the fibers. Instead, use a dabbing or pressing motion. As the cloth underneath absorbs the ink, rotate it or replace it with a fresh one. Continue this blotting process, using new, clean sections of cloth until you notice that very little or no more ink is transferring. This step might require patience and several changes of blotting material.
- Pre-treat and Wash: Once most of the visible ink is gone, apply a small amount of liquid dish soap directly onto the remaining faint stain. Gently rub it in with your fingers or a soft brush. This pre-treatment helps break down any residual ink and prepares the fabric for washing. Let it sit for about 5-10 minutes. Afterward, wash the garment in your washing machine as you normally would, using your regular detergent and the hottest water setting safe for the fabric. For stubborn traces, consider adding a scoop of oxygen-based bleach (color-safe) to the wash cycle. Air dry the garment initially to ensure the stain is completely gone before putting it in a hot dryer, as heat can permanently set any remaining ink.
Eradicating Crayon Stains from Surfaces
Crayon marks on walls and furniture are a common artistic expression for young children, but they don’t have to be permanent fixtures. Here’s how to tackle them effectively:
- The Baking Soda Method (for most surfaces):
- Preparation: First, gently scrape off any excess crayon wax with a credit card or the dull side of a butter knife. Be careful not to damage the surface underneath.
- Application: Dampen a clean sponge with warm water. Sprinkle a generous amount of baking soda onto the wet sponge. Baking soda is a mild abrasive that can gently scrub away the wax and pigment without damaging most painted walls or finishes.
- Buff and Clean: Gently buff the crayon stain on the surface with the baking soda-laden sponge. Use light, circular motions. You should see the crayon marks starting to lift and transfer onto the sponge. As the sponge gets soiled, rinse it out and reapply baking soda. Continue buffing until the crayon stain is completely gone.
- Rinse and Dry: Once the stain is removed, wipe the surface clean with a fresh, damp cloth to remove any baking soda residue. Finally, wipe the area dry with a clean, soft towel to prevent water spots.
- The Toothpaste Method (as an alternative):
- Application: For particularly stubborn crayon marks or as an alternative to baking soda, you can use a small amount of non-gel toothpaste. It’s crucial that it’s a paste, not a gel, as the mild abrasive particles in toothpaste are what do the work.
- Scrub and Rinse: Apply a dab of toothpaste directly onto the crayon mark. Using an old toothbrush or a soft cloth, gently scrub the area in circular motions. The abrasives in the toothpaste will help lift the crayon wax and pigment.
- Clean Up: Wipe the area clean with a damp cloth, then dry with a clean towel.
- Special Considerations for Different Surfaces:
- Painted Walls: Always test baking soda or toothpaste in an inconspicuous area first, especially on matte or flat paints, as these can be more sensitive to scrubbing. Semi-gloss or gloss paints are generally more durable.
- Wallpaper: Use extreme caution. Some wallpapers are washable, while others can be easily damaged. Test extensively and use the gentlest touch possible, or consider professional cleaning.
- Furniture (Wood/Laminate): For sealed wood, the baking soda or toothpaste method can work, but avoid excessive moisture. For unsealed wood, consult a furniture cleaning expert, as moisture can cause damage.
- Plastic/Metal: Both methods are generally safe for hard, non-porous surfaces like plastic toys or metal, but always test first.
Advanced Tips and Prevention Strategies
Dealing with Specific Ink Types
While rubbing alcohol is excellent for ballpoint ink, other ink types might require a slightly different approach:
- Permanent Marker Ink: Hairspray (containing alcohol), hand sanitizer, or even dry-erase markers (drawing over the permanent mark then wiping off) can sometimes work.
- Gel Pen Ink: Similar to ballpoint, rubbing alcohol is usually effective. For stubborn gel ink, sometimes a mixture of dish soap and white vinegar can help.
- Printer Ink/Toner: These stains are notoriously difficult. For fabric, a pre-treatment with a heavy-duty laundry detergent or a stain remover spray, followed by a hot wash, might be necessary. Avoid water initially, as it can set the stain.
Preventing Future Crayon Art on Walls
Prevention is always better than cure! Consider these strategies to minimize crayon incidents:
- Designated Art Space: Create a specific area for drawing, complete with an easel, paper, and washable art supplies.
- Washable Crayons: Invest in “washable” or “ultra-washable” crayons. These are specifically formulated to come off surfaces more easily.
- Supervision: Keep an eye on young artists, especially when they’re near walls.
- Child-Friendly Paint: When repainting, consider using washable or scrubbable paint finishes, often labeled “egg-shell,” “satin,” or “semi-gloss,” which are more resilient to cleaning than flat finishes.
When to Seek Professional Help
While these DIY methods are highly effective for most common ink and crayon stains, there are instances where professional intervention might be the best course of action:
- Delicate Fabrics: For silk, velvet, antique textiles, or other very delicate materials, attempting DIY removal could cause irreversible damage. A professional dry cleaner or textile conservator is recommended.
- Large or Deeply Set Stains: If a stain is extremely large, very old, or has deeply permeated a material, home methods may not suffice.
- Valuable Items: For cherished garments, antique furniture, or expensive items, the risk of damage from experimental cleaning might outweigh the benefits of DIY.
- Unknown Surface Materials: If you’re unsure what type of surface you’re dealing with (e.g., certain types of wallpaper, unsealed wood, specialty finishes), a professional can assess and treat it safely.
Embrace a Spotless Home with Confidence
No longer do stubborn ink and crayon stains have to be a source of frustration. With the simple, effective techniques and readily available household items outlined in this guide, you can confidently tackle these common messes. From rescuing your favorite shirt from a pen mishap to erasing your child’s artistic endeavors from the walls, you now possess the knowledge to restore cleanliness and order with minimal effort.
Remember to always test your cleaning solution, blot gently, and work patiently. For a visual demonstration of these techniques and more helpful tips, be sure to watch the informative video tutorial from Clean My Space on YouTube.
*All image credit belongs to Clean My Space via YouTube. Follow and subscribe to her channel for more!