
Mastering Ink Stain Removal: Simple Household Hacks for Spotless Clothes
Few things are as disheartening as discovering a fresh ink stain marring your favorite shirt or an essential piece of clothing. Ink, by its very nature, is designed to be permanent, making its removal seem like an insurmountable challenge. The fear of spreading the stain further or even damaging the fabric can be incredibly stressful, often leading people to abandon hope and deem the garment irreparable. However, before you relegate that beloved item to the back of your closet or the discard pile, know that hope is not lost!
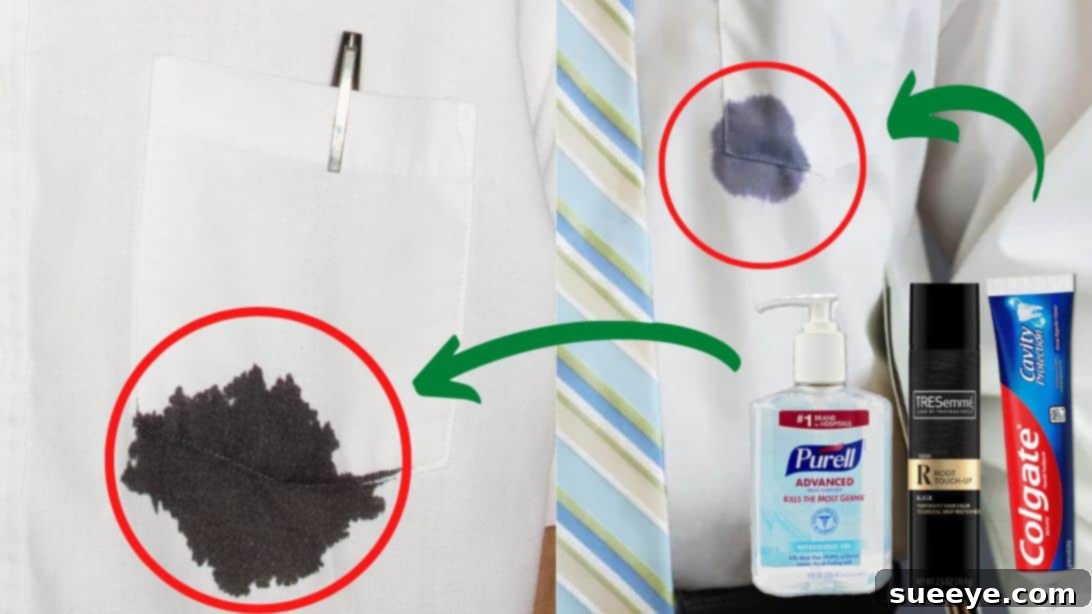
Thanks to ingenious cleaning experts like Andrea Jean Cleaning on YouTube, effective solutions for ink stain removal are readily available, often utilizing products you already have in your home. This comprehensive guide will walk you through three simple, yet powerful methods to tackle even the most stubborn ink marks, transforming your anxiety into triumph. We’ll delve into the science behind these hacks, providing detailed instructions to ensure your success. The key to successful stain removal lies in acting quickly, understanding your fabric, and always performing a patch test. So, prepare to arm yourself with common household items and learn the secrets to restoring your clothes to their pristine condition.
Before You Begin: Essential Preparations for Ink Stain Removal
Before you dive into any of the stain removal methods, taking a few preparatory steps can significantly increase your chances of success and prevent further damage to your garments. These preliminary measures are crucial for an effective and safe cleaning process.
Act Fast: The Golden Rule of Stain Removal
Ink stains, much like many other types of stains, are easiest to remove when they are fresh. The longer an ink stain sits on fabric, the more it bonds with the fibers, making it exponentially harder to lift. As soon as you notice an ink mark, begin the treatment process without delay. Avoid letting the garment sit in a laundry basket for days, as this will only allow the ink to set deeper.
Identify the Ink Type
Knowing the type of ink (e.g., ballpoint, gel, permanent marker, washable marker) can sometimes influence the effectiveness of certain removal techniques. While the methods described below are generally effective for common pen inks, particularly ballpoint, extremely permanent markers might require more aggressive, professional solutions. For typical pen mishaps, these hacks are usually sufficient.
Understand Your Fabric
Different fabrics react differently to cleaning agents. Delicate materials like silk, wool, rayon, or linen might be more susceptible to damage or discoloration from certain chemicals or vigorous scrubbing. Always consider the fabric composition of your garment. For robust materials like cotton, denim, or polyester, most methods are relatively safe. For delicate items, proceed with extreme caution and always prioritize the patch test.
Perform a Patch Test
This step cannot be overstressed. Before applying any stain removal solution to the visible stained area, always test it on an inconspicuous part of the garment. This could be an inside seam, the hem, or a hidden flap. Apply a small amount of the chosen solution, let it sit for a few minutes, then blot it away. Check for any discoloration, fabric damage, or adverse reactions. If the fabric shows any signs of damage or color change, do not proceed with that method on the main stain.
Avoid Heat at All Costs
Never put an ink-stained garment into a dryer or use hot water on the stain before it has been completely removed. Heat will permanently set the ink into the fabric fibers, making it virtually impossible to remove later. Always air dry stained items until you are absolutely certain the stain is gone.
Materials You’ll Need:
Gathering your materials beforehand ensures a smooth and uninterrupted cleaning process. Most of these items are likely already in your pantry or bathroom cabinet.
- Laundry liquid detergent (a heavy-duty detergent is often more effective)
- Baking soda (sodium bicarbonate)
- Lemon (fresh lemon juice is best)
- Toothpaste (white, non-gel toothpaste is recommended)
- Hairspray (alcohol-based hairspray works best)
- Hand sanitizer (alcohol-based)
- Cotton balls or clean white cloths (ensure they are white to prevent color transfer)
- Old toothbrush or soft-bristled brush (for gentle scrubbing)
- Paper towels or old towels (to absorb excess liquid and protect surfaces)
Detailed Directions: Three Powerful Methods to Erase Ink Stains
Here are three highly effective methods to tackle ink stains, each leveraging common household items. Remember to choose the method that best suits the type of ink, fabric, and products you have available, and always perform a patch test first.
Method 1: The Potent Paste Solution (Detergent, Baking Soda, Lemon, Toothpaste)
This multi-ingredient paste combines the cleaning power of several household staples, creating a formidable force against stubborn ink. Each component plays a specific role in breaking down and lifting the ink from the fabric fibers.
Understanding the Science Behind the Paste:
- Laundry Detergent: Acts as a surfactant, reducing the surface tension of water and allowing the solution to penetrate the fabric and surround the ink particles, lifting them away.
- Baking Soda: A mild abrasive that helps to gently scrub away the ink without damaging the fabric. Its absorbent properties can also help draw out the ink.
- Lemon Juice: A natural bleaching agent and mild acid that can help break down the ink’s pigments. Its acidic nature can also react with certain ink components, aiding in removal.
- Toothpaste: Often contains mild abrasives (like silica) and detergents that work similarly to laundry detergent, helping to scrub and lift the stain. Ensure you use a white, non-gel toothpaste to avoid adding new dyes to your fabric.
Step-by-Step Application:
- Prepare the Paste: In a small, non-metal bowl, mix a small amount of laundry detergent, baking soda, fresh lemon juice, and white toothpaste. Start with roughly equal parts, adjusting as needed to achieve a thick, spreadable paste consistency. The goal is a uniform mixture that isn’t too runny or too clumpy.
- Apply to the Stain: Carefully apply a generous layer of the paste directly onto the ink-stained area. Ensure the entire stain is covered.
- Gentle Scrubbing: Using an old toothbrush or a soft-bristled brush, gently scrub the paste into the stain. Use small, circular motions, working from the outside of the stain inward to prevent spreading. The goal is to work the paste into the fabric fibers, not to aggressively abrade them. Continue scrubbing for 1-2 minutes.
- Allow to Dwell: Let the paste sit on the stain for at least 15-30 minutes. This allows the active ingredients time to penetrate the ink and begin breaking it down. For very stubborn stains, you might extend this dwelling time to an hour.
- Rinse and Repeat: After the dwelling period, rinse the treated area thoroughly with cool water. Check the stain. If it’s still noticeable, repeat the application and scrubbing process as needed until the ink is barely visible or completely gone.
- Final Wash: Once the ink stain is removed or significantly faded, wash the fabric as you normally would, using cold water and your regular laundry detergent. Air dry the garment to ensure the stain is fully gone before considering machine drying.
Method 2: Hairspray to the Rescue (Alcohol-Based)
Hairspray might seem like an unconventional stain remover, but its effectiveness against ink stains is a widely known secret. The key lies in its alcohol content, which acts as a powerful solvent for many types of ink.
Understanding the Science Behind Hairspray:
- Alcohol as a Solvent: Many modern inks are alcohol-soluble. The alcohol in hairspray works to dissolve the ink, loosening its grip on the fabric fibers. Once dissolved, the ink can then be blotted away.
- Importance of Blotting: Unlike scrubbing, blotting is crucial with alcohol-based removers to transfer the dissolved ink from the fabric to the clean cotton or cloth. Rubbing would only spread the dissolved ink further into the fibers.
Step-by-Step Application:
- Prepare the Area: Place a clean paper towel or an old white cloth beneath the stained area of the garment. This will absorb the dissolved ink and prevent it from transferring to other parts of the fabric or your work surface.
- Spray the Stain: Hold the hairspray can a few inches away from the ink stain and spray a small amount directly onto the affected area. Avoid oversaturating the fabric, as this could spread the stain. Focus the spray directly on the ink. Ensure you are using an alcohol-based hairspray for the best results.
- Blot, Don’t Rub: Immediately after spraying, grab a clean cotton ball or a fresh section of a white cloth. Gently blot the ink-stained area. You should see the ink begin to transfer from the fabric to the cotton.
- Change Cotton Frequently: As the cotton absorbs the ink, it will become discolored. It is critical to use a fresh, clean section of cotton for each blot. Continuing to blot with an ink-laden piece of cotton will only redistribute the stain.
- Repeat as Needed: Continue spraying small amounts of hairspray and blotting with clean cotton, changing the cotton frequently, until the ink stain is significantly faded or completely gone. This process may require patience and several repetitions.
- Final Wash: Once you are satisfied with the stain removal, rinse the treated area thoroughly with cool water, then wash the garment as usual with your regular laundry detergent in cold water. Air dry to confirm the stain’s complete disappearance.
Method 3: Hand Sanitizer – Your On-the-Go Ink Eraser
In a pinch, or when you’re away from home, hand sanitizer can be a surprisingly effective weapon against fresh ink stains. Much like hairspray, its active ingredient—alcohol—is the secret to its success.
Understanding the Science Behind Hand Sanitizer:
- High Alcohol Content: Most hand sanitizers contain a high percentage of alcohol (usually 60-90%), which acts as an excellent solvent for various ink types, breaking down the ink pigments.
- Convenience: Its gel-like consistency makes it easy to apply directly to the stain without oversaturation, and its portability means you can tackle stains almost anywhere.
Step-by-Step Application:
- Isolate the Stain: As with other methods, place a clean paper towel or an old white cloth underneath the stained area of the garment to absorb the dissolved ink.
- Apply Hand Sanitizer: Squeeze a small amount of alcohol-based hand sanitizer directly onto the ink-stained area. Ensure the stain is fully covered but avoid drenching the fabric.
- Blot Gently: Grab a clean cotton ball or a fresh section of a white cloth. Gently blot the ink stain. You will observe the ink beginning to lift and transfer onto the cotton.
- Refresh Your Cotton: Continuously switch to a clean part of the cotton or a new cotton ball as it picks up the ink. This prevents reapplying the dissolved ink back onto your garment.
- Continue Treatment: Repeat the application of hand sanitizer and blotting, using fresh cotton each time, until the ink stain is visibly reduced or entirely removed. Patience and persistence are key here.
- Rinse and Wash: Once the stain is gone, rinse the treated area thoroughly under cool water to remove any residue. Then, proceed to wash the garment in your washing machine with cold water and your usual detergent. Allow the item to air dry to ensure complete stain removal before applying any heat.
Additional Tips for Stubborn Ink Stains and Prevention
Sometimes, an ink stain can be particularly persistent, or you might want to take steps to avoid them altogether. Here are some extra pointers to help you in your laundry endeavors.
What If the Stain Persists?
- Repeat Treatments: For very old or set-in stains, you might need to repeat your chosen method multiple times. Give the fabric time to rest between treatments.
- Pre-Soaking: After initial treatment, consider pre-soaking the garment in a mixture of cold water and oxygen-based bleach (safe for colors) for several hours or overnight before washing.
- Professional Help: If all else fails, a professional dry cleaner might have access to stronger solvents and specialized techniques that can remove the stain without damaging your fabric. Make sure to point out the stain and inform them of any previous treatments you’ve tried.
Dealing with Different Fabric Types:
- Delicate Fabrics: For silk, rayon, or wool, always opt for the gentlest approach. Hand sanitizer or a very diluted paste might be safer. Avoid harsh scrubbing or strong acids like pure lemon juice, which can damage fibers or cause discoloration. A professional cleaner is often the safest bet for these materials.
- Synthetics: Polyester, nylon, and acrylic generally respond well to these methods. However, always test first, as some synthetics can be sensitive to alcohol.
- Natural Fibers: Cotton and linen are quite durable and usually tolerate all three methods well.
Preventing Future Ink Mishaps:
- Cap Your Pens: Simple yet effective. Always cap your pens when not in use or when carrying them in pockets or bags.
- Pen Holders: Use dedicated pen loops or pockets in bags to keep pens secure and upright.
- Check Pockets: Before doing laundry, always double-check all pockets for pens, markers, and other items that could cause stains.
- Quality Pens: Some cheaper pens are more prone to leaking. Investing in higher-quality pens can sometimes reduce the risk of unexpected leaks.
Conclusion: Reclaim Your Wardrobe from Ink Stains
Ink stains, while daunting, are far from a death sentence for your favorite clothes. With the right approach and a few common household items, you can effectively tackle these notorious marks and restore your garments to their former glory. Whether you opt for the multi-faceted cleaning paste, the alcohol-powered hairspray, or the convenient hand sanitizer, success hinges on swift action, careful application, and the crucial step of testing on an inconspicuous area first.
Remember that patience is a virtue in stain removal. Some stains may require repeated applications, and thorough rinsing is paramount to ensure all cleaning agents and dissolved ink are completely removed before washing. By following these detailed instructions and incorporating these clever cleaning hacks into your routine, you’ll gain the confidence to face any ink-related mishap head-on, ensuring your wardrobe remains spotless and your stress levels low. So, next time a pen strikes, you’ll be prepared to save the day, just like Andrea Jean Cleaning taught us!
*Many thanks to Andrea Jean Cleaning via YouTube for inspiring these practical solutions and for all images used here. If you found these cleaning hacks helpful, we highly recommend visiting her channel for more ingenious tips and subscribing to her content!