
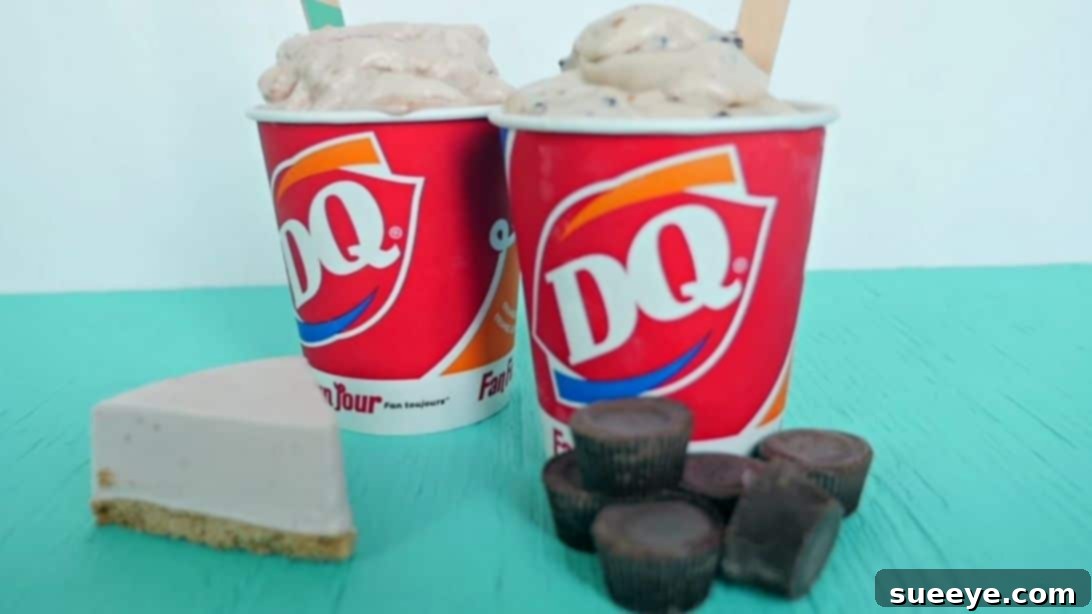
Do you ever find yourself reminiscing about those carefree childhood days, especially the joy of indulging in a rich, creamy Dairy Queen Blizzard? For many, the iconic treat holds a special place in their hearts – perhaps it was the irresistible crunch of Reese’s Pieces or the delightful chewiness of Cookie Dough that captured your imagination. My personal favorite has always been the combination of Reese’s Pieces and Cookie Dough, a timeless classic that still brings a smile to my face. The sheer delight of watching a server confidently flip your Blizzard upside down, a testament to its perfect, thick consistency, is a memory cherished by many. But what if we told you that this beloved dessert, complete with its gravity-defdefying charm, can be effortlessly recreated in your own kitchen? What’s more, you can craft a wholly delicious, plant-based version that captures all the flavor and fun of the original, proving that dairy-free doesn’t mean compromising on taste or texture. Prepare to embark on a delightful culinary adventure as we follow the fantastic lead of Edgy Veg from YouTube, who expertly guides us through making these quick, easy, and utterly satisfying vegan Blizzards right at home.
Master the Art of Homemade Vegan Blizzards: Dairy-Free Dairy Queen Copycat Recipes
The allure of a Dairy Queen Blizzard is undeniable. That thick, spoon-standing, upside-down-friendly ice cream treat packed with delicious mix-ins is a quintessential American dessert experience. However, for those following a vegan lifestyle, managing dairy allergies, or simply looking to explore plant-based alternatives, the traditional Blizzard has long been off-limits. Until now! We’re thrilled to share these incredible recipes that not only replicate the classic Dairy Queen experience but elevate it with wholesome, dairy-free ingredients. Get ready to churn up some nostalgia and create your own indulgent, compassionate Blizzards that will impress even the most discerning palates.
Why Choose a Vegan Blizzard? The Benefits of Plant-Based Indulgence
Opting for a vegan Blizzard isn’t just a dietary choice; it’s a step towards a more sustainable, ethical, and often healthier lifestyle. Plant-based ingredients offer a wealth of benefits, from reducing your environmental footprint to catering to specific dietary needs like lactose intolerance or dairy allergies. Today’s market is brimming with fantastic dairy-free alternatives for ice cream, whipped cream, and even cheesecake, making it easier than ever to enjoy your favorite treats without compromise. By making your Blizzard vegan, you’re embracing innovation in the kitchen and proving that deliciousness knows no bounds, even without traditional dairy. Plus, you get full control over the quality and type of ingredients used, ensuring a wholesome and delightful dessert every time.
The Iconic “Upside Down” Test: A Sign of Perfect Consistency
One of the most defining characteristics of a Dairy Queen Blizzard is its legendary thickness – so thick, in fact, that it can be held upside down without a single drop spilling. This isn’t just a marketing gimmick; it’s a hallmark of a perfectly blended, rich ice cream treat. Our homemade vegan Blizzards are designed to achieve this very same gravity-defying consistency. The key lies in the perfect balance of softened dairy-free ice cream and well-incorporated mix-ins. We’ll guide you through the techniques to ensure your homemade vegan Blizzards pass the ultimate upside-down test, adding an element of fun and authenticity to your culinary creation.
Essential Ingredients for Your Dairy-Free Blizzard Creations
Crafting these delectable vegan Blizzards requires just a few simple, high-quality ingredients. The beauty of these recipes lies in their flexibility, allowing you to choose your favorite dairy-free brands and tailor the sweetness and texture to your preference. Pay attention to the quality of your base ice cream, as it will significantly impact the final texture and flavor.
Homemade Vegan Peanut Butter Blizzard: A Classic Reimagined
- 1 pint of any dairy-free vanilla ice cream: The foundation of your Blizzard. Look for a brand with a rich, creamy texture and a clean vanilla flavor. Popular options include oat milk, almond milk, or cashew milk-based ice creams. Ensure it’s not too icy; a good quality, denser vegan ice cream will yield the best results for that classic thick Blizzard consistency. Slightly softened ice cream straight from the freezer works best for mixing.
- 1 cup of mini vegan peanut butter cups, roughly chopped: These delightful morsels provide the signature sweet and salty crunch that makes this Blizzard so irresistible. You can find vegan peanut butter cups at most health food stores or larger supermarkets. If mini cups aren’t available, simply chop larger vegan peanut butter cups into smaller, bite-sized pieces. The goal is to have varying textures, so some finer crumbs and some chunkier pieces are ideal.
Homemade Vegan Strawberry Cheesequake Blizzard: Decadence Without Dairy
- 1 pint of any dairy-free vanilla ice cream: Again, choose a premium dairy-free vanilla ice cream. Its mild flavor provides the perfect canvas for the vibrant strawberry and creamy cheesecake notes.
- ¼ cup of strawberry jam or high-quality strawberry sauce: Opt for a good quality strawberry jam with real fruit pieces for an authentic flavor and texture burst. Alternatively, a homemade strawberry sauce (simmered strawberries with a touch of sugar and lemon) can elevate this Blizzard to gourmet status.
- 1 slice (roughly 1 cup) of dairy-free strawberry cheesecake of choice: This is where the magic happens! Vegan cheesecakes are widely available now, often made with cashew, tofu, or coconut cream bases. You can buy a slice from a local vegan bakery, a whole frozen vegan cheesecake, or even make your own if you’re feeling ambitious. Ensure it’s a strawberry-flavored cheesecake to match the theme. Roughly chopping it will allow for delightful creamy pockets and chewy bits throughout the Blizzard.
Step-by-Step Directions: Crafting Your Perfect Vegan Blizzard
The process for making these Blizzards is surprisingly simple, primarily involving a stand mixer and a bit of patience. The key is to achieve that perfect balance of softened ice cream and thoroughly incorporated mix-ins without overmixing.
Crafting Your Vegan Peanut Butter Blizzard
- Prepare Your Toppings: Begin by roughly chopping your vegan peanut butter cups. Aim for a variety of sizes – some finer crumbs and some larger chunks – to ensure every bite offers a delightful textural experience. Set these aside in a small bowl; they’ll be added later.
- Soften the Ice Cream: Scoop the entire pint of dairy-free vanilla ice cream into the bowl of a stand mixer. If your ice cream is rock-hard from the freezer, let it sit out for 5-10 minutes to soften slightly, but not melt.
- Beat to Creamy Perfection: Attach the paddle attachment to your stand mixer. Begin beating the ice cream on a low speed, gradually increasing to medium. Continue to mix until the ice cream softens and achieves a smooth, creamy, yet still thick consistency, resembling soft-serve. This might take 1-3 minutes depending on the ice cream’s initial hardness. Avoid over-beating at this stage, as too much air can make it less dense.
- Incorporate the Mix-ins: Once the ice cream is perfectly softened, add the chopped vegan peanut butter cups to the mixer bowl.
- Gentle Mixing: With the paddle attachment, mix on low speed just until the peanut butter cups are evenly incorporated throughout the ice cream. It’s crucial not to overmix here. Overmixing can melt the ice cream too much, reduce its thickness, and break down the toppings excessively, losing their textural appeal. You want distinct pieces of peanut butter cup throughout the creamy base.
- Serve Immediately: Scoop the freshly made Vegan Peanut Butter Blizzard into a sturdy cup or bowl. Grab a spoon and enjoy this delightful, dairy-free treat right away! Don’t forget to try the famous “upside down” test!
Crafting Your Vegan Strawberry Cheesequake Blizzard
- Prepare Your Cheesecake: Take one slice of your chosen dairy-free strawberry cheesecake and roughly chop it into small, manageable pieces. Similar to the peanut butter cups, aim for varied sizes for a delightful textural experience. Set these aside.
- Soften the Ice Cream: Scoop the entire pint of dairy-free vanilla ice cream into the bowl of a stand mixer. Allow it to soften slightly if it’s too hard, ensuring it’s pliable enough for mixing without melting.
- Beat to Creamy Perfection: Using the paddle attachment, beat the ice cream on low to medium speed until it transforms into a smooth, creamy, soft-serve-like consistency. This is key for the Blizzard’s signature thickness.
- Incorporate the Cheesecake: Gently add the chopped dairy-free strawberry cheesecake pieces to the softened ice cream. Mix on low speed just until the cheesecake chunks are evenly distributed. Be careful not to overmix, as you want to preserve the distinct cheesecake texture.
- Add the Strawberry Swirl: Now, add the strawberry jam or strawberry sauce to the mixture. Instead of fully incorporating it, mix just enough to create beautiful swirls of vibrant red throughout the creamy white ice cream. This creates an appealing visual effect and ensures bursts of strawberry flavor.
- Serve Immediately: Scoop the luscious Vegan Strawberry Cheesequake Blizzard into a cup or bowl and serve at once. Revel in the delightful combination of creamy vanilla, tangy strawberry, and rich cheesecake. Don’t forget to put it to the upside-down test!
Tips for the Perfect Homemade Vegan Blizzard
Achieving that iconic Blizzard consistency and flavor is all about technique and ingredient quality. Keep these tips in mind for consistently perfect results:
- Start with Slightly Softened Ice Cream: Don’t try to beat rock-hard ice cream. Let it sit out for 5-10 minutes until it’s pliable but not melting. This makes it easier to beat into a smooth, creamy base.
- The Right Dairy-Free Ice Cream: Not all vegan ice creams are created equal. For Blizzards, opt for brands known for their dense, creamy texture rather than overly airy or icy ones. Oat, cashew, or coconut milk-based options often work wonderfully.
- Don’t Overmix: This is perhaps the most crucial tip. Overmixing will melt your ice cream and diminish its thickness, making it soupy rather than thick. Mix just enough to incorporate toppings. The paddle attachment of a stand mixer is ideal, but a sturdy spoon or a very low-speed hand mixer can also work.
- Chill Your Bowl (Optional but Recommended): For an extra thick Blizzard, you can place your mixer bowl and paddle attachment in the freezer for 15-20 minutes before starting. This helps keep the ice cream colder during the mixing process.
- Topping Temperature: Ensure your mix-ins, especially cheesecake or other delicate items, are cold when added to prevent them from melting the ice cream too quickly.
- Serve Immediately: Blizzards are best enjoyed fresh from the mixer when they have that perfect soft-serve consistency.
Unleash Your Creativity: Customizing Your Vegan Blizzard Experience
While our Peanut Butter and Strawberry Cheesequake recipes are phenomenal, the world of vegan Blizzards is vast and full of possibilities! Use these recipes as a starting point and let your imagination run wild with different flavors and mix-ins. Here are some ideas to inspire your next creation:
- Cookie Lover’s Dream: Swap peanut butter cups for chopped vegan chocolate chip cookies, Oreo-style cookies, or even brownie pieces.
- Fruity Freshness: Experiment with other jams like raspberry or blueberry, or incorporate fresh, finely diced fruits like mango or peaches.
- Candy Crush: Many popular candies now have vegan versions. Think crushed vegan chocolate bars, gummy bears (ensure they are gelatin-free), or even vegan caramel bits.
- Nutty Combinations: Add toasted chopped nuts like pecans or walnuts, or swirl in a different nut butter for a unique flavor profile.
- Coffee Kick: A spoonful of instant espresso powder or a drizzle of coffee syrup can transform your vanilla base into a mocha delight.
- Chocolate Extravaganza: Use vegan chocolate ice cream as your base, then add vegan chocolate chips, chocolate sauce, and even a sprinkle of cocoa powder.
The only limit is your imagination (and perhaps your freezer space)!
Why Homemade is Always Best for Your Vegan Blizzard Cravings
Beyond the sheer joy of creating something delicious, making your own vegan Blizzards offers several advantages. You have complete control over the ingredients, ensuring they are fresh, high-quality, and align with your dietary preferences. This means no hidden additives, artificial flavors, or excessive sugars. Homemade Blizzards are also often more cost-effective than purchasing specialty vegan desserts, allowing you to indulge more frequently without breaking the bank. Plus, there’s an immense sense of satisfaction that comes from mastering a classic treat and adapting it to your lifestyle. It’s a fun, engaging activity for families, and the results are truly rewarding – a personalized, perfect Blizzard every time.
So, next time that familiar craving for a Dairy Queen Blizzard strikes, remember that a delectable, dairy-free version is just minutes away in your own kitchen. With these simple recipes and helpful tips, you’re ready to create creamy, dreamy, and perfectly thick vegan Blizzards that will satisfy your sweet tooth and impress everyone lucky enough to try them. A huge thank you to Edgy Veg via YouTube for inspiring these wonderful creations and demonstrating just how easy and enjoyable plant-based desserts can be. Dive in, experiment with flavors, and most importantly, enjoy every spoonful of your homemade, upside-down-approved vegan Blizzard!