
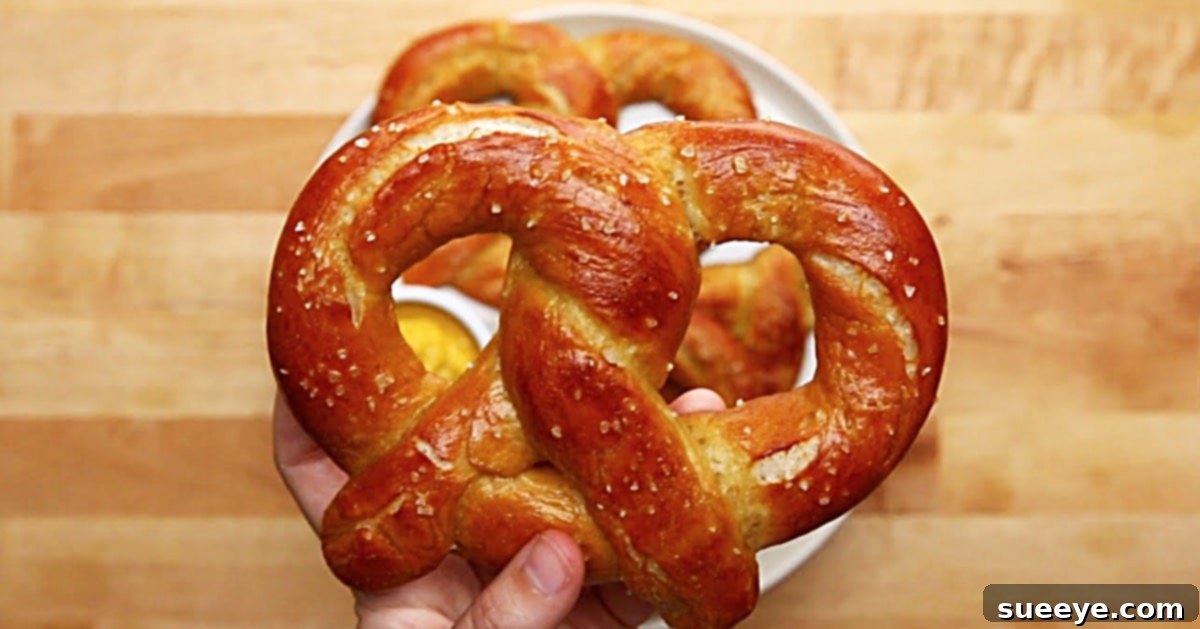
The Ultimate Homemade Soft Pretzels: A Game Day Favorite Recipe
There’s something undeniably satisfying about a warm, soft pretzel, fresh from the oven, with its distinctive chewy texture and salty exterior. While store-bought options are convenient, nothing quite compares to the flavor and aroma of homemade pretzels. They’re not just a snack; they’re an experience – perfect for movie nights, cozy afternoons, or, as I recently discovered, the star attraction at any game day gathering. The process might seem intimidating at first, but with a clear guide, you’ll be baking batches of these golden beauties in no time. Forget complicated techniques; this recipe focuses on simplicity and delicious results, making it an ideal choice for bakers of all skill levels.
My inspiration struck when planning a game day party for my husband. I wanted something substantial yet easy to eat, and something that paired perfectly with cold beverages. A fantastic online tutorial showcased a method that promised large, soft pretzels that could be prepared in advance, freeing up valuable time for other party preparations like hot dips and hearty casseroles. The idea of having a platter of warm, homemade pretzels ready to go was incredibly appealing. Let’s dive into creating these irresistible treats that are sure to be a crowd-pleaser and elevate your snack game!
Ingredients for Perfect Homemade Soft Pretzels:
Gathering your ingredients is the first step to any successful baking adventure. For these delicious soft pretzels, you’ll find that most items are likely already staples in your pantry. Using fresh yeast is key for a good rise, and coarse salt is essential for that classic pretzel finish.
- 1 1/2 cups warm water (around 105-115°F or 40-46°C)
- 1 tablespoon salt (fine grain for dough)
- 1 tablespoon sugar
- 1 packet of dry active yeast (about 2 1/4 teaspoons)
- 4 1/2 cups of all-purpose flour
- 3 tablespoons of oil (divided, such as vegetable or canola oil)
- 2/3 cup baking soda
- 2 large eggs (beaten, for egg wash)
- Some coarse salt (for sprinkling on the outside of your pretzels, like pretzel salt or sea salt flakes)
Step-by-Step Guide to Baking Delicious Soft Pretzels:
Creating homemade soft pretzels is a rewarding process that involves a few distinct stages, each contributing to their unique flavor and texture. From activating the yeast to the crucial baking soda bath, follow these steps closely for the best results. For a visual demonstration, this pretzel video recipe tutorial on YouTube offers excellent guidance.
1. Activating the Yeast and Preparing the Dough:
Begin by ensuring your yeast is active. In a large mixing bowl, combine the warm water (ensure it’s not too hot, as this can kill the yeast, or too cold, which won’t activate it), sugar, and dry active yeast. Stir gently and let this mixture sit for 5-10 minutes. You should see a foamy layer form on the surface, indicating that your yeast is alive and ready to work its magic.
Next, add the fine-grain salt, 2 tablespoons of the oil, and half of the flour to the yeast mixture. Mix well until a shaggy dough forms. Gradually incorporate the remaining flour, adding it a little at a time until the dough pulls away from the sides of the bowl. If using a stand mixer, use the dough hook attachment. If mixing by hand, turn the dough out onto a lightly floured surface.
2. Kneading and First Rise:
Knead the dough for about 8-10 minutes until it becomes smooth, elastic, and no longer sticky. Proper kneading is vital for developing the gluten, which gives pretzels their characteristic chewiness. To test if it’s kneaded enough, press a finger into the dough; if it springs back slowly, it’s ready. Lightly grease a clean bowl with the remaining 1 tablespoon of oil. Place the dough in the bowl, turning it once to coat all sides. Cover the bowl with plastic wrap or a clean kitchen towel and let it rise in a warm, draft-free place for 1 to 1 1/2 hours, or until it has doubled in size. This proofing stage allows the yeast to ferment, creating air pockets and flavor.
3. Shaping Your Classic Pretzels:
Once the dough has risen, gently punch it down to release the air. Turn the dough out onto a lightly floured surface and divide it into 10-12 equal pieces. To shape a pretzel, roll each piece of dough into a long rope, approximately 18-20 inches (45-50 cm) long, keeping the ends slightly thinner. Form a “U” shape with the rope. Take the ends and cross them over each other twice. Then, bring the twisted ends down and press them firmly onto the bottom curve of the “U,” creating the classic pretzel knot. Ensure the twists are secure to prevent them from unraveling during baking. Place the shaped pretzels on a parchment-lined baking sheet as you go.
4. The Essential Baking Soda Bath:
This step is crucial for achieving the signature dark brown, slightly crisp exterior and distinct flavor of a true soft pretzel. Preheat your oven to 450°F (230°C). In a wide, shallow pot, bring 8 cups of water to a rolling boil. Carefully add the 2/3 cup of baking soda to the boiling water. Be cautious as the mixture will foam up significantly. Gently lower one or two pretzels at a time into the boiling baking soda bath, ensuring not to overcrowd the pot. Let each pretzel boil for 30 seconds on each side (total 1 minute per pretzel). Using a slotted spoon or spatula, carefully remove the pretzels from the bath, allowing excess water to drip off, and return them to the parchment-lined baking sheets.
5. Egg Wash and Coarse Salt Application:
Once all pretzels have had their baking soda bath, it’s time for the final touches before baking. In a small bowl, beat the two eggs thoroughly to create an egg wash. Using a pastry brush, generously brush the top and sides of each pretzel with the egg wash. This step is key for giving the pretzels a beautiful golden-brown sheen and helping the coarse salt adhere. Immediately after applying the egg wash, sprinkle a good amount of coarse salt over the surface of each pretzel. Don’t be shy with the salt; it’s a defining characteristic of a classic soft pretzel!
6. Baking to Golden Perfection:
Transfer the baking sheets to your preheated oven. Bake the pretzels for 10 to 15 minutes, or until they achieve a rich, deep golden-brown color. Baking time can vary depending on your oven, so keep a close eye on them, especially after the 10-minute mark. Once baked, remove the pretzels from the oven and transfer them to a wire rack to cool slightly. While they are delicious served warm, allowing them to cool for a few minutes helps them firm up and develop their full flavor and texture. Get ready to enjoy the fruits of your labor!
Why Homemade Pretzels Are a Must-Try for Any Occasion
Beyond the simple joy of baking, homemade soft pretzels offer numerous advantages that make them a standout treat. Firstly, the freshness is incomparable; a warm pretzel straight from the oven boasts a tender interior and a crispier crust that’s often lost in packaged versions. Secondly, it’s a fun and engaging activity, perfect for involving family members, especially children, in the kitchen. There’s a real sense of accomplishment in creating something so delicious from scratch. Moreover, you have complete control over the ingredients, ensuring quality and allowing for dietary adjustments if needed. Making them yourself also turns a simple snack into an impressive culinary feat, guaranteed to earn compliments from friends and family, making them ideal for game day snacks or any celebratory gathering.
Mastering the Pretzel: Expert Tips for Success
Achieving pretzel perfection is easier with a few insider tips. Always ensure your water temperature for activating yeast is just right – too hot will kill it, too cold won’t wake it up. Don’t rush the kneading process; proper gluten development is essential for that signature chew. When shaping, aim for consistent rope thickness to ensure even baking. The baking soda bath is non-negotiable; it’s what gives pretzels their distinct color and flavor, so don’t skip it! Be mindful of boiling time; over-boiling can make them taste metallic or too tough. Lastly, don’t be shy with the coarse salt – it’s a key flavor component and visual appeal. Practice makes perfect, so don’t be discouraged if your first batch isn’t perfectly shaped; they’ll still be delicious!
Beyond the Classic: Delicious Pretzel Variations
While the classic salted soft pretzel is an absolute delight, don’t be afraid to experiment with variations to suit different tastes. For a sweet twist, skip the coarse salt after the egg wash and instead sprinkle with cinnamon sugar before baking – perfect with a cup of coffee. Savory options abound too: try adding shredded cheddar cheese or parmesan to the dough, or brush with melted garlic butter after baking. You could even stuff them with a bit of cheese or a mini hot dog before shaping for a truly unique snack. The versatility of this pretzel dough allows for endless creative possibilities, transforming a simple snack into an exciting culinary adventure.
Perfect Pairings: What to Serve with Your Soft Pretzels
A warm, soft pretzel is fantastic on its own, but it truly shines when paired with the right accompaniments. For game day, a classic pairing is, of course, a cold beer. However, the dipping sauce options are where you can really get creative. Classic yellow mustard is a must, but try elevating it with a spicy brown mustard, a honey mustard dip, or even a gourmet stone-ground variety. For something richer, a warm, creamy beer cheese dip or a jalapeño cheddar sauce is absolutely divine. For non-alcoholic options, pair them with sparkling cider or a robust root beer. Sweet pretzels are wonderful with a cream cheese frosting dip or a chocolate dipping sauce, making them suitable for dessert.
Storing Your Freshly Baked Pretzels
While these homemade soft pretzels are best enjoyed fresh from the oven, you can certainly store them for later. Once completely cooled, place them in an airtight container or a resealable bag. They will stay fresh at room temperature for up to 2 days. To refresh them, a quick pop in the microwave for 10-15 seconds or a few minutes in a preheated oven (around 350°F or 175°C) will bring back some of their original warmth and softness. You can also freeze baked pretzels for up to a month. To reheat from frozen, thaw at room temperature, then warm in the oven until soft and heated through. This makes them an excellent make-ahead option for future gatherings or cravings.
These soft pretzels were, without a doubt, the undisputed hit of the game day party. Everyone raved about their authentic taste and perfect texture, and they disappeared almost as quickly as I could bake them! There’s an immense satisfaction in sharing homemade treats, and these pretzels are a testament to how simple ingredients can create something truly extraordinary. So, roll up your sleeves, follow this guide, and prepare to impress everyone with your baking prowess. You might just find yourself crowned the MVP of the snack table!