
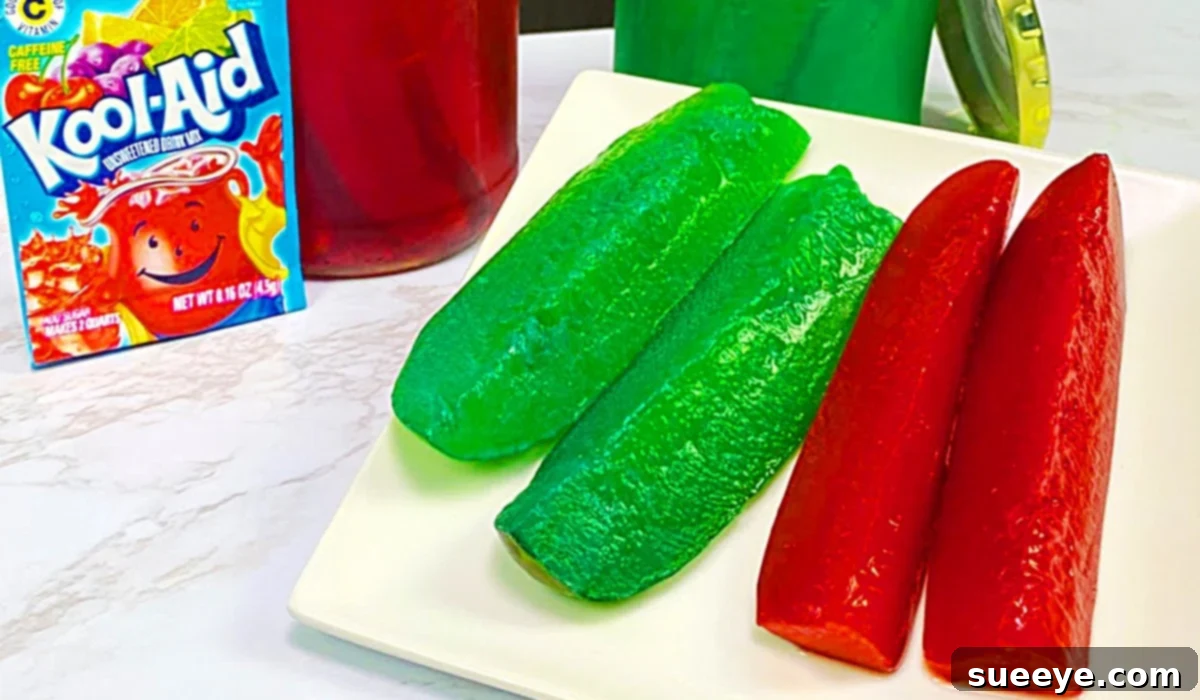
The Ultimate Guide to Making Kool-Aid Pickles: A Sweet & Tangy Delight
Are you ready to transform ordinary dill pickles into an extraordinary taste sensation and visual delight? Look no further than the whimsical world of Kool-Aid pickles! This unique culinary trend has taken social media by storm, captivating food enthusiasts with its vibrant colors and surprisingly delicious sweet and tangy flavor profile. Far from a traditional canning project, making Kool-Aid pickles is incredibly simple, requiring just a few ingredients and a dash of patience as the flavors meld. Perfect for summer cookouts, quirky snacks, or simply adding a splash of color to your plate, these pickles are a guaranteed conversation starter.
We first discovered the magic behind this fascinating treat through an insightful video recipe tutorial by Definitely Not Gourmet on YouTube. Their approach demonstrated just how accessible and fun it is to create these eye-catching delights right in your own kitchen. Imagine a pickle that combines the familiar crunch of a dill spear with an unexpected burst of fruity sweetness – that’s the essence of a Kool-Aid pickle. They share a kinship with bread and butter pickles due to their sweetness, but the distinctive Kool-Aid flavor adds an unparalleled twist, creating a truly memorable snack. Beyond their unique taste, these pickles boast a stunning, almost neon hue that makes them an irresistible addition to any party platter or alongside your favorite BBQ dishes.
The beauty of this recipe lies in its simplicity. There’s no complex canning equipment or lengthy sterilization process involved. You start with readily available store-bought dill pickles, making this an ideal project for beginners and seasoned snack innovators alike. Just a few easy steps stand between you and a jar full of intensely flavored, brilliantly colored pickles that will surprise and delight anyone who tries them. Get ready to embark on a sweet and savory adventure that redefines your perception of what a pickle can be!
The Irresistible Allure of Kool-Aid Pickles
Kool-Aid pickles are more than just a novelty; they represent a fascinating fusion of flavors and textures that captivate the palate. The initial tang and salty crunch of a dill pickle are beautifully complemented by the sweet, fruity notes of Kool-Aid, creating a complex taste experience that is both familiar and excitingly new. This unexpected combination is what makes them so addictive and popular, especially among those who enjoy adventurous eating.
Beyond their unique flavor, the visual impact of Kool-Aid pickles is undeniable. Depending on the Kool-Aid flavor you choose, your pickles can transform into vibrant shades of cherry red, grape purple, tropical blue, or even lime green. This kaleidoscope of colors makes them particularly appealing for social gatherings, adding a playful and festive touch to any food spread. They are a fantastic way to introduce a splash of color to a bland plate or to surprise guests with something truly out of the ordinary. Imagine a platter of bright red pickles sitting next to a burger – it’s an instant conversation starter and a feast for the eyes before it even reaches your mouth.
Another significant factor contributing to their widespread appeal is the sheer ease of preparation. In an age where many seek simple yet impactful recipes, Kool-Aid pickles stand out. They offer a gourmet-like experience without the need for specialized skills or equipment, making them accessible to everyone. This no-canning method means less fuss and more fun, allowing you to enjoy homemade, uniquely flavored pickles with minimal effort. Whether you’re a culinary novice or a seasoned chef, the straightforward process ensures a delicious and visually stunning outcome every time.
Ingredients For The Ultimate Kool-Aid Pickles Recipe:
Gathering your ingredients for Kool-Aid pickles is straightforward, but a few considerations can elevate your final product. The beauty of this recipe lies in its accessibility and the minimal number of items required to achieve maximum flavor and visual impact.
- 2 Jars of Store-Bought Dill Pickles: The foundation of your Kool-Aid pickle adventure! For the best results, opt for whole dill pickles or spears rather than slices, as they tend to hold their shape and absorb the vibrant Kool-Aid brine more effectively. Choose a brand you enjoy, as the underlying dill flavor will still shine through. Ensure they are standard dill pickles, not sweet or bread-and-butter varieties, to get the desired sweet and tangy contrast.
- 2 Packages of Unsweetened Kool-Aid Mix: This is where the magic happens! The choice of flavor dictates both the color and the primary fruity note of your pickles. Popular choices include Cherry (for a classic red), Grape (for a deep purple), Tropical Punch (for a vibrant red/orange), or even Blue Raspberry (for an electric blue hue). Experiment with different flavors to find your personal favorite, or mix and match for a truly unique batch. Remember to use the unsweetened variety, as you’ll be able to control the sweetness level yourself.
- A Strainer: An essential tool for separating the pickles from their original brine. A fine-mesh strainer or even a colander will work perfectly to ensure you capture all the pickle juice for your new Kool-Aid infusion.
- Optional: Granulated Sugar (to taste): While the Kool-Aid provides flavor, adding sugar allows you to customize the sweetness level. Start with 1/2 to 1 cup per jar, and adjust based on your preference. More sugar will result in a sweeter, more candy-like pickle, while less will keep them tart.
- Optional: Large Mixing Bowl or Pitcher: Useful for thoroughly dissolving the Kool-Aid and sugar into the pickle brine before returning it to the jars.
With these simple ingredients in hand, you are well on your way to crafting a batch of these fun, flavorful, and incredibly colorful pickles. The key is to start with good quality dill pickles and let your creativity guide your flavor choices!
Detailed Directions for Crafting Kool-Aid Pickles:
Creating these delightful Kool-Aid pickles is a straightforward process, broken down into a few easy-to-follow steps. Precision and a little patience are your best friends here. Let’s walk through the transformation of ordinary dill pickles into a spectacularly colored and flavored snack.
Step 1: Prepare Your Pickles by Draining the Brine
The first crucial step in making Kool-Aid pickles is to separate your pickles from their original dill brine. Carefully open your jars of store-bought dill pickles. Using a strainer placed over a large bowl or pitcher, gently pour the contents of both pickle jars through the strainer. This allows the liquid (the original dill pickle juice) to collect in the bowl below, while the pickles remain in the strainer. Ensure you save every drop of that pickle juice; it’s the foundation of your new Kool-Aid brine! Once drained, you can return the pickles to their empty jars or set them aside in a clean container while you prepare the new brine. This step is vital as it creates the base for the Kool-Aid infusion and allows the pickles to fully soak up the new flavors without dilution from the old brine.
Step 2: Crafting the Vibrant Kool-Aid Brine
Now comes the fun part – mixing your colorful new brine! Take the strained pickle juice you collected in your bowl or pitcher. Open your two packages of unsweetened Kool-Aid mix and pour them directly into the pickle juice. This is also the stage where you can add granulated sugar if you desire a sweeter pickle. For a noticeable sweetness, start by stirring in about 1/2 to 1 cup of sugar per jar (so 1 to 2 cups total for two jars). Stir the mixture vigorously until the Kool-Aid powder and any added sugar are completely dissolved. You want a smooth, homogenous liquid with no grainy residue. The color will instantly transform, becoming intensely vibrant, signaling that your flavorful new brine is ready.
Step 3: Re-brining the Pickles for Flavor Infusion
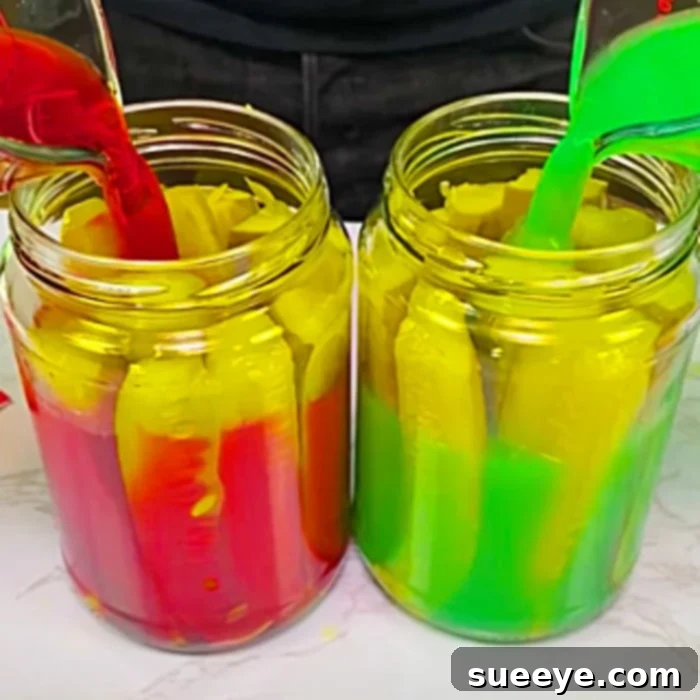
With your vibrant Kool-Aid brine ready, it’s time to reunite it with the pickles. Carefully pour the freshly mixed Kool-Aid brine back into the jars containing your dill pickles. Ensure that all the pickles are fully submerged in the colorful liquid. If you have extra brine, you can reserve it for another batch or discard it. If the brine doesn’t completely cover the pickles, you can gently press them down with a spoon or add a little more water to top them off, though this might slightly dilute the flavor. Secure the lids tightly on both jars.
Step 4: The Waiting Game – Refrigeration and Infusion
Once the lids are sealed, place the jars of Kool-Aid pickles into your refrigerator. This is the most crucial part of the process, as it allows the pickles to slowly absorb the new flavors and vibrant colors. You will need to leave the pickles in the refrigerator for a minimum of 5 days. For even more intense flavor and deeper color, many enthusiasts recommend waiting a full week, or even up to 10 days. During this period, the pickles will gradually transform, soaking up the sweet and fruity brine. Occasionally, you can gently invert or shake the jars to ensure an even distribution of flavor and color, but this is not strictly necessary. The anticipation builds during these days, promising a delightful reward at the end.
Step 5: Enjoy Your Brilliantly Colored & Flavored Pickles!
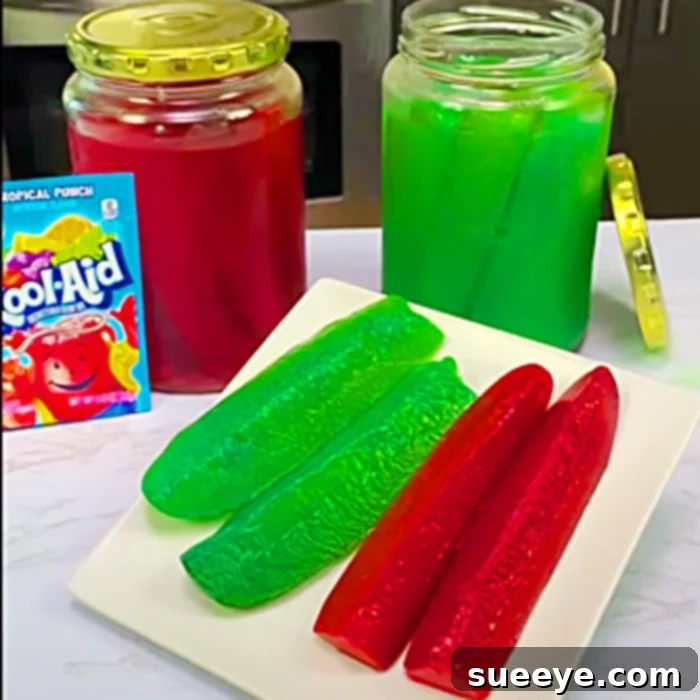
After the designated refrigeration period, your Kool-Aid pickles are ready to be enjoyed! Carefully remove a pickle from the jar and observe its stunning transformation. It should be firm, brilliantly colored, and offer a distinct sweet and tangy crunch with every bite. The longer they sit, the more profound the flavor and color infusion will be. Serve them chilled as a unique snack, alongside your favorite sandwiches, burgers, or as a surprising addition to a charcuterie board. Prepare for delighted reactions and questions about how you created such a fantastic treat!
Tips for Kool-Aid Pickle Perfection
Achieving the perfect batch of Kool-Aid pickles is simple, but a few insider tips can elevate your results from good to absolutely amazing. Keep these suggestions in mind for optimal flavor, color, and texture:
- Choose the Right Pickles: Start with good quality, firm whole dill pickles or spears. Avoid very soft or mushy pickles, as they won’t hold up well during the brining process. Also, ensure they are plain dill, not already sweet or spiced, to allow the Kool-Aid flavor to truly shine.
- Don’t Skimp on Soaking Time: While 5 days is the minimum, allowing your pickles to soak for 7 to 10 days in the refrigerator will yield a much deeper color and more intense flavor. Patience truly pays off with this recipe!
- Experiment with Sweetness: The amount of sugar is entirely up to your preference. Start with the suggested amount (1/2 to 1 cup per jar) and adjust in future batches. Some prefer a subtly sweet pickle, while others crave a candy-like tang. You can even taste the brine before adding it back to the pickles to gauge the sweetness.
- Ensure Full Submersion: It’s critical that all pickles are fully submerged in the Kool-Aid brine. Any pickle exposed to air will not properly absorb the color and flavor. If needed, gently press the pickles down with a fermentation weight or a small, clean plate.
- Consider Different Kool-Aid Flavors: Don’t limit yourself to just one! Cherry and Grape are classics, but flavors like Blue Raspberry, Green Apple, or Tropical Punch offer unique taste experiences and stunning colors. You can even mix two different flavors for a custom blend.
- Occasional Shaking or Inversion: While not strictly necessary, gently shaking or inverting the jars every day or two can help ensure an even distribution of color and flavor throughout all the pickles.
- Proper Storage: Always store your finished Kool-Aid pickles in the refrigerator. They will last for several weeks, if not months, when properly stored in their colorful brine.
- Taste Test Along the Way: After a few days, feel free to pull out a single pickle, slice it, and taste it. This will give you an idea of how the flavor is developing and whether you want to let them soak longer.
Creative Variations and Serving Suggestions
Once you’ve mastered the basic Kool-Aid pickle recipe, the fun truly begins with customization and discovering new ways to enjoy them. These vibrant snacks are incredibly versatile!
Flavor & Spice Variations:
- Sweet Heat Pickles: For those who love a kick, add a few slices of fresh jalapeño or a pinch of red pepper flakes to the brine along with the Kool-Aid and sugar. The heat will infuse into the pickles, creating a delightful sweet-spicy sensation.
- Garlic & Herb Infusion: Introduce crushed garlic cloves or fresh dill sprigs into the Kool-Aid brine. These aromatics will add another layer of traditional pickle flavor, beautifully complementing the fruity sweetness.
- Citrusy Zest: A squeeze of fresh lemon or lime juice (1-2 tablespoons per jar) can brighten the entire flavor profile, adding a refreshing zing that cuts through the sweetness.
- Different Base Pickles: While dill pickles are standard, don’t hesitate to experiment with other pickled vegetables! Pickled green beans, okra, or even hard-boiled eggs could be interesting candidates for a Kool-Aid bath, though their texture and absorption rates might vary.
- Candy Cane Pickles: For a festive twist, try using peppermint extract along with a red Kool-Aid flavor like Cherry. This creates a truly unexpected, holiday-themed pickle that’s a real conversation starter.
Serving Suggestions:
- The Ultimate Snack: Serve them chilled straight from the jar for a refreshing and unique snack. They’re particularly satisfying on a hot day.
- BBQ & Cookout Star: These pickles are a showstopper at any barbecue or potluck. Their vibrant color makes them an instant hit, and their sweet-tangy profile pairs perfectly with grilled meats, hot dogs, and burgers. Slice them into chips or spears for easy serving.
- Sandwich & Burger Enhancer: Replace your regular pickles on sandwiches, burgers, or hot dogs with Kool-Aid pickles for an unexpected burst of flavor and color. They’re especially good with pulled pork or grilled cheese.
- Charcuterie Board Novelty: Add a pop of color and an intriguing flavor to your next cheese and charcuterie board. They pair surprisingly well with creamy cheeses and cured meats.
- Chopped in Salads: Finely chop Kool-Aid pickles and mix them into potato salad, tuna salad, or chicken salad for a sweet, tangy, and colorful crunch.
- Garnish for Cocktails: For a truly adventurous touch, use a Kool-Aid pickle spear as a garnish for savory cocktails like a Bloody Mary or a unique martini.
- Creative Appetizers: Skewer small pieces of Kool-Aid pickles with cheese cubes and olives for a quick and easy appetizer.
The possibilities are endless once you embrace the creative potential of Kool-Aid pickles. Don’t be afraid to experiment and discover your own favorite combinations and serving methods!
Conclusion: Your Journey to Vibrant Pickle Perfection
Embarking on the journey of making Kool-Aid pickles is an adventure that promises both culinary delight and a visually stunning outcome. What begins as a simple jar of dill pickles transforms into an extraordinary treat, bursting with an unexpected harmony of sweet, tangy, and fruity notes, all wrapped in a dazzling hue. This recipe, popularized by engaging tutorials like the one from Definitely Not Gourmet, proves that delicious and exciting food doesn’t have to be complicated.
With minimal effort, no specialized canning equipment, and just a few days of patient anticipation, you can create a unique snack that will impress friends and family alike. Whether you’re looking to add a playful twist to your next summer gathering, surprise your taste buds with an unconventional flavor combination, or simply enjoy a homemade treat with a vibrant personality, Kool-Aid pickles are the perfect choice. So, grab your favorite Kool-Aid flavor, prepare your pickles, and get ready to experience a whole new world of pickle perfection. Your taste buds (and your Instagram feed) will thank you!