
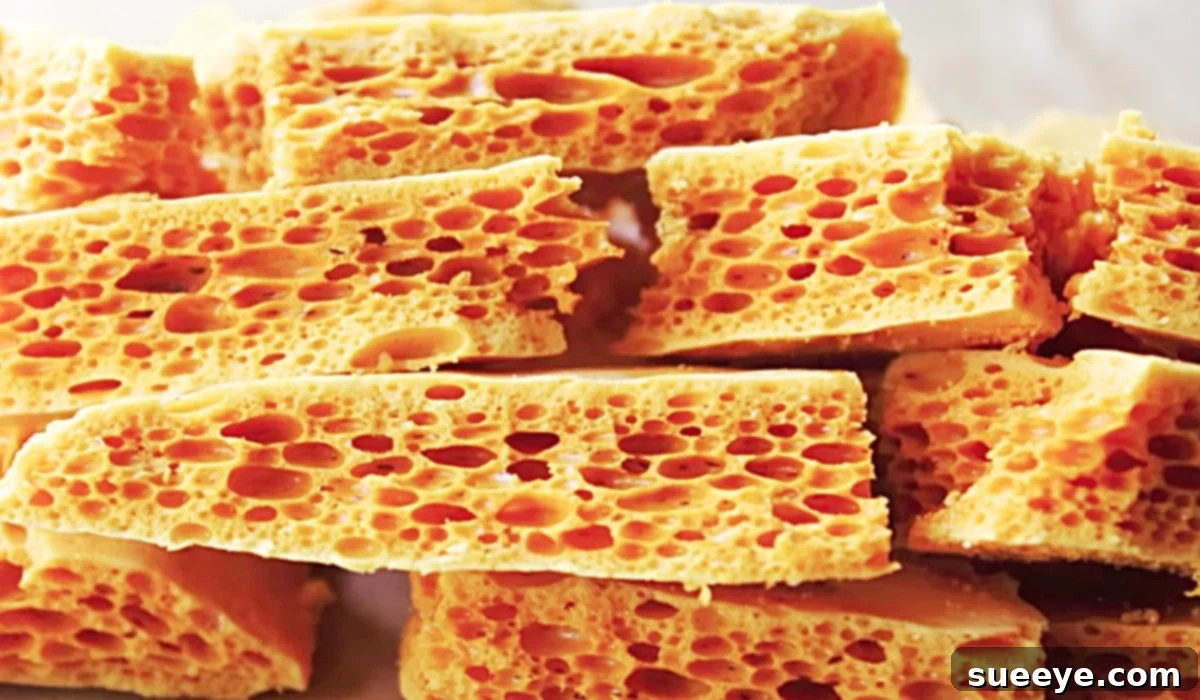
Mastering Old-Fashioned Honeycomb Sponge Candy: A Delicious Journey
There’s an undeniable charm and comforting nostalgia associated with old-fashioned honeycomb candy. Its unique, airy texture, delicate crunch, and sweet, caramelized flavor have made it a beloved treat across generations and cultures. For many, it evokes cherished childhood memories of light, fluffy confections that seemingly melt in your mouth. This delightful sponge candy, known by a myriad of enchanting names such as Hokey Pokey in New Zealand, Cinder Toffee in the UK, Sponge Toffee in Canada, and Sea Foam Candy in parts of the US, is a testament to simple ingredients transforming into something truly magical. Whether you’re rediscovering a childhood favorite or trying it for the first time, this homemade version promises an unforgettable culinary experience.
Inspired by classic preparations, crafting this old-fashioned honeycomb sponge candy at home is a surprisingly simple yet incredibly rewarding endeavor. The process is a beautiful demonstration of basic kitchen chemistry, resulting in a light, bubbly structure that defines this iconic treat. Forget store-bought versions; the satisfaction of creating your own batch, fresh from the kitchen, is unparalleled. Prepare to indulge in every golden, crunchy bite!
What is Honeycomb Candy and Why is It So Special?
Honeycomb candy is a type of brittle sugar candy characterized by its light, porous, and airy texture, resembling a natural honeycomb. This distinctive structure is achieved through a fascinating chemical reaction: when baking soda is added to hot sugar syrup, it decomposes, releasing carbon dioxide gas. These gas bubbles become trapped within the rapidly cooling sugar, creating the signature effervescent appearance and delicate crunch. The moment the baking soda hits the hot syrup, it puffs up dramatically, creating a captivating visual spectacle in your saucepan.
Its appeal extends beyond its unique texture. The flavor profile is a delightful blend of rich caramel notes, often enhanced with a hint of honey or molasses, contributing to its depth and warmth. It’s a versatile candy, enjoyable on its own, or as an inclusion in various desserts, from ice cream toppings to chocolate bar fillings. Its simple yet profound taste makes it a timeless classic that continues to captivate palates worldwide.
The Joy of Homemade: Creating Your Own Old-Fashioned Honeycomb
While readily available in many confectionary shops, making honeycomb candy at home offers several distinct advantages. Firstly, you have complete control over the quality of ingredients, ensuring a fresh and pure taste. Secondly, it’s a wonderfully engaging and educational cooking project, particularly for families, as you witness the dramatic transformation of liquid sugar into a bubbly, solid confection. The process is less intimidating than it might seem, requiring only a few common pantry staples and a little patience. The aroma that fills your kitchen as the sugar caramelizes and the candy expands is an experience in itself, promising a delicious reward. Furthermore, homemade treats make thoughtful and impressive gifts, showcasing your culinary skills and personal touch.
Essential Ingredients For Your Honeycomb Masterpiece:
The beauty of this classic recipe lies in its simplicity, utilizing just a handful of readily available ingredients:
- 1/2 cup of granulated sugar: The foundation of our candy, providing sweetness and the crystalline structure. When heated, it caramelizes, contributing to the distinct flavor.
- 2 tablespoons corn syrup (or Golden Syrup): Crucial for preventing sugar crystallization. It helps create a smooth, glossy syrup that won’t turn grainy, ensuring that signature snap. Golden Syrup offers a slightly richer, more complex flavor.
- 1 tablespoon of honey: Adds a subtle floral note and depth of flavor, complementing the caramelization of the sugar. It also contributes to the syrup’s texture.
- 1 teaspoon of baking soda: The star ingredient responsible for the ‘sponge’ effect. When it reacts with the hot, acidic sugar syrup, it releases carbon dioxide, creating the characteristic airy bubbles.
- 2 tablespoons of water: Used to dissolve the sugar and corn syrup, helping them cook evenly and reach the desired temperature without burning too quickly.
Equipment You’ll Need for Perfect Honeycomb:
Having the right tools on hand will make the candy-making process smoother and more successful. You don’t need highly specialized equipment, but a few key items are essential:
- Heavy-bottomed saucepan: A good quality, heavy-bottomed pan ensures even heat distribution and prevents the sugar from scorching.
- Candy thermometer: Absolutely critical for accuracy. Reaching the precise hard-crack stage (300°F/149°C) is key to the honeycomb’s texture. Don’t eyeball it!
- Parchment paper: Essential for lining your baking dish or sheet. It prevents sticking and makes removal and cleanup incredibly easy.
- Baking dish or sheet: A sturdy, heat-proof dish (about 8×8 inches or similar) or a baking sheet with sides will contain the candy as it expands and cools.
- Whisk or heat-proof spatula: For stirring the initial syrup mixture.
- Clean, dry utensils: Ensure all your tools are completely dry; even a tiny drop of water can cause sugar to crystallize.
Step-by-Step Directions For Crafting Your Honeycomb Candy:
Making honeycomb candy involves careful attention to temperature, but the steps themselves are straightforward. Follow these instructions closely for a perfectly airy and crunchy result:
- Prepare Your Workspace: Before you even start heating the sugar, it’s crucial to have everything ready. Line an 8×8 inch (or similar sized) baking dish or a sturdy baking sheet with parchment paper, allowing an overhang on the sides for easy lifting later. Have your baking soda measured out and ready, as you’ll need to add it quickly. Ensure your candy thermometer is clean and functioning correctly.
- Combine Ingredients: In your heavy-bottomed saucepan, combine the granulated sugar, corn syrup (or Golden Syrup), honey, and water. Stir gently with a whisk or heat-proof spatula until all the sugar is moistened and the ingredients are well mixed. Avoid stirring too vigorously to prevent sugar crystals from forming on the sides of the pan.
- Heat the Syrup: Place the saucepan over medium-high heat. Attach your candy thermometer to the side of the pan, ensuring the tip is submerged in the syrup but not touching the bottom of the pan. Bring the mixture to a boil. Once it starts boiling, resist the urge to stir. Stirring at this stage can introduce sugar crystals, leading to a grainy texture.
- Cook to Hard-Crack Stage: Continue to cook the syrup without stirring. The temperature will steadily rise. You are aiming for the “hard-crack” stage, which is precisely 300°F (149°C). This can take anywhere from 10 to 20 minutes, depending on your stove and pan. Watch the thermometer carefully. The syrup will turn a beautiful amber color as it approaches the correct temperature.
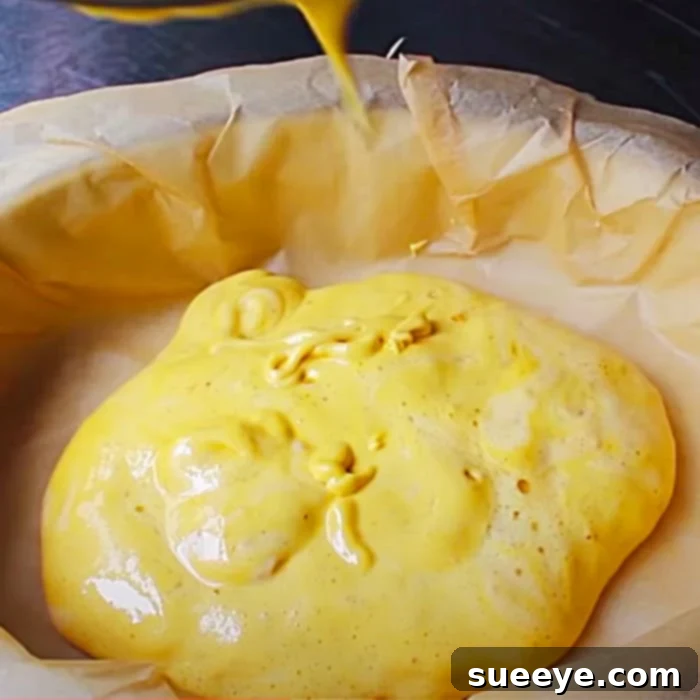
- The Magic Moment: Add Baking Soda: As soon as the thermometer reaches 300°F (149°C), immediately remove the saucepan from the heat. Quickly, yet gently, sprinkle the baking soda evenly over the hot syrup. Immediately begin to stir with your whisk or spatula. You will see an incredible transformation: the syrup will vigorously foam and expand, turning a much lighter, golden color. This is the carbon dioxide being released, creating the signature honeycomb structure. Stir just enough to incorporate the baking soda, about 5-10 seconds – over-stirring can deflate the foam.
- Pour and Set: Without delay, carefully pour the foamy, expanded candy mixture onto your prepared parchment-lined dish or baking sheet. Do not spread it or scrape the sides of the pan; just let it pour out naturally. Trying to spread it will crush the delicate air bubbles you’ve just created.
- Cool Completely: Allow the honeycomb to cool undisturbed at room temperature for at least 1 to 2 hours, or until it is completely hard and cool to the touch. Do not refrigerate or freeze it, as this can introduce moisture and make it sticky.
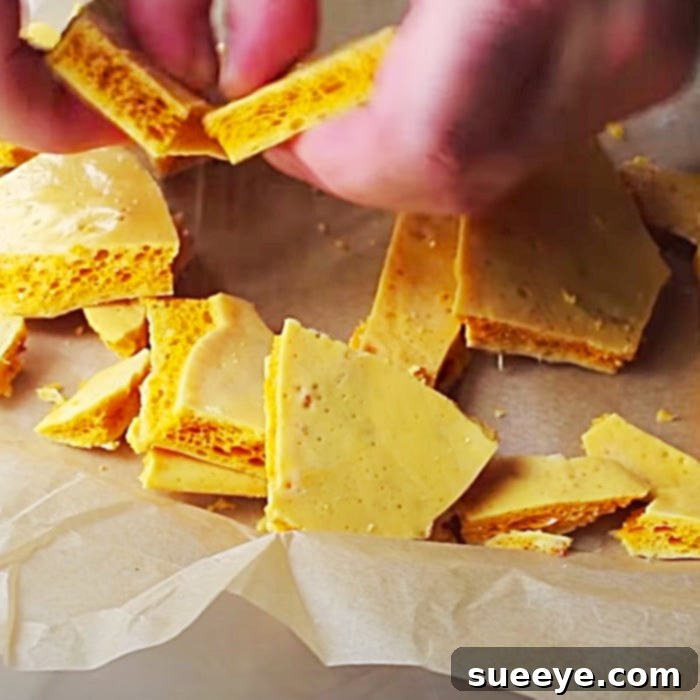
- Break and Enjoy: Once fully cooled and hardened, gently lift the parchment paper to remove the entire slab of honeycomb. Place it on a cutting board and use a heavy knife or your hands to break it into irregular, bite-sized pieces. The satisfying snap and crunch are a clear indicator of success!
Tips for Honeycomb Candy Success:
- Accuracy is Key: A reliable candy thermometer is your best friend. Even a few degrees off can impact the final texture.
- Work Quickly: Once the syrup reaches 300°F and you add the baking soda, move swiftly. The candy sets fast.
- Don’t Stir (Most of the Time): Avoid stirring the syrup once it boils until you add the baking soda. Stirring promotes crystallization.
- Humidity Matters: High humidity can make honeycomb sticky. Choose a dry day if possible.
- Prepare Ahead: Have all your ingredients measured and your pan lined before you start cooking.
- Cleanliness: Ensure your saucepan and utensils are perfectly clean and dry. Any sugar crystals or water can trigger crystallization.
Troubleshooting Common Honeycomb Issues:
- Why didn’t it foam? The baking soda might be old or inactive. Also, if the syrup wasn’t hot enough (300°F), the reaction won’t be sufficient.
- Why is my honeycomb sticky? This usually happens due to high humidity, or if the syrup didn’t reach the full 300°F hard-crack stage. It can also occur if cooled too quickly in the fridge.
- Why is it too hard or grainy? If the syrup was cooked too long past 300°F, it might become too hard or burnt. Graininess indicates crystallization, often from stirring too much or from sugar crystals on the pan’s sides.
Creative Serving Suggestions for Your Homemade Honeycomb:
While delicious on its own, honeycomb candy is incredibly versatile and can be incorporated into many other delightful treats:
- Chocolate Dipped: Melt your favorite chocolate (dark, milk, or white), dip individual honeycomb pieces, and let them set on parchment paper. A sprinkle of sea salt on top before the chocolate hardens adds an exquisite touch.
- Ice Cream Topping: Crumble pieces of honeycomb over vanilla ice cream for an irresistible crunch and flavor contrast.
- Dessert Garnish: Use small pieces to adorn cakes, cupcakes, trifles, or mousses.
- Inclusion in Baked Goods: Fold crushed honeycomb into cookie dough, brownie batter, or even sprinkle on top of a cheesecake before baking (though it might melt slightly).
- Coffee or Hot Chocolate Accent: A small piece of honeycomb melting in a hot beverage adds a wonderful sweetness and caramel note.
Storage Tips to Keep Your Honeycomb Fresh:
To maintain its crispness and prevent stickiness, proper storage is essential. Store your homemade honeycomb candy in an airtight container at room temperature, in a cool, dry place. Avoid storing it in the refrigerator, as the moisture can make it soften and become tacky. When stored correctly, honeycomb can last for up to 1-2 weeks, though its unique texture is best enjoyed within the first few days of making it.
Conclusion: The Sweet Reward of Making Your Own Classic Treat
Embarking on the journey of making old-fashioned honeycomb sponge candy is more than just following a recipe; it’s about recreating a piece of culinary history and experiencing the simple magic of transformation in your kitchen. From the bubbling syrup to the dramatic foam and the final satisfying crunch, every step is a delight. This classic treat, known by many names and loved by all, is a testament to how humble ingredients can yield extraordinary results. So, gather your ingredients, follow these steps, and prepare to enchant your taste buds and those of your family and friends with this truly delicious and unforgettable homemade candy. Happy candy making!