
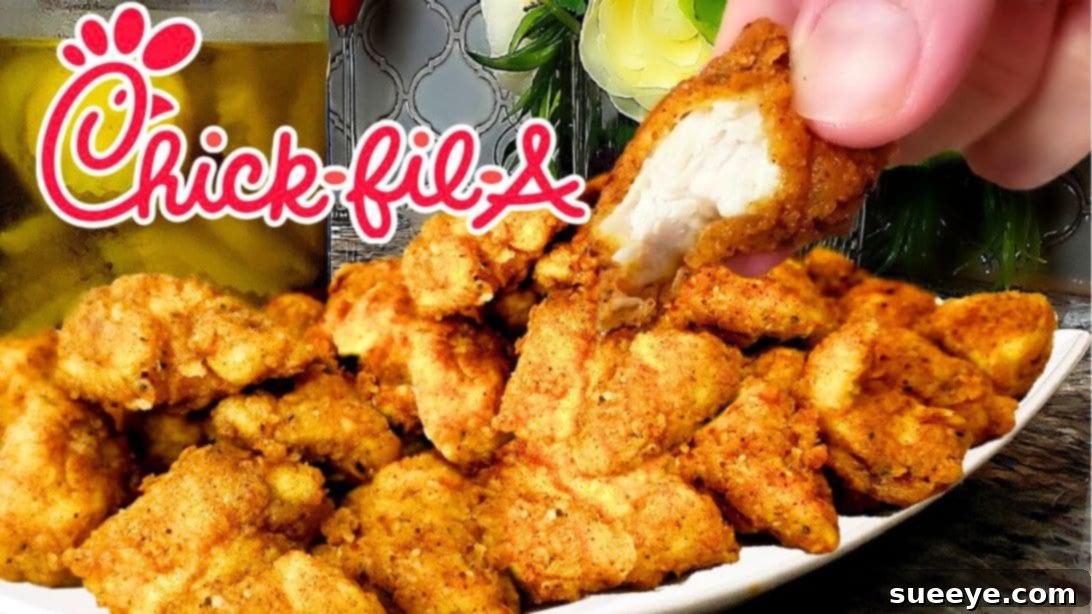
Mastering the Chick-fil-A Nuggets Copycat Recipe: Your Guide to Homemade Perfection
Do you often find yourself dreaming of those perfectly seasoned, tender, and irresistibly crispy Chick-fil-A nuggets? Imagine being able to enjoy them fresh from your own kitchen, any time the craving strikes, without the drive-thru line or delivery fees. Thanks to the culinary genius behind Simply Mamá Cooks, that dream is now a delicious reality. This incredible copycat recipe brings the beloved fast-food classic right to your dining table, allowing you to recreate the magic with simple ingredients and surprising ease.
There’s a unique satisfaction that comes with preparing your favorite comfort foods from scratch. Not only do you get to savor the freshest flavors and textures, but you also have complete control over the quality of ingredients. You can opt for organic chicken, adjust seasoning to your precise preference, and ensure every bite is made with love. Forget about relying on takeout; with this comprehensive guide, you’ll master the art of homemade Chick-fil-A style nuggets that are guaranteed to impress. From the secret pickle brine to the perfectly seasoned double breading, we’ll walk you through every step to ensure your homemade nuggets are just as good, if not better, than the original.
The Secret Unveiled: Achieving Authentic Chick-fil-A Flavor and Crisp
The quest for the perfect copycat recipe often involves uncovering subtle techniques and ingredient combinations that elevate a dish from good to extraordinary. For these Chick-fil-A style nuggets, the magic lies in two fundamental areas: the tenderizing pickle brine and the expertly crafted, double-coated flour dredge. These elements work in perfect harmony to deliver that signature juicy interior and remarkably crispy exterior that millions of fans adore. Understanding the ‘why’ behind each step is key to replicating the authentic taste and texture.
Let’s dive deeper into what makes this recipe truly stand out. The pickle juice marinade is more than just a flavor enhancer; it’s a powerful tenderizing agent. The acidity in the pickle juice works to gently break down muscle fibers in the chicken, resulting in unbelievably moist and tender nuggets that practically melt in your mouth. This initial brining step is absolutely crucial for replicating the succulent texture of the original Chick-fil-A nuggets. Following the brine, the flour dredge is where the bulk of the distinctive Chick-fil-A flavor profile truly comes alive. It’s a masterful blend of savory and aromatic spices, including dry milk powder (a true secret weapon for achieving beautiful browning and adding a profound depth of savory flavor), chicken bouillon powder for an intense umami kick, fragrant onion powder, essential salt, vibrant paprika, zesty lemon pepper, robust black pepper, and just a hint of cayenne for a subtle, warming spice. The synergy of these carefully selected spices creates a complex, irresistible taste that will transport you straight to your favorite fast-food joint.
The technique of double coating is another non-negotiable step for achieving that ultimate, shatteringly crispy exterior. This method creates a robust, multi-layered barrier, not only sealing in the chicken’s natural moisture during frying but also ensuring a delightfully crunchy crust that holds up beautifully. Furthermore, allowing the breaded chicken to rest for a short period before frying is a small but mighty tip that makes a significant difference. This crucial resting time gives the coating an opportunity to hydrate and adhere firmly to the chicken pieces. This prevents the breading from flaking off during cooking and guarantees a consistent, irresistibly crispy finish on every single nugget. This meticulous attention to detail is what transforms a simple chicken nugget into a culinary masterpiece right in your home kitchen.
Perfect Pairings: What to Serve with Your Homemade Nuggets
No nugget experience is complete without the perfect accompaniment. While your homemade Chick-fil-A nuggets will be delicious on their own, pairing them with the right sides and sauces can elevate your meal to a whole new level, turning a simple snack into a memorable feast. To truly complete your fast-food feast, consider whipping up a batch of homemade Air Fryer Chicken Tenders and Copycat Chick-Fil-A Sauce. The homemade sauce is an absolute game-changer and a must-have for an authentic Chick-fil-A experience, perfectly complementing the savory chicken.
If you’re looking for something a bit more indulgent to serve alongside, try these Chicken Loaded Fries With Cheese Sauce as a decadent side dish. The creamy, cheesy goodness would perfectly complement the savory crunch of your homemade nuggets. Other classic and popular side dishes include crispy waffle fries (store-bought or homemade), a fresh and vibrant garden salad for a lighter option, or even a creamy, tangy coleslaw. And, of course, don’t forget an array of diverse dipping sauces – from classic ketchup and creamy ranch to tangy barbecue or a spicy sriracha mayo – to cater to every preference at your table. Offering a variety ensures everyone finds their perfect flavor match.
Homemade Chick-fil-A Nuggets Ingredients: The Building Blocks of Flavor
The beauty of this recipe lies not only in its incredible flavor but also in its use of readily available, simple ingredients. This ensures that you can embark on your nugget-making journey without needing a special trip to obscure grocery stores. Here’s a detailed look at what you’ll need to create these delectable treats, complete with notes on ingredient selection:
For the Chicken & Brine:
- 3/4 to 1 lb of boneless chicken breast: Always opt for high-quality, fresh chicken breast for the best results. For a slightly richer flavor and even juicier texture, some home cooks prefer to use boneless, skinless chicken thighs, though breast meat is the traditional choice for nuggets.
- 1/3 cup of pickle juice: Do not discard that precious pickle jar brine! It’s truly the secret ingredient for tenderizing and imparting that subtle, signature tang that makes these nuggets so authentic. Any dill pickle juice will work wonderfully, so use what you have on hand.
For the Wet Mixture:
- 1 large egg: This acts as a crucial binder, helping the seasoned breading adhere firmly to the chicken pieces. Ensure it’s fresh for optimal binding.
- 1/3 cup of milk: Whole milk typically works best for richness and creating the ideal consistency for the wet dredge. However, any type of milk (dairy or non-dairy alternatives) can be used successfully, offering flexibility for various dietary needs.
For Frying:
- Cooking oil for frying: The choice of oil is important for flavor and proper frying. Select an oil with a high smoke point, such as peanut oil (which is often used in commercial fryers and imparts a subtle, pleasant flavor), canola oil, vegetable oil, or grapeseed oil. You’ll need a generous amount, typically several cups, to adequately deep-fry the nuggets. The exact quantity will depend on the size of your chosen frying pan or Dutch oven.
For the Breading (The Flavor Powerhouse):
- 3/4 cup of all-purpose flour: This forms the essential base for our incredibly crispy coating.
- 1 tablespoon of dry milk powder: This is a true game-changer and a key secret weapon! It contributes significantly to the beautiful golden-brown color of the nuggets and adds a deeper, more savory, almost umami-rich flavor profile.
- 1 1/2 teaspoon of chicken bouillon powder: This ingredient brilliantly enhances the inherent chicken flavor, adding a profound umami depth that is highly characteristic of fast-food style chicken.
- 1 teaspoon of onion powder: Provides a foundational savory aroma and taste that complements the chicken beautifully.
- 1/4 teaspoon of salt: Absolutely essential for proper seasoning, it balances and brings out all the other delightful flavors in the dredge.
- 1 1/2 teaspoon of paprika: Adds a lovely reddish hue for visual appeal and a mild, peppery sweetness to the flavor profile.
- 1/2 teaspoon of lemon pepper: Introduces a bright, zesty note that expertly cuts through the richness of the fried chicken and perfectly complements its savory base.
- 1/4 teaspoon of cracked black pepper: For a classic, pungent peppery kick that every good chicken dish needs.
- 1/8 teaspoon of cayenne pepper: Just a touch is added for a very subtle warmth and depth, without making the nuggets overtly spicy. Feel free to adjust this quantity to your personal preference for a spicier kick if desired!
How to Make Chick-fil-A Nuggets: A Step-by-Step Guide to Perfection
Follow these detailed steps closely to achieve crispy, juicy, and flavor-packed Chick-fil-A style nuggets right in your own kitchen. Precision in each stage will ensure the most authentic and delicious outcome.
Step 1: Prepare and Brine the Chicken for Maximum Tenderness
Begin by preparing your chicken with care. Cut the boneless chicken breast into uniform, bite-sized pieces, aiming for roughly 1 to 1.5 inches in size. Consistency in size is important, as it ensures all pieces cook evenly and at the same rate. Place these chicken pieces into a resealable plastic bag (a gallon-sized bag works well) or a shallow, non-reactive dish. Pour the pickle juice over the chicken, making sure all pieces are thoroughly submerged or well-coated. Seal the bag, pressing out any excess air, or cover the dish tightly with plastic wrap. Refrigerate the chicken for at least one hour to allow the pickle juice to work its tenderizing magic and infuse flavor. You can marinate for up to four hours for maximum tenderization and flavor infusion, but avoid marinating for much longer, as the acidity can eventually start to break down the chicken too much, leading to a mushy texture.
Step 2: Craft the Signature Flavor Dredge
While the chicken is brining in the refrigerator, prepare your essential dry breading mixture. In a medium-sized bowl, combine the all-purpose flour, dry milk powder, chicken bouillon powder, salt, onion powder, paprika, lemon pepper, cracked black pepper, and cayenne pepper. Whisk these ingredients together thoroughly until they are uniformly combined. This step is crucial to ensure that every nugget gets an even distribution of the delicious, complex seasoning blend. Set this bowl aside, ready for coating.
Step 3: Create the Wet Mixture
In a separate, shallow bowl (wide enough to easily dip chicken pieces), crack the large egg and add the milk. Whisk these two ingredients together vigorously until they are well combined and smooth, with no streaks of egg white visible. This homogeneous wet mixture will act as the crucial “glue” or bridge between the chicken and the dry breading, helping it adhere perfectly for a crisp finish.
Step 4: The Secret to that Craggy Texture
Here’s a fantastic trick for achieving that classic craggy, uneven texture similar to restaurant-style nuggets: add a few drops (about 1-2 teaspoons) of the prepared egg-milk mixture directly into your dry flour dredge. Use a fork or your fingertips to gently mix it into the flour, creating small, pea-sized clumps. Do not overmix; you want distinct clumps. These small flour clumps will stick to the chicken during the coating process, forming those desirable nooks and crannies that fry up extra crispy and appealing.
Step 5: Master the Double-Coating Technique
Remove the brined chicken from the refrigerator and drain off any excess pickle brine. It’s important not to rinse the chicken, as you want to retain that pickle flavor. Working in small batches to avoid overcrowding, take each chicken piece and first dip it into the egg-milk mixture, ensuring it’s fully coated. Allow any excess liquid to drip off briefly. Then, transfer the wet chicken piece into the prepared dry flour dredge. Toss and press gently to coat completely, ensuring every surface is covered. For that extra crispy, signature Chick-fil-A coating, repeat this process: dip the already flour-coated chicken back into the egg-milk mixture, let excess drip, and then return it to the dry dredge for a second, thorough coating. Once double-coated, place the chicken pieces in a single layer on a baking tray lined with parchment paper. This separation prevents them from sticking together. Allow the coated chicken to rest uncovered at room temperature for at least 10 minutes (up to 20 minutes is ideal). This crucial resting period allows the breading to hydrate and adhere firmly to the chicken, preventing it from flaking off during frying and ensuring a truly crispy, golden crust.
Step 6: Achieve Golden Perfection Through Frying
Pour a generous amount of your chosen cooking oil into a heavy-bottomed pan, a deep skillet, or a Dutch oven, ensuring there’s at least 2-3 inches of oil for proper deep frying. Heat the oil over medium-high heat until it reaches a precise temperature of 350°F (175°C). An instant-read thermometer is highly recommended for accuracy, as maintaining the correct oil temperature is vital for crispy, non-greasy nuggets. If you don’t have one, you can test the oil readiness by inserting the end of a wooden spoon or chopstick into the hot oil; if small bubbles vigorously form around the wood, your oil is ready for frying. Carefully add the coated chicken nuggets to the hot oil, working in small batches. It’s absolutely essential not to overcrowd the pan, as this will drastically lower the oil temperature, leading to greasy, soggy nuggets instead of perfectly crispy ones. Cook the nuggets for 3 to 5 minutes, flipping them occasionally to ensure even browning, until they are beautifully golden brown, wonderfully crispy, and cooked through to a safe internal temperature. The exact cooking time will vary depending on the thickness of your chicken pieces and the consistency of your oil temperature. Always ensure the internal temperature of the chicken reaches 165°F (74°C) using a meat thermometer for optimal food safety and doneness.
Step 7: Drain, Serve, and Savor Your Homemade Masterpiece
Once the nuggets are beautifully golden and thoroughly cooked, carefully remove them from the hot oil using a slotted spoon or a spider strainer. Immediately transfer them onto a wire rack that has been placed over a baking sheet lined with paper towels. This setup is crucial, as it allows any excess oil to drain away from all sides, preventing the bottom of the nuggets from becoming soggy and ensuring they retain their delightful crispiness. Serve your freshly cooked homemade Chick-fil-A nuggets warm with your favorite dipping sauces. The classic Chick-fil-A sauce (especially if you made it homemade!), honey mustard, ranch, or barbecue sauce are all excellent choices. Don’t forget those essential side dishes to complete your meal and truly create a restaurant-quality experience at home. Get ready to enjoy the immense satisfaction of creating incredible fast food right in your own home!
Your Ultimate Chick-fil-A Nuggets Copycat Recipe at Home
Congratulations! You’ve successfully navigated the path to creating mouthwatering Chick-fil-A nuggets from scratch. This Simply Mamá Cooks copycat recipe is not just about making food; it’s about bringing joy, convenience, and a touch of that beloved fast-food experience directly into your home kitchen. With a little effort, a few simple ingredients, and these detailed instructions, you can now enjoy these crispy, tender, and perfectly seasoned chicken bites whenever your heart desires. Share them with family and friends for a fun meal, or keep them all to yourself for a well-deserved treat – we won’t tell! Get ready to make this fantastic recipe a cherished staple in your home cooking repertoire, proving once and for all that the best fast food can indeed be homemade, healthier, and incredibly satisfying.