
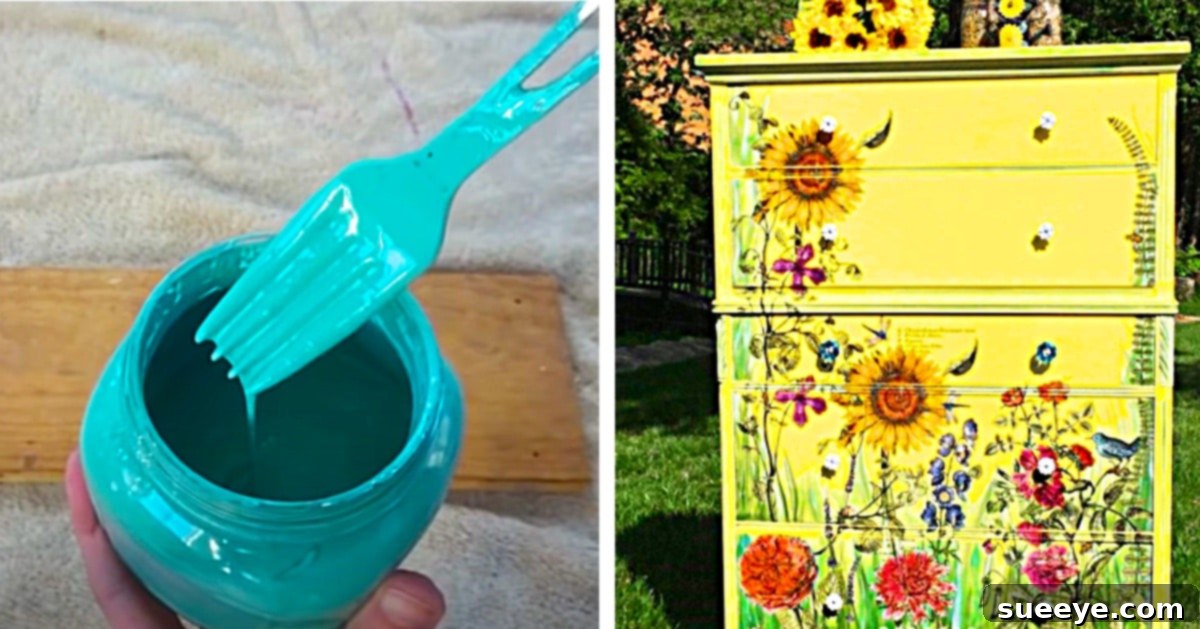
There’s a special kind of magic that happens when a piece of tired, old furniture is given a new lease on life with a fresh coat of paint. But not just any paint – we’re talking about chalk paint. This unique medium has taken the DIY world by storm, offering an effortless way to achieve stunning, professional-looking finishes that range from rustic farmhouse to elegant shabby chic. My personal journey into the enchanting world of chalk paint began during a visit to a friend’s house in Dallas. Her home, once adorned with beautiful yet somewhat dark and heavy traditional mahogany furniture, had undergone an incredible transformation. Every piece, from dressers to dining chairs, now boasted a custom, hand-painted look that felt light, airy, and utterly contemporary. It was a true farmhouse effect, vibrant and full of character, and I was instantly captivated.
How To Make Chalk Paint: Your Ultimate Guide to Affordable Furniture Transformation
The secret to my friend’s stunning home makeover was Annie Sloan chalk paint. Known for its exceptional quality and beautiful matte finish, Annie Sloan is widely regarded as the benchmark for chalk paint. However, its premium quality often comes with a premium price tag, and finding specific colors or retailers can sometimes be a challenge. Inspired by her results but mindful of the cost, I embarked on a quest to find a more accessible alternative. My search led me down a rabbit hole of online tutorials, and it was on YouTube that I discovered a fantastic tutorial by Mr. DIY Dork. This video proved to be a game-changer, demonstrating exactly how to create high-quality chalk paint at home using readily available materials. The process, I soon learned, was far simpler and more rewarding than I could have imagined.
Unlocking the Secret: What Makes Chalk Paint So Special?
Chalk paint isn’t just another type of paint; it’s a versatile medium celebrated for its distinctive properties. Unlike traditional latex or oil-based paints, chalk paint requires minimal surface preparation – often no sanding or priming is needed, making it a favorite among busy DIY enthusiasts. Its ultra-matte finish lends itself perfectly to distressing techniques, allowing you to easily create that coveted aged, antique, or farmhouse look. It adheres beautifully to almost any surface, including wood, metal, laminate, and even fabric, opening up a world of creative possibilities for furniture, cabinetry, and home decor. The thick, creamy consistency of chalk paint provides excellent coverage, often requiring fewer coats than conventional paints, and it dries quickly, allowing you to complete projects in a shorter timeframe.
The Allure of Annie Sloan: A Premium Experience
Annie Sloan, the originator of chalk paint, developed her signature product in 1990, revolutionizing the way people approached furniture painting. Her paint is renowned for its rich pigment, ease of use, and a timeless color palette. It’s designed to be incredibly forgiving, allowing for various painting styles, from smooth modern finishes to heavily distressed vintage looks. While the results are undeniably beautiful and the paint itself is a joy to work with, the cost can accumulate quickly, especially for larger projects or if you’re experimenting with multiple colors. This is precisely why discovering an effective DIY chalk paint recipe became such an exciting prospect – it allows you to achieve a very similar aesthetic and workability without breaking the bank, empowering you to tackle numerous furniture transformations with confidence.
Embrace Your Inner DIYer: Crafting Your Own Chalk Paint
Creating your own chalk paint offers several compelling advantages beyond just cost savings. It gives you complete control over your color palette. By starting with any shade of flat or eggshell latex paint, you can customize your chalk paint to perfectly match your home decor or vision. This eliminates the frustration of searching for a specific pre-mixed color that might not exist or be easily accessible. Furthermore, the satisfaction of transforming a piece of furniture with paint you’ve made yourself is immeasurable. The recipe I found and perfected is incredibly straightforward, utilizing common household materials that are both affordable and easy to source. This method truly democratizes furniture restoration, making it accessible to anyone with a creative spirit and a desire to upcycle.
The Science Behind the Smooth Finish: Plaster of Paris vs. Other Additives
There are several methods for making DIY chalk paint, often involving different additives like calcium carbonate, baking soda, or grout. However, the Plaster of Paris method stands out for its superior smoothness and durability. Plaster of Paris, a fine white powder made from gypsum, reacts with water to form a hard, stable compound. When mixed with latex paint, it creates a unique texture that mimics commercial chalk paint’s characteristic matte finish and excellent adhesion. It helps the paint bond more effectively to various surfaces and contributes to that signature slightly textured, yet smooth, feel that makes chalk paint so distinctive. This particular recipe ensures a paint that not only looks great but is also robust enough to withstand the test of time, especially when properly sealed.
Essential Materials for Your Homemade Chalk Paint Project
Gathering your materials is the first step towards your furniture transformation journey. You’ll be surprised how simple the list is, making this a truly accessible DIY project.
- 1 Part Plaster of Paris: This is the key ingredient that gives your paint its chalky finish and excellent adhesion. Ensure you use standard Plaster of Paris, readily available at most hardware stores or craft shops. It’s a fine powder, so handle it carefully to avoid inhaling dust.
- 3 Parts Flat (or Eggshell) Acrylic Latex Paint: The choice of your base paint is crucial. Flat latex paint will give you the most traditional, matte chalk paint finish. Eggshell can also work if you prefer a slightly softer sheen, but avoid anything with a higher gloss as it might affect the final chalky texture and adhesion. Acrylic latex paints are water-based, making cleanup easy. Pick any color you desire – this is where your creativity truly shines!
- Mixing Tools: You’ll need a container for mixing (an old plastic container or bucket works well) and a stirring utensil. A fork is perfectly adequate for smaller batches, but for larger quantities, an old immersion blender dedicated solely to paint mixing can ensure a perfectly smooth, lump-free consistency. Having a dedicated blender prevents cross-contamination with food items. A measuring cup is also essential for maintaining the correct ratio.
Step-by-Step Guide: Crafting Your Perfect Batch of Chalk Paint
Follow these detailed steps to create a beautiful, smooth batch of homemade chalk paint ready for your next project. Remember, precision in measurement and thorough mixing are key to achieving the best results.
Step 1: Preparing the Plaster of Paris Slurry – The Foundation
The first critical step is to create a smooth Plaster of Paris slurry. This prevents lumps from forming when you mix it into your latex paint. Start by taking your “1 part” measurement of Plaster of Paris and place it into a separate mixing container. Gradually add a small amount of water – roughly half a part of water for your one part of Plaster of Paris, or enough to create a thick, pourable paste. Stir vigorously with a fork or a small whisk until all the powder is fully dissolved and you have a completely smooth, lump-free consistency similar to a thin pancake batter. It’s essential that this slurry is perfectly smooth before proceeding, as any undissolved plaster will create gritty bits in your final paint. Take your time with this step to ensure optimal results. If using an immersion blender, a quick pulse can achieve this smoothness in seconds.
Step 2: Combining Ingredients for a Smooth, Creamy Consistency
Now that your Plaster of Paris slurry is ready, it’s time to introduce it to your latex paint. Measure out your “3 parts” of flat or eggshell acrylic latex paint and pour it into a larger mixing container. Slowly, and while stirring continuously, pour the Plaster of Paris slurry into the latex paint. Stir thoroughly for several minutes until the paint and slurry are fully combined and the mixture is uniform. If you’re using an immersion blender, carefully blend the mixture until it reaches a silky-smooth, creamy consistency, ensuring no streaks or pockets of unmixed ingredients remain. The ideal consistency should be similar to a slightly thick milkshake – thick enough to provide good coverage, but thin enough to flow smoothly off your brush. If the paint feels too thick, you can add a tiny amount of water (a tablespoon at a time) and mix again until you achieve your desired workability. Once mixed, your homemade chalk paint is ready to use immediately!
Beyond the Paint: Mastering the Art of Chalk Paint Application and Finishing
Making the paint is just the beginning! Achieving a truly transformative finish requires understanding a few key application and finishing techniques. The beauty of chalk paint lies in its versatility, allowing for a wide range of looks from perfectly smooth and modern to delightfully distressed and vintage. Much like the Mr. DIY Dork tutorial expertly demonstrates, proper application and sealing are crucial for long-lasting results.
Surface Preparation: Getting Your Furniture Ready
One of the most appealing aspects of chalk paint is its minimal need for prep work. For most projects, you won’t need to sand down to bare wood or prime extensively. However, a clean surface is always paramount. Start by thoroughly cleaning your furniture piece to remove any dirt, grease, or grime. A simple wipe-down with a degreaser or a mild soap and water solution followed by a clean water rinse and complete drying is usually sufficient. If your piece has a particularly glossy finish, a light scuff sanding can help the chalk paint adhere even better, though it’s often not strictly necessary. For pieces with significant damage, loose veneer, or peeling paint, address these issues before painting to ensure a smooth canvas.
Painting Techniques: Achieving Desired Effects
Chalk paint applies beautifully with a good quality brush, roller, or even a spray gun. For most furniture projects, a natural bristle brush will give you the best results, creating subtle brushstrokes that add to the paint’s character. Apply paint in thin, even coats. Chalk paint dries quickly, so you can often apply a second coat within an hour or two. For a smooth, contemporary finish, apply two to three thin coats, allowing each to dry completely, and lightly sand with a fine-grit sandpaper (around 220-grit) between coats. For a distressed, antique look, apply a coat, let it dry, then strategically sand through the top layer to reveal the original finish (or a previously painted layer) underneath. Experiment with different brush strokes – some prefer long, even strokes, while others like a more textured, haphazard approach. Always remember to paint in the direction of the wood grain where applicable.
Sealing Your Masterpiece: Protection and Durability
Once your chalk-painted piece is completely dry and you’ve achieved your desired look, sealing it is a crucial step to protect the finish and ensure durability, especially for high-traffic items. There are two primary types of sealants commonly used with chalk paint: wax and polycrylic.
- Clear Wax: Furniture wax is the traditional choice for chalk paint. It deepens the color, provides a soft sheen, and offers good protection. Apply wax with a lint-free cloth or a waxing brush, working in small sections. Buff off any excess immediately with a clean cloth. For extra durability, especially on tabletops, apply two or three thin coats, allowing each to cure for at least 24 hours before adding the next. Wax provides a beautiful, natural-looking finish, but it does require reapplication every few years depending on use.
- Polycrylic (Water-Based Polyurethane): For maximum durability and water resistance, particularly on kitchen cabinets, dining tables, or children’s furniture, a water-based polycrylic (like Minwax Polycrylic) is an excellent choice. It dries clear, won’t yellow over time, and offers a harder, more protective finish than wax. Apply polycrylic in thin coats using a good quality brush, foam roller, or sprayer. Typically, two to three coats are recommended, with light sanding between coats for the smoothest finish. Allow adequate drying time between coats as per product instructions.
Transform Your Home: Inspiring Projects with DIY Chalk Paint
The possibilities with homemade chalk paint are virtually endless. Once you’ve mastered the technique, you’ll start seeing potential in every piece of forgotten furniture or outdated decor. Here are just a few ideas to spark your imagination:
- Dressers and Nightstands: Give old bedroom furniture a modern farmhouse or vintage chic makeover. Add new hardware for a complete transformation.
- Dining Chairs and Tables: Revitalize your dining area with a cohesive look. Chalk paint allows you to easily paint chairs that might have intricate details.
- Picture Frames and Decor: Instantly update existing frames, vases, candle holders, or even old ceramic pots with a fresh, chalk-painted finish.
- Kitchen and Bathroom Cabinets: A major kitchen or bathroom refresh can be achieved at a fraction of the cost of replacement by simply painting your cabinets with durable, sealed DIY chalk paint.
- Bookcases and Shelves: Turn utilitarian storage into stylish display pieces that complement your home’s aesthetic.
- Entryway Benches and Consoles: Create a welcoming first impression with a personalized and beautifully painted entryway piece.
The Joy of DIY: Unleash Your Creativity with Homemade Chalk Paint
Making your own chalk paint is more than just a cost-saving measure; it’s an empowering act of creativity. It opens up a world of design possibilities, allowing you to personalize your home with unique, hand-finished pieces that reflect your style. From transforming dark, heavy furniture into light and airy statements, just like my friend did, to breathing new life into thrift store finds, the power of DIY chalk paint is truly remarkable. With readily available materials and a simple, step-by-step process, you can achieve professional-looking results that will impress everyone. So, gather your materials, choose your favorite paint color, and embark on your next furniture transformation project. The satisfaction of creating something beautiful with your own hands is an unparalleled reward. Happy painting!