
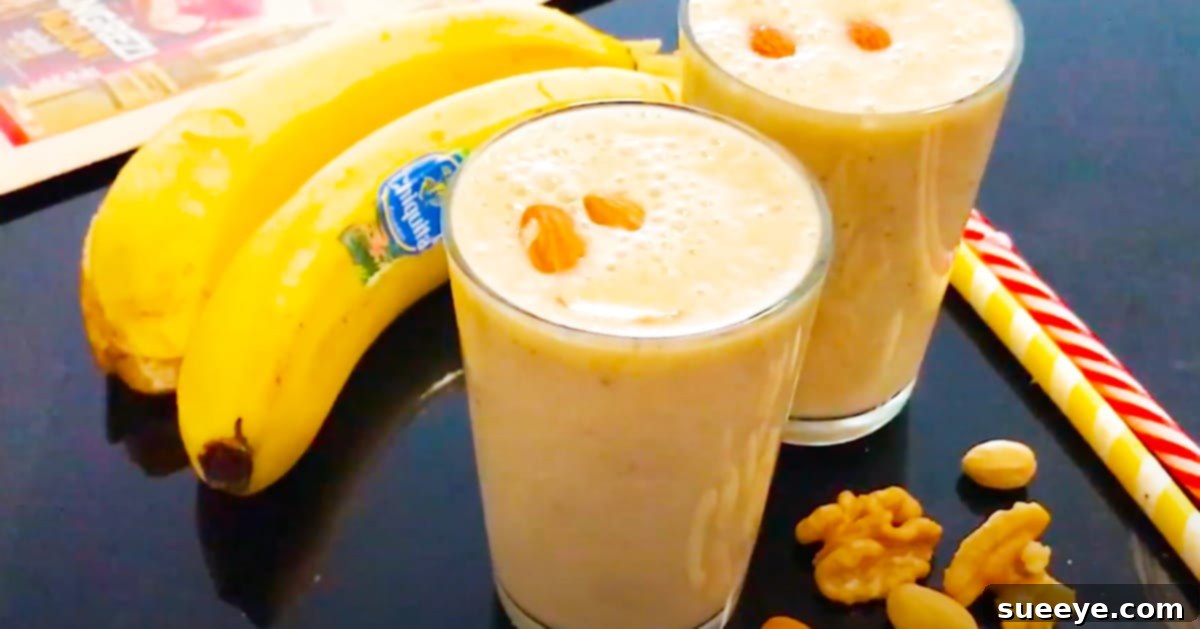
There’s a special kind of satisfaction that comes with creating something delicious and wholesome right in your own kitchen. And when it comes to quick, satisfying treats, a homemade banana milkshake truly stands out. Bananas, with their natural sweetness and creamy texture, are incredibly versatile, especially when they reach that perfectly ripe stage – a condition often seen as a race against time before they become too soft. While overripe bananas are excellent for baking delightful banana bread or muffins, they truly shine in a refreshing, easy-to-make milkshake.
This guide, inspired by the simplicity championed by Tasty Appetite, will walk you through crafting a simple yet incredibly flavorful banana milkshake. Milkshakes are perhaps one of the most straightforward and cost-effective delights you can prepare at home. The process is wonderfully uncomplicated: gather your ingredients, toss them into a blender, and within moments, you’re rewarded with a luscious beverage. While a classic banana-only smoothie has its charm, the real magic often happens when you start experimenting with various fruits and spices to create your signature blend. For instance, the timeless strawberry-banana combination remains a crowd-pleaser, offering a vibrant burst of flavor. Whether you opt for fresh, perfectly ripe fruits or prefer to freeze them for an extra-cold, thick, and creamy milkshake, the possibilities for customization are endless.
Beyond its delightful taste, making your own milkshake provides an unmatched sense of control over the ingredients. You can adjust the sweetness, choose your preferred milk, and load it up with beneficial add-ins, transforming a simple treat into a powerhouse of nutrition. Let’s delve into the art of creating a perfect homemade banana milkshake, ensuring it’s not just delicious, but also tailored precisely to your preferences.
The Irresistible Appeal of Homemade Milkshakes
In a world often driven by convenience, the allure of store-bought beverages is strong. However, homemade milkshakes offer a compelling array of benefits that extend far beyond just taste. Embracing the ‘do-it-yourself’ approach to your favorite frosty treat can lead to significant advantages for your health, your wallet, and your taste buds.
- Unmatched Freshness and Quality Control: When you prepare a milkshake at home, you have complete authority over every ingredient. This means selecting the freshest fruits, choosing organic options if you prefer, and avoiding artificial flavors, preservatives, or excessive added sugars often found in commercially prepared versions. You know exactly what’s going into your body.
- Significant Cost Savings: A single store-bought smoothie or milkshake can often cost as much as, or even more than, the ingredients for several homemade servings. By making your own, especially when using fruits that are in season or on sale, you can enjoy this refreshing treat much more frequently without breaking the bank.
- Customization for Dietary Needs and Preferences: Whether you’re lactose intolerant, vegan, watching your sugar intake, or have specific allergies, homemade milkshakes are incredibly adaptable. You can easily swap dairy milk for plant-based alternatives like almond, oat, or soy milk. Natural sweeteners like honey or dates can replace refined sugar, and you can boost protein with powders or healthy fats with nuts and seeds.
- Nutritional Powerhouse: Depending on your ingredient choices, a homemade milkshake can be a fantastic way to pack in essential vitamins, minerals, fiber, and protein. Ripe bananas provide potassium and natural energy, while milk offers calcium. Adding nuts, seeds, or even a handful of spinach can elevate its nutritional profile, making it a wholesome breakfast, snack, or post-workout refuel.
- Fun for All Ages: Making milkshakes is an engaging and enjoyable activity, perfect for getting kids involved in the kitchen. It’s a simple process that yields immediate, delicious results, fostering a positive relationship with healthy eating and cooking.
- Quick and Convenient: Despite being “homemade,” the preparation time for a milkshake is minimal. From gathering ingredients to blending and serving, you can have a delicious drink ready in under five minutes, making it ideal for busy mornings or an instant pick-me-up.
Choosing to blend your own milkshake is more than just a culinary decision; it’s a step towards healthier eating habits, greater financial wisdom, and a personalized gastronomic experience.
Unlocking the Potential of Ripe Bananas
The secret to an exceptional banana milkshake lies in the ripeness of your bananas. While green bananas are often favored for their firmness and lower sugar content, it’s the mottled, spotty yellow banana that truly transforms a simple blend into a creamy, naturally sweet delight. Here’s why ripe bananas are your best friend for this recipe:
- Natural Sweetness: As bananas ripen, their starches convert into sugars, resulting in an intensified sweetness. This natural sugary boost means you’ll need less, if any, added sugar, making your milkshake healthier and more flavorful.
- Creamy Texture: Ripe bananas are softer and contain more moisture, which contributes to an incredibly smooth and luxurious consistency when blended. They effortlessly create a thick, velvety texture that’s hard to achieve with firmer, less ripe fruit.
- Enhanced Flavor Profile: The ripening process not only sweetens the banana but also deepens its flavor, adding more aromatic notes that complement other ingredients beautifully.
Tips for Perfect Banana Ripeness:
- Spotting the Ideal Banana: Look for bananas with plenty of brown spots on their skin. The more spots, the sweeter and softer they’ll be. Avoid bananas that are entirely black or mushy, as their flavor can become too intense or fermented.
- Speeding Up Ripening: If your bananas are still green, you can accelerate ripening by placing them in a paper bag with an apple or tomato. The ethylene gas released by these fruits will encourage the bananas to ripen faster.
- Freezing Ripe Bananas: To ensure you always have ripe bananas on hand for milkshakes, peel them, chop them into 1-inch pieces, and freeze them in an airtight container or freezer bag. Frozen banana pieces will make your milkshake extra cold and thick, eliminating the need for much ice, which can sometimes dilute the flavor.
Embracing the ripe banana is the first and most crucial step toward a truly outstanding homemade milkshake experience.
Ingredients for the Ultimate Banana Milkshake:
Crafting the perfect banana milkshake requires a thoughtful selection of ingredients, each playing a crucial role in achieving that ideal balance of flavor, sweetness, and creaminess. Our recipe calls for a blend that goes beyond the basic, introducing aromatic spices and wholesome nuts to elevate the experience.
- 2-3 Ripe Bananas: As discussed, ripeness is key! These provide the primary flavor, natural sweetness, and a thick, creamy base. Adjust the quantity based on your desired banana intensity and thickness.
- 300ml Whole Milk: The liquid base for our milkshake. Whole milk contributes to a richer, creamier texture and provides essential calcium and vitamins. For those with dietary restrictions or preferences, feel free to substitute with almond milk, oat milk, soy milk, or coconut milk for a delicious alternative. Each plant-based milk will impart its unique subtle flavor.
- 2-3 tsp Raw Sugar: This is an optional ingredient, primarily for those who prefer an extra layer of sweetness or if your bananas aren’t quite as ripe as desired. Raw sugar offers a slightly less refined sweetness compared to white granulated sugar. You can substitute with honey, maple syrup, agave nectar, or even a few pitted dates for natural sweetness. Adjust to taste.
- 1/4 tsp Cardamom Powder: This spice is a game-changer, adding an exquisite, aromatic, and slightly floral note that beautifully complements the sweetness of the banana. Cardamom is widely used in many traditional desserts and beverages, especially in South Asian cuisine, for its warming and invigorating properties. Don’t skip it if you’re looking for an elevated flavor profile.
- 1/4 tsp Cinnamon Powder: A classic pairing with banana, cinnamon adds a comforting warmth and a subtle spicy sweetness that deepens the overall flavor of the milkshake. It’s known for its antioxidant properties and its ability to enhance sweetness naturally.
- 1 Ice Cube: While optional if using frozen bananas, an ice cube helps to chill the milkshake and can contribute to a slightly thicker consistency without diluting the flavor too much. For an even colder, thicker shake, consider using 2-3 ice cubes or pre-chilled milk.
- 1/2 cup Cashews, Almonds, and Walnuts: This is where our milkshake takes an unexpected, yet delightful, turn! I must admit, I hadn’t often considered adding nuts to my smoothies or milkshakes, but this combination is truly inspired. Nuts not only introduce a fantastic source of healthy fats, protein, and fiber, but they also contribute to an incredibly rich and decadent creamy texture. The blend of cashews (buttery), almonds (nutty), and walnuts (earthy) adds a complex flavor dimension that makes this milkshake uniquely satisfying and nutritious.
Crafting Your Perfect Banana Milkshake: Step-by-Step
Creating this delicious and wholesome banana milkshake is incredibly simple. Follow these detailed steps to ensure a perfect blend every time:
Step 1: Prioritize Ripe Bananas for Natural Sweetness
First and foremost, the foundation of an outstanding banana milkshake begins with selecting the right bananas. You want to choose bananas that are perfectly ripe, indicated by numerous brown spots on their yellow skin. These naturally sweet and soft bananas are crucial because they impart a rich, authentic sweetness to your smoothie, reducing the need for excessive added sugars. If your bananas aren’t quite ripe enough, their starchier texture will make for a less creamy shake, and the flavor won’t be as profound. For an even colder and thicker milkshake, consider using pre-sliced and frozen ripe bananas instead of fresh ones. This also eliminates the need for too much ice, which can sometimes dilute the flavor.
Step 2: Combine All Ingredients in the Blender
Once your bananas are ready (peeled and broken into chunks if fresh, or pre-frozen), it’s time to assemble your milkshake. Carefully place all the ingredients into your blender. For optimal blending and to prevent your blender from struggling, it’s generally a good practice to add liquids first, followed by softer ingredients, and then the harder ones like ice and nuts. So, start with the whole milk, then add your ripe banana pieces, followed by the raw sugar (if using), cardamom powder, cinnamon powder, the ice cube, and finally, your medley of cashews, almonds, and walnuts.
Step 3: Blend Until Smooth and Creamy
Secure the lid on your blender and start blending. Begin at a low speed to incorporate the ingredients, then gradually increase to a high speed. Blend until the mixture is completely smooth and creamy, with no visible chunks of banana or nuts. This might take anywhere from 30 seconds to a minute, depending on the power of your blender. If the mixture seems too thick, you can add a splash more milk. If it’s too thin, a few more frozen banana pieces or an extra ice cube can help. For an even more luxurious texture, blend for an additional 10-15 seconds after it appears smooth.
Step 4: Taste, Adjust, and Serve Immediately
Once blended, taste your milkshake. This is your chance to make any final adjustments. If you prefer it sweeter, add a little more sugar, honey, or a few dates and blend again briefly. If the spice flavors aren’t pronounced enough for your liking, add another tiny pinch of cardamom or cinnamon. Pour your freshly made banana milkshake into a tall glass. For an extra touch of indulgence, you can garnish it with a slice of fresh banana, a sprinkle of cinnamon, a dollop of whipped cream, or even some chopped nuts. Serve immediately to enjoy its optimal temperature and texture.
Beyond the Basic: Customizing Your Perfect Banana Milkshake
The beauty of a homemade milkshake lies in its adaptability. While our recipe provides a fantastic base, don’t hesitate to experiment and make it truly your own. Here are some ideas to inspire your culinary creativity:
- Fruitful Additions:
- Strawberry: The classic pairing. Adds a tart-sweet note and a beautiful pink hue.
- Mango: For a tropical twist, offering a luscious sweetness and vibrant color.
- Pineapple: Adds a zesty tang that brightens the milkshake.
- Mixed Berries: Blueberries, raspberries, or blackberries introduce antioxidants and a delightful tartness.
- Flavor Boosters:
- Vanilla Extract: A splash enhances the overall sweetness and aroma.
- Cocoa Powder or Chocolate Syrup: Transform it into a banana-chocolate dream.
- Peanut Butter or Almond Butter: For a protein-packed, nutty, and even creamier consistency.
- Coffee or Espresso Shot: A “dirty banana milkshake” for a morning kick.
- Matcha Powder: For an earthy green tea flavor and an energy boost.
- Nutritional Power-Ups:
- Chia Seeds or Flax Seeds: Boost fiber and omega-3s. Remember to let them soak briefly if you want to avoid a slightly gritty texture.
- Protein Powder: Ideal for a post-workout recovery drink. Choose your favorite flavor (vanilla or unflavored work best).
- Spinach or Kale: A handful of leafy greens can add a nutritional punch without significantly altering the taste, especially with the strong banana flavor.
- Oats: A tablespoon or two of rolled oats can add fiber and make the milkshake more filling, perfect for breakfast.
- Spice it Up:
- Nutmeg: A pinch offers a warm, earthy complement, especially good if you enjoy a more “eggnog-like” spice profile.
- Ginger: A tiny piece of fresh ginger can add a subtle zing and digestive benefits.
- Alternative Sweeteners:
- If avoiding refined sugar, dates, honey, maple syrup, or stevia are excellent natural choices. Adjust to your desired level of sweetness.
- Dairy-Free Options:
- For a vegan or lactose-free version, easily swap whole milk for almond milk, oat milk, soy milk, or coconut milk. Each offers a slightly different flavor profile and creaminess.
The inclusion of nuts like cashews, almonds, and walnuts in this recipe was a revelation for me. I’ve always enjoyed smoothies but had never considered the textural and flavor depth that nuts could bring. They create an incredibly satisfying richness and an extra layer of healthy fats and protein, making this milkshake not just a treat, but a substantial and nourishing meal replacement or snack. I highly encourage you to give this unique nutty addition a shot – you might just discover your new favorite milkshake ingredient!
Conclusion: Your Journey to the Perfect Homemade Banana Milkshake
There you have it – a comprehensive guide to crafting a delicious, healthy, and incredibly versatile homemade banana milkshake. From understanding the crucial role of ripe bananas to exploring a spectrum of flavor and nutritional enhancements, you’re now equipped with the knowledge to create a truly exceptional beverage in your own kitchen.
Embracing the simplicity of this recipe allows you to take control of your ingredients, tailor it to your dietary needs, and save money, all while enjoying a refreshment that rivals any store-bought alternative. The inclusion of aromatic spices like cardamom and cinnamon, alongside the surprising richness of cashews, almonds, and walnuts, elevates this milkshake from a simple treat to a gourmet experience that is both nourishing and deeply satisfying.
So, the next time you find your bananas ripening faster than you can eat them, don’t reach for the bread pan just yet. Instead, pull out your blender and embark on a delightful culinary adventure. Experiment with different fruits, nuts, seeds, and spices. Discover your own perfect blend and savor the joy of a homemade creation. This banana milkshake isn’t just a recipe; it’s an invitation to explore, customize, and enjoy a healthier, more flavorful lifestyle, one delicious sip at a time.