
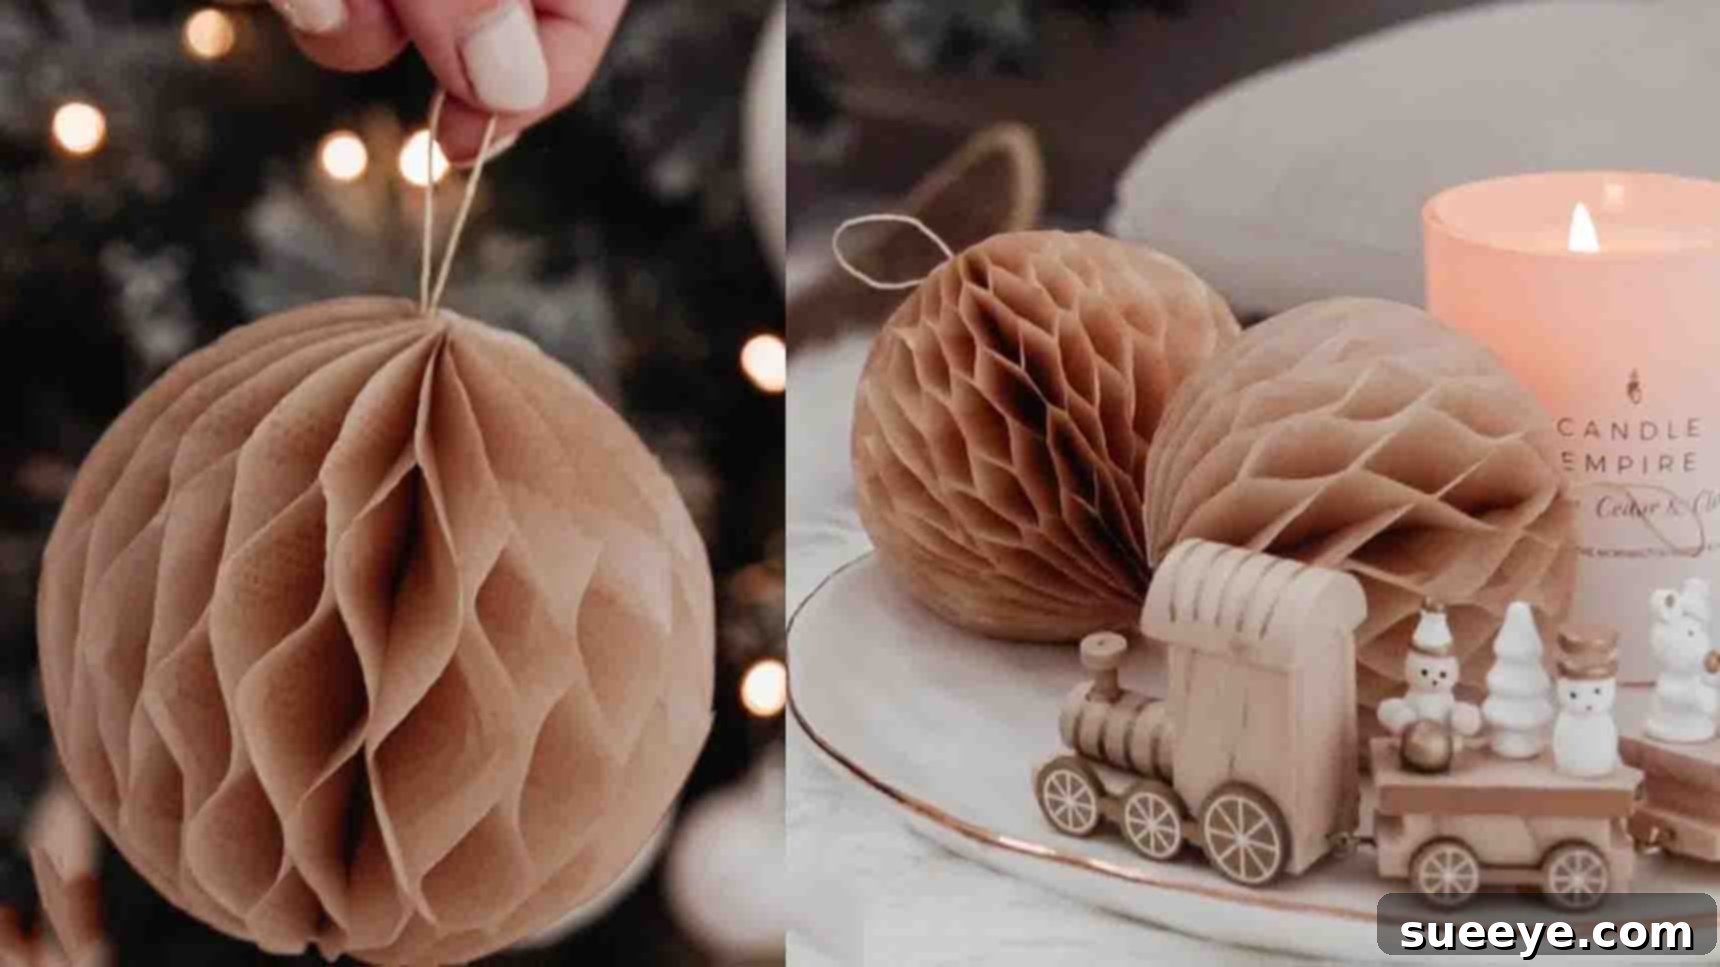
Transform your holiday decor this season with exquisite, handmade charm by crafting your own stunning DIY honeycomb ornaments! This project, inspired by the fantastic tutorial from Ashlee White on YouTube, offers a delightful way to add a unique, personalized touch to your Christmas tree. Using just a few sheets of tissue paper and basic crafting supplies, you can create an entire collection of these beautiful, three-dimensional ornaments. They’re surprisingly quick and incredibly easy to make, perfect for a cozy weekend craft session with your family or friends. Dive into this comprehensive guide and discover how to craft these eye-catching decorations that will surely become a cherished part of your festive display year after year.
Why Choose DIY Honeycomb Ornaments for Your Holiday Decor?
In a world brimming with mass-produced decorations, there’s something truly special about adorning your home with handmade items. DIY honeycomb ornaments offer a plethora of benefits that go beyond just aesthetics, elevating your holiday experience in unique ways:
- Unforgettable Charm: These ornaments possess a whimsical, delicate beauty that instantly stands out. Their unique three-dimensional structure and vibrant colors add remarkable depth and texture to your tree, creating a captivating visual display that store-bought ornaments often can’t match. Each one is a tiny sculpture of festive elegance.
- Budget-Friendly Creativity: Crafting your own decorations is a fantastic way to stretch your holiday budget further. Tissue paper is remarkably inexpensive, making this project accessible for almost any financial plan. You can create a large quantity of stunning ornaments without breaking the bank, allowing you to lavishly decorate your home without guilt.
- Precious Family Bonding Activity: This craft is simple enough for children to participate in (with adult supervision for cutting and gluing), making it an excellent opportunity for meaningful family bonding. Spending quality time together, creating something beautiful as a team, fosters cherished memories and instills a wonderful sense of shared accomplishment and holiday spirit.
- Eco-Conscious Decorating: Opting for paper-based ornaments is a more sustainable and environmentally friendly choice compared to plastic or glass alternatives, which often have a higher carbon footprint. By making them yourself, you contribute less to consumer waste and embrace a more mindful, eco-friendly approach to holiday decorating.
- Unleash Personalized Style: The beauty of DIY lies in its boundless customization potential. You can effortlessly choose tissue paper in any color scheme or pattern to perfectly complement your existing holiday decor, or experiment with different sizes and textures to create a truly unique collection that reflects your personal style and aesthetic.
- Immense Sense of Achievement: There’s immense satisfaction and pride in looking at your beautifully decorated tree and knowing that you’ve personally crafted some of its most charming and eye-catching elements. These aren’t just ornaments; they’re tiny triumphs of your creativity, hard work, and holiday spirit!
Essential Materials for Crafting Your Honeycomb Ornaments:
Gathering your supplies is the exciting first step in any creative crafting adventure. For these stunning honeycomb ornaments, you’ll need a few common items, many of which you might already have around the house. Here’s a detailed look at what you’ll need and some valuable tips for selecting the best options:
- Tissue Paper: This is the undeniable star of our project! You’ll need approximately 35-40 sheets per individual ornament, depending on how full and dense you want your honeycomb to be. Choose vibrant colors that perfectly complement your holiday theme, or opt for a charming mix of pastels for a softer, whimsical look. Thicker, good-quality tissue paper tends to hold its shape better and is less prone to tearing, but any standard craft tissue paper will work beautifully.
- Cardstock or Sturdy Paper: This essential item is for creating your tracing template. A thicker, more robust paper will ensure a durable template that you can confidently use repeatedly for crafting multiple ornaments, providing consistent results every time.
- A Small Bowl or Glass: To create your perfectly circular template. The chosen size of your bowl or glass will directly determine the final diameter of your finished ornament, so select one that fits your desired aesthetic.
- Pen or Pencil: For tracing and precisely marking your template lines. A fine-tipped pen can offer greater precision and clearer marks, which is beneficial for intricate gluing.
- Glue Tape or Craft Glue with a Fine Applicator: While Ashlee White’s original tutorial suggests glue tape for its ease and minimal mess, a good quality craft glue with a very fine nozzle can also work effectively. The absolute key here is to apply very thin, precise lines of glue to prevent the tissue paper from warping and to ensure a clean, sharp honeycomb effect when the ornament expands. Standard glue sticks are generally not recommended as they may not provide a strong enough or lasting bond for this delicate structure.
- Sharp Scissors: These are absolutely essential for making clean, crisp cuts, especially when you’re dealing with multiple delicate layers of tissue paper. A precision craft knife might also be useful for very exact cuts, but a pair of high-quality, sharp scissors is usually sufficient for excellent results.
- Wood Glue: A small amount of a strong adhesive like wood glue is ideal and highly recommended for securely attaching the hanging twine. Its robust bond ensures that your beautiful ornament stays firmly and safely on the tree throughout the holiday season.
- Twine or Ribbon: For creating the practical and decorative hanging loop. Natural jute twine offers a charming, rustic aesthetic, while metallic string, baker’s twine, or thin satin ribbon can instantly add a touch of elegance, sparkle, and sophistication to your finished ornament.
- Optional: Craft Pins or Paper Clips: These can be incredibly helpful for holding glued sections firmly together while they dry, ensuring a strong, firm bond and preventing any shifting.
- Optional: Ruler and Protractor: For exceptionally precise division of your circle template. While not strictly necessary if you’re comfortable with free-handing or visual estimation, these tools can guarantee perfect symmetry.
Step-by-Step Guide to Crafting Your Honeycomb Ornaments:
Get ready to transform simple sheets of tissue paper into a dazzling festive display! Follow these detailed, easy-to-understand instructions carefully to ensure your honeycomb ornaments turn out perfectly, adding a professional touch to your handmade decor.
Step 1: Preparing Your Template and Meticulously Layering the Tissue Paper
Precision and patience are absolutely key in this initial stage to ensure your honeycomb design unfolds beautifully and symmetrically.
- Create Your Circular Template with Care: Take your piece of sturdy cardstock or paper. Place your chosen small bowl or glass upside down on it and meticulously trace carefully around its rim with a pen or pencil to create a perfectly even circle. This precise circle will define the consistent final size of all your ornaments. Cut out this template.
- Divide and Mark the Template for Structure: Now, this is a truly crucial step for achieving the desired honeycomb effect. Carefully divide your traced cardstock circle into six equal segments, much like cutting slices of a pie. You can achieve this by using a protractor to accurately mark 60-degree angles from the center, or by carefully folding the circle into thirds twice. Once accurately divided, use your pen to draw distinct lines radiating from the exact center to the edge of the circle, clearly defining these six segments. Now, mark these lines alternately with the numbers “1” and “2”. For example, if you have six lines, they should be clearly marked Line 1, Line 2, Line 1, Line 2, Line 1, Line 2. This precise alternating pattern is fundamental for how the honeycomb will elegantly expand.
- Prepare Your Tissue Paper Stack: You will need approximately 35 to 40 individual pieces of tissue paper for each ornament, depending on your desired fullness. Cut these pieces into squares or rectangles that are slightly larger than your traced circle template. To save considerable time and ensure consistent sizing, it’s often more efficient to stack several sheets of tissue paper together (e.g., 5-10 sheets) and cut them simultaneously. Always ensure your cuts are as clean and straight as possible.
- Begin the Layering Process (Apply Glue to Line 1 Marks): Place your first cut tissue paper square directly on top of your marked circular template, ensuring it’s perfectly centered and aligned. This initial sheet will be designated as Layer 1. Referring closely to the template beneath, apply a thin, continuous, and even line of glue tape (or a very fine bead of craft glue) only along all the lines on your template that are clearly marked with the number “1”. Be incredibly precise; avoid any excess glue and ensure the lines are perfectly straight and consistent.
- Continue Layering (Apply Glue to Line 2 Marks): Gently place a second piece of tissue paper squarely and smoothly on top of the first, aligning all edges as perfectly as possible. This is Layer 2. Now, referencing your template again, apply glue only along the lines marked with the number “2”. The deliberate alternating pattern of glue lines (1 then 2, 1 then 2) is precisely what creates the unique, expandable pockets for the honeycomb to open into its beautiful three-dimensional form.
- Repeat the Alternating Glue Process for All Layers: Continue this meticulous layering process, alternating consistently between applying glue to the “1” lines and then the “2” lines, for all 35-40 pieces of tissue paper. Take your time with each sheet, ensuring every layer is smoothly applied, perfectly aligned, and that the glue lines remain thin and consistent. This meticulous repetition is absolutely vital for achieving a beautiful, symmetrical, and fully functional honeycomb structure.
- Craft the End Caps for a Polished Finish: Once all your tissue paper layers are glued and stacked, take a fresh piece of cardstock or sturdy paper (the same type you used for your initial template). Draw another circle using the exact same bowl or glass, and carefully cut it out. This will form one of your ornament’s structural end caps. Fold this circle precisely in half, then fold it in half again (into quarters). Trim a tiny sliver off the rounded edge of the folded quarter circle. When you open it, you’ll have a slightly smaller, perfectly symmetrical circle with a refined, clean edge. Make two of these identical end caps.
- Attach the End Caps and Make the Final Border Cut: Apply a thin, even layer of craft glue to one side of your entire stack of tissue paper layers (on top of the very last tissue paper layer you glued). Carefully center one of your prepared cardstock end caps onto this glued surface. Press gently but firmly to secure it. Repeat this process for the other side of your tissue paper stack, attaching the second end cap. Allow the glue to dry completely. Once thoroughly dry, carefully cut around the original traced circle, ensuring you leave a small, consistent border (approximately 1/8 to 1/4 inch) of the tissue paper layers extending beyond the cardstock end caps. This delicate border will give your finished ornament a softer, more organic edge.
Step 2: Assembling the Ornament and Securely Adding the Hanger
This stage is where your meticulously layered paper stack truly comes to life, transforming into a beautiful, three-dimensional honeycomb ornament.
- Orient for the Central Cut: With your layered, glued, and carefully trimmed circular stack (now complete with its cardstock end caps) in hand, ensure that the original glue lines you created in Step 1.2 are oriented horizontally. This precise orientation makes the next critical cut easier to visualize and execute accurately.
- Execute the Vertical Central Cut: Carefully cut the entire stacked circle exactly in half along a precise vertical line that passes directly through its center. You should now have two perfectly matched semi-circular stacks of tissue paper. Take your time with this cut to ensure it is as straight, clean, and exact as possible, as this will impact the ornament’s final symmetry.
- Glue the Semi-Circles Together: Take one of your semi-circular stacks. Apply glue tape (or a very thin, consistent line of craft glue) only along the lines marked “1” on the top tissue paper layer of this semi-circle. Now, carefully place the second semi-circular stack directly on top of the first, aligning all edges and the straight central cut line perfectly. Press firmly but gently to ensure a strong, even bond between the layers. This critical step creates a complete, glued semi-circle unit that is still designed to be foldable.
- Secure the Hanger with Wood Glue: Get your strong wood glue ready. Along the newly formed straight edge of your now combined semi-circle stack, apply a thin, even, and consistent layer of wood glue. This is the precise area where your hanging loop will be attached, so using a robust adhesive like wood glue is absolutely crucial for long-lasting durability. While the wood glue is still wet, take your desired length of twine or ribbon (ensuring it’s long enough to form a secure loop for hanging). Press the ends of the twine firmly and securely into the wet wood glue, making sure it’s perfectly centered along the straight edge.
- Allow for Thorough Drying Time: This is an absolutely critical step for the ornament’s long-term durability and integrity. Secure the twine firmly in place with craft pins or paper clips, holding it tight against the wood glue to prevent any movement. Allow the wood glue to dry completely – this might take several hours, or even overnight, depending on the specific type of glue used and the ambient humidity. Do not rush this step under any circumstances, as a prematurely moved or strained hanger can easily compromise the ornament’s stability and risk it falling apart.
- Final Assembly and Reveal: Once the wood glue and twine are absolutely dry, firm, and completely secure, it’s time for the magical reveal! Apply a thin line of regular craft glue (or glue tape) to one of the flat, straight edges of your semi-circular ornament. Carefully and very gently open the ornament, fanning out all the meticulously glued layers, and slowly bring the two flat edges together. Align them perfectly and press firmly to seal the ornament into its full circular, stunningly three-dimensional honeycomb shape. Hold for a few moments until the glue firmly sets.
Congratulations! Your exquisite DIY honeycomb ornament is now complete and beautifully ready to grace your Christmas tree with its unique, handmade charm and elegance. Each one is a testament to your creativity!
Tips for Success and Inspiring Creative Variations
To ensure your DIY honeycomb ornaments are truly spectacular and to spark even more creativity, consider incorporating these additional tips and exploring exciting variations:
- Maintain a Clean, Flat Workspace: Tissue paper is incredibly delicate and prone to tearing or wrinkling. Always work on a clean, dust-free, and perfectly flat surface to prevent accidental damage and ensure smooth, even glue application.
- Embrace Patience with Glue: Allowing ample drying time between each gluing step, especially for the robust wood glue, is paramount. Rushing the process can easily lead to the ornament falling apart, losing its intended shape, or experiencing unsightly warping.
- Handle with Utmost Gentleness: Remember that tissue paper is inherently fragile. Handle your individual layers and the finished ornament with extreme care and a light touch to avoid any rips, tears, or creases that could mar its beauty.
- Experiment with Different Sizes: Once you’ve confidently mastered the basic technique, don’t hesitate to try making smaller ornaments for a dainty, subtle look, or significantly larger ones for a bold, dramatic statement on your tree or around your home. Simply adjust your bowl or glass size accordingly.
- Mix Colors and Patterns for Visual Impact: Why limit yourself to a single color? Be adventurous! Alternate tissue paper colors between layers for a striking striped effect when the ornament is opened, or incorporate beautifully patterned tissue paper for a truly unique and intricate design that stands out.
- Add a Touch of Sparkle: For extra festive dazzle, consider lightly dusting the exposed edges of your tissue paper stack with fine glitter before the final assembly. Alternatively, apply glitter glue to the cardstock end caps for a more controlled shimmer.
- Beyond the Christmas Tree: These versatile honeycomb ornaments aren’t exclusively for Christmas trees! Get creative – hang them gracefully from garlands, use them as charming decorative accents on wrapped gifts, string them together to create a festive banner for a mantelpiece, or simply hang them in windows to beautifully catch the natural light.
- Infuse with Scent for Sensory Delight: For a subtle yet delightful sensory experience, very lightly mist some of your tissue paper layers with a festive essential oil (such as cinnamon, pine, frankincense, or orange) before you begin the gluing process. Ensure it’s an extremely light mist to avoid over-saturating and dampening the delicate paper too much.
Embrace the Joy of Handmade Holiday Decor
Crafting your own DIY honeycomb Christmas ornaments is far more than just a simple creative project; it’s a wonderful opportunity to infuse your holiday celebrations with deep personal meaning, heartfelt charm, and increasingly important sustainable practices. Each exquisite ornament you meticulously create carries a unique story, a tangible touch of your own effort and artistry, and the undeniable warmth of handmade love. They not only make incredibly thoughtful, personalized gifts that truly stand out but also serve as beautiful, cherished additions to your home decor and wonderful keepsakes that can be proudly brought out and admired year after year, building a legacy of handmade holiday memories.
We wholeheartedly encourage you to embark on this delightful crafting journey. Watch Ashlee White’s inspiring video for a clear visual guide, confidently gather all your supplies, and let your creativity shine brightly! Once you’ve completed your array of beautiful honeycomb ornaments, we’d absolutely love for you to share your unique creations with us and the broader crafting community online using relevant hashtags. Happy crafting and warmest wishes for a truly festive and joyful holiday season filled with handmade treasures!