
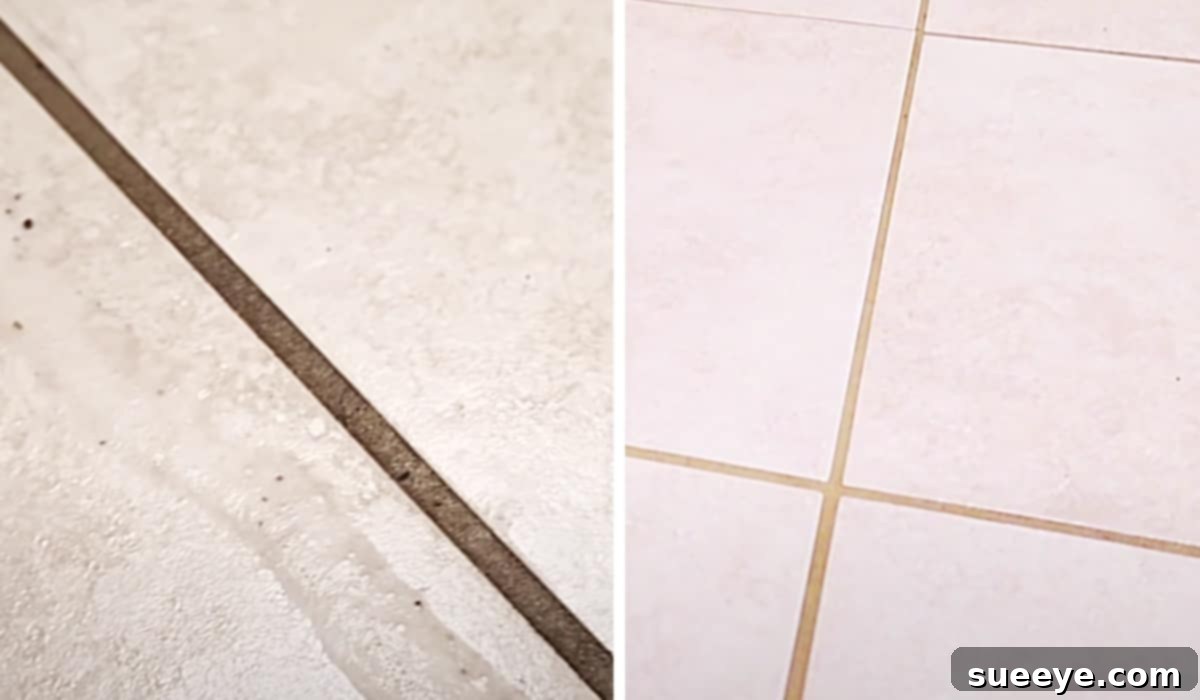
Effortless Grout Cleaning: Revitalize Your Tiles with This Simple Method
Tired of staring at discolored, grimy grout lines that detract from the beauty of your tiled surfaces? You’re not alone. Grout cleaning is a chore many homeowners dread, often feeling like a losing battle against dirt, grime, mold, and mildew. The narrow channels and porous nature of grout make it a magnet for stains, quickly transforming pristine tilework into an eyesore. For years, I struggled with various cleaning hacks and harsh chemicals, spending countless hours on my hands and knees, only to achieve mediocre results. The frustration was real, especially after realizing that choosing tile for high-traffic areas like bathrooms and laundry rooms meant a perpetual fight against stubborn stains.
However, my perspective on grout cleaning changed entirely when I stumbled upon an incredible video by Andrea Jean Cleaning on YouTube. Her practical, no-nonsense approach promised to tackle this pervasive problem once and for all, and I was instantly intrigued. What she revealed was a remarkably simple, yet highly effective method that transformed my cleaning routine and brought my grout back to life. This isn’t just another temporary fix; it’s a game-changer for anyone who has resigned themselves to living with dingy grout. If you’re ready to reclaim the sparkle in your tiled spaces without the back-breaking effort, keep reading to discover this easy-to-implement solution.
Why Grout Becomes So Stubbornly Dirty
Before diving into the cleaning method, it’s helpful to understand why grout lines are such a challenge. Unlike the smooth, non-porous surface of most tiles, grout is a cement-based material that is inherently porous. This means it has tiny microscopic holes and channels that act like sponges, absorbing everything from spilled liquids and dirt to soap scum, hard water minerals, and even airborne particles. In bathrooms and kitchens, the constant presence of moisture creates an ideal breeding ground for mold and mildew, which manifest as black, pink, or green stains.
Over time, these accumulated contaminants embed themselves deep within the grout matrix, making superficial cleaning ineffective. Traditional scrubbing with general household cleaners often only cleans the surface, leaving the ingrained dirt and stains untouched. This is why many people find themselves in a perpetual cycle of cleaning, only to see the grime return quickly. Understanding this porosity is key to appreciating why a specialized product and method are necessary to penetrate and lift these stubborn deposits.
Essential Supplies for Sparkling Grout
The beauty of Andrea Jean Cleaning’s method lies in its simplicity and the accessibility of its required materials. You won’t need an arsenal of specialized tools or a cabinet full of expensive, harsh chemicals. The power of this technique comes from a few common household items working in synergy to break down and lift away years of accumulated grime. Gather these items before you begin to ensure a smooth and efficient cleaning process:
- Lime-A-Way: This is the star of the show. Its powerful formula is specifically designed to tackle hard water stains, lime, and rust, which are often the culprits behind discolored grout.
- A Collection of Old Rags or Microfiber Cloths: These will be crucial for wiping away residue and ensuring a clean finish. Have plenty on hand, as they will get dirty quickly.
- A Sturdy Scrub Brush: Choose a brush with stiff bristles that can effectively agitate the grout lines without damaging your tiles. A grout brush with a narrow head is ideal, but a general-purpose utility brush can also work.
- A Swiffer Mop or Sponge Mop: Essential for the final cleanup, allowing you to efficiently rinse and absorb the cleaning solution and lifted dirt from larger areas without excessive bending.
- Safety Gloves and Goggles (Recommended): While not explicitly listed in the original, protecting your hands and eyes when working with cleaning chemicals like Lime-A-Way is always a wise precaution.
- Good Ventilation: Ensure the area is well-ventilated by opening windows or using a fan.
Step-by-Step Guide to Effortless Grout Cleaning
This method, championed by Andrea Jean Cleaning on YouTube, simplifies the daunting task of grout cleaning into a few straightforward steps. Follow these directions precisely to achieve stunning results and restore your grout to its original brightness.
Step 1: Prepare Your Area and Yourself
Before you even think about spraying, take a moment to prepare. Clear the tiled area of any items – rugs, toiletries, furniture, etc. This ensures you have full access to all grout lines. It’s also critical to ensure the space is well-ventilated; open windows and doors, or use an exhaust fan. Don your safety gloves and goggles to protect your skin and eyes from chemical exposure. If you have any concerns about sensitive surfaces near your grout, it might be wise to perform a patch test in an inconspicuous area, especially if your tiles are natural stone or very delicate.
Step 2: Liberally Apply Lime-A-Way to the Grout Lines
The core of this method begins with the direct application of Lime-A-Way. Take your bottle and generously spray the cleaner directly onto the discolored grout lines. Don’t be shy; ensure the grout is thoroughly saturated. The goal is to allow the acidic properties of the cleaner to penetrate and dissolve the hard water deposits, soap scum, and other mineral stains that cling to the porous grout. Avoid spraying excessively onto the tiles themselves, especially if they are sensitive, but a little overspray is generally fine for ceramic or porcelain tiles. Work in manageable sections if you have a large area to clean.
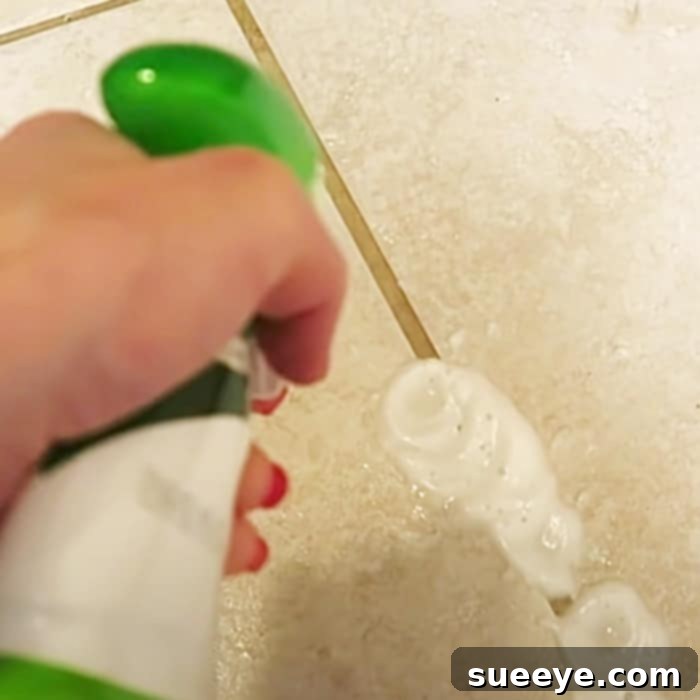
Step 3: Allow for Penetration and Dwell Time
Once the Lime-A-Way has been applied, patience is key. Let the product sit and work its magic for at least 10 minutes. This dwell time is crucial; it gives the active ingredients in the cleaner sufficient time to break down and loosen the stubborn mineral deposits and grime embedded in the grout. Resist the urge to scrub immediately. While 10 minutes is a good baseline, for exceptionally dirty or heavily stained grout, you might extend this to 15-20 minutes. However, do not let the cleaner dry completely on the surface, as this can make it harder to remove.
Step 4: The Scrubbing Phase
After the dwell time, it’s time for some gentle agitation. Grab your scrub brush and begin to work on the treated grout lines. You’ll likely notice the grime beginning to lift with minimal effort, a testament to the cleaner’s effectiveness. Use a back-and-forth or circular motion, focusing on particularly stubborn spots. You shouldn’t need to apply excessive force; the chemical action of the Lime-A-Way should have done most of the heavy lifting. If some areas remain very dirty, you can reapply a small amount of Lime-A-Way and let it sit for another few minutes before scrubbing again.
Step 5: The Quick Mop Up and Rinse
Once you’ve scrubbed your sections, it’s time to remove the loosened dirt and cleaning solution. Fill your Swiffer bucket or a regular bucket with clean water. Use your Swiffer or sponge mop to thoroughly wipe down the cleaned areas. This step serves a dual purpose: it rinses away the Lime-A-Way residue and picks up all the dislodged grime, leaving your grout sparkling clean. Rinse your mop head frequently to avoid spreading dirty water back onto your freshly cleaned surfaces. For very precise cleaning or hard-to-reach corners, use your old rags to wipe away the final remnants.

Tips for Optimal Grout Cleaning Results and Longevity
While Andrea Jean Cleaning’s method is remarkably effective, incorporating a few additional tips can enhance your results and help keep your grout cleaner for longer.
Prioritize Safety and Ventilation
Always prioritize your safety. Work in a well-ventilated area to avoid inhaling chemical fumes. Wear protective gloves and eyewear to prevent skin and eye irritation. If you have sensitive skin, consider wearing a long-sleeved shirt to protect your forearms.
Work in Sections
For larger tiled areas, it’s best to work in small, manageable sections. This ensures that the Lime-A-Way doesn’t dry on the grout before you have a chance to scrub and rinse it off. Cleaning one small section at a time allows for more thorough application, dwell time, and rinsing.
Consider Your Grout Color and Type
This method is highly effective for most standard cement-based grout. However, if you have colored grout, particularly dark colors, always do a patch test in an inconspicuous area first to ensure the cleaner doesn’t cause any discoloration. While unlikely with modern grout, it’s a good precaution. This method is generally safe for ceramic and porcelain tiles, but exercise caution around natural stone tiles (like marble or travertine) as they can be sensitive to acidic cleaners.
Regular Maintenance is Key
Once your grout is sparkling clean, establish a routine for regular maintenance. This prevents the heavy buildup of grime that necessitated the deep clean. Lightly cleaning your grout weekly with a mild, pH-neutral cleaner and a soft brush can significantly extend the life of your deep clean results. For showers, consider using a daily shower spray after each use or squeegeeing down the walls to prevent soap scum and mildew from forming.
Seal Your Grout for Protection
For an extra layer of protection, consider applying a grout sealer after your deep clean. Grout sealers penetrate the porous surface, creating a barrier that repels water, dirt, and stains. This makes future cleaning much easier and helps maintain the vibrant look of your grout for years to come. Ensure your grout is completely dry (usually 24-48 hours) before applying a sealer, and follow the product’s instructions carefully.
Common Grout Cleaning Mistakes to Avoid
Even with an effective method, certain practices can hinder your progress or even damage your grout. Be mindful of these common mistakes:
- Skipping the Dwell Time: Rushing the process by scrubbing immediately after application won’t allow the cleaner to properly dissolve the grime, making your efforts less effective.
- Using Abrasive Tools: While a stiff brush is good, avoid steel wool or overly abrasive pads that can scratch and damage both your grout and tiles.
- Over-wetting the Area: Excessively saturating the area with water during rinsing can push dirty water back into the grout lines or lead to moisture problems if not dried properly.
- Mixing Chemicals: Never mix different cleaning products, especially those containing bleach with acidic cleaners like Lime-A-Way, as this can create dangerous fumes.
- Neglecting Ventilation: Working in a closed-off space with strong cleaners can lead to respiratory irritation.
Embrace the Shine: Your Grout Transformation Awaits
Cleaning grout doesn’t have to be a dreaded chore that leaves you exhausted and disappointed. Thanks to simple yet powerful techniques like the one shared by Andrea Jean Cleaning, achieving brilliantly clean grout is now within reach for everyone. This method provides an accessible and efficient way to tackle the most stubborn stains, restoring the pristine appearance of your tiled floors and walls.
Imagine walking into a bathroom or kitchen where the grout lines are no longer an eyesore but seamlessly blend with your beautiful tiles, enhancing the overall aesthetic of your home. This isn’t just about cleanliness; it’s about renewing the look and feel of your living spaces, boosting hygiene, and even potentially prolonging the life of your tile installation. So, gather your simple materials, dedicate a little time, and follow these easy steps. You’ll be amazed at the transformation and wonder why you didn’t discover this method sooner. Say goodbye to dingy grout and hello to a brighter, cleaner home!
To see the full process in action and get additional visual tips, be sure to watch Andrea Jean Cleaning’s original video on YouTube. Happy cleaning!