
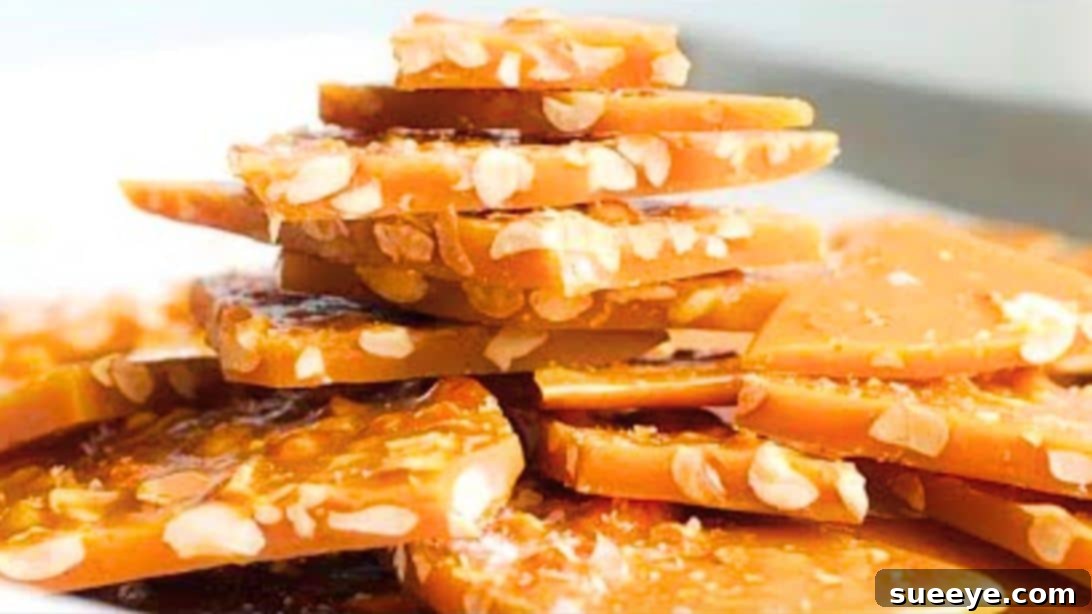
Embark on a delightful culinary journey into the world of homemade confections with this comprehensive guide to crafting the most exquisite **Old-Fashioned Peanut Brittle**. If you’ve never experienced the irresistible charm of this iconic candy, prepare to be captivated by its perfect balance of crunchy peanuts and sweet, buttery caramel. And for those who cherish this timeless treat and aspire to create it in their own kitchen, this is your definitive recipe. Forget store-bought alternatives; the superior taste and texture of homemade brittle are unparalleled, offering a nostalgic flavor that brings warmth to any occasion.
Our recipe draws inspiration from the cherished methods of **Cooking At Pam’s Place** on YouTube, upholding the integrity of a truly classic, old-fashioned preparation. This approach ensures each ingredient plays its part harmoniously, resulting in a brittle that’s neither too sweet nor too dense, but perfectly crisp and satisfying. Even if you’re a novice in the art of candy making, the detailed, straightforward steps provided here will guide you effortlessly, transforming simple ingredients into a brittle masterpiece.
Why Choose Homemade Old-Fashioned Peanut Brittle?
There’s an undeniable magic in creating your own sweets, and peanut brittle is no exception. Beyond the sheer satisfaction of a DIY project, homemade brittle offers a multitude of advantages:
- Unmatched Freshness: Enjoy brittle at its peak, with the aroma of freshly roasted peanuts and caramelized sugar filling your home.
- Quality Ingredients: You control what goes in. Opt for high-quality butter, fresh peanuts, and pure sugar for the best flavor.
- Customization Opportunities: While this guide focuses on the classic, homemade brittle opens doors to creative variations, from adding a hint of spice to experimenting with different nuts.
- Perfect Texture: Achieve that ideal brittle snap that only freshly made candy can offer, avoiding the sometimes stale or overly chewy texture of commercial varieties.
- A Heartfelt Gift: A batch of homemade peanut brittle makes for an incredibly thoughtful and cherished gift for friends, family, or holiday gatherings.
- Nostalgic Comfort: For many, peanut brittle evokes fond memories of childhood, grandmothers’ kitchens, and simpler times. Recreating it at home brings that nostalgia to life.
Mastering this **Classic Peanut Brittle Recipe** is not just about making candy; it’s about preserving a tradition, creating joy, and indulging in a truly special treat that will impress everyone who tries it.
Essential Ingredients for Your Old-Fashioned Peanut Brittle:
Crafting perfect peanut brittle relies on a few key ingredients, each playing a crucial role in achieving that desirable texture and flavor. Here’s what you’ll need:
- 1 cup of Granulated Sugar: The foundation of our brittle, providing sweetness and the necessary crystalline structure when caramelized.
- ½ cup of Light Corn Syrup: This acts as an interfering agent, preventing the sugar from recrystallizing and ensuring a smooth, glassy, and less grainy brittle. It’s essential for that signature snap.
- ¼ cup of Water: Helps dissolve the sugar initially and provides moisture for even heating and caramelization.
- 1 stick of Unsalted Butter (½ cup), sliced: Adds richness, a delightful buttery flavor, and helps prevent sticking. Slicing it helps it melt more evenly into the hot sugar mixture.
- 1 cup + 2 tbsp of Raw Peanuts: The star of the show! Using raw peanuts allows them to roast gently as the sugar cooks, deepening their flavor and ensuring they don’t overcook.
- ½ tsp of Baking Soda: The secret ingredient! When added at the end, it reacts with the hot sugar to create tiny carbon dioxide bubbles, making the brittle light, porous, and incredibly crisp rather than dense and rock-hard.
- Pinch of Salt (optional, but recommended): Balances the sweetness and enhances the overall flavor.
Recommended Equipment for Perfect Peanut Brittle:
To ensure a smooth and successful brittle-making experience, having the right tools prepared beforehand is crucial:
- Heavy-Bottomed Pot (3-quart or larger): Essential for even heat distribution, preventing the sugar from burning quickly.
- Candy Thermometer: Non-negotiable for accuracy! Achieving the correct temperatures (280°F and 300°F) is critical for perfect brittle.
- Large Baking Sheet: For spreading the hot brittle mixture.
- Parchment Paper or Silicone Baking Mat: To line the baking sheet, preventing sticking and making removal easy. Aluminum foil can also be used if greased well.
- Non-Stick Cooking Spray: For lightly greasing parchment paper/foil and your spreading utensil.
- Heat-Resistant Spatula or Wooden Spoon: For stirring and spreading the hot mixture safely.
- Oven Mitts: For handling the hot pot and baking sheet.
How to Make Old-Fashioned Peanut Brittle: Step-by-Step Guide
Follow these detailed steps to create a truly delicious **Homemade Peanut Brittle** that’s perfectly crisp and utterly irresistible.
Step 1: Preparing Your Workstation and Initial Sugar Syrup
Before you even turn on the stove, ensure your workstation is fully prepared. This includes having all your ingredients measured out (mise en place) and your baking sheet ready. Line a large baking sheet with parchment paper or aluminum foil, then generously grease it with a nonstick cooking spray. Set this aside, as you’ll need to work quickly later. In a heavy-bottomed pot, combine the granulated sugar, light corn syrup, and water. Add a pinch of salt if desired, as it helps to enhance the flavors. Stir these ingredients gently until they are well combined. Place the pot over medium-high heat. Your goal at this stage is to dissolve the sugar and bring the mixture to a boil. Do not stir excessively once it starts heating, as this can encourage crystallization.
Step 2: Incorporating Butter and Reaching First Temperature
Once the sugar mixture comes to a full, rolling boil, give it a good stir to ensure everything is evenly heated. Immediately add the slices of unsalted butter to the boiling syrup. Continue to stir the mixture continuously until the butter is completely melted and thoroughly incorporated into the sugar syrup. This ensures a smooth, buttery foundation for your brittle. Insert your candy thermometer into the pot, making sure the tip does not touch the bottom. Allow the mixture to return to a boil and continue cooking, without stirring, until the thermometer reaches precisely 280 degrees Fahrenheit (138 degrees Celsius). This is the “Soft Crack” stage, where the sugar threads are still pliable but beginning to firm up. Keep a close eye on the temperature to avoid overcooking.
Step 3: Adding Peanuts, Reaching Final Temperature, and Finishing
As soon as your syrup hits 280 degrees Fahrenheit, it’s time to add the raw peanuts. Stir them in quickly to ensure they are evenly coated and submerged in the hot syrup. Continue to let the mixture boil, now with the peanuts, constantly monitoring the candy thermometer. Your target is a final temperature of 300 degrees Fahrenheit (149 degrees Celsius), which is the “Hard Crack” stage. At this point, a drop of syrup will harden instantly when placed in cold water, breaking cleanly. Once 300 degrees is reached, immediately remove the pot from the heat. Stir in the baking soda vigorously. You’ll notice the mixture will foam up and lighten in color slightly – this is the baking soda reacting, creating the characteristic porous texture of brittle. Work quickly! Pour the entire hot mixture onto your prepared baking sheet. Using your greased spatula, spread the brittle out into a thin, even layer. The thinner it is, the crisper it will be. Allow the brittle to cool completely at room temperature, which can take an hour or more. Once fully hardened and cooled, break it into irregular pieces. Serve and enjoy your perfectly crunchy, **Crispy Peanut Brittle**!
Pro Tips for Achieving Perfect Peanut Brittle Every Time:
Making **Easy Peanut Brittle** is straightforward, but a few expert tips can elevate your results from good to absolutely perfect:
- Mise en Place is Key: Have all your ingredients measured and your baking sheet prepared before you start cooking. Candy making requires speed once the sugar heats up.
- Use a Candy Thermometer: This cannot be stressed enough. Eyeballing sugar temperatures is a recipe for failure. A reliable candy thermometer ensures precision.
- Don’t Stir Excessively: Once the sugar syrup starts boiling, avoid stirring too much. This can cause sugar crystals to form on the sides of the pan, leading to a grainy brittle. If crystals form, you can carefully brush them down with a wet pastry brush.
- Heavy-Bottomed Pot: A thick-bottomed pot distributes heat evenly, preventing scorching in spots and ensuring uniform cooking of the sugar.
- Humidity Matters: High humidity can affect how brittle hardens. On very humid days, your brittle might take longer to set or remain slightly sticky. If possible, choose a dry day for candy making.
- Work Quickly After Baking Soda: The baking soda creates air bubbles that make the brittle crisp. It starts working immediately, so pour and spread the mixture without delay.
- Spread Thinly: The thinner you spread the brittle, the crisper it will be. Use a greased spatula or the back of a greased spoon to spread it out evenly.
- Safety First: Sugar syrup gets extremely hot and can cause severe burns. Always use oven mitts and exercise caution when handling the hot pot and pouring the mixture.
- Clean Equipment: Ensure your pot and utensils are completely clean. Even a tiny bit of old food or grease can interfere with the sugar’s crystallization.
Flavor Variations for Your Homemade Brittle:
While this recipe celebrates **Traditional Peanut Brittle**, don’t hesitate to get creative once you’ve mastered the classic. Here are some ideas to inspire you:
- Nutty Alternatives: Substitute peanuts with other nuts like almonds, cashews, pecans, or a mix of several. Ensure they are raw or unsalted to prevent over-roasting.
- Chocolate Drizzle: Once the brittle is completely cool, melt some dark, milk, or white chocolate and drizzle it over the broken pieces for an extra layer of decadence.
- Spicy Kick: Add a pinch of cayenne pepper along with the peanuts for a surprising sweet and spicy brittle.
- Sesame Seed Brittle: Incorporate toasted sesame seeds for an interesting texture and nutty flavor, reminiscent of Asian sesame snaps.
- Sea Salt Finish: Just after spreading the hot brittle but before it fully cools, sprinkle a pinch of flaky sea salt over the top to enhance the sweetness.
- Vanilla Extract: A tiny splash of pure vanilla extract added with the baking soda can deepen the flavor profile.
Storing Your Homemade Peanut Brittle:
Proper storage is essential to keep your **Crispy Peanut Brittle** fresh and crunchy for as long as possible:
- Airtight Container: Once completely cooled and broken into pieces, store the brittle in an airtight container at room temperature. Exposure to air is the enemy of crispness.
- Avoid Refrigeration: Do not store peanut brittle in the refrigerator, as the moisture can make it sticky and lose its snap.
- Layer with Parchment: If stacking multiple layers of brittle, place a piece of parchment paper between them to prevent sticking.
- Shelf Life: Stored correctly, homemade peanut brittle can last for up to 2-3 weeks, though it’s often so delicious it won’t last that long!
Troubleshooting Common Peanut Brittle Problems:
Even with the best instructions, sometimes things go awry. Here’s how to troubleshoot common issues:
- Brittle is Too Soft or Chewy: This usually means the sugar mixture didn’t reach the “Hard Crack” stage (300°F). It needs to cook longer. Always rely on your candy thermometer.
- Brittle is Grainy: This happens when sugar crystals form in the syrup. Avoid stirring after the sugar has dissolved and started boiling. If crystals appear on the sides of the pot, carefully wipe them down with a damp pastry brush.
- Brittle Burned: The heat was likely too high, or the pot wasn’t heavy-bottomed enough for even heat distribution. Reduce heat slightly and use a reliable pot. A burnt taste means starting over.
- Peanuts are Burnt: This can happen if you add the peanuts too early, or if your heat is too high. Adding them at 280°F allows them just enough time to toast without burning.
- Mixture Hardened in the Pot: You didn’t work fast enough after adding the baking soda. Speed is crucial in the final steps. Ensure everything is prepped and ready before you start cooking.
Making **Old-Fashioned Peanut Brittle** is a rewarding experience, transforming simple ingredients into a dazzling, crunchy delight. With this comprehensive guide and the helpful tips provided, you’re well on your way to mastering this classic confectionery. Whether you’re making it for a special occasion, as a thoughtful gift, or simply to satisfy your own sweet tooth, this **Homemade Peanut Brittle** recipe promises a perfect, crispy outcome every time.
Now, gather your ingredients, prepare your kitchen, and get ready to create a batch of the most delicious **Classic Peanut Brittle** you’ve ever tasted. Happy candy making!
*All image credit belongs to Cooking At Pam’s Place via YouTube. Follow and subscribe to her channel for more amazing recipes!