
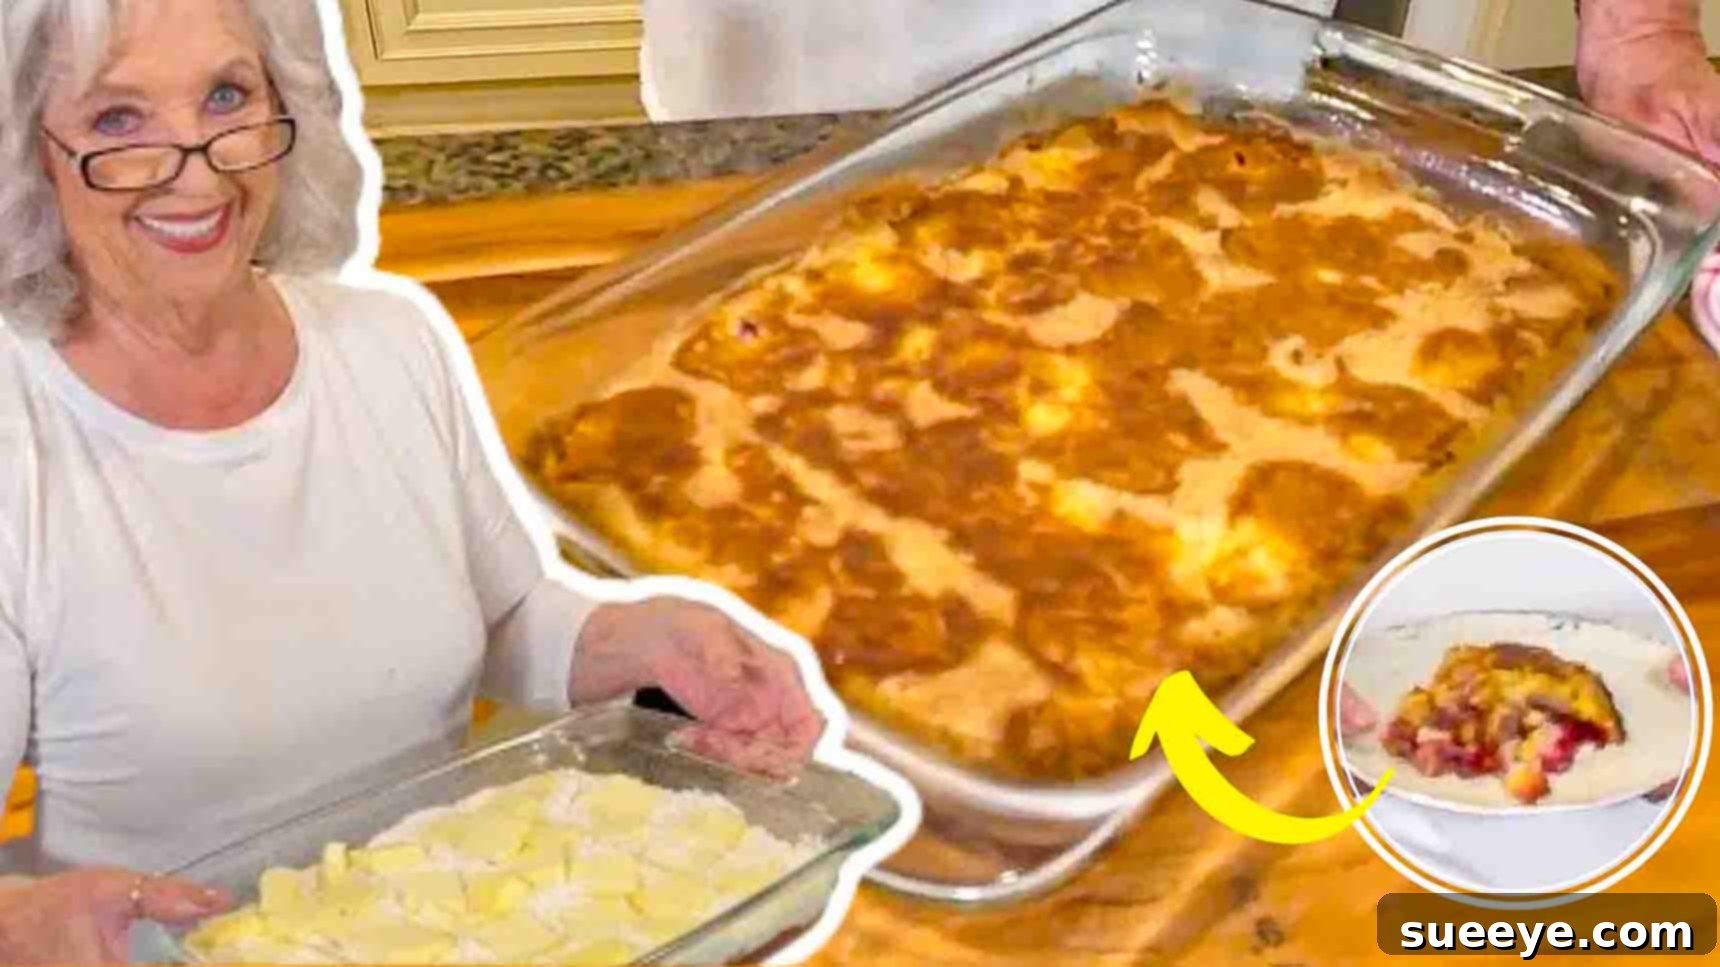
Facing unexpected guests or simply craving a delightful dessert without the usual fuss? Look no further! The cherry-pineapple dump cake is a quintessential American classic, renowned for its incredible simplicity and mouth-watering flavor. This recipe is your secret weapon for whipping up a stunning sweet treat with minimal effort and maximum impact. It’s perfect for those spontaneous gatherings or when you just need a comforting dessert that tastes like you spent hours in the kitchen, but only took minutes to prepare.
Originating from the concept of “dumping” all ingredients into a baking dish without extensive mixing or layering, dump cakes have earned their place as a beloved no-fuss dessert. This particular rendition marries the bright, sweet tang of crushed pineapple with the rich, slightly tart notes of cherry pie filling, all beneath a buttery, golden cake topping. The result is a moist, fruity base with a delightfully crisp top, creating a symphony of textures and flavors that will leave everyone asking for more.
Forget complicated baking techniques, elaborate ingredient lists, or endless cleanup. This cherry-pineapple dump cake requires only a handful of pantry staples and a single baking dish, making it the ultimate solution for busy hosts and novice bakers alike. Get ready to impress your family and friends with a dessert that’s as easy to make as it is utterly delicious.
Effortless Indulgence: The Ultimate Cherry-Pineapple Dump Cake Recipe for Any Occasion
What Makes a Dump Cake So Special?
The allure of a dump cake lies in its name: you literally “dump” the ingredients into a baking dish, and the oven does most of the magic. This style of baking eliminates many of the traditional baking steps that can often feel intimidating, such as creaming butter and sugar, sifting flour, or precisely measuring multiple liquid ingredients. For the cherry-pineapple dump cake, you’re primarily using canned fruit fillings and a boxed cake mix, which means consistent results every time.
Beyond its renowned simplicity, dump cakes offer a wonderful versatility. While the cherry-pineapple combination is a time-honored favorite, the basic concept can be adapted with countless other fruit fillings and cake mixes, allowing for endless flavor experimentation. This makes it a fantastic recipe to have in your repertoire, whether you’re looking for a quick weeknight dessert, a potluck contribution, or a comforting treat on a lazy Sunday afternoon. It’s a testament to the fact that delicious baking doesn’t always have to be complex.
Gathering Your Ingredients: Simple & Accessible
One of the best aspects of this cherry-pineapple dump cake is its reliance on readily available ingredients. You likely have most of these in your pantry already, making it an ideal choice for a spontaneous baking session. Here’s what you’ll need to create this delightful dessert:
Ingredients:
- 1 box (15.25 oz) yellow cake mix: A classic yellow cake mix provides a neutral, sweet base that beautifully complements the fruit flavors. Ensure it’s a standard-sized box.
- 1 can (20 oz) crushed pineapple (strained well): Crushed pineapple is preferred over tidbits or chunks as it integrates more smoothly with the other layers, ensuring an even distribution of tangy sweetness throughout the cake. The “strained well” part is crucial – we’ll elaborate on this in the directions.
- 1 can (21 oz) cherry pie filling: This provides a thick, luscious, and wonderfully sweet-tart fruit layer. Its consistency is perfect for creating the moist base of the dump cake.
- 12 tbsp salted butter: Using salted butter adds a subtle depth of flavor and helps to balance the sweetness of the fruit and cake mix. It melts over the dry cake mix to create a rich, crisp, and golden crust during baking.
A note on butter: While the recipe specifies salted butter, if you only have unsalted on hand, you can use it and add a tiny pinch of salt (about 1/4 teaspoon) directly to the cake mix layer if desired, though it’s not strictly necessary. The salted butter simply enhances the overall flavor profile.
Crafting Your Delicious Cherry-Pineapple Dump Cake: Step-by-Step Guide
Follow these straightforward steps, and in under an hour, you’ll have a warm, bubbling, and irresistible dump cake ready to be devoured. Precision isn’t paramount here; the beauty of this recipe is its forgiving nature.
Step 1: Preparation is Key: Oven & Dish Prep
Before you begin layering, preheat your oven to 350 degrees Fahrenheit (175 degrees Celsius). This ensures the oven is at the correct temperature for even baking from the moment your dish goes in. Next, select a suitable baking dish. A 9×13-inch rectangular dish or a similar-sized oven-safe casserole dish works best for the quantities in this recipe. Lightly grease the baking dish with cooking spray or a thin layer of butter. This step is important to prevent the delicious fruit and cake from sticking to the bottom and sides, making for easier serving and cleanup.
Step 2: Layering the Flavor Foundation: Fruits First
Once your dish is prepped, it’s time to build the flavor base. Open your can of cherry pie filling and pour the entire contents into the bottom of the prepared baking dish. Use a spatula or the back of a spoon to spread it out evenly, creating a consistent layer across the entire bottom. This rich, sweet cherry layer will become the moist foundation of your cake.
Next, take your can of crushed pineapple. This is where the “strained well” instruction comes into play. It is absolutely crucial to drain the pineapple thoroughly. Excess liquid from the pineapple can make the bottom of your dump cake soggy, preventing it from setting properly. You can use a fine-mesh sieve, pressing down on the pineapple with a spoon to extract as much juice as possible. Once well-drained, evenly spread the crushed pineapple over the cherry pie filling. This creates a vibrant, tangy contrast that perfectly balances the sweetness of the cherries.
Step 3: The Magic Powder: Cake Mix Application
Now, for the dry ingredients. Take your box of yellow cake mix. Without mixing it with any other ingredients or liquids, simply sprinkle the dry cake mix evenly over the top of the fruit layers. It’s important to distribute it as uniformly as possible to ensure even absorption of the butter and fruit juices during baking. Try to avoid leaving large clumps of dry mix, as these might not fully hydrate and could result in dry spots in the finished cake.
Step 4: The Golden Topping: Butter Slices
The final layer before baking is the butter. Cut the 12 tablespoons of salted butter into thin slices. Aim for about 12-18 thin pats of butter, roughly 1/4 inch thick. Arrange these butter slices evenly over the entire surface of the dry yellow cake mix. As the cake bakes, this butter will melt and seep down into the dry cake mix, creating a delicious, golden-brown, and slightly crisp crust that is absolutely essential to the dump cake experience. It also provides the necessary moisture for the cake mix to transform into a cake-like topping.
Step 5: Baking to Golden Perfection
Carefully place your baking dish into the preheated oven at 350 degrees Fahrenheit (175 degrees Celsius). Bake for approximately 50 minutes. The exact baking time can vary slightly depending on your oven, so it’s a good idea to start checking around the 45-minute mark. You’re looking for the top to be beautifully golden brown and the fruit filling underneath to be bubbling around the edges. A quick peek with a spoon should reveal the fruit mixture has thickened and the cake topping is set. Avoid overbaking, as this can lead to a dry crust.
Serving Suggestions & Flavor Enhancements
Once baked, remove the dump cake from the oven and allow it to cool for about 10-15 minutes before serving. This brief resting period allows the fruit filling to set slightly and prevents it from being too runny when scooped. While delicious warm, it’s also excellent at room temperature.
- Classic Toppings: Serve generous scoops of warm dump cake with a dollop of freshly whipped cream or a scoop of vanilla bean ice cream. The contrast of the warm, fruity cake with cold, creamy toppings is simply divine.
- Nutty Crunch: For added texture, sprinkle some chopped pecans or walnuts over the butter layer before baking.
- Citrus Zest: A little lemon or orange zest sprinkled over the top just before serving can brighten the flavors beautifully.
- Extra Fruit: Garnish with a few fresh cherries or pineapple chunks for an appealing presentation.
Variations to Explore: Beyond Cherry & Pineapple
The beauty of the dump cake is its adaptability. Once you master this cherry-pineapple classic, you might find yourself eager to experiment. Here are a few popular variations to inspire your next dump cake creation:
- Apple Crumble Delight: Use apple pie filling with a spice cake mix, perhaps adding a sprinkle of cinnamon and chopped walnuts.
- Peach Cobbler Twist: Combine peach pie filling with a yellow or butter pecan cake mix for a southern-inspired treat.
- Berry Bliss: Opt for blueberry or mixed berry pie filling with a lemon or vanilla cake mix for a burst of berry goodness.
- Tropical Escape: Mango or guava pie filling with a coconut cake mix can transport you to a tropical paradise.
- Chocolate Indulgence: For the chocolate lovers, try a cherry pie filling with a chocolate fudge cake mix for a Black Forest-esque experience.
The key is to match the fruit filling with a complementary cake mix flavor. Don’t be afraid to get creative and discover your own favorite combinations!
Troubleshooting Common Dump Cake Issues
Even though dump cakes are famously foolproof, sometimes minor issues can arise. Here are solutions to common problems:
- Soggy Bottom: This is almost always due to not thoroughly draining the crushed pineapple. Ensure you press out as much liquid as possible before layering.
- Dry or Unevenly Cooked Top: If your top crust is dry or has patches of dry cake mix, it usually means the butter wasn’t distributed evenly enough. Ensure your butter slices cover the entire surface of the dry cake mix. Overbaking can also contribute to dryness.
- Too Sweet: If you find the cake a bit too sweet, you can try using an unsweetened canned fruit (like unsweetened crushed pineapple) and adjust sweetness with a little less pie filling or by incorporating more tart elements like lemon zest.
- Not Golden Enough: If your cake isn’t golden brown after 50 minutes, continue baking for another 5-10 minutes, keeping a close eye on it. Some ovens vary in temperature accuracy.
Storage Tips for Your Leftover Delights
While this dump cake is best enjoyed warm and fresh, leftovers are still wonderfully delicious. Store any remaining cake in an airtight container at room temperature for up to 2 days, or in the refrigerator for up to 4-5 days. If refrigerating, allow it to come to room temperature or gently reheat individual servings in the microwave for a few seconds until warm and soft.
For longer storage, you can freeze individual portions. Wrap slices tightly in plastic wrap and then aluminum foil, and place them in a freezer-safe bag or container. It can be frozen for up to 1 month. Thaw in the refrigerator overnight and then reheat as desired.
Why This Cherry-Pineapple Dump Cake Will Be Your New Go-To
In a world where time is a precious commodity, finding a dessert recipe that delivers exceptional flavor with minimal effort is a true culinary treasure. This cherry-pineapple dump cake embodies convenience without compromising on taste. It’s a testament to the fact that sometimes, the simplest recipes yield the most satisfying results.
Whether you’re a seasoned baker looking for a quick fix, a beginner eager to explore the joys of baking, or simply someone who appreciates a delicious, fuss-free dessert, this cherry-pineapple dump cake is guaranteed to become a staple in your kitchen. So, gather your ingredients, follow these easy steps, and prepare to delight your taste buds with this effortlessly indulgent sweet treat. Your guests (and your sweet tooth) will thank you!