
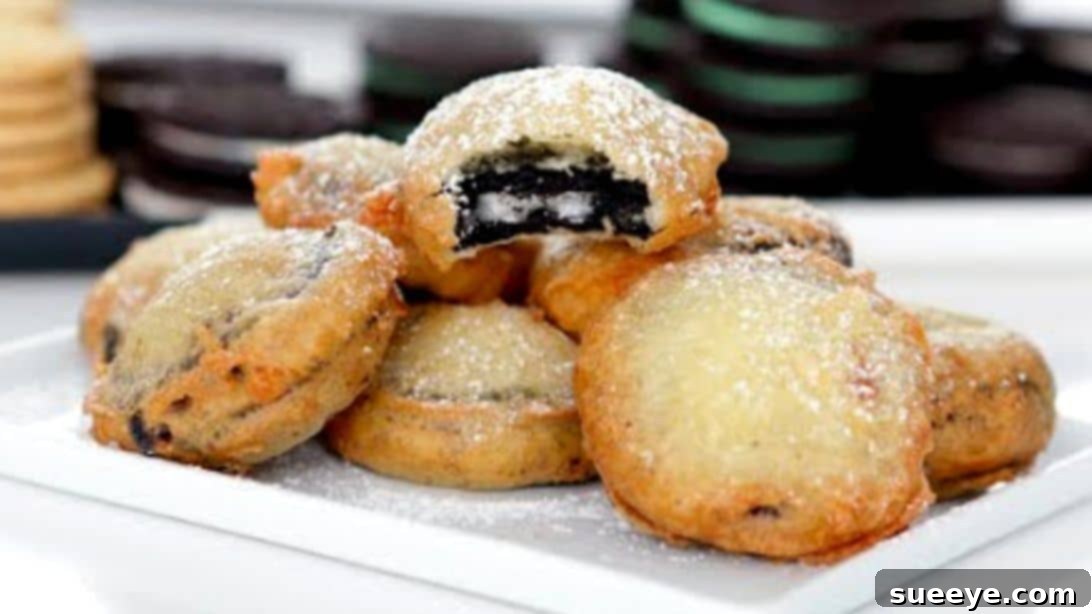
Indulge Your Cravings: The Ultimate Deep-Fried Oreos Recipe
For many, the mere mention of an Oreo cookie evokes a wave of nostalgia and comfort. These iconic chocolate sandwich cookies, with their creamy white filling, have been a beloved snack across generations. Their perfect balance of sweetness and rich chocolatey crunch makes them an irresistible treat, often enjoyed with a cold glass of milk or nestled atop a scoop of ice cream. I’ve personally cherished Oreos since childhood; they’ve been my go-to comfort food, providing that little moment of bliss needed to navigate a stressful day.
But what if you could elevate this classic snack to an entirely new level of deliciousness? Imagine a warm, crispy exterior giving way to a soft, molten Oreo center, all dusted with a delicate cloud of confectioners’ sugar. This dream becomes a reality with deep-fried Oreos – a carnival staple that brings a fairground favorite right into your kitchen. Inspired by a mouth-watering recipe from POPSUGAR on YouTube, I recently ventured into making these indulgent treats, and the results were nothing short of spectacular. They were incredibly tasty, a delightful revelation that I could easily enjoy every day without ever growing tired of them. If you’re ready to transform your favorite cookie into an extraordinary dessert, read on for the full instructions and tips to create your own batch of these irresistible deep-fried delights.
Why Deep-Fried Oreos Are a Must-Try Treat
Deep-fried Oreos aren’t just a novelty; they’re a culinary experience. The process of deep-frying transforms the humble cookie into something truly magical. The outer batter becomes golden brown and wonderfully crispy, while the heat gently melts the creamy filling and softens the chocolate wafers within. This creates a warm, gooey, and unbelievably decadent interior that contrasts beautifully with the crisp shell. It’s a symphony of textures and temperatures that makes every bite an absolute delight.
Traditionally found at fairs, carnivals, and boardwalks, these deep-fried wonders have captured the hearts (and taste buds) of dessert enthusiasts worldwide. The good news is, you don’t need a ticket to an amusement park to enjoy them. With a few common ingredients and simple steps, you can recreate this iconic carnival treat in the comfort of your own home. They’re perfect for parties, movie nights, or simply when you’re craving something uniquely sweet and satisfying.
Essential Equipment for Frying Success
Before you dive into the deliciousness, ensure you have the right tools on hand to make the frying process smooth and safe:
- Deep Skillet or Deep Fryer: A heavy-bottomed pot or a dedicated deep fryer is crucial for maintaining consistent oil temperature and ensuring even frying.
- Thermometer: An oil or candy thermometer is indispensable for monitoring the oil temperature. Maintaining 350°F (175°C) is key to crispy, perfectly cooked Oreos and safe frying.
- Slotted Spoon or Tongs: Essential for safely lowering and removing the Oreos from the hot oil.
- Baking Sheet with Wire Rack: Placing fried Oreos on a wire rack over a baking sheet allows excess oil to drain away, preventing them from becoming soggy. Line the baking sheet with paper towels underneath the rack for easier cleanup.
- Large Mixing Bowl: For preparing your luscious batter.
- Whisk: To ensure a smooth, lump-free batter.
Ingredients: Crafting Your Deep-Fried Oreo Masterpiece
The beauty of this recipe lies in its simplicity. You’ll likely have most of these ingredients already stocked in your pantry, making it incredibly easy to whip up a batch whenever a craving strikes.
- 1 cup of cake mix: This forms the base of your delicious batter. While the original inspiration mentioned pancake mix in the instructions, cake mix (especially yellow or vanilla) provides a slightly sweeter, richer batter that complements the Oreos wonderfully. You can certainly substitute with pancake mix if preferred.
- 2/3 cup of milk: Any milk (dairy or non-dairy) will work to achieve the desired batter consistency.
- 1 egg: Helps bind the batter and gives it structure and a golden hue.
- 1 and 1/2 teaspoons of vegetable oil: Adds moisture and tenderness to the batter.
- 18 Oreo cookies: The star of the show! Original Oreos work best, but feel free to experiment with Double Stuf or even flavored varieties for unique twists.
- Oil for frying: Choose a neutral-flavored oil with a high smoke point, such as vegetable oil, canola oil, peanut oil, or sunflower oil. You’ll need enough to fill your skillet at least 2 inches deep.
- Confectioners’ sugar: The perfect finishing touch for that classic carnival look and an added touch of sweetness.
Now that you have your ingredients and equipment ready, let’s get frying!
Instructions: Your Step-by-Step Guide to Perfection
Step 1: Prepare Your Frying Station and Oil
Safety first! Choose a sturdy, flat surface for your frying setup. Pour a generous amount of frying oil into your large skillet or deep fryer. The oil should be at least 2 inches deep to ensure the Oreos are properly submerged. Place the skillet on your stovetop burner over medium-high heat. Attach your oil thermometer to the side of the pan, ensuring the tip is submerged in the oil but not touching the bottom. Heat the oil slowly until it reaches a steady temperature of 350 degrees Fahrenheit (175 degrees Celsius). While the oil heats, prepare a baking sheet by lining it with several layers of paper towel, then place a wire rack on top. This setup is crucial for draining excess oil from your fried Oreos, ensuring they remain crispy and not greasy.
Step 2: Craft Your Irresistible Batter
In a large mixing bowl, combine the 1 cup of cake mix, 2/3 cup of milk, 1 egg, and 1 and 1/2 teaspoons of vegetable oil. Using a whisk, mix these ingredients thoroughly until a smooth, lump-free batter is created. The consistency should be thick enough to coat the Oreos evenly without dripping off too quickly, but thin enough to flow. If using pancake mix instead of cake mix, you might need to adjust the milk slightly to reach this ideal consistency. For an extra touch of flavor, consider adding a dash of vanilla extract or a pinch of cinnamon to your batter.
Step 3: Dip, Fry, and Drain to Golden Perfection
Once your oil has reached the target temperature and your batter is ready, it’s time for the main event. Carefully dip each Oreo cookie into the prepared batter, ensuring it’s completely coated. A fork or tongs can be helpful here to achieve an even coating and avoid getting your fingers messy. Using a slotted spoon or tongs, gently remove the battered Oreo, allowing any excess batter to drip back into the bowl. Carefully place the coated Oreos into the hot oil, one at a time. Be mindful not to overcrowd the skillet; fry only a few at a time to maintain the oil temperature and ensure even cooking. Fry the Oreos for 2 to 3 minutes, flipping them once halfway through, or until the dough turns a beautiful golden brown on all sides. Once golden, remove them from the oil using the slotted spoon, allowing any excess oil to drip off for a few seconds. Immediately transfer the fried Oreos to your prepared wire rack on the baking sheet to further drain and cool slightly.
Step 4: The Sweet Finishing Touch and Serving
Once all your Oreos are fried and have drained for a minute or two on the cooling rack, it’s time for the grand finale. Arrange the deep-fried Oreos on a serving plate. Generously dust them with confectioners’ sugar using a sieve or a small shaker. This adds a delicate sweetness and a classic carnival appearance. Serve your deep-fried Oreos immediately while they are still warm, allowing the gooey center to shine. Enjoy this extraordinary treat!
Tips for the Perfect Deep-Fried Oreos Every Time
Achieving deep-fried Oreo perfection is easy with a few expert tips:
- Monitor Oil Temperature: This is arguably the most critical factor. If the oil is too cold, the Oreos will absorb too much oil and become greasy. If it’s too hot, the batter will burn before the inside is properly warmed through. Aim for a consistent 350°F (175°C).
- Don’t Overcrowd the Fryer: Frying too many Oreos at once will drop the oil temperature significantly, leading to soggy results. Fry in small batches to maintain optimal temperature.
- Even Batter Coating: Ensure each Oreo is fully coated in batter. This provides a protective layer and ensures that wonderful crispy exterior.
- Serve Immediately: Deep-fried Oreos are best enjoyed fresh off the fryer when they are warm, gooey, and at their peak crispiness.
- Experiment with Toppings: While confectioners’ sugar is classic, don’t stop there! Drizzle with chocolate syrup, caramel sauce, sprinkles, or even a scoop of vanilla ice cream for an extra indulgent experience.
- Oil Safety: Always exercise caution when frying with hot oil. Keep a lid nearby to smother any potential flames, and never leave hot oil unattended.
Frequently Asked Questions About Deep-Fried Oreos
Can I use an air fryer to make deep-fried Oreos?
While air fryers are great for healthier versions of fried foods, deep-fried Oreos rely on the hot oil to create that unique melty interior and crispy, golden batter. An air fryer won’t achieve the same texture or gooeyness. For this indulgent treat, traditional deep frying is the way to go.
What kind of oil is best for frying?
For deep frying, always use a neutral-flavored oil with a high smoke point. Excellent choices include vegetable oil, canola oil, peanut oil, sunflower oil, or corn oil. Avoid olive oil or butter, as they have lower smoke points and will burn quickly.
How do I store leftover deep-fried Oreos?
Deep-fried Oreos are definitely best eaten fresh. However, if you have leftovers, store them in an airtight container at room temperature for up to 1-2 days. Reheating them in a conventional oven or toaster oven for a few minutes can help restore some crispiness, but they won’t be quite the same as fresh.
Can I prepare the batter ahead of time?
Yes, you can prepare the batter a few hours in advance and store it covered in the refrigerator. Give it a good whisk before using, as some ingredients might settle. However, for best results, fresh batter is always recommended.
Delicious Deep-Fried Oreo Recipe: A Sweet Escape
Transforming a simple Oreo cookie into a gourmet dessert is an experience everyone should try. This deep-fried Oreo recipe is more than just a sweet treat; it’s a delightful journey into the world of elevated comfort food. Whether you’re reliving fond carnival memories or simply seeking a new way to enjoy your favorite cookie, these homemade deep-fried Oreos are guaranteed to impress. The combination of crispy batter, warm melted cream, and soft chocolate wafers creates an unforgettable taste sensation that is both familiar and exciting.
So, gather your ingredients, follow these simple steps, and prepare to delight your taste buds. This recipe is easy to follow, incredibly rewarding, and produces a dessert that will have everyone asking for more. Dive into the deliciousness and make some deep-fried Oreo magic today!