
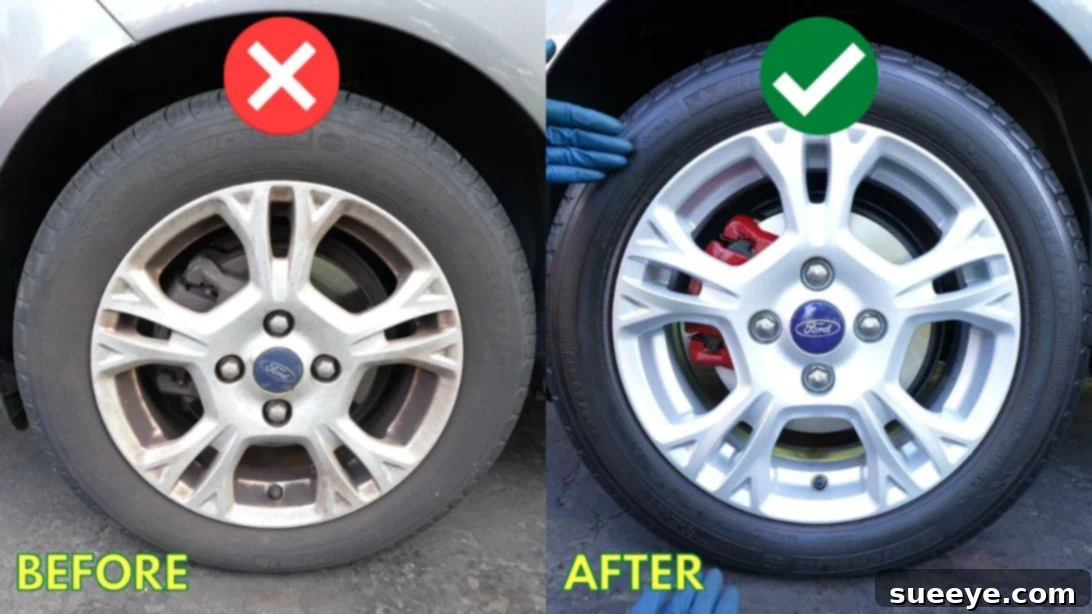
The Ultimate Guide to Deep Cleaning Your Car Wheels at Home
Are your car’s wheels looking a bit worse for wear? If you’ve noticed rust forming on the rims, or your tires have lost their deep black luster, appearing more a dull brown, it’s a clear sign that a thorough deep cleaning is long overdue. While a professional car wash might seem convenient, achieving a showroom-quality shine on your wheels is entirely possible right in your own driveway. This comprehensive guide will walk you through an easy-to-follow, five-step process to revitalize your car’s wheels and tires, restoring their brilliance and protecting them for the long haul. You’ll learn the secrets to tackling stubborn grime, removing unsightly stains, and applying lasting protection, all while saving money and gaining a rewarding sense of accomplishment. Special thanks to ChrisFix on YouTube for his invaluable insights into car detailing.
Essential Materials for a Flawless Finish
Before you begin your wheel restoration project, gather all the necessary tools and products. Having everything on hand will ensure a smooth and efficient cleaning process. Each item plays a crucial role in achieving sparkling clean wheels and tires.
- Detailing Brush Set: A variety of brushes (wheel brushes, lug nut brushes, tire brushes) are essential for reaching every crevice and safely scrubbing different surfaces without scratching.
- High-Quality Wheel Cleaner: Choose a pH-neutral, non-acidic wheel cleaner suitable for all wheel types. This will safely dissolve brake dust, road grime, and light oxidation.
- Tar Remover for Car: Specifically formulated to dissolve stubborn tar spots and sticky residues that regular washing can’t touch.
- Mild Clay Bar: An often-overlooked tool, a clay bar effectively pulls embedded contaminants like brake dust, industrial fallout, and tree sap from the wheel surface, leaving it incredibly smooth.
- Fine Finishing Compound for Car: For wheels with minor scratches, scuffs, or light oxidation, a gentle finishing compound can help restore clarity and shine.
- Ceramic Detail Spray or Sealant: This provides a protective barrier, enhancing shine and making future cleaning much easier. It repels water and contaminants.
- Gel Tire Dressing: Designed to restore the deep black appearance of tires, while also protecting them from UV rays and preventing cracking.
- Several Microfiber Cloths: Ideal for drying, wiping down surfaces, and buffing. They are soft, highly absorbent, and prevent scratching.
- Garden Hose with a High-Pressure Nozzle or Pressure Washer: For efficient rinsing and blasting away loose dirt.
- Bucket with Clean Water: For rinsing brushes and cloths.
- Car Jack and Jack Stands (Optional, but Recommended): If removing wheels for a more thorough clean.
Step-by-Step Guide to Deep Cleaning Your Car Wheels
This detailed guide covers all the essential steps to transform your dirty, neglected wheels into gleaming assets. Follow each instruction carefully for the best results.
Step 1: The Initial Rinse and Intensive Cleaning
The first and most critical step is to prepare the wheels for cleaning and then apply your primary cleaning solution. Always ensure your wheels are cool to the touch before starting, as hot wheels can cause cleaners to dry too quickly and potentially stain.
Begin by giving each wheel a thorough rinse. Use a garden hose with the highest pressure setting, or ideally, a pressure washer, to blast away loose dirt, mud, and caked-on brake dust. Focus on all areas – the spokes, barrel, and tire sidewall. After the initial rinse, for the most comprehensive cleaning, consider removing the wheels from your car. This provides unrestricted access to all sides of the wheel, including the often-neglected inner barrel. Lay the wheel on a clean, stable surface. Don’t forget to carefully remove the center cap; this allows you to clean beneath it and address any grime buildup in that area.
Next, liberally spray your chosen wheel cleaner over the entire surface of the wheel. Allow it to dwell for the time recommended by the product manufacturer (typically 2-5 minutes), but do not let it dry. As the cleaner works its magic, spray a small amount onto your detailing brushes to lubricate them. Now, begin meticulously scrubbing the wheel. Use a dedicated wheel brush for the barrel, a softer brush for the spokes and face, and a smaller, stiffer brush for intricate areas like lug nut recesses, valve stems, and around the spokes. Pay close attention to every gap, corner, and crevice where dirt loves to hide. The goal here is to agitate and break down all the accumulated grime, brake dust, and light oxidation. Once you are confident that you have thoroughly brushed every part of the wheel and tire, immediately rinse the entire wheel thoroughly with clean, high-pressure water. This immediate rinse is crucial to prevent the cleaner from drying on the surface, which could lead to streaking or staining.
Step 2: Addressing Lug Nuts, Tires, and Stubborn Stains with Clay Bar
With the main wheel surface cleaned, it’s time to focus on the details and any remaining embedded contaminants. Don’t overlook the lug nuts, which often accumulate dirt and brake dust. Grab your lug nut brush, spray a bit of wheel cleaner onto them, scrub thoroughly, and then rinse. Repeat this for all lug nuts until they gleam.
Next, turn your attention to the tires themselves. While some wheel cleaners are safe for tires, a dedicated tire cleaner and a stiff tire brush will provide the best results. Scrub the tire sidewalls vigorously to remove all the old tire dressing, browning, and road grime. After cleaning the tires, give the entire wheel assembly one final, comprehensive rinse to ensure all cleaning product residues are gone. Immediately after rinsing, use a clean, dry microfiber cloth to thoroughly wipe down and dry the wheel and tire. This prevents water spots and allows you to clearly see any remaining imperfections.
For persistent stains, particularly those caused by tar, road paint, or embedded brake dust that survived the initial cleaning, a clay bar is your secret weapon. First, if you spot any larger tar spots, apply a dedicated tar remover to these areas and allow it to dwell briefly before gently wiping it away with a separate microfiber cloth. Once larger tar is gone, pinch off a small, workable piece of your mild clay bar and flatten it into a disc. Spray a lubricating solution (either a detail spray or your wheel cleaner diluted with water) onto the stained area of the wheel. Gently glide the clay bar back and forth over the lubricated surface with light to medium pressure. You’ll feel the clay picking up contaminants as it moves. Once the area feels smooth, wipe it dry with a clean microfiber towel. Inspect the clay; if it’s dirty, knead and fold it to expose a fresh, clean surface, then repeat the process on other stained areas until the entire wheel surface feels perfectly smooth to the touch.
Step 3: Compounding for Minor Imperfections and Enhanced Clarity
If your wheels have minor surface imperfections like light swirl marks, fine scratches, or oxidation that wasn’t fully removed by the clay bar, a fine finishing compound can dramatically improve their appearance. This step is optional but highly recommended for achieving a truly pristine finish, especially on polished or clear-coated wheels.
Apply a small amount of car finishing compound onto a foam applicator pad or a soft microfiber applicator. Work on one small section of the wheel at a time, using moderate pressure in a circular or back-and-forth motion. The compound contains mild abrasives that gently polish the surface, removing a microscopic layer to reveal fresh, unblemished material underneath. Continue buffing until the compound dissipates and the area looks clearer. Then, use a clean microfiber cloth to wipe away any residue and inspect your work. Be careful not to over-compound, particularly on painted or coated wheels, as you could remove too much material. This step will significantly enhance the gloss and clarity of your wheel’s finish, making them look almost new.
Step 4: Applying Long-Lasting Protection and Tire Dressing
After all the cleaning and polishing, the final and perhaps most important step is to protect your newly restored wheels and tires. This not only keeps them looking good for longer but also makes future cleaning much easier.
Begin by applying a ceramic detail spray or a dedicated wheel sealant to the clean, dry wheel surfaces. These products create a hydrophobic barrier that repels water, brake dust, and road grime, preventing them from adhering to the surface. Spray a fine mist onto one section of the wheel, then immediately spread and buff it into the surface using a clean, dry microfiber cloth. Work your way around the entire wheel, ensuring even coverage. This protective layer will significantly enhance the wheel’s shine and durability, offering protection against environmental contaminants and UV radiation.
Finally, address the tires with a high-quality gel tire dressing. This product will restore the deep, rich black color of your tires, making them look factory-fresh. Apply a small amount of the gel onto a tire applicator pad. Work it evenly into the tire sidewall, ensuring complete coverage without oversaturating. Avoid getting tire dressing on the wheel’s tread, as this can reduce traction. For a less glossy, more natural look, you can wipe off any excess with a clean microfiber cloth after a few minutes. The tire dressing also offers UV protection, helping to prevent the rubber from cracking and fading over time. Once the protection and dressing are applied, your wheels and tires will look spectacular and be well-prepared for the road ahead.
Maintaining Your Wheels for Lasting Shine
Achieving a deep clean on your car wheels is a rewarding process, but regular maintenance is key to preserving that showroom shine. Incorporate these tips into your routine:
- Regular Rinsing: After driving, especially in wet or dusty conditions, give your wheels a quick rinse to prevent brake dust and grime from baking onto the surface.
- Weekly Washes: Include your wheels in your regular car washing routine, using a dedicated wheel cleaner and brushes to prevent heavy buildup.
- Avoid Harsh Chemicals: Stick to pH-neutral wheel cleaners. Harsh acids can damage clear coats and finishes over time.
- Reapply Protection: Depending on the product, reapply your ceramic detail spray or wheel sealant every few months to maintain the protective barrier.
- Tire Dressing: Reapply tire dressing as needed to keep your tires looking fresh and protected.
- Inspect Regularly: Periodically check your wheels for any signs of damage, deep scratches, or persistent stains, addressing them promptly to prevent further deterioration.
Conclusion: Ride in Style with Sparkling Wheels
Deep cleaning your car’s wheels at home might seem like a daunting task, but by following these detailed steps, you can achieve professional-level results with ease. From tackling stubborn rust and grime to applying protective coatings, you now possess the knowledge and techniques to restore your wheels to their original glory. Not only will your vehicle look more appealing, but proper wheel and tire maintenance also contributes to their longevity and performance. So, roll up your sleeves, gather your materials, and get ready to transform your ride. Enjoy the satisfaction of seeing your car gleam from the ground up, turning heads wherever you go!