
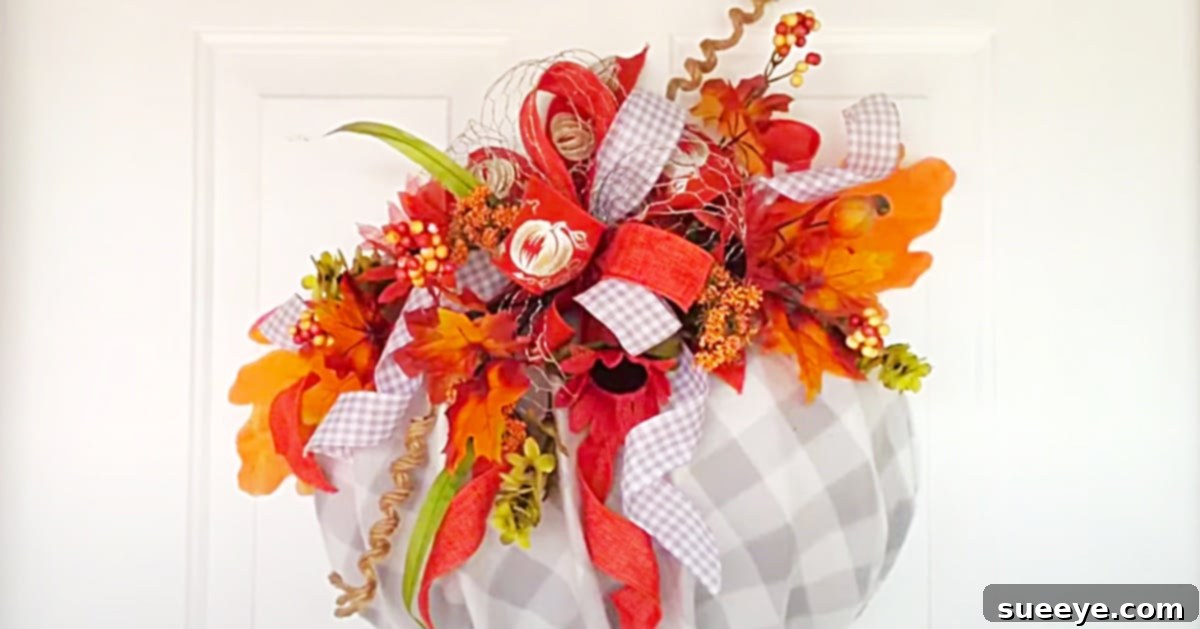
DIY Dollar Tree Pumpkin Wreath: Crafting Affordable Autumn Charm for Your Front Door
As the vibrant hues of green give way to the warm embrace of red, orange, and gold, there’s an undeniable shift in the air that signals the arrival of autumn. The crisp breeze, the comforting scent of pumpkin spice, and the delightful anticipation of the upcoming holiday season all inspire us to infuse our homes with the cozy spirit of Fall. For many, decorating the front door is the quintessential first step, setting a welcoming and festive tone for everyone who approaches. And what could be more charming than a handcrafted, personalized wreath?
Here at my home, the holiday season has already begun, and the moment you step inside, the essence of Fall is in full, glorious swing. However, my front porch remained a blank canvas, particularly my front door, which was yearning for a touch of seasonal splendor. My quest for the perfect autumn wreath led me to a delightful discovery: a fantastic Dollar Tree pumpkin wreath video tutorial by My DIY on YouTube. The moment I watched the tutorial, I instantly knew this project was destined for my front door. The absolute best part? I realized I had almost all the necessary materials already laying around the house from my last Dollar Tree crafting adventure!
This DIY project is more than just about creating a beautiful piece of decor; it’s about the pure joy of crafting, the immense satisfaction of transforming simple, affordable items into something truly special, and the sheer delight of personalizing your home for the season without overspending. Join me as we delve into the steps of making this enchanting Dollar Tree pumpkin wreath, a perfect blend of creativity, economy, and undeniable autumn charm.
Why Choose a Dollar Tree DIY Fall Wreath?
Embracing a DIY approach, especially with materials from Dollar Tree, offers a multitude of benefits:
- Unbeatable Affordability: Dollar Tree is a true haven for crafters, offering a wide array of seasonal items, fabrics, and craft supplies for just a dollar. This makes it possible to create stunning, elaborate decor without a hefty price tag, proving that beautiful style doesn’t have to be expensive.
- Endless Customization: When you craft your own wreath, you gain complete creative control over the design. You can handpick colors, textures, and embellishments that perfectly complement your home’s unique aesthetic and your personal decorating style, ensuring a truly bespoke piece.
- A Rewarding Creative Outlet: Engaging in DIY projects provides a wonderful opportunity to express your creativity, learn new skills, and even serve as a relaxing, therapeutic activity. There’s an immense sense of accomplishment and pride in seeing your creative vision come to life through your own hands.
- Unique Home Decor: Unlike mass-produced items found in big-box stores, your handmade wreath will be a one-of-a-kind creation. This adds a unique, personal, and heartfelt touch to your home that is sure to draw admiration and compliments from guests.
- Versatility for All Seasons: While this specific tutorial focuses on a charming Fall pumpkin wreath, the fundamental principles and techniques can be easily adapted for any season or holiday. This allows you to create beautiful, custom decor for your home year-round, from festive winter wreaths to vibrant spring designs.
Gathering Your Essentials: Materials for Your DIY Dollar Tree Pumpkin Wreath
One of the most appealing aspects of this creative DIY project is how readily available and budget-friendly the materials are. Nearly everything you need can be found at your local Dollar Tree, enabling you to craft a stunning piece of decor for a mere fraction of the cost of store-bought alternatives. Here’s a detailed breakdown of what you’ll need, along with helpful tips for selecting the best items:
- A Plaid Baby Blanket: Look for a soft, festive plaid blanket in classic autumn colors such as rich orange, deep red, rustic brown, or creamy ivory. The timeless plaid pattern instantly evokes a cozy, farmhouse-inspired Fall feel. If a baby blanket isn’t available, any small plaid fabric remnant or even a patterned scarf could serve as an excellent alternative. The crucial factor is ensuring you have enough material to generously cover your wire pumpkin base.
- A Wire Wall Pumpkin: This piece will form the foundational shape and structure for your entire wreath. Dollar Tree typically carries these wire frames during the Fall season. Be sure to select one that feels sturdy enough to maintain its shape once the fabric and decorative elements are added. These come in various sizes, so choose one that perfectly fits your front door or your intended display area.
- Faux Autumn Flowers and Leaves: Dollar Tree often boasts an impressive and surprisingly diverse array of artificial flora. Select a variety of flowers (such as cheerful mums, iconic sunflowers, or elegant dahlias) and lush foliage (like maple leaves, oak leaves, and berry sprigs) in complementary autumn hues. Mixing different textures and sizes will create wonderful visual interest and depth within your wreath. Don’t forget to look for smaller embellishments like mini pumpkins, gourds, or pinecones for an extra festive touch.
- A Spool of Craft Chicken Wire (Optional but Recommended): While not strictly a structural component for the pumpkin frame itself, craft chicken wire can be incredibly versatile for adding unique texture and dimension. It can be used to provide additional anchoring points for heavier embellishments, create small, sculptural elements within your wreath, or simply weave through to add a rustic, layered look. If you desire more complexity or varied textures in your design, this is a fantastic addition.
- Assorted Ribbons (for Bows and Accents): Choose a selection of ribbons in varying widths and patterns that beautifully complement your chosen plaid blanket and floral arrangements. Materials like burlap, satin, or wired ribbons in solid autumn colors or with subtle Fall-themed prints will add elegance and charm. You’ll use these to craft eye-catching bows and create smaller accent loops to complete your design.
- Large Notebook Clips (or Wonder Clips): These simple clips are an indispensable tool for temporarily holding the fabric securely in place on the wire pumpkin while you’re fitting and gluing. They offer a firm grip without causing any damage to your material, helping you achieve a snug and neat finish.
- A Hot Glue Gun: This will be your primary tool for securely attaching all the various components of your wreath. A good quality glue gun, preferably with a fine tip, will allow for precise and neat adhesive application.
- Plenty of Glue Sticks: Always keep extra glue sticks on hand! You will be using a fair amount to ensure that every element is firmly and durably attached to your wreath.
- Craft Rope (or Jute Twine): This natural material is perfect for creating a sturdy and rustic hanging loop for your finished wreath. Choose a thickness that can confidently support the wreath’s weight and complements the overall aesthetic of your autumn creation.
Crafting Your Autumn Masterpiece: Step-by-Step Directions for Your Wreath
Creating this beautiful Dollar Tree pumpkin wreath is a truly fun, rewarding, and straightforward process. Follow these detailed steps to transform your affordable materials into a stunning, personalized piece of autumn door decor that will welcome guests with seasonal cheer:
Step 1: Preparing Your Wire Pumpkin Base
Begin by laying out your wire wall pumpkin on a clean, flat, and protected work surface. Take a moment to inspect the frame thoroughly, ensuring there are no sharp edges or loose wires that could snag your fabric. This wire frame serves as the essential canvas for your creation, so having a good, stable, and well-shaped base is absolutely crucial. If the wire pumpkin is slightly bent or misshapen, gently reshape it to achieve the perfect pumpkin silhouette.
Step 2: Dressing Your Pumpkin with Plaid Fabric
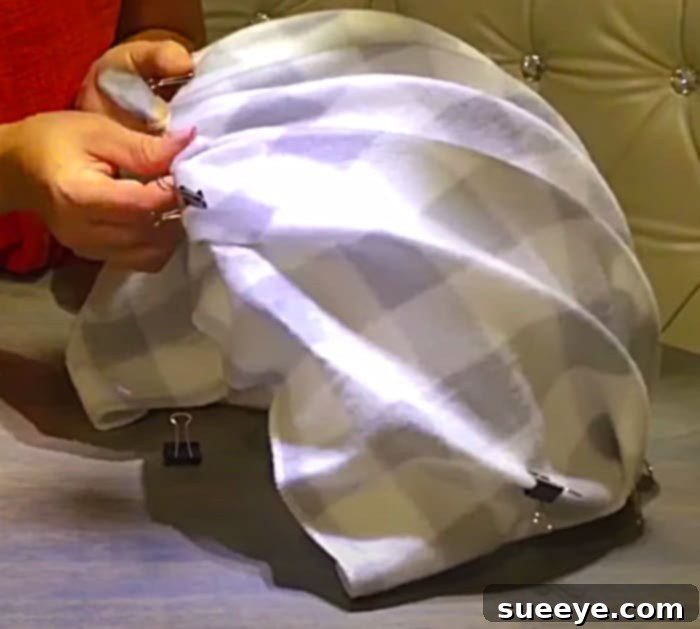
Carefully drape the plaid baby blanket over the wire pumpkin frame. Your primary goal is to cover the entire frame smoothly and evenly. Center the blanket as best as you can, allowing for a generous amount of overlap around all the edges of the wire frame. Begin to gather and meticulously fold the fabric around the wire, using your large notebook clips (or Wonder Clips) to temporarily secure it in place. Work your way methodically around the entire pumpkin, pulling the fabric tautly to minimize any wrinkles and create a neat, upholstered, and plush appearance. Once you are fully satisfied with the fit and the overall look, carefully trim any excess fabric, leaving approximately an inch or two of material for gluing.
Now, with the fabric securely held in place by the clips, heat up your hot glue gun. Starting from one section, carefully remove a clip, apply a continuous bead of hot glue directly to the wire frame, and firmly press the fabric over the glue, holding it in place until it completely sets. Work in small, manageable sections, constantly checking for a smooth, taut finish. Pay meticulous attention to the curves and intricate edges of the pumpkin, ensuring the fabric is securely glued down all around the perimeter and any inner wires of the pumpkin frame. This creates a beautifully soft, plush, and inviting base for all your subsequent decorations.
Step 3: Creating a Sturdy Hanging Loop
Once the fabric is completely secured to the wire frame and the glue has thoroughly dried, it’s time to add a reliable hanging mechanism. Cut a length of craft rope (or jute twine), approximately 12-18 inches long, depending on how low you wish your finished wreath to hang. Form a sturdy loop and securely knot the ends together, ensuring the knot is tight and will not unravel. Then, carefully hot glue or firmly tie this rope loop to the top-back center of your fabric-covered wire pumpkin frame. It is absolutely vital that this loop is robustly attached, as it will bear the entire weight of your beautifully decorated wreath. Test its strength by gently lifting the wreath to ensure it holds securely.
Step 4: Arranging Your Autumn Florals and Embellishments
This is the most exciting step where your wreath truly begins to come to life and reflect your personal style! Begin by laying out all your chosen faux autumn flowers, leaves, berries, and any other embellishments (such as charming mini pumpkins or rustic pinecones) on a table. Experiment with different arrangements on your fabric-covered pumpkin without gluing anything down. Consider creating visually appealing clusters of flowers and leaves at the top, bottom, or strategically off to one side for an asymmetrical yet balanced design. Think critically about color balance, varying textures, and overall visual harmony. Snip larger floral stems into smaller, more manageable pieces if needed to fit your design.
Once you’re completely happy with your chosen arrangement, begin carefully gluing your selected elements onto the fabric-covered pumpkin. Start with the larger, more prominent pieces, such as the main flowers or expansive leaf clusters, and then gradually fill in with smaller items to create depth. Use generous amounts of hot glue to ensure every single element is firmly and durably attached. If you’ve opted to use craft chicken wire, you could creatively weave smaller floral stems through its mesh or even use it to create a unique, textured background layer in a specific section. This step allows for immense personalization, so let your creativity flow freely!
Step 5: Adding Ribbons and Final Touches
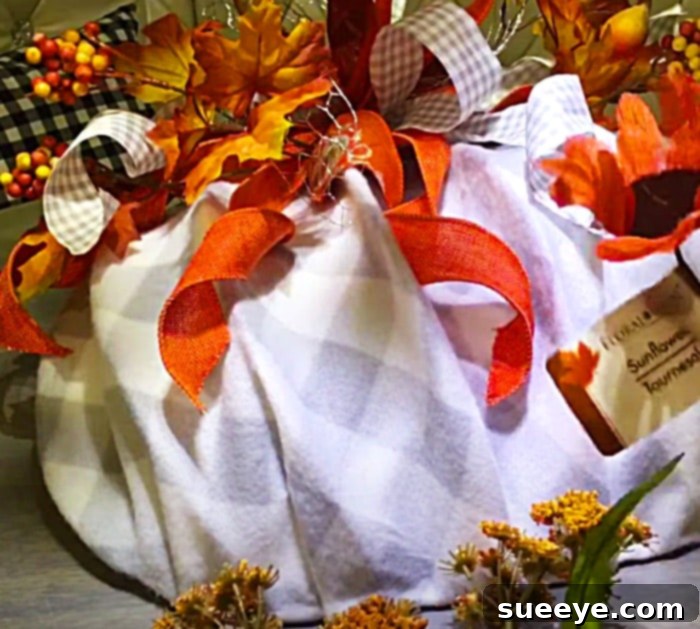
Ribbons are essential for adding a touch of elegance, charm, and completeness to your wreath. Create one or two beautiful bows using your chosen ribbons. You can place a larger, more prominent bow at the top where the hanging loop is, or slightly off-center to beautifully complement your existing floral arrangement. You can also artfully weave thinner ribbons through the foliage or create small accent loops in various strategic spots around the wreath. Secure all bows and ribbon accents firmly with hot glue, ensuring they are positioned beautifully and symmetrically (or artfully asymmetrically) within your overall design.
Take a step back and examine your wreath from a distance. Are there any noticeable gaps? Does it look perfectly balanced? This is your final opportunity to make any last-minute adjustments, add a few more small leaves, berries, or even a whimsical mini sign if desired. Ensure all glue has thoroughly dried and hardened before handling or hanging your stunning new autumn wreath.
Expert Tips for a Professional-Looking DIY Autumn Wreath
To elevate your homemade wreath from charming to truly professional-looking, consider these helpful tips:
- Embrace Layering for Depth: When arranging your florals and foliage, always layer items from largest to smallest. Begin with expansive leaves or foundational flowers, then add medium-sized blooms, and finish with delicate berries or tiny sprigs. This technique creates incredible depth and dimension.
- Vary Your Textures: Combine a variety of textures – the smooth feel of satin ribbon, the rustic roughness of burlap, the soft coziness of fabric, and the varied surfaces of faux foliage – to create a rich, visually appealing, and inviting look.
- Maintain Color Palette Cohesion: Stick to a consistent autumn color palette (e.g., warm oranges, deep reds, muted greens, golden yellows, and rich browns) to ensure a harmonious and polished design that feels cohesive and intentional.
- Step Back and Assess Periodically: Throughout the decoration phase, periodically step away from your wreath to gain a fresh perspective. This critical distance helps you identify any imbalances, gaps, or areas that might need more attention or adjustment.
- Secure Everything Generously: Do not be shy with the hot glue! Ensure that every single element is firmly and liberally attached to withstand potential outdoor conditions (if your wreath will be displayed outdoors) and general handling.
- Personalize with Unique Touches: Make your wreath truly yours by adding unique elements like a small wooden initial, a miniature scarecrow, a charming faux bird, or even a touch of glitter spray for a subtle sparkle and festive shimmer.
Displaying Your Dollar Tree Autumn Wreath with Pride
The inherent beauty of this DIY pumpkin wreath lies in its remarkable versatility. While it looks absolutely adorable adorning a front door, making it the perfect autumn welcome, you can also consider it for other prominent areas within and around your home:
- Over a Fireplace Mantel: Gracefully drape it above your fireplace for a cozy and inviting focal point in your living room, enhancing the warmth of the hearth.
- On an Interior Wall: Brighten up a plain wall in your dining room, kitchen, or entryway, instantly infusing the space with seasonal charm and color.
- As a Stunning Centerpiece: Lay the wreath flat on your dining table with a large, pillar candle or a cluster of smaller candles in the center for a festive and elegant table arrangement.
- On a Covered Porch or Patio: Extend the touch of fall charm to your outdoor living spaces. Just ensure it’s displayed in a location protected from direct harsh weather conditions to preserve its longevity and vibrant appearance.
Embrace the Spirit of DIY this Fall and Beyond!
This DIY Dollar Tree pumpkin wreath project is so much more than just a simple craft; it’s a heartfelt invitation to embrace the creative spirit of the autumn season. It beautifully demonstrates that truly impactful and stunning home decor doesn’t necessarily have to come with a hefty price tag. With just a few affordable supplies from your local Dollar Tree, a reliable hot glue gun, and a dash of your unique creativity, you possess the power to transform simple, everyday items into a captivating, warm, and inviting piece that brings immense charm and personality to your home.
My new wreath looks absolutely adorable on our front door, and it has already garnered countless compliments from friends, family, and neighbors alike! Everyone loves its charming aesthetic, and the absolute best part is the immense satisfaction that comes from knowing I made it entirely myself. So, why not give it a try? Gather your Dollar Tree treasures, watch the inspiring tutorial from My DIY, and embark on your very own wreath-making journey this autumn. You’ll be truly amazed at the beautiful creation you can bring to life!