
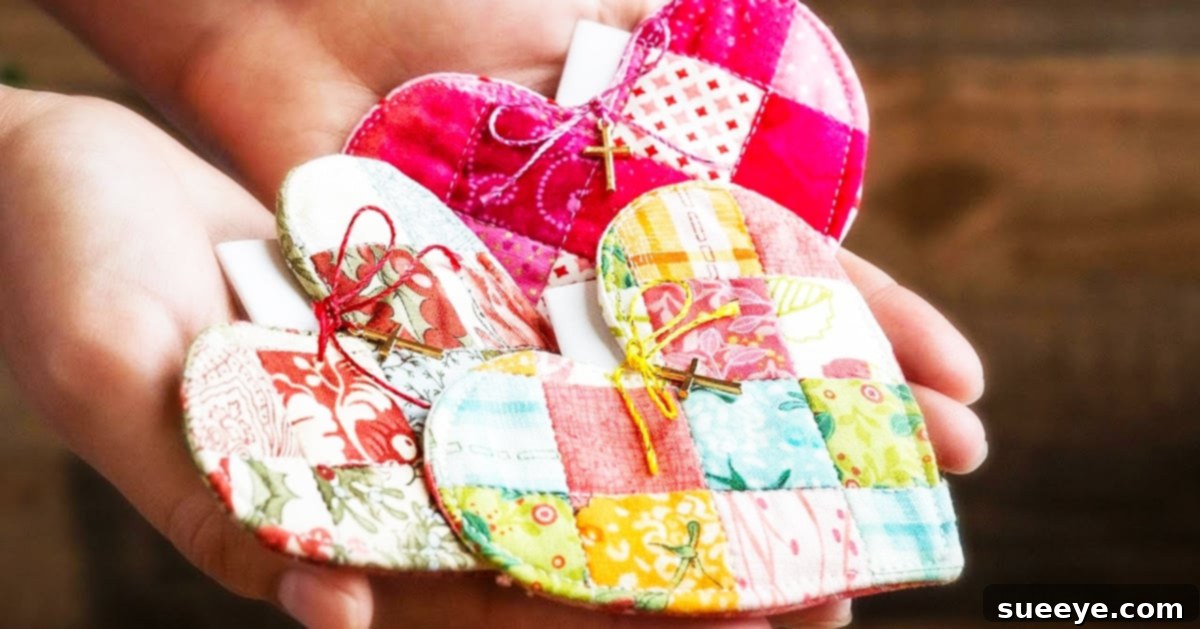
Embark on a truly heartwarming crafting journey with the creation of an adorable and deeply meaningful patchwork heart pocket prayer quilt. This cherished project comes complete with a free pattern generously provided by Shabby Fabrics, making it accessible and enjoyable for quilters of all skill levels. Far more than just a decorative piece, this unique quilt serves as a tangible symbol of comfort, hope, and love, designed to hold heartfelt messages or small tokens within its discreet pocket. It’s an incredibly versatile project, offering countless avenues for personalization, such as incorporating a delicate cross piece prominently displayed on the front, or experimenting with an array of fabric designs and colors to truly reflect the recipient’s personality or the giver’s intentions.
Imagine the joy and comfort this handmade treasure could bring to someone special in your life. Whether it’s a friend facing a challenging time, a family member needing a reminder of support, or simply a thoughtful gesture to show you care, a personalized pocket prayer quilt is a gift that resonates deeply. The act of creating something with your own hands infuses it with unparalleled warmth and sincerity, transforming a simple piece of fabric into a cherished keepsake. In an age where mass-produced items are commonplace, a handmade gift like this stands out, conveying a powerful message of love, effort, and personal connection. These small, heartfelt gestures often leave the most lasting impressions, bringing immeasurable comfort and joy to those who receive them. Each stitch holds a prayer, each fabric choice a thought, culminating in a beautiful offering that provides solace and a tangible reminder of affection.
The beauty of this project lies not only in its aesthetic appeal but also in its profound symbolic value. A pocket prayer quilt is designed to be small enough to carry, allowing its recipient to keep prayers, inspirational notes, or tiny mementos close to their heart. This constant presence can serve as a source of strength, encouragement, and peace throughout their day. Shabby Fabrics has made this wonderful crafting experience even more inviting by offering a free, easy-to-follow pattern, ensuring that even those new to quilting can achieve stunning results. Delve into the world of fabric, thread, and heartfelt intentions, and discover the immense satisfaction of crafting a gift that truly makes a difference in someone’s life.
Essential Materials for Your Patchwork Heart Prayer Quilt Project
To embark on this fulfilling quilting adventure, gathering the right materials is the first crucial step. The beauty of the patchwork heart prayer quilt is its adaptability, allowing you to use existing fabric scraps for a truly unique and eco-friendly creation, or select specific charm packs for a cohesive and vibrant design. Below is a comprehensive list of what you’ll need, along with specific recommendations from Shabby Fabrics to get you started on the right foot.
- Patchwork Heart Pocket Prayer Quilt PATTERN ONLY: While a free download is available, for those who prefer a physical copy or more detailed guidance, this dedicated pattern provides comprehensive instructions and templates.
- Pocket Prayer Quilt Pack: A convenient kit that often includes pre-selected fabrics and sometimes even batting, simplifying the material gathering process. Ideal for beginners or those seeking a coordinated look.
- Pocket Prayer Quilt PATTERN ONLY: Another option for the core pattern, ensuring you have all the necessary cutting guides and assembly instructions.
- Charm Packs: Pre-cut squares of fabric (typically 5×5 inches) that are perfect for patchwork projects. They come in coordinated collections, saving you time on fabric selection and cutting, and are an excellent way to introduce variety and color.
- FREE download: The foundational free pattern from Shabby Fabrics, providing step-by-step guidance without any cost.
- Rotary Cutter: Essential for precise, clean, and quick cuts, especially when working with multiple layers of fabric. A sharp blade is paramount for safety and accuracy.
- Self-Healing Cutting Mat: Protects your work surface and provides a stable base for using your rotary cutter.
- Quilting Ruler (Acrylic): Transparent rulers with clear markings are indispensable for accurate measuring and cutting of fabric strips and squares.
- Iron and Ironing Board: Crucial for pressing seams flat and crisp, which is vital for professional-looking patchwork and overall quilt construction.
- Fabric Pen or Chalk: For marking fabric, drawing templates, or indicating quilting lines, ensuring your marks are visible yet temporary.
- Needle and Thread: High-quality polyester or cotton thread suitable for quilting and general sewing. Having a variety of colors that complement your chosen fabrics can be beneficial.
- Fabric Scraps: A wonderful opportunity to use up smaller pieces of fabric from previous projects, adding to the unique charm and sustainable aspect of your quilt.
- Batting (Quilt Wadding): The soft, fluffy layer in the middle of the quilt that provides warmth, dimension, and structure. Choose a lightweight batting suitable for small projects.
- Sewing Machine: While a prayer quilt can be hand-stitched, a sewing machine will significantly speed up the process and ensure consistent seam allowances.
- Fabric Scissors: Dedicated scissors for fabric cutting will keep them sharp and prevent snagging.
- Fabric Pins or Clips: For holding fabric layers together securely during sewing, preventing shifting and ensuring accurate alignment.
- Seam Ripper: An indispensable tool for correcting any mistakes, allowing you to easily undo stitches without damaging the fabric.
- Freezer Paper or Cardstock: Used for creating durable and reusable templates, especially for cutting out the heart shape. Freezer paper is particularly useful as it can temporarily adhere to fabric for easy cutting.
Step-by-Step Guide to Crafting Your Patchwork Heart Pocket Prayer Quilt
Creating your patchwork heart pocket prayer quilt is a rewarding process that combines precision with creativity. While this guide provides a detailed overview of the steps involved, for the most comprehensive and visual instructions, we highly recommend following the Shabby Fabrics video tutorial on YouTube. Their expert guidance will walk you through each phase, ensuring you achieve beautiful results.
Step 1: Fabric Preparation and Precise Cutting
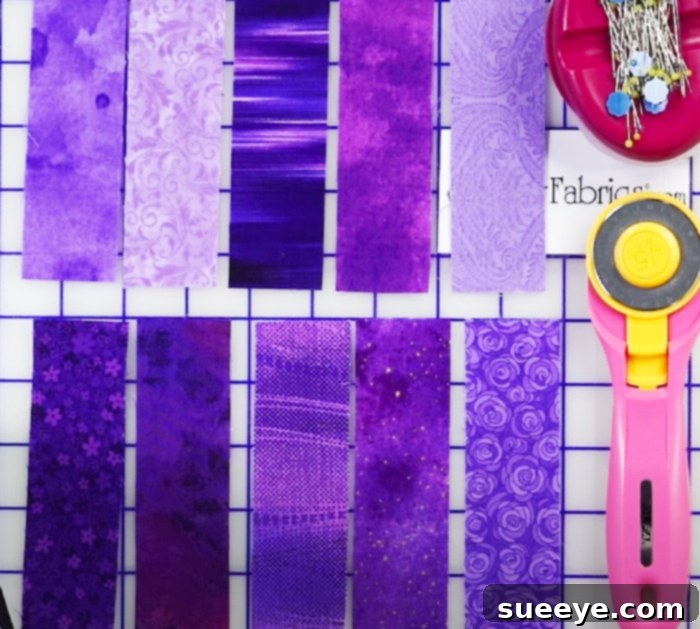
Begin by selecting your chosen fabrics, whether they are vibrant charm packs or a delightful assortment of fabric scraps. For optimal results, consider pre-washing and ironing your fabrics to prevent shrinkage and ensure a smooth working surface. Next, grab your rotary cutter—ensuring it has a fresh, sharp blade—along with your self-healing mat and quilting ruler. Following the Shabby Fabrics pattern, carefully cut your fabrics into 1 1/2-inch wide strips. If you are using charm squares (typically 5×5 inches), you’ll often cut these into narrower strips to create the patchwork effect. Precision in this step is crucial, as consistent strip widths are key to a beautiful, symmetrical patchwork design. Take your time, measure twice, and cut once to ensure all your pieces are perfectly sized.
Step 2: Piecing the Patchwork Panel
Once your fabric strips are meticulously cut, it’s time to begin piecing them together to form the patchwork panel. Take two strips and place them right sides together, aligning the edges perfectly. Using your sewing machine, stitch along one long edge with a consistent 1/4-inch seam allowance. This precise seam allowance is fundamental in quilting to ensure your finished blocks and panels come out to the correct size. After sewing, carefully press the seam open or to one side with a warm iron. Continue this process, adding subsequent strips one by one, always pressing your seams as you go. This creates a flat, smooth, and cohesive patchwork fabric from which your heart will be cut. The more strips you join, the larger and more intricate your patchwork panel will become, allowing for a variety of heart sizes.
Step 3: Crafting the Heart Template
With your patchwork panel ready, the next step involves creating the iconic heart shape. You can draw your heart template freehand onto sturdy freezer paper or cardstock, or use a pre-existing template from the Shabby Fabrics pattern. If drawing your own, ensure the heart is symmetrical and sized appropriately for your patchwork panel. Freezer paper is an excellent choice as it can be temporarily ironed onto fabric, providing a stable cutting guide. If using cardstock, simply trace around it onto the fabric. The key is to create a clean, well-defined heart shape that will serve as the focal point of your prayer quilt. You might consider making a few templates of different sizes to decide which best suits your patchwork design.
Step 4: Cutting the Patchwork Heart
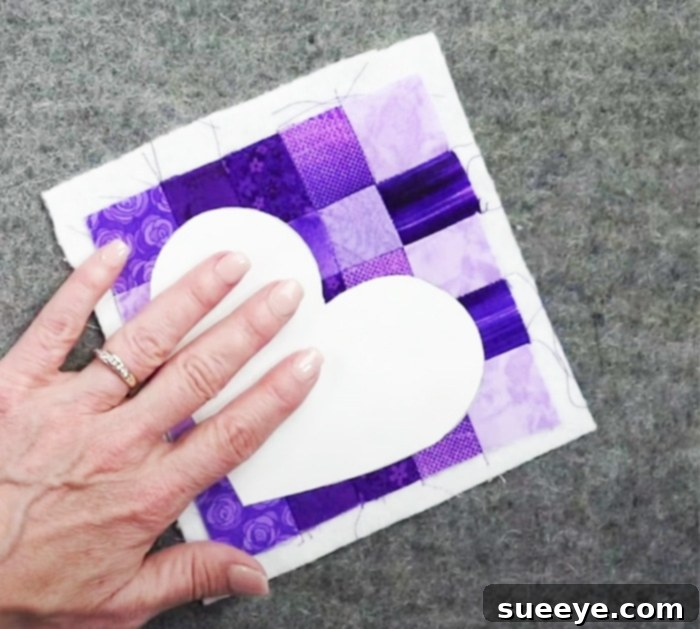
Carefully position your heart template onto your assembled patchwork fabric. Arrange it so that the various fabric strips create an appealing design within the heart shape. Pin the template securely to the fabric, or if using freezer paper, iron it gently to adhere it. Using sharp fabric scissors, meticulously cut around the perimeter of your heart template. Take your time to achieve clean, smooth curves, as this will define the final look of your quilt’s center. Once cut, gently peel off the template, revealing your beautiful patchwork heart, ready for the next stages of assembly.
Step 5: Incorporating Batting and Quilting Details
Now, it’s time to add the batting, which provides the soft, plush feel and slight dimension characteristic of quilts. Place your cut patchwork heart on top of a piece of batting, slightly larger than the heart itself. To secure these layers and begin the quilting process, you will stitch “in the ditch.” This technique involves sewing directly into the seam lines where your fabric strips meet, making the quilting lines almost invisible while effectively holding the layers together. You can also add additional quilting lines, such as simple straight lines running parallel to the patchwork strips or a delicate echo quilting around the perimeter of the heart, to enhance its texture and visual appeal. This step not only adds to the quilt’s aesthetics but also prevents the batting from shifting over time.
Step 6: Creating the Functional Pocket
A distinctive feature of the prayer quilt is its functional pocket, designed to hold small notes, prayers, or tiny keepsakes. This pocket can be made from a coordinating solid fabric, a subtle print, or even a smaller piece of patchwork. Cut a rectangle of fabric according to the pattern’s specifications (or to a size that suits your heart quilt). Hem the top edge of this rectangle neatly to create a clean opening for the pocket. Then, position the pocket piece onto the backing fabric or a designated section of the quilt, typically on the front or back, leaving the top edge open. Stitch the sides and bottom of the pocket securely into place, ensuring it forms a sturdy and accessible pouch. This pocket transforms the quilt into a truly interactive and personal gift.
Step 7: Assembling and Finishing the Quilt Layers
With your patchwork heart quilted to its batting and the pocket prepared, the final assembly involves layering the quilt components. Typically, this includes a backing fabric, the batting, and your quilted heart top. Stack these layers carefully: backing fabric (right side down), batting, and finally, your quilted heart top (right side up). Use safety pins or basting stitches to secure all layers together, preventing any shifting during the final sewing stages. Once layered and basted, you will sew around the perimeter of the entire quilt, leaving a small opening for turning. After trimming the seams and clipping corners, turn the quilt right side out through the opening. Gently poke out the corners to create crisp edges and press the entire quilt flat with your iron. Finally, hand-stitch or machine-stitch the opening closed to complete the assembly.
Step 8: Final Touches and Personalization
The beauty of a handmade gift lies in its ability to be deeply personalized. For your patchwork heart prayer quilt, consider adding a small, embroidered cross to the front, symbolizing faith and hope. You could also embroider the recipient’s initials, a significant date, or a short, meaningful word onto the quilt. Decorative stitching along the edges, using a contrasting thread color, can also add a charming finish. Alternatively, if you prefer a more traditional finish, you can add a binding strip around the entire perimeter of the quilt, using a coordinating or contrasting fabric to frame your beautiful patchwork heart. These final touches not only enhance the aesthetic appeal but also imbue the quilt with an even deeper sense of care and intentionality, making it an truly unforgettable keepsake.
There are many intricate steps to follow in this detailed quilting tutorial, but rest assured, Shabby Fabrics excels at explaining everything in clear, concise detail, making the process enjoyable and achievable. While creating one prayer quilt is immensely satisfying, you might find yourself inspired to create multiple pieces simultaneously. Batching your work, such as cutting all fabrics at once or piecing several heart panels in a single session, can significantly streamline the process, saving you time and effort. This allows you to produce a collection of these beautiful and comforting gifts, perfect for various occasions throughout the year. Whether for charity, gifting to loved ones, or simply to have on hand for unexpected needs, crafting multiple quilts can be both efficient and incredibly rewarding. Embrace the journey of creation, and let your hands craft comfort and love, one stitch at a time. Start your own meaningful crafting journey today with this wonderful pattern!