
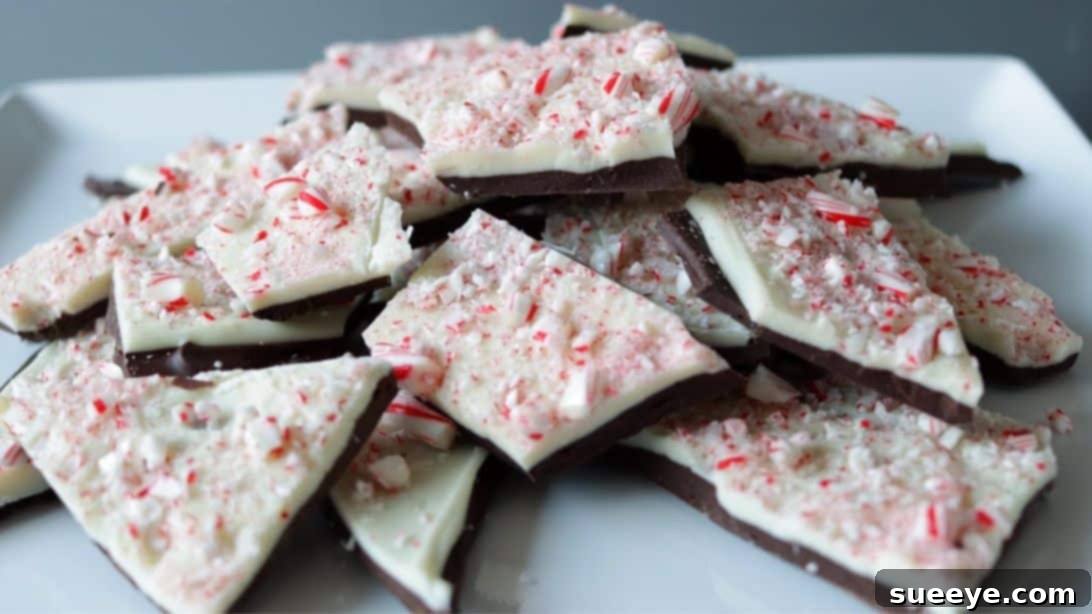
Embrace the festive spirit with a classic holiday treat that’s as delightful to make as it is to eat: Peppermint Bark. This beloved confection, renowned for its crisp texture and refreshing minty flavor combined with rich chocolate, is a cornerstone of holiday celebrations. Whether you’re crafting thoughtful homemade gifts, preparing for a party, or simply indulging in a seasonal craving, this recipe by In The Kitchen With Matt on YouTube offers a remarkably easy and satisfying experience. Imagine the joy of serving these shimmering, minty treats to friends and family, watching both children and adults light up with delight. What makes this recipe truly special is its incredible simplicity. With just four core ingredients, you can whip up a batch of gourmet-quality peppermint bark that tastes like it came straight from a high-end confectionery. Even better, it’s a perfect make-ahead dessert, allowing you to prepare it days in advance and store it, ready to be enjoyed whenever the mood strikes. Get ready to transform your kitchen into a holiday workshop and create unforgettable memories with this effortless peppermint bark recipe.
The Ultimate Easy 4-Ingredient Peppermint Bark Recipe for Holiday Magic
The holidays are synonymous with delicious treats, and few evoke the spirit of the season quite like homemade peppermint bark. This iconic candy, with its striking layers of dark and white chocolate crowned with festive crushed candy canes, is a timeless favorite. It’s not just a dessert; it’s an experience – a symphony of rich chocolate and cool peppermint that melts in your mouth. Our simplified recipe ensures that anyone, regardless of their baking experience, can create a stunning and delicious batch of peppermint bark. Forget complicated techniques or extensive ingredient lists; we’re focusing on maximum flavor with minimal effort. This guide will walk you through each step, providing expert tips and insights to ensure your peppermint bark is perfectly set, beautifully layered, and utterly irresistible. Prepare to impress your guests, delight your family, and maybe even treat yourself to a little holiday cheer.
Essential Ingredients for Flawless Peppermint Bark
Crafting perfect peppermint bark begins with selecting high-quality ingredients. While the list is short, the quality of each component significantly impacts the final taste and texture of your homemade confection. Here’s what you’ll need to create this festive delight:
- 3 cups of Quality Dark or Semi-Sweet Chocolate Chips: Opt for a reputable brand of chocolate chips or finely chopped baking chocolate. The better the chocolate, the richer and smoother your bark will be. Dark chocolate offers a delightful contrast to the sweet white chocolate and peppermint, while semi-sweet provides a milder, universally appealing flavor.
- 2½ cups of Premium White Chocolate Chips: Just like with the dark chocolate, choosing a good quality white chocolate is key. Look for white chocolate that contains cocoa butter for a creamier melt and superior taste. Avoid “white confectionery coating” or “candy melts” if you want a true chocolate flavor, as these often contain vegetable oils instead of cocoa butter.
- ¼ tsp of Pure Peppermint Extract (or more to taste): Peppermint extract is what gives this bark its signature refreshing kick. Start with a quarter teaspoon, but don’t hesitate to add a little more if you prefer a bolder mint flavor. Ensure you’re using pure extract, not imitation, for the best taste.
- 20-22 Mini Candy Canes, Crushed: These vibrant, crunchy pieces not only add a burst of peppermint flavor but also contribute to the beautiful festive appearance of the bark. Mini candy canes are easier to crush and distribute evenly, but larger ones can also be used if broken down sufficiently.
With these four simple ingredients, you’re well on your way to creating a homemade treat that rivals any store-bought version. The beauty of this recipe lies in its simplicity and the ability to customize it to your preferred taste profile.
Step-by-Step Guide: Crafting Your Own Peppermint Bark Masterpiece
Follow these easy directions carefully to achieve perfectly layered, irresistibly crunchy, and minty fresh peppermint bark. The process is straightforward, but attention to detail will ensure a professional-looking and tasting result.
Step 1: Preparing the Peppermint Dust and Dark Chocolate Base
Begin by preparing your festive topping. Place the mini candy canes into a sturdy Ziploc bag. Using a rolling pin, a meat mallet, or the bottom of a heavy pan, gently but firmly crush the candy canes until they are broken into small, irregular pieces, ranging from fine dust to small chips. Avoid pulverizing them into a powder if you want some textural variety. Set these crushed candy canes aside for later. Next, it’s time to melt your dark chocolate. Pour the 3 cups of dark or semi-sweet chocolate chips into a microwave-safe bowl. Heat the chocolate in 30-second intervals, stirring thoroughly after each interval. This gradual melting process prevents the chocolate from scorching and helps achieve a smooth, silky consistency. Continue heating and stirring until the chocolate is completely melted and beautifully smooth, without any lumps. Once melted, carefully pour the liquid chocolate onto a baking sheet that has been lined with parchment paper or a silicone mat. Using a spatula or the back of a spoon, spread the chocolate evenly into a thin layer. Aim for a thickness of about ⅛ to ¼ inch (3-6mm). The thinner the layer, the snappier your bark will be. Transfer the baking sheet to the refrigerator and allow the chocolate to freeze for approximately 15 to 20 minutes, or until it is firm to the touch and fully set. This quick chilling ensures a stable base for your white chocolate layer.
Step 2: Layering the Peppermint White Chocolate and Finishing Touches
While your dark chocolate base is chilling, prepare the white chocolate layer. Place the 2½ cups of white chocolate chips in another microwave-safe bowl. Melt the white chocolate using the same 30-second interval method, stirring well after each burst, until it is completely smooth and free of lumps. Once melted, stir in the ¼ teaspoon of peppermint extract until it is thoroughly combined. The extract should blend seamlessly, infusing the white chocolate with its refreshing aroma and taste. Remove the baking sheet with the set dark chocolate layer from the refrigerator. Immediately and carefully pour the melted peppermint white chocolate evenly over the dark chocolate layer. Use your spatula to gently spread it out into another thin, consistent layer, ensuring it covers the dark chocolate completely from edge to edge. Work relatively quickly here, as the cold dark chocolate will start to set the white chocolate. Before the white chocolate has a chance to fully set, generously sprinkle the reserved crushed candy canes all over the surface. Press them down very lightly with your palm or the back of a spoon to ensure they adhere well to the still-soft white chocolate. Return the baking sheet to the refrigerator for approximately 45 to 60 minutes, or for a quicker set, place it in the freezer for 30 to 45 minutes. The bark is ready when both chocolate layers are firm and snap cleanly when broken. Once fully chilled and hardened, remove the sheet from the fridge or freezer. Gently lift the entire bark slab off the parchment paper. Place it on a clean cutting board and break the peppermint bark into irregular pieces by hand or use a sharp knife for more uniform shards. Serve immediately or store for later enjoyment. Congratulations, you’ve just made incredible homemade peppermint bark!
Expert Tips for Perfect Peppermint Bark Every Time
While this recipe is incredibly simple, a few professional tips can elevate your homemade peppermint bark from good to absolutely outstanding, ensuring perfect results on your first try:
- Choose Your Chocolate Wisely: The quality of your chocolate makes a significant difference. High-quality chocolate melts more smoothly and has a richer flavor. Avoid chocolate chips that have wax added as they won’t melt as nicely or set as cleanly. For the best snap, look for chocolate with at least 60% cocoa solids for the dark layer and real white chocolate made with cocoa butter.
- Mastering the Melt: Melting chocolate slowly is crucial. While the microwave method is convenient, always use low power settings and stir frequently to prevent overheating and seizing (where the chocolate becomes thick and grainy). Alternatively, a double boiler offers a gentler, more controlled melt. Place a heat-proof bowl over a pot of simmering water, ensuring the bottom of the bowl doesn’t touch the water. Stir until melted.
- Achieving Even Layers: For a beautiful presentation and balanced flavor, aim for thin, even layers of both dark and white chocolate. Use an offset spatula or the back of a spoon to spread the chocolate quickly and smoothly.
- Crushing Candy Canes: To get varying textures in your crushed candy canes, place them in a freezer bag and cover them with a kitchen towel. Gently tap with a rolling pin or hammer. Avoid turning them into a fine powder unless that’s your preference. A mix of fine dust and small pieces adds visual appeal and textural interest.
- Temperature Control is Key: Ensure the first chocolate layer is fully set and cold before pouring the second layer. This prevents the colors from swirling and helps maintain distinct layers. Similarly, make sure the second layer is firm before breaking the bark.
- Preventing White Chocolate Seizing: White chocolate is more prone to seizing than dark chocolate. Be extra careful not to introduce any water or steam while melting. Even a tiny drop can ruin the texture.
- Storage for Freshness: Store your finished peppermint bark in an airtight container at room temperature for up to two weeks, or in the refrigerator for longer freshness. If storing in the fridge, let it come to room temperature for a few minutes before serving for optimal flavor and texture.
Creative Variations and Customizations
While the classic peppermint bark is perfection in itself, don’t hesitate to get creative! Here are some ideas to customize your bark:
- Chocolate Varieties: Experiment with milk chocolate for a sweeter bark, or a mix of dark and milk chocolate for a unique flavor profile. You could even use colored white chocolate melts for a vibrant touch.
- Alternative Extracts: Replace peppermint extract with other flavors like almond, orange, or even a hint of espresso for a different holiday twist.
- Add-ins and Toppings: Before the white chocolate sets, sprinkle on additional festive toppings. Ideas include:
- Chopped nuts (pecans, walnuts, almonds)
- Sprinkles (holiday-themed)
- Cocoa nibs for extra crunch and bitterness
- A drizzle of melted caramel or a sprinkle of sea salt
- Crushed Oreos or other cookies
- Gifting Presentation: Peppermint bark makes an excellent homemade gift. Break it into appealing shapes, stack it in festive tins or cellophane bags, and tie with a ribbon. It’s a personal touch that everyone appreciates.
Why Homemade Peppermint Bark is the Best
There’s an undeniable charm and satisfaction in making your own holiday treats, and peppermint bark is no exception. Beyond the significant cost savings compared to gourmet store-bought versions, homemade bark offers a superior taste experience. You control the quality of ingredients, ensuring a richer chocolate flavor and the perfect balance of mint. The process itself is a delightful activity, especially enjoyable with family, creating cherished memories. Plus, the ability to customize flavors and toppings means you can tailor each batch to personal preferences or dietary needs. The warmth of a homemade gift speaks volumes, conveying thoughtfulness and effort that pre-packaged items simply can’t replicate. So, skip the crowded stores and expensive specialty shops this year; gather your simple ingredients and embark on a rewarding culinary journey right in your own kitchen.
Indulge in the Sweet Simplicity
This easy 4-ingredient peppermint bark recipe is more than just a sweet treat; it’s an invitation to create, share, and savor the simple joys of the holiday season. From the satisfying crunch of the candy canes to the smooth, rich layers of chocolate, every bite is a celebration. It’s a testament to how effortlessly you can produce something truly special with minimal fuss. Whether you’re a seasoned baker or just starting your culinary adventures, this recipe promises success and smiles. So, go ahead, gather your ingredients, follow these steps, and prepare to delight everyone with your homemade creation. Don’t forget to check out In The Kitchen With Matt via YouTube for more fantastic recipes and inspiration. Happy baking, and happy holidays!
*A special thank you to In The Kitchen With Matt via YouTube for the wonderful inspiration and all images used in this delightful recipe guide. Be sure to visit and subscribe to their channel for more amazing culinary ideas!