
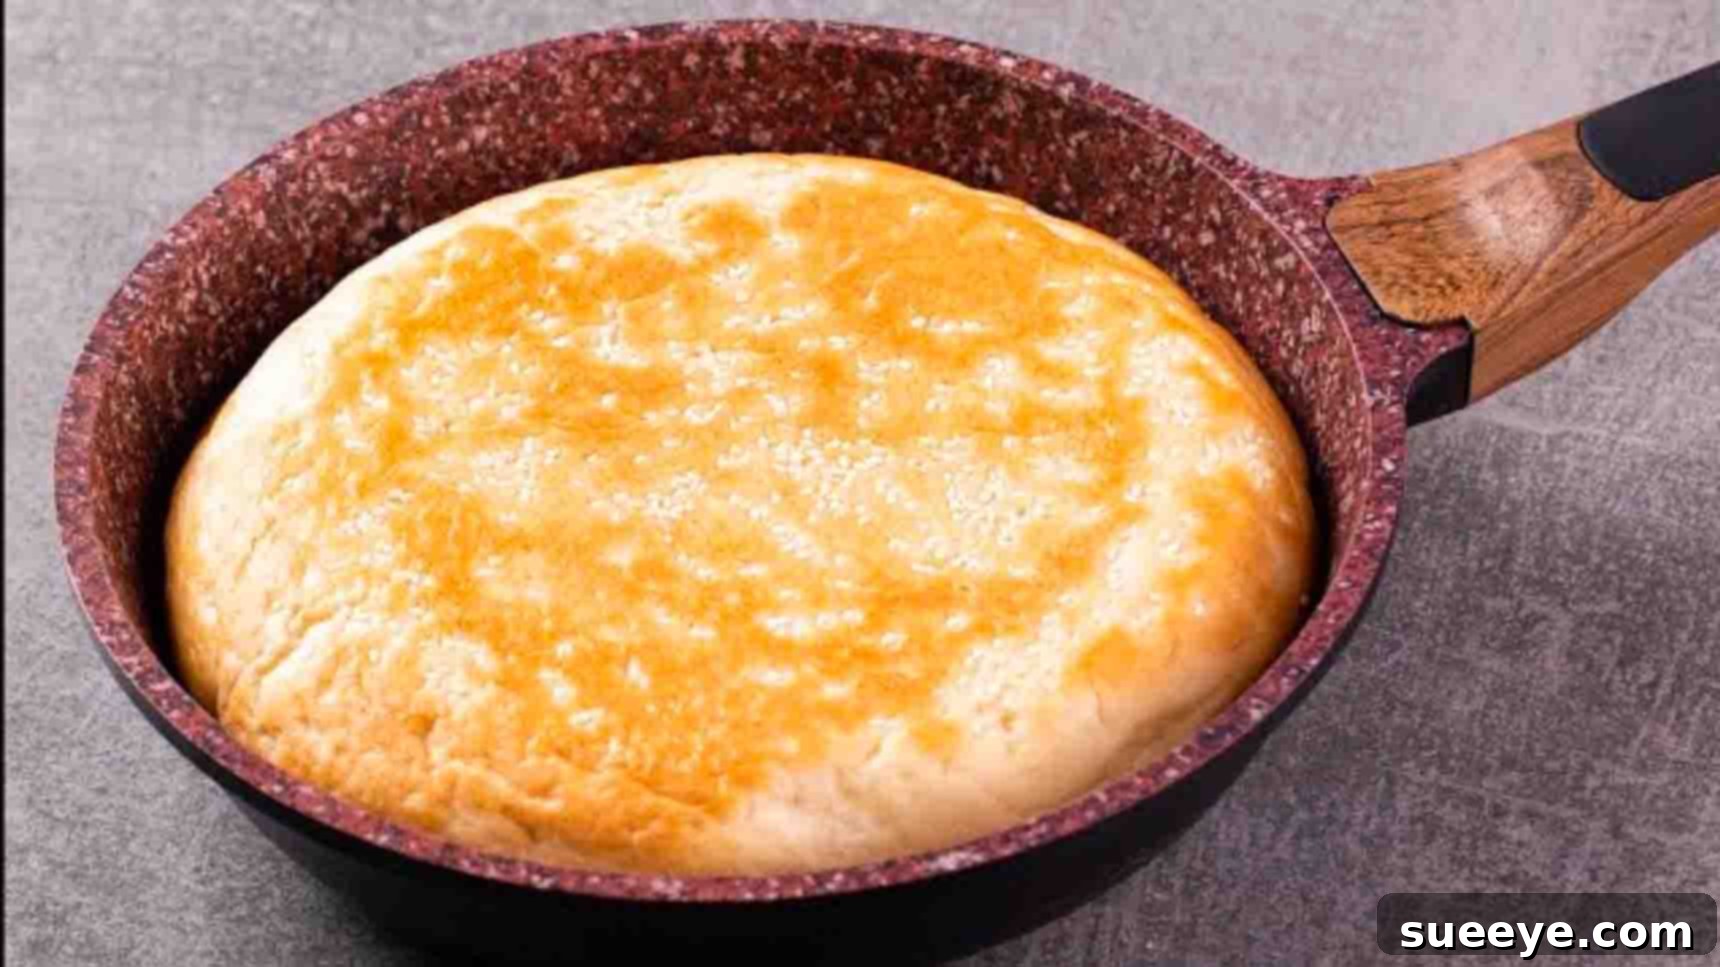
Stovetop Soft Bread Recipe: Bake Delicious No-Oven Bread Made Easy
Imagine the warm, comforting aroma of freshly baked bread filling your home, its crust golden and its interior impossibly soft. Now, imagine achieving this culinary delight without ever needing to turn on an oven! For many home bakers, an oven is considered an indispensable tool for bread making, but we’re here to challenge that notion. This incredible stovetop bread recipe from the talented creators at N’Oven – Cake & Cookies on YouTube proves that delicious, homemade bread is entirely possible with just a simple stovetop setup. Forget complex techniques or specialized equipment; this recipe is a game-changer for anyone seeking an easy, accessible way to enjoy soft, fluffy bread.
Whether you’re living in a small apartment without an oven, want to save energy, or simply love exploring innovative cooking methods, this no-oven bread is your answer. It’s surprisingly simple, incredibly rewarding, and yields a loaf that rivals its oven-baked counterparts in terms of texture and taste. Get ready to embark on a delightful baking journey and discover the joy of making super soft and utterly delicious bread on your stovetop. We’ll guide you through every step, from activating the yeast to achieving that perfect golden finish, ensuring your first stovetop bread experience is a resounding success.
Ingredients for Your Stovetop Soft Bread
Gathering your ingredients is the first exciting step towards making this amazing stovetop bread. You’ll find that most of these are pantry staples, making this recipe not only easy but also incredibly convenient. Each component plays a crucial role in achieving the desired soft texture and rich flavor.
- ¾ cup Lukewarm Water: Essential for activating the yeast. The temperature is key – too hot will kill the yeast, too cold won’t activate it.
- 2 tablespoons Granulated Sugar: Acts as food for the yeast, helping it to activate and providing a hint of sweetness to the bread.
- 2 teaspoons Active Dry Yeast: The leavening agent that makes your bread light and fluffy. Ensure it’s fresh for best results.
- 2 cups All-Purpose Flour: The foundation of your bread. Sifting it can help create a lighter texture, but it’s not strictly necessary.
- 1 tablespoon Powdered Milk: Adds richness, tenderness, and a lovely golden hue to the crust. It also contributes to the bread’s soft crumb.
- ½ teaspoon Salt: Balances the flavors, strengthens the gluten structure, and controls yeast activity. Don’t skip it!
- 1 tablespoon Cooking Oil (Vegetable, Canola, or Olive Oil): Adds moisture to the dough, making it more pliable and contributing to the bread’s soft texture.
- Sesame Seeds (optional): For sprinkling on top, adding a delightful nutty flavor and a beautiful visual appeal.
Step-by-Step Directions: How to Make Stovetop Bread
Follow these detailed instructions carefully, and you’ll be enjoying warm, homemade stovetop bread in no time. Precision and patience are your best friends in bread making, especially when you’re adapting to a new method like stovetop baking.
Step 1: Preparing the Dough and First Rise
The journey to perfect stovetop bread begins with creating a vibrant, active dough. This initial stage involves carefully combining your ingredients and allowing the yeast to work its magic, leading to a beautifully risen dough ready for baking.
- Activate the Yeast: In a medium-sized mixing bowl, combine ¾ cup of lukewarm water, 2 tablespoons of sugar, and 2 teaspoons of yeast. Stir gently until the sugar dissolves and the yeast is incorporated. The water should be comfortably warm, like a baby’s bath – typically between 105-115°F (40-46°C). If it’s too hot, it will kill the yeast; too cold, and it won’t activate.
- Proofing Period: Cover the bowl loosely with a clean kitchen towel or plastic wrap. Set it aside in a warm, draft-free place for about 5 to 10 minutes. During this time, the yeast will activate, feeding on the sugar and producing tiny bubbles. You should see a frothy, foamy layer forming on the surface – this is a good sign that your yeast is alive and ready to bake! If you don’t see foam, your yeast might be expired, or the water temperature was off; it’s best to start again.
- Add Dry Ingredients: Once your yeast is visibly active, add 2 cups of all-purpose flour, 1 tablespoon of powdered milk, and ½ teaspoon of salt to the bowl.
- Incorporate Oil: Pour in 1 tablespoon of cooking oil. This oil will contribute to the dough’s softness and elasticity.
- Mix to Form Dough: Using a wooden spoon or your hands, begin to mix the ingredients together. Start with circular motions, gradually bringing everything into a shaggy mass. Continue mixing until a soft, slightly sticky dough begins to form.
- Knead for Smoothness: Transfer the dough to a lightly floured clean surface. Knead the dough for approximately 5 to 7 minutes. The kneading process is crucial as it develops the gluten in the flour, which gives the bread its structure and chewy, yet soft, texture. You’ll notice the dough becoming smoother, more elastic, and less sticky as you knead. It should be supple and spring back when gently poked.
- First Rise (Bulk Fermentation): Lightly grease the mixing bowl with a little cooking oil. Place the kneaded dough into the bowl, then turn it over once to ensure it’s lightly coated with oil on all sides (this prevents it from drying out). Cover the bowl tightly with plastic wrap or a damp kitchen towel. Place it in a warm environment (like a switched-off oven with the light on, or a sunny spot) for about 1 hour, or until the dough has roughly doubled in size. This first rise allows the yeast to produce ample carbon dioxide, giving your bread volume and flavor.
- Degas the Dough: After the first rise, gently punch down the dough to release the accumulated gases. Transfer it back to your lightly floured surface and knead it for just 1 to 2 more minutes. This brief second knead helps to redistribute the yeast and creates a finer crumb structure.
Step 2: Second Rise and Stovetop Baking
With your dough perfectly prepared, it’s time to move to the stovetop, where the magic truly happens. This stage involves a final short rise and careful cooking to achieve a beautifully baked, soft loaf without an oven.
- Prepare the Pan: Select a heavy-bottomed pan with a lid that fits snugly, ideally one that’s non-stick or well-seasoned cast iron. Lightly brush the inside of the pan with cooking oil. This prevents the dough from sticking and helps create a golden crust.
- Shape and Place Dough: Gently shape your kneaded dough into a round or oval loaf, ensuring it fits comfortably in your prepared pan without touching the sides too much, as it will expand. Carefully place the dough into the oiled pan.
- Second Rise (Proofing): Cover the pan with its lid. Place the covered pan in a warm, draft-free spot for another 15 to 20 minutes. This shorter second rise (proofing) allows the dough to relax, regain some air, and develop its final structure before cooking. You’ll notice it puffing up slightly.
- Prepare for Baking: After the second rise, gently brush the top surface of the dough with a small amount of milk. This milk wash isn’t just for shine; it helps achieve that desirable golden-brown color on the crust and encourages the sesame seeds to adhere. Now, generously sprinkle sesame seeds over the milk-brushed dough, if using.
- Stovetop Setup: Place a flat, heavy-bottomed pan or a cast-iron griddle on your stovetop burner. This will act as a heat diffuser, preventing direct heat from burning the bottom of your bread. Set your stove to a low-medium heat setting.
- Preheat the Diffuser: Allow the flat pan or griddle to preheat for 5 to 7 minutes. This ensures an even, consistent heat source for your bread, which is crucial for even cooking on a stovetop.
- Begin Stovetop Baking: Carefully place your bread pan (with the dough inside) on top of the preheated flat pan. Ensure the lid is securely on the bread pan. Cook on low-medium heat for approximately 10 minutes. Avoid the temptation to lift the lid frequently, as this releases heat and moisture, disrupting the cooking process.
- Flip and Finish: After 10 minutes, gently remove the lid and carefully flip the bread over to cook the other side. Re-cover the pan with the lid and continue cooking for another 5 to 7 minutes. The goal is a bread that is golden brown on both sides and cooked through. You can carefully tap the bottom of the bread; if it sounds hollow, it’s likely done.
- Cooling Process: Once cooked, turn off the heat. Carefully transfer the hot bread from the pan onto a wire rack. Immediately cover the warm bread with a clean kitchen cloth. Allowing the bread to cool completely under a cloth helps trap steam, which prevents the crust from becoming too hard and ensures the interior remains incredibly soft and moist. Resist the urge to slice into it immediately – cooling is an essential part of the baking process for optimal texture.
Tips for Stovetop Bread Baking Success
Achieving perfect stovetop bread is simple when you keep a few key tips in mind. These insights will help you navigate common baking challenges and ensure your bread turns out wonderfully soft and delicious every time.
- Yeast Temperature is Crucial: Always ensure your water is lukewarm (105-115°F / 40-46°C) for yeast activation. Too hot will kill it, too cold will prevent it from activating, both leading to dense bread.
- Don’t Rush the Rise: Patience is a virtue in bread making. Allow the dough ample time to rise in a warm, draft-free place. Rising times can vary based on ambient temperature and yeast freshness. Trust your eyes – the dough should double in size.
- Use a Heavy-Bottomed Pan: A heavy pan (like cast iron or a good quality non-stick pan) distributes heat more evenly and prevents burning, which is especially important for stovetop baking.
- Maintain Low, Consistent Heat: The key to stovetop baking is low and slow. Using a heat diffuser (another flat pan or griddle) under your bread pan helps prevent the bottom from burning while allowing the interior to cook thoroughly.
- Resist the Urge to Peek: Opening the lid frequently releases precious heat and steam, which can slow down the cooking process and affect the bread’s texture. Only peek when necessary, like when it’s time to flip.
- Proper Cooling is Essential: Covering the hot bread with a cloth immediately after cooking helps trap steam, which softens the crust and ensures the bread stays moist. Cooling on a wire rack allows air circulation, preventing a soggy bottom.
- Adjust Flour as Needed: Humidity can affect how much flour your dough needs. If your dough feels too sticky after the initial knead, add a tiny bit more flour, a tablespoon at a time, until it’s pliable but still soft.
Delicious Variations and Serving Suggestions
While this basic stovetop soft bread recipe is fantastic on its own, there’s always room for customization. Experiment with these ideas to make the recipe truly your own:
- Seed Variations: Instead of or in addition to sesame seeds, try sprinkling poppy seeds, nigella seeds (kalonji), or even a mix of ‘everything bagel’ seasoning on top before cooking.
- Herb Infusion: For a savory twist, knead a tablespoon of dried herbs like oregano, rosemary, or Italian seasoning into the dough during the last few minutes of kneading.
- Garlic & Cheese: Add a teaspoon of garlic powder and a quarter cup of grated Parmesan cheese to the dry ingredients for a wonderfully aromatic loaf.
- Sweet Bread Option: Increase the sugar by another tablespoon and add a teaspoon of cinnamon for a subtly sweet bread that pairs well with coffee or tea.
- Serving Suggestions:
- Enjoy warm slices simply with butter and your favorite jam or honey.
- Make quick sandwiches with deli meats, cheese, and fresh vegetables.
- Serve alongside hearty soups, stews, or chili for dipping.
- Toast slices and top with avocado, eggs, or bruschetta for a delicious breakfast or light meal.
Experience the Joy of Easy Stovetop Soft Bread
Who knew making delicious, soft bread could be so accessible? This stovetop method from N’Oven – Cake & Cookies truly demystifies bread baking, proving that you don’t need a fancy oven or years of experience to enjoy the comforting taste of homemade bread. It’s a fantastic recipe for beginners, for those with limited kitchen space, or simply for anyone looking for a quicker and more energy-efficient way to bake.
The satisfaction of pulling a warm, golden loaf off your stovetop, knowing you created something so wonderful with minimal equipment, is truly unmatched. So, gather your ingredients, follow these detailed steps, and prepare to impress yourself and your loved ones with this incredibly easy and utterly delightful stovetop soft bread. Don’t hesitate – give this recipe a try today and transform your kitchen into a fragrant bakery!