
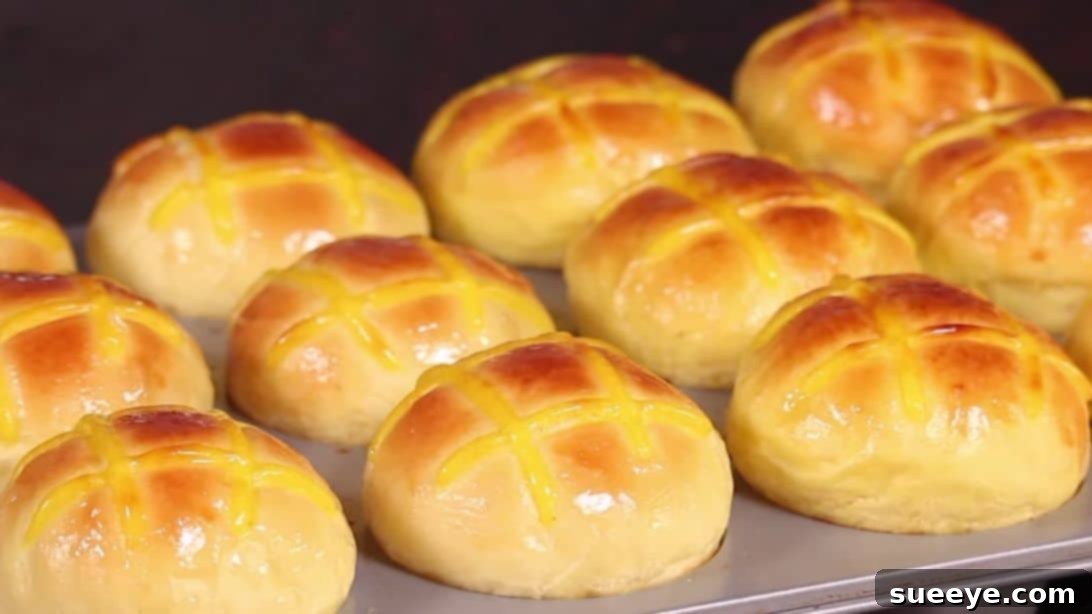
Prepare to revolutionize your dinner table with these unbelievably fluffy potato dinner rolls! Inspired by the culinary brilliance of How Tasty on YouTube, this isn’t just another ordinary dinner roll recipe; it’s a delightful upgrade that promises to become a staple in your home. By masterfully blending the tender texture of classic milk bread with the rich moisture of mashed potatoes, we create an extraordinary bun that is exceptionally soft, airy, and utterly irresistible. Forget the hassle of heavy machinery; this dough is wonderfully easy to mix, knead, and shape by hand, making the baking process a true joy. Whether served warm with a slather of butter, alongside your favorite meal, or as a delightful snack, these rolls are guaranteed to impress.
Imagine sinking your teeth into a cloud-like roll, its subtle potato flavor perfectly complementing its pillowy soft crumb. This recipe takes traditional baking to a new level, offering a unique texture and depth of flavor that sets it apart. It’s perfect for beginner bakers and seasoned pros alike, providing clear, step-by-step instructions that ensure success every time. Get ready to embark on a baking adventure that culminates in the most delicious, melt-in-your-mouth potato buns you’ve ever tasted, all from the comfort of your own kitchen.
Ingredients: Crafting Your Fluffy Potato Rolls
Gathering high-quality ingredients is the first step towards baking perfection. Each component plays a crucial role in achieving the desired texture and flavor of these remarkable potato dinner rolls. Ensure all ingredients are at room temperature unless otherwise specified, as this helps them combine more evenly and promotes optimal yeast activity.
For the Irresistible Dough:
- 2 cups (approx. 240g) All-Purpose Flour: The primary structural component of our rolls, providing the framework for their airy texture.
- ½ tsp Salt: Essential for enhancing the overall flavor of the bread and helps to regulate yeast fermentation, preventing the dough from rising too quickly.
- 1 tbsp (13g) Granulated Sugar: Serves as food for the yeast, accelerating its activity and contributing to a beautiful golden crust and a hint of sweetness in the finished rolls.
- 1 tsp (3g) Instant Dry Yeast or Active Dry Yeast: The magical leavening agent responsible for the rolls’ incredible fluffiness and rise. Instant yeast can be mixed directly with dry ingredients, while active dry yeast usually requires proofing in liquid first.
- ⅓ cup (approx. 80g) Mashed Potatoes: The secret ingredient for unparalleled moisture, exceptional softness, and a unique, delicate flavor profile. It’s crucial that they are smooth, lump-free, and unseasoned (no added butter, milk, or herbs from leftovers).
- 2½ tbsp (35g) Unsalted Butter, melted: Adds richness, tenderness, and a delicate buttery flavor that elevates the overall taste and texture of the dough.
- ½ cup + 1 tsp (approx. 125ml) Milk, lukewarm: Crucial for activating the yeast and hydrating the flour to form the dough. It should be warm to the touch (around 105-115°F or 40-46°C) – not too hot to kill the yeast, and not too cold to inhibit its activity.
For the Elegant Topping:
This simple yet effective topping not only adds a delightful aesthetic appeal but also a subtle layer of flavor, making your rolls look as professional and enticing as they taste.
- 1½ tbsp (12g) All-Purpose Flour: Forms the base of our decorative paste, providing the necessary consistency for piping.
- ⅛ tsp Salt: A tiny pinch to balance the flavors in the topping.
- 1 tsp (4g) Granulated Sugar: Adds a touch of sweetness to the topping, complementing the dough beautifully.
- ½ cup (approx. 120ml) Milk, warm: Helps to create a smooth, pipeable consistency for the topping mixture.
- ⅛ tsp Turmeric Powder, optional: Incorporating turmeric provides a beautiful, vibrant golden hue to the topping, along with a very subtle earthy note that doesn’t overpower the rolls. It’s primarily for visual appeal.
Directions: Baking Your Way to Fluffy Perfection
Follow these detailed, step-by-step instructions closely to achieve the most delectable, fluffy potato dinner rolls that will undoubtedly become a family favorite. Precision and patience are your best tools in baking, ensuring each stage contributes to the perfect final product.
Step 1: Preparing the Dough and First Rise
Begin by combining your dry ingredients for the dough. In a generously sized mixing bowl, which will accommodate the dough as it rises, combine the all-purpose flour and salt. Whisk them thoroughly until they are evenly distributed, ensuring every grain of flour is seasoned. Next, add the granulated sugar and the instant dry yeast (or active dry yeast, if you’ve proofed it separately), mixing again until these new additions are fully incorporated into the flour mixture.
Now, it’s time to introduce the wet ingredients that will bring the dough to life. Pour in the lukewarm milk, followed by the melted unsalted butter, and finally, the smooth mashed potatoes. Using a sturdy spatula or a wooden spoon, begin to mix all the ingredients together. Continue mixing patiently until everything is fully combined and a sticky, shaggy dough begins to form in the bowl. Don’t worry if it looks a bit messy or too sticky at this stage – that’s perfectly normal for a high-hydration dough!
Lightly dust your clean work surface with a small amount of all-purpose flour. Transfer the sticky dough onto this floured surface. Begin kneading the dough with determination and rhythm. Knead for approximately 8 to 10 minutes, or until the dough undergoes a magical transformation: it should become smooth, elastic, and significantly less sticky, no longer adhering excessively to your hands or the surface. A good way to test for readiness is the “windowpane test”: gently stretch a small piece of dough; if it stretches thin enough to be translucent without tearing, it’s ready.
Once adequately kneaded, gather the dough and shape it into a smooth, taut ball. Lightly grease a clean bowl with a touch of neutral oil or melted butter, then place the dough ball inside, turning it once to lightly coat all sides. This prevents it from sticking during the rise. Cover the bowl securely with plastic wrap or a damp kitchen towel. Find a warm, draft-free spot in your kitchen – a turned-off oven with the light on, or near a warm window away from drafts, works exceptionally well. Let the dough rise for approximately 1 to 2 hours, or until it has visibly doubled in size. This first rise, known as bulk fermentation, is crucial for developing flavor and texture.
After the dough has successfully risen and looks beautifully puffy, gently “degas” it by lightly pressing down to release the trapped air. This helps to redistribute the yeast and creates a finer crumb. Reshape the dough back into a smooth ball. On your lightly floured surface, divide the dough into 6 equal pieces. For best results and uniform rolls, which ensures even baking, you can use a kitchen scale to ensure each piece weighs precisely the same.
Take each individual piece of dough and roll it smoothly into a smaller, tight ball. The goal here is to create surface tension, which helps the rolls rise beautifully and maintain their shape during the second proof and baking. Arrange each dough ball into a greased muffin mold or a baking pan lined with parchment paper, ensuring there’s a little space between each for expansion. Cover the muffin mold or baking pan again with plastic wrap or a damp cloth and let the dough balls undergo their second rise (proofing) in a warm place for about 30 minutes, or until they look noticeably puffy and have increased by about 50-75% in volume.
Step 2: Preparing the Topping and Baking
While your buns are undergoing their second proof, prepare the delightful topping that will give them their signature decorative look. Place a small non-stick pan on your stove over low heat. In the pan, thoroughly whisk together the all-purpose flour, salt, and sugar until they are perfectly blended.
Gradually pour the warm milk into the pan, stirring continuously and vigorously with a whisk to prevent any lumps from forming. It’s important to keep stirring to achieve a smooth consistency. Continue cooking and mixing for a few minutes; the mixture will slowly thicken into a smooth, paste-like consistency, similar to a thin pudding. Once thickened, if desired, stir in the turmeric powder until it is fully incorporated, lending a beautiful golden hue to your topping mixture.
Transfer this warm topping mixture into a piping bag. Snip a small amount off the very tip of the piping bag – just enough to allow a controlled, thin stream for delicate decoration, typically about a ⅛-inch opening. Set the piping bag aside until your buns have finished their second rise and are ready for decoration.
Once the buns have visibly doubled in size during their second rise and are wonderfully puffy and light, they are ready for the final touches before baking. Gently brush the tops of each bun with an egg wash (prepared by whisking one egg with a tablespoon of water) or, for an alternative, use a simple mixture of milk and a tiny pinch of turmeric powder. This egg wash or milk mixture will help achieve a beautiful, glossy, golden-brown crust during baking.
Now, take your piping bag filled with the topping mixture. Get creative with your designs! Pipe decorative patterns onto the top of each bun. Simple swirls, elegant crisscross lines, or even a more intricate design will significantly elevate the presentation of your homemade rolls, making them truly special.
Carefully transfer the muffin mold or baking pan into a preheated, no-fan oven set to 180°C (350°F). Bake for approximately 19 to 20 minutes, or until the tops of the rolls are beautifully golden brown and they sound hollow when lightly tapped on the bottom. Baking times can vary slightly depending on your oven, so keep a close eye on them towards the end of the baking period to prevent over-browning.
Once baked to golden perfection, remove the rolls from the oven and let them cool slightly in the pan for a few minutes. This allows them to firm up slightly before transferring them to a wire rack. Allow them to cool down completely, or at least to a comfortable handling temperature, before serving. Enjoy the incredible aroma filling your kitchen and savor the taste of these homemade masterpieces!
The Magic Behind Fluffy Potato Rolls: Why This Recipe Works
What exactly makes these potato dinner rolls exceptionally soft, moist, and fluffy? It’s a brilliant combination of time-honored baking techniques and specific ingredients, primarily the clever incorporation of mashed potatoes and the principles often found in the milk bread method.
Mashed potatoes are the secret weapon here. They add an incredible amount of moisture to the dough, far more than water or milk alone, preventing the rolls from drying out quickly and contributing to an extraordinarily softer crumb that stays fresh for longer. The starches present in the potatoes also play a crucial role in binding moisture and promoting a tender, almost pillowy texture that is truly unique and addictive. This makes the rolls not just soft on the day of baking, but for days to come.
Furthermore, the use of a milk-based dough, drawing inspiration from the renowned Japanese milk bread (often associated with the Tangzhong or Yudane method, though simplified here for ease), significantly contributes to the rolls’ characteristic tenderness and resilience. Milk provides essential fats and sugars that enrich the dough, leading to a richer flavor profile and a velvety texture that melts in your mouth. This intelligent fusion of mashed potatoes and a milk-enriched dough ensures a roll that is not only profoundly delicious but also boasts an unparalleled light, airy, and incredibly soft interior, making every single bite a delight. The structure of the dough, strengthened by the gluten developed during kneading and softened by the potato and milk, allows for a high rise and an open, fluffy crumb.
Expert Tips for Baking Perfect Potato Rolls
Achieving bakery-quality rolls at home is entirely possible with a few insider tips and tricks. Paying attention to these details will significantly elevate your baking results and ensure consistently perfect fluffy potato dinner rolls every time.
- Perfect Mashed Potatoes are Key: Always use plain, unseasoned mashed potatoes for this recipe. If you’re using leftover mashed potatoes, ensure they are free of large chunks, added herbs, garlic, or excessive butter/cream that might interfere with the dough’s chemistry and flavor balance. Russet or Yukon Gold potatoes are generally preferred for mashing due to their high starch content, which contributes to a fluffy texture.
- Verify Yeast Activity: Yeast is a living organism, and its vitality is crucial. If using active dry yeast, it’s always wise to proof it first. Mix it with a small amount of the lukewarm milk and a pinch of sugar (taken from the recipe’s total) for 5-10 minutes before adding it to the flour. It should become bubbly and foamy, indicating it’s alive and active. If using instant dry yeast, you can mix it directly with the dry ingredients as instructed, but ensure your yeast isn’t expired.
- Kneading is Non-Negotiable: Do not skimp on kneading time. This crucial step develops the gluten strands in the flour, which are essential for the rolls’ structure, elasticity, and that signature chewy-soft texture. If kneading by hand, it can take anywhere from 10-15 minutes of consistent effort. The dough should transform from a shaggy, sticky mass into a smooth, elastic, and pliable ball. The “windowpane test” is your best indicator.
- Consistent Warm Proofing Environment: A stable, warm, and draft-free environment is absolutely vital for optimal rising. Cold spots can inhibit yeast activity, while direct drafts can dry out the dough. Excellent choices include your oven (turned off, with the light on, which generates gentle heat), a warm spot near a sunny window, or a proofer box if you have one. Too cold, and the dough won’t rise effectively; too hot, and it might overproof or develop an undesirable yeasty flavor.
- Avoid Overproofing: While a good rise is desirable, overproofing can lead to a dense, sometimes sour texture and an overly yeasty flavor. Keep a close eye on the dough during both rises; it should roughly double in size (or increase by 50-75% for the second rise), not triple. If it looks saggy or collapses when poked, it’s likely overproofed.
- Uniform Rolls for Even Baking: For professional-looking rolls that bake evenly, divide your dough into equally sized portions. A kitchen scale is your best friend here, ensuring consistent weight for each dough ball. This prevents some rolls from being underbaked while others are overbaked.
- Preheat Oven Thoroughly: Always ensure your oven is fully preheated to the specified temperature before placing the rolls inside. An oven thermometer can help verify the accuracy of your oven’s temperature. Avoid opening the oven door too frequently during baking, as this can cause temperature fluctuations and lead to uneven baking or deflated rolls.
- Proper Cooling is Essential: Once baked, allow the rolls to cool slightly in the pan for a few minutes, then transfer them to a wire rack to cool completely. This prevents the bottoms from becoming soggy due to trapped steam and allows the internal structure of the bread to set properly, resulting in the best texture.
Creative Variations to Try
Once you’ve mastered the basic recipe for these incredible fluffy potato dinner rolls, feel free to get creative and experiment with different flavor profiles to suit your taste and occasion. The versatile base dough is perfect for incorporating a myriad of additions.
- Garlic Herb Rolls: Infuse your rolls with aromatic flavors by adding 1-2 cloves of finely minced fresh garlic and 1 tablespoon of fresh chopped herbs (such as rosemary, thyme, chives, or parsley) to the dough during the kneading stage. This creates a wonderfully savory side for any meal.
- Cheesy Potato Rolls: For an extra layer of indulgence, incorporate ½ cup of shredded sharp cheddar, Parmesan, or Gruyère cheese into the dough towards the end of the kneading process. You can also sprinkle extra cheese on top of the rolls during the last 5-10 minutes of baking for a crispy, cheesy crust.
- Sweet Potato Rolls: Substitute the regular mashed potatoes with an equal amount of mashed sweet potatoes for a slightly sweeter, earthier flavor and a beautiful natural orange hue. You might want to adjust the sugar content in the dough slightly, depending on the sweetness of your sweet potatoes.
- Spicy Kick: If you enjoy a little heat, a small pinch of cayenne pepper or red pepper flakes can be added to the dough for a subtle warmth that adds an intriguing dimension to the rolls.
- Sesame Seed Topping: For a classic touch and a nutty crunch, skip the piped topping and instead sprinkle sesame seeds generously over the rolls after brushing them with egg wash, just before baking. Poppy seeds or everything bagel seasoning are also great options.
- Onion & Chive Rolls: Sauté finely diced onion until caramelized and add to the dough with fresh chives for a savory and fragrant roll.
Serving Suggestions: What to Pair with Your Fluffy Rolls
These versatile potato dinner rolls are truly perfect for almost any meal or occasion. Their tender texture and subtle flavor make them an ideal accompaniment to a wide range of dishes, from hearty comfort food to lighter fare.
- With Dinner: They are an ideal accompaniment to hearty stews, rich pot roasts, roasted chicken, grilled fish, or a simple steak. Their ability to soak up gravies and sauces makes them an indispensable part of a comforting meal.
- Breakfast/Brunch: Serve them warm with a generous slather of butter, your favorite jam or marmalade, or alongside scrambled eggs and crispy bacon for a comforting and satisfying morning meal. They can also be sliced and used for miniature breakfast sandwiches.
- Sandwich Sliders: Their soft texture and individual size make them absolutely perfect for crafting delicious small sandwiches or sliders. Fill them with pulled pork, shredded chicken salad, thinly sliced deli ham and cheese, or even mini veggie burgers.
- Soups and Salads: These rolls are excellent for soaking up delicious broths from soups or complementing a fresh green salad, adding substance and comfort to a lighter meal.
- As a Snack: Sometimes, the best way to enjoy them is simply plain, fresh from the oven, with just a touch of butter. They make for a delightful and satisfying snack any time of day.
- Holiday Feasts: They’re a guaranteed crowd-pleaser at Thanksgiving, Christmas, or any festive gathering, offering a homemade touch that everyone will appreciate.
Storage and Freezing Instructions
Proper storage ensures your homemade potato rolls stay fresh, soft, and delicious for as long as possible, allowing you to enjoy your baking efforts for days or even weeks.
- Room Temperature Storage (Baked Rolls): Once completely cooled, place the baked rolls in an airtight container or a resealable plastic bag. Store them at room temperature for up to 2-3 days. Ensuring they are fully cool before storing prevents condensation, which can make them soggy.
- Refrigeration (Baked Rolls): While not strictly necessary, you can refrigerate baked rolls for up to 5 days. However, refrigeration can sometimes dry out bread slightly, so it’s often best to keep them at room temperature for short-term storage or freeze them for longer periods.
- Freezing Baked Rolls: This is an excellent option for long-term storage. Once the rolls are completely cooled, arrange them in a single layer on a baking sheet and flash freeze them for about an hour until solid. Then, transfer the frozen rolls to a freezer-safe bag or container, removing as much air as possible to prevent freezer burn. They can be frozen for up to 2-3 months. To reheat, thaw at room temperature for an hour or two, then warm in a preheated oven (175°C/350°F) for 5-10 minutes, or microwave briefly until soft and warm.
- Freezing Dough (Unbaked Rolls): If you want to prepare ahead, you can freeze the dough after its first rise and after dividing it into individual balls. Flash freeze the dough balls on a baking sheet until solid (this prevents them from sticking together), then transfer them to a freezer-safe bag. They can be frozen for up to 2-3 weeks. To bake from frozen, thaw the dough balls overnight in the refrigerator. Then, arrange them in your muffin mold or baking pan and let them rise at room temperature until doubled (this may take longer than usual) before brushing and baking as usual.
*All these images are credited to How Tasty via YouTube. Give their channel a visit and subscribe for more amazing culinary inspiration and delicious recipes!*
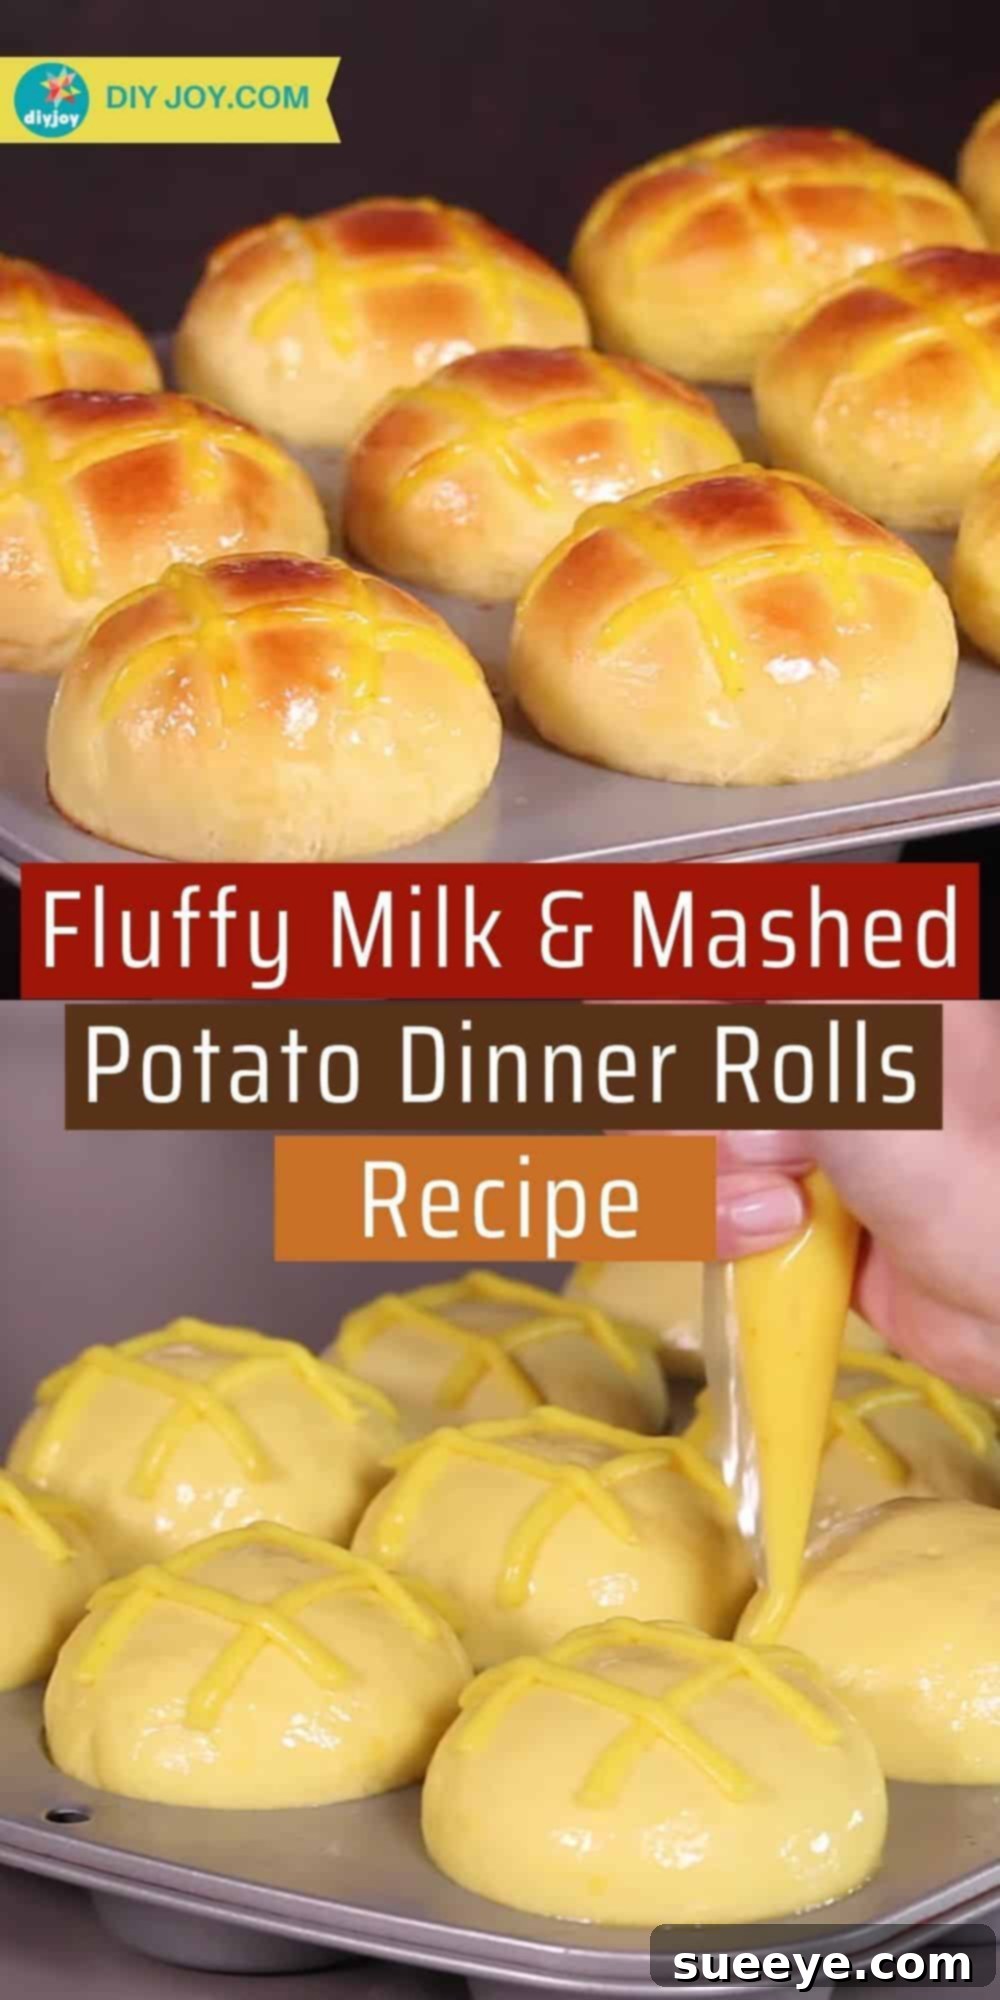
Fluffy Potato Dinner Rolls: Your New Favorite Homemade Bread
Baking these fluffy potato dinner rolls is a truly rewarding experience that yields incredibly delicious and memorable results. The unique combination of simple, wholesome ingredients and a straightforward, approachable process results in a bread that is far from ordinary. Perfect for any meal, from a casual weeknight dinner to a grand holiday feast, these rolls bring unparalleled comfort, rich flavor, and the unmistakable warmth of homemade goodness to your table. We wholeheartedly encourage you to try this recipe and discover the pure joy of baking and sharing these exceptional buns for yourself. They are sure to become a beloved staple in your culinary repertoire. Happy baking, and enjoy every fluffy bite!