
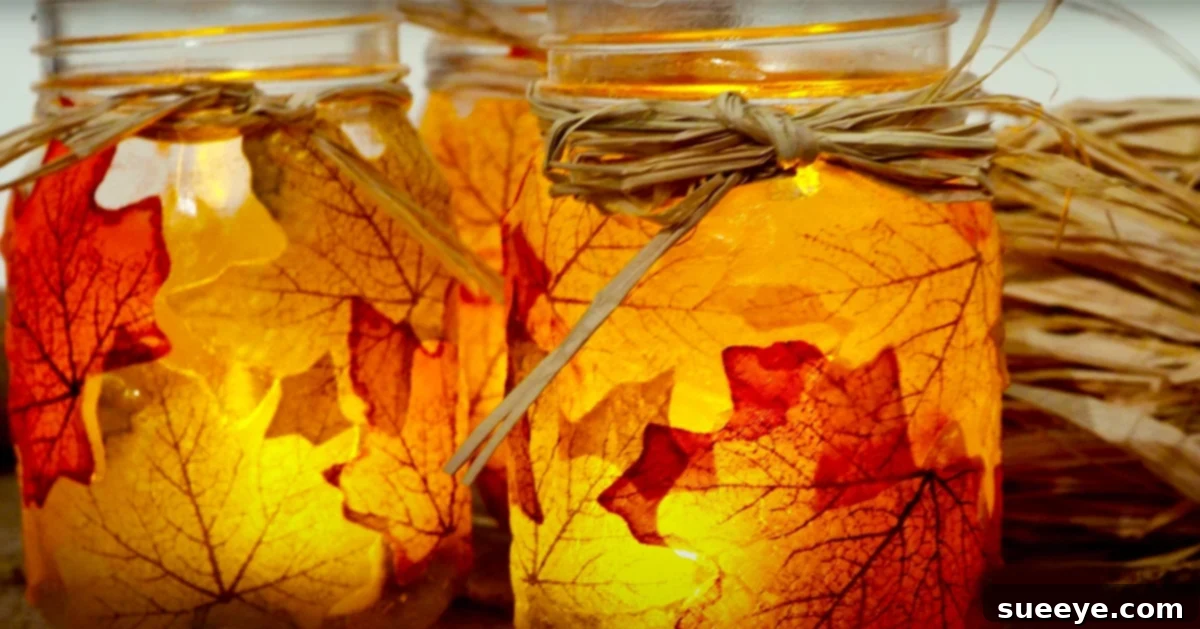
DIY Fall Leaves Mason Jar Centerpieces: An Easy & Budget-Friendly Guide to Autumn Decor
As the crisp air of autumn descends and the world transforms into a symphony of reds, oranges, and golds, our homes naturally follow suit. Embracing the warmth and beauty of the season through decor doesn’t have to be complicated or expensive. In fact, some of the most charming fall decorations are those you can craft yourself with minimal effort and cost. If you’re looking for a delightful way to infuse your living space with autumnal charm, these DIY fall leaves mason jar centerpieces are an absolute must-try. Inspired by simple and accessible tutorials, such as the one shared by Better Homes and Gardens on YouTube, this project epitomizes simplicity, affordability, and personal satisfaction.
Imagine transforming ordinary mason jars into captivating decorative pieces in under 30 minutes! This craft is not only incredibly straightforward, requiring just a handful of supplies, but it also offers a fantastic opportunity to unleash your creativity. Whether you’re planning a cozy craft day with friends, seeking a rewarding solo project, or simply want to add a unique touch to your fall festivities, these mason jar centerpieces are perfectly suited. They’re a brilliant solution for upgrading those empty jars lying around and a wonderful alternative to mass-produced store-bought decor. Crafting your own allows you to achieve the exact aesthetic you envision, often at a fraction of the cost, making your fall home decor truly your own.
There’s an undeniable joy that comes from creating something beautiful with your own hands. Beyond the significant cost savings, DIY projects like these fall leaf mason jars offer a therapeutic escape, a sense of accomplishment, and the satisfaction of knowing every piece tells a story. Why settle for generic decorations when you can personalize every detail, from the color of the leaves to the choice of embellishments? This guide will walk you through everything you need to know, ensuring your crafting experience is as enjoyable as the finished product. Let’s gather our materials and begin creating some stunning autumn magic!
Why DIY Your Fall Decor? The Benefits of Crafting
Opting for DIY home decor, especially during seasonal changes, comes with a myriad of benefits. Firstly, it’s incredibly budget-friendly. Store-bought fall decorations, while beautiful, can quickly add up, especially if you’re decorating multiple rooms or looking for unique statement pieces. Crafting your own allows you to use affordable materials, many of which you might already have, significantly reducing expenses.
Secondly, personalization is key. When you craft your own centerpieces, you have complete control over the design, colors, and overall aesthetic. You can choose silk leaves that perfectly match your home’s color scheme, select specific jar sizes, and add embellishments that reflect your personal style. This level of customization is rarely available with mass-produced items, ensuring your decor is truly one-of-a-kind.
Moreover, crafting offers a wonderful creative outlet and can be a remarkably relaxing activity. The process of assembling, arranging, and decorating can be meditative, providing a much-needed break from daily stresses. It’s also an excellent way to spend quality time with family and friends, making memories while creating something beautiful together. Finally, repurposing old mason jars and other materials promotes sustainability, giving new life to items that might otherwise be discarded.
Essential Supplies for Your Fall Leaves Centerpieces
One of the most appealing aspects of this project is the minimal number of supplies required. You’ll likely find most of these items readily available at local craft stores, dollar stores, or even around your home. Here’s a detailed look at what you’ll need:
- Mod Podge: This all-in-one glue, sealer, and finish is the star of the show. It’s essential for adhering your leaves to the jar and providing a protective, long-lasting coating. There are various types of Mod Podge, including glossy, matte, and even outdoor formulas. For these centerpieces, either glossy or matte will work beautifully depending on your desired finish. The glossy version will give your leaves a subtle sheen, while matte will offer a more natural, subdued look.
- Foam Brush: A simple foam brush is ideal for applying an even, streak-free coat of Mod Podge. Its soft texture helps to spread the adhesive smoothly without leaving bristles behind. You can also use a regular paintbrush, but foam brushes are inexpensive and perfect for this type of application.
- Mason Jar(s): The foundation of your centerpiece! Standard pint or quart-sized mason jars are perfect, but don’t limit yourself. Smaller half-pint jars can make charming votives, while larger jars can create more dramatic focal points. Repurpose old canning jars, buy new ones in bulk, or even check thrift stores for unique options. Ensure your jars are clean and dry before starting the project to ensure proper adhesion.
- Silk Leaves: Opting for artificial silk leaves provides durability and a consistent vibrant color that won’t wilt or fade like real leaves. You can find a vast array of colors, shapes, and sizes at any craft store, often sold in bundles or garlands. Look for realistic-looking leaves with a good texture to enhance the overall aesthetic. Consider a mix of sizes for added visual interest. While real leaves can be used, they require special pressing and sealing to prevent decay, making silk leaves the easier and more lasting choice for this particular craft.
- Raffia: This natural fiber ribbon adds a rustic, earthy touch that perfectly complements the fall theme. It’s easy to tie and provides a lovely decorative accent around the neck of the jar. Raffia comes in various natural and dyed colors, allowing you to match or contrast with your chosen leaves. Alternatives include jute twine, burlap ribbon, or even a simple fabric ribbon for a different look.
- Optional: Tea Light Candles (LED or Traditional): To truly bring your centerpieces to life, tea lights are a wonderful addition. Flameless LED tea lights are a safe and long-lasting option, especially if you have children or pets, or if you plan to display them for extended periods. Traditional wax tea lights offer a warm, flickering glow and a cozy ambiance.
Step-by-Step Directions: Crafting Your Fall Leaves Mason Jar Centerpieces
Now that you have all your supplies, let’s dive into the simple steps to create your beautiful fall centerpieces. Remember, there’s no right or wrong way; embrace your creativity!
Step 1: Prepare Your Mason Jar
Before you begin, ensure your mason jar is sparkling clean and completely dry. Any dust, grease, or moisture can prevent the Mod Podge from adhering properly. Wash jars with soap and water, then dry thoroughly with a lint-free cloth. For an extra clean surface, you can wipe them down with rubbing alcohol and let it evaporate. Having a clean, smooth canvas is crucial for a professional-looking finish.
Step 2: Apply the First Layer of Mod Podge
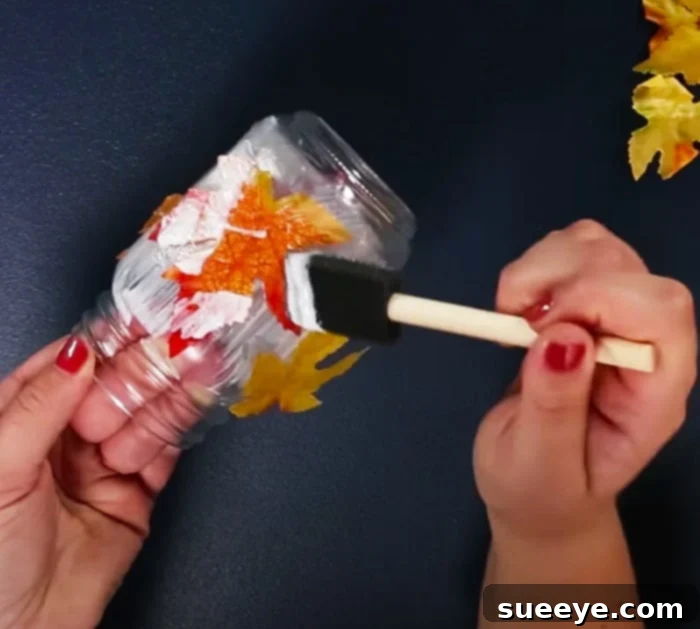
Using your foam brush, apply a thin, even coat of Mod Podge to a section of the mason jar where you intend to place your first leaves. Don’t cover the entire jar at once, as the Mod Podge might dry before you get to apply the leaves. Work in manageable sections. The key here is a thin, consistent layer. Too much Mod Podge can create bubbles or make the leaves slide around. Let this layer dry for just 1-2 minutes until it becomes slightly tacky. This tackiness is essential for the leaves to grip firmly.
Step 3: Strategically Place Your Silk Leaves
Once the Mod Podge is tacky, begin placing your silk leaves onto the treated section of the jar. Arrange them in a way that looks natural and aesthetically pleasing. You can overlap them slightly, vary the direction, and mix different sizes and colors of leaves for a more dynamic look. Gently smooth each leaf onto the jar with your fingers or the foam brush, pressing out any air bubbles from the center outwards. Work carefully to ensure the edges of the leaves are well-adhered. Continue this process, applying Mod Podge to new sections and adding leaves, until your jar is covered to your liking. Don’t be afraid to experiment with layering for added depth!
Step 4: Seal Your Design with a Top Coat of Mod Podge
After all your leaves are placed and smoothed, apply a generous, but even, top coat of Mod Podge over the entire leaf-covered surface of the jar. This layer acts as a sealant, protecting the leaves, securing their edges, and providing a unified finish (either glossy or matte, depending on your Mod Podge type). Ensure every part of the leaves is covered to prevent peeling. You might notice the Mod Podge appearing milky white when wet, but don’t worry—it will dry clear. Allow the jar to dry completely, which can take several hours, or even overnight, depending on humidity. For extra durability, especially if you plan to use these outdoors or for extended periods, you can apply a second thin top coat once the first is fully dry.
Step 5: Add the Finishing Touch with Raffia
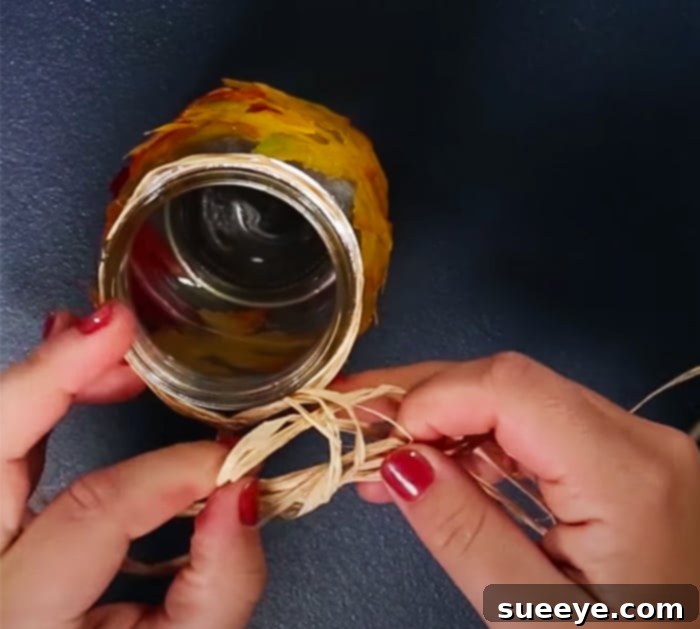
Once the Mod Podge is completely dry and clear, it’s time to add the charming raffia accent. Cut a length of raffia (or twine/ribbon) that’s long enough to wrap around the neck of the mason jar a couple of times, with enough extra to tie a neat bow or knot. Wrap it around the top rim of the jar, just below the threaded section, and secure it with a pretty bow or a simple knot. You can leave the ends long and whimsical or trim them neatly for a cleaner look. This simple addition beautifully frames the leafy design and enhances the rustic fall aesthetic.
Step 6: Illuminate with Tea Lights (Optional, but Recommended)
To truly elevate your fall leaves mason jar centerpieces, add a tea light candle inside. For safety and convenience, especially if displaying them for long periods or in areas where open flames are a concern, flameless LED tea lights are an excellent choice. They mimic the warm flicker of a real candle without any fire hazard or melting wax. If you prefer the authentic glow, traditional wax tea lights can be used, but always exercise caution and never leave burning candles unattended. The soft, ambient light filtering through the colorful leaves creates an absolutely magical effect, transforming your craft into a glowing beacon of autumn warmth.
Tips for Success and Customization
- Work in a Well-Ventilated Area: Mod Podge has a mild odor, so it’s best to work in a well-ventilated space or outdoors if possible.
- Experiment with Leaf Arrangement: Don’t feel confined to a uniform pattern. Overlap leaves, create clusters, or even arrange them to look like they’re “falling” down the jar for a more organic feel.
- Consider Color Palettes: While classic reds, oranges, and yellows are perfect for fall, you can also experiment with deeper purples, burgundies, or even touches of green for a varied look.
- Add More Embellishments: Beyond raffia, think about adding small acorns, miniature faux berries, cinnamon sticks, or even a sprinkle of fine glitter to your Mod Podge topcoat for extra sparkle.
- Multi-Purpose Jars: These decorated jars aren’t just for centerpieces! Use them as unique gift packaging, pencil holders on a desk, or simply as charming decorative accents on a mantelpiece or bookshelf.
- Care and Cleaning: Your finished jars are best cleaned with a damp cloth. Avoid submerging them in water or putting them in a dishwasher, as this can compromise the Mod Podge seal.
Where to Display Your Beautiful Creations
Once your fall leaves mason jar centerpieces are complete, the fun continues with finding the perfect spots to showcase them. Their versatility means they can enhance almost any area of your home. Imagine a cluster of these glowing jars as the focal point on your dining table, setting a warm and inviting atmosphere for fall dinners. They also look stunning lined up on a mantelpiece, casting a soft, autumnal glow across the room.
Consider placing them on coffee tables, end tables, or even windowsills to capture natural light during the day and offer a gentle luminescence at night. For outdoor gatherings, if you’ve used outdoor-grade Mod Podge, they can add a festive touch to patio tables or garden paths. Grouping jars of different sizes creates a dynamic and visually interesting display. These centerpieces are perfect for Thanksgiving decor, harvest festivals, or simply to enjoy the cozy vibes throughout the entire autumn season. Their gentle light and vibrant colors will surely bring a smile to anyone who sees them.
Conclusion: Embrace the Beauty of DIY Fall Decor
In summary, these fall leaves mason jar centerpieces are an incredibly rewarding and straightforward DIY project that perfectly captures the essence of autumn. They are charming, customizable, and exceptionally budget-friendly, making them an ideal choice for anyone looking to add a personal touch to their seasonal decor. The process is quick, enjoyable, and results in beautiful, unique pieces that you’ll be proud to display.
There’s an undeniable satisfaction in crafting your own home decor. Not only is it a more economical option than continually purchasing new items, but it also allows for a level of personalization that store-bought goods simply cannot match. From the warm glow of the tea light candles creating a cozy ambiance during a quiet evening at home to their vibrant colors enhancing your daytime decor, these mason jar centerpieces bring a perfect finish to any autumnal setting. So, if you’re searching for a delightful and inexpensive way to celebrate the beauty of fall, gather your supplies and embark on this wonderful crafting journey. Your home, and your wallet, will thank you!