
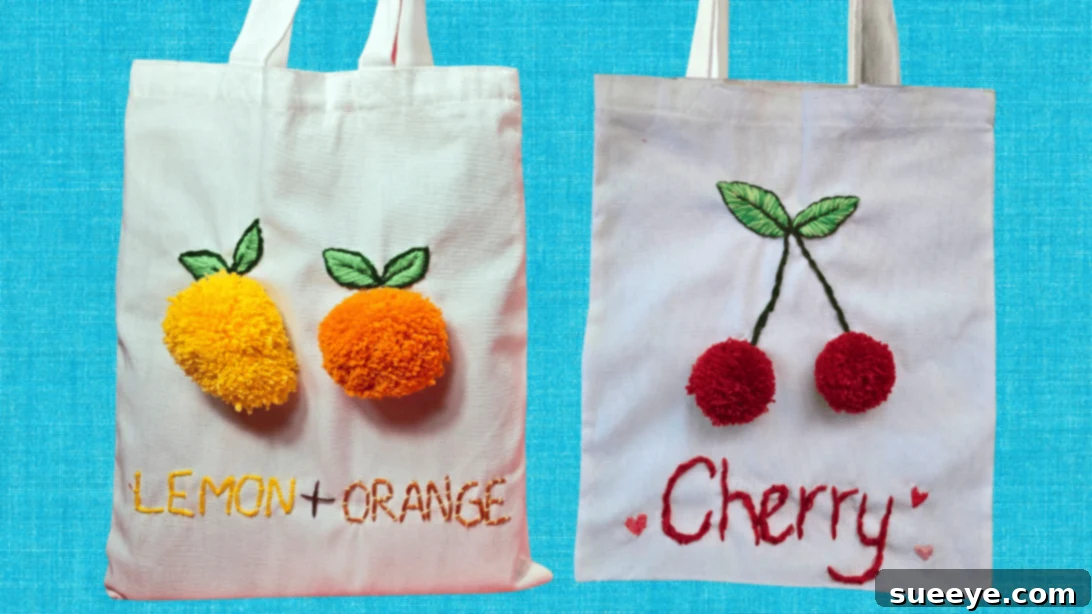
Craft Your Own Personalized Fruit Embroidered Tote Bag: The Ultimate Summer DIY Project
Are you ready to dive into the most delightful and rewarding summer craft project? You’ve landed in the perfect spot! Today, we’re going to embark on a creative journey to transform a simple tote bag into a vibrant, personalized masterpiece. This engaging DIY project masterfully blends the charm of hand embroidery with the playful texture of pom-pom making – two of the hottest and most beloved summer crafting trends. Whether you’re breathing new life into an old, forgotten bag or starting fresh with a blank canvas, this adorable DIY embroidered tote bag offers the perfect opportunity for beginners to explore easy embroidery techniques and infuse their accessories with a unique splash of personality.
Beyond being a fantastic creative outlet, crafting your own tote bag is an eco-friendly way to express your style. It’s not just about making something beautiful; it’s about creating a functional piece that reflects you, reduces waste, and stands out from mass-produced items. Imagine carrying a bag that truly speaks to your aesthetic, designed by your own hands! This project promises not only a stunning end product but also a truly enjoyable and relaxing crafting experience.
In this comprehensive tutorial, you’ll discover how effortlessly you can embroider delicate leaves and skillfully shape soft pom-poms into charming fruits like juicy cherries, zesty lemons, or vibrant oranges. But the beauty of this project lies in its endless customization possibilities! Feel free to let your imagination soar and experiment with any fruit design that captures your fancy – perhaps a succulent strawberry, a tropical pineapple, or a slice of watermelon. The choice of yarn colors and textures can dramatically enhance the realism and personality of your chosen fruit, which many find to be the most exciting aspect of this project.
So, if you’re already envisioning your perfectly personalized, upcycled tote bag, it’s time to gather your crafting essentials. Grab your favorite embroidery thread, a pristine blank tote bag canvas, and a selection of colorful yarns. Let’s get creative and bring your unique summer accessory to life!
Why Choose a DIY Embroidered Tote Bag?
Creating your own embroidered tote bag offers numerous advantages. It’s a fantastic way to:
- Express Individuality: Design a bag that perfectly reflects your personal style and interests, making it truly one-of-a-kind.
- Embrace Sustainability: Upcycle an old tote or choose an eco-friendly blank canvas, reducing waste and promoting sustainable fashion.
- Save Money: Crafting your own stylish accessory can be significantly more affordable than purchasing designer bags.
- Develop New Skills: Learn fundamental embroidery stitches and pom-pom making techniques, expanding your crafting repertoire.
- Gift with Love: A handmade embroidered tote makes a thoughtful and personal gift for friends and family, perfect for birthdays, holidays, or just because.
- Enjoy Mindful Creativity: Engage in a relaxing and meditative activity that provides a wonderful escape from daily stresses.
Detailed Fruit Embroidered Tote Bag Instructions
This easy-to-follow, step-by-step guide will walk you through the process of crafting your own adorable embroidered pom-pom tote bag. We’ll cover everything from design planning to the final touches, ensuring a smooth and enjoyable crafting experience.
Materials You’ll Need:
Materials
- Tote Bag: A plain canvas or cotton tote bag is ideal. Choose a durable fabric that can withstand embroidery and daily use. Light colors will make your fruit designs pop!
- Yarn: Assorted colors for your pom-poms (e.g., red for cherries, yellow for lemons, green for leaves). Acrylic yarn is beginner-friendly and comes in a wide range of colors.
- Embroidery Floss: Various colors for stitching leaves, stems, and any text. Consider cotton or silk floss for a smooth finish.
- Embroidery Needle: A sharp needle with an eye large enough for your chosen floss.
- Scissors: Both fabric scissors for cutting yarn and small, sharp embroidery scissors for precision thread work.
- Pencil or Fabric Marker: For sketching your design onto the tote bag. A washable fabric marker is recommended.
- Glue Gun and Glue Sticks: For securely attaching your finished pom-poms to the bag.
- Optional: Embroidery Hoop: While not strictly necessary for this project, an embroidery hoop can help keep your fabric taut and your stitches even.
Step-by-Step Crafting Guide:
-
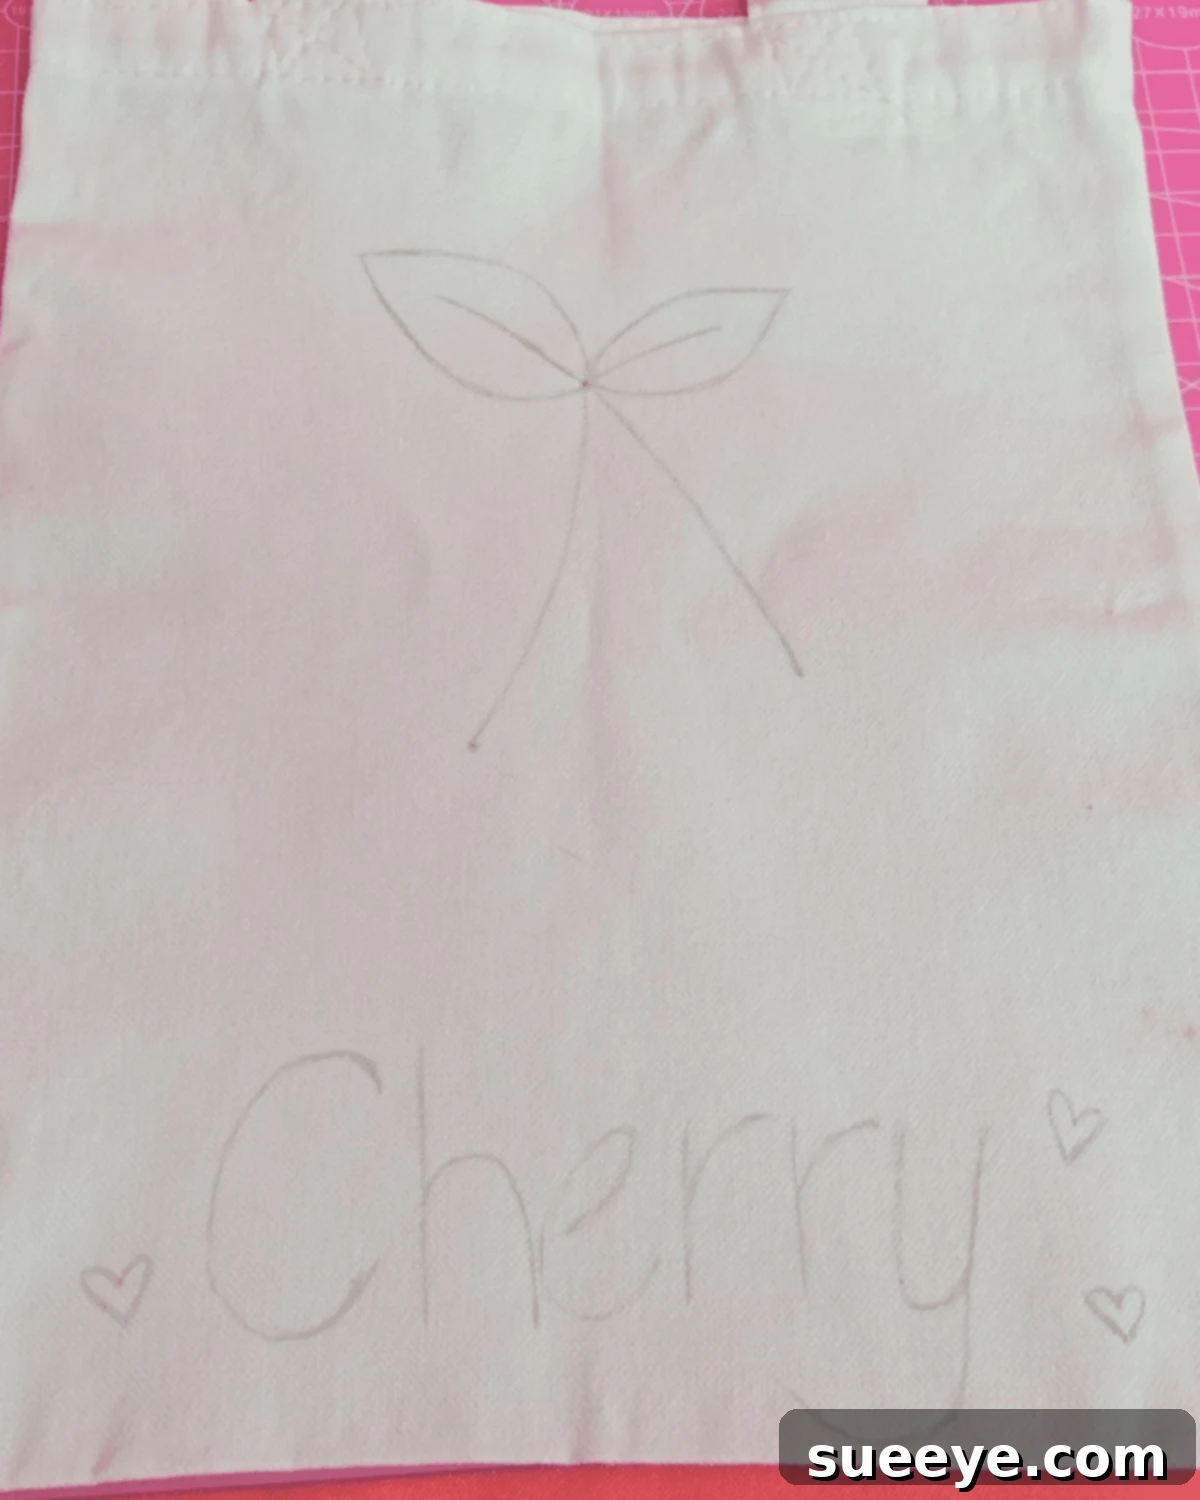
1. Plan and Draw Your Pattern

Begin by conceptualizing your design. What fruits do you want to feature? Will you add text like your name or a fun quote? Lightly sketch your chosen design directly onto your tote bag using a pencil or washable fabric marker. Remember, this is just a guide, so don’t worry about perfection. If you’re feeling less confident in your drawing skills, consider printing a template and tracing it onto your bag. This initial planning stage is crucial for ensuring a balanced and pleasing final aesthetic. -
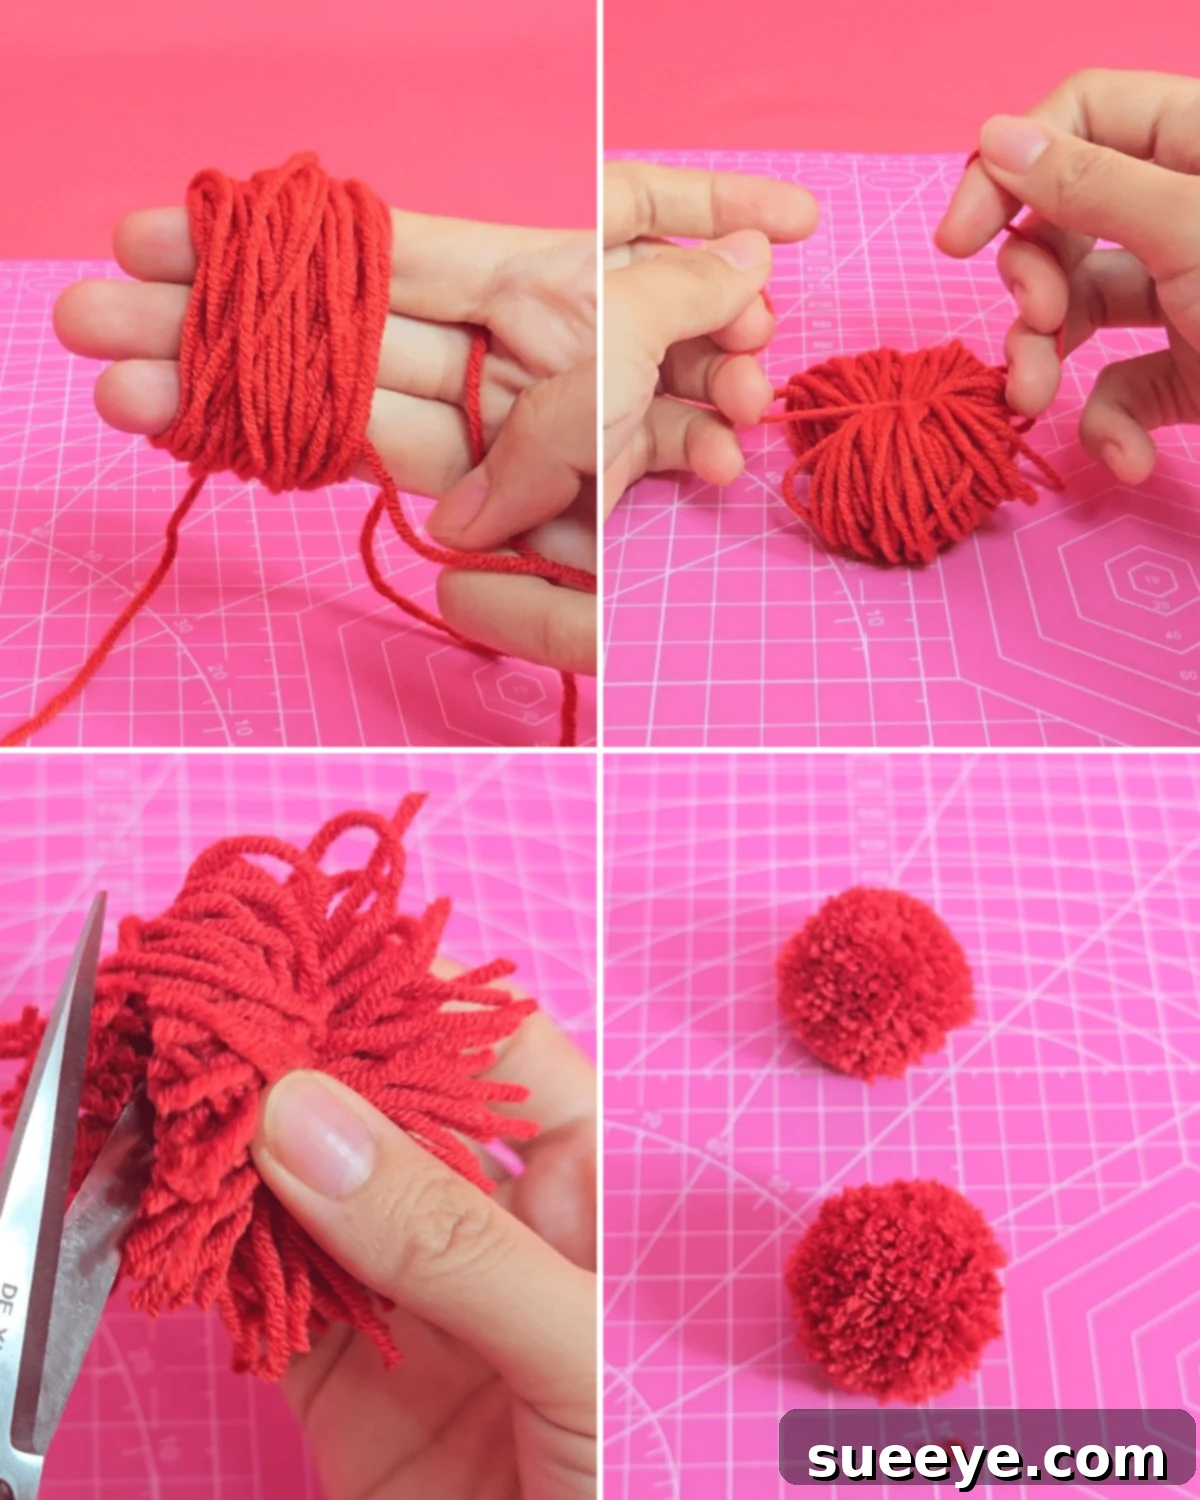
2. Craft Your Pom-Poms
To create a fluffy pom-pom, start by wrapping your chosen yarn around three fingers (or a dedicated pom-pom maker) approximately 100 times. The more wraps, the denser and fuller your pom-pom will be. Carefully slide the wrapped yarn off your fingers, then tie a separate piece of yarn tightly around the middle of the bundle, creating a secure knot. Next, use sharp scissors to cut through all the loops on both sides. Once cut, gently fluff out the yarn and trim any uneven strands to shape it into a perfectly round ball. Repeat these steps to create a second pom-pom, or as many as your design requires. -
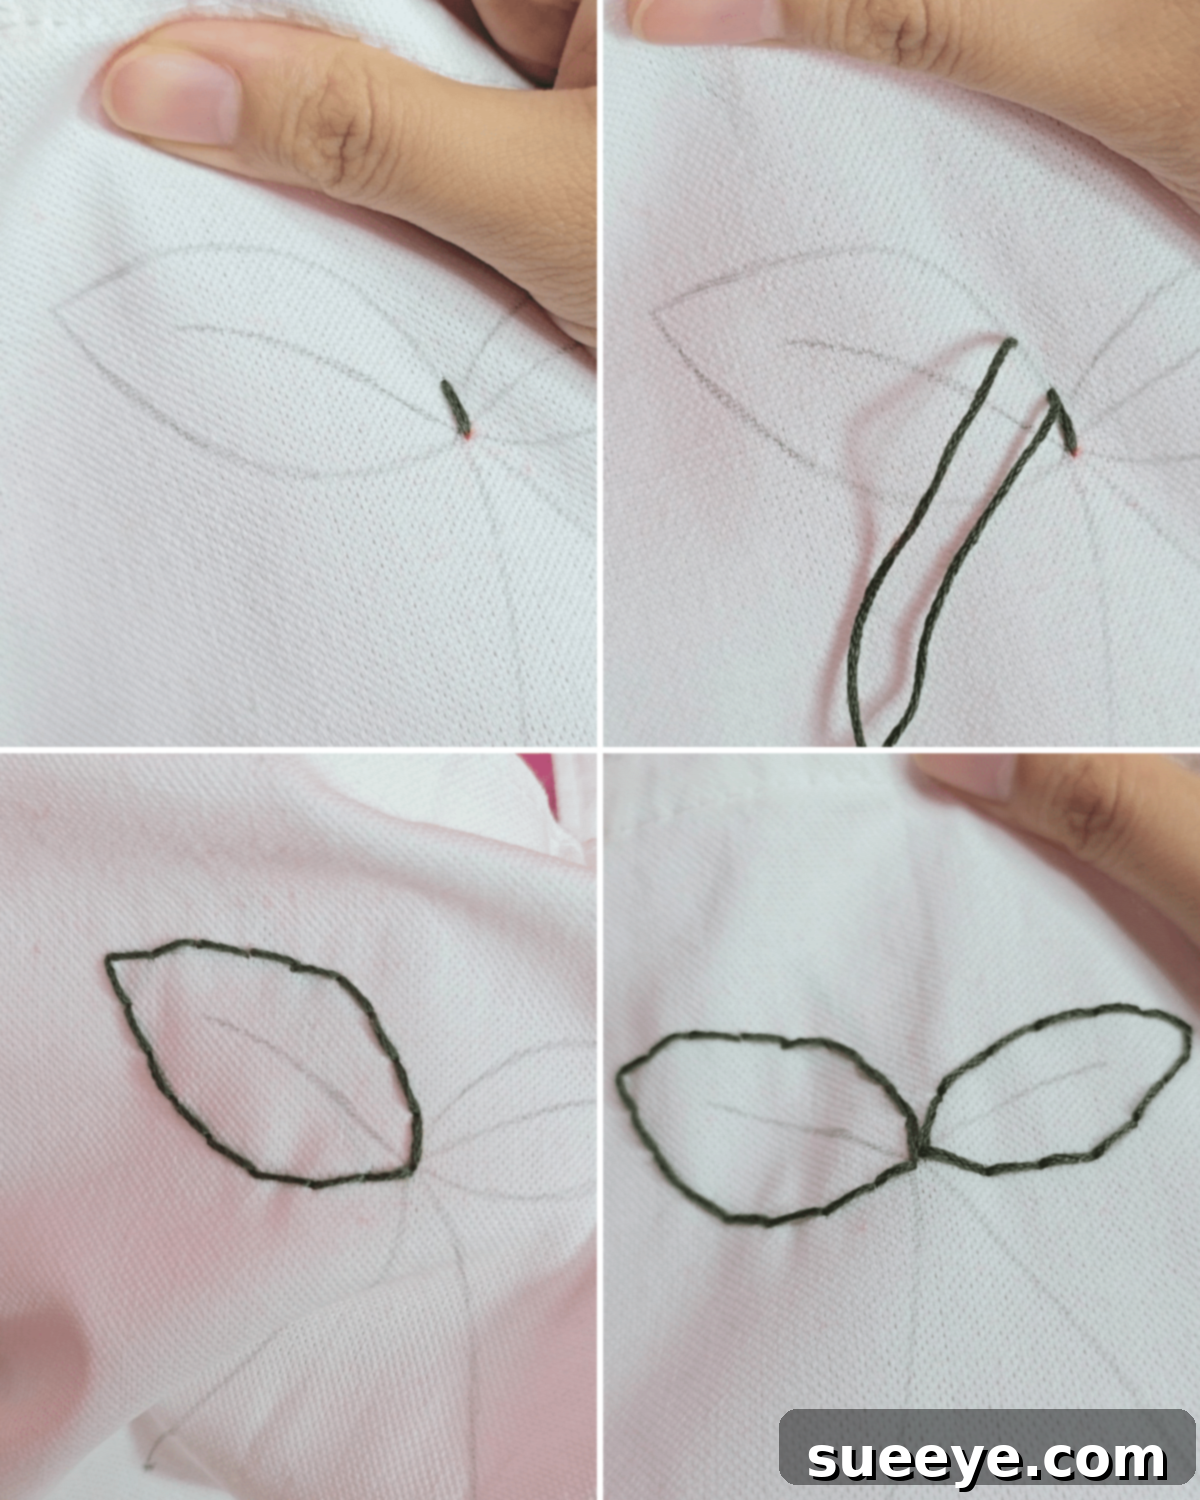
3. Outline Your Drawing with Backstitch
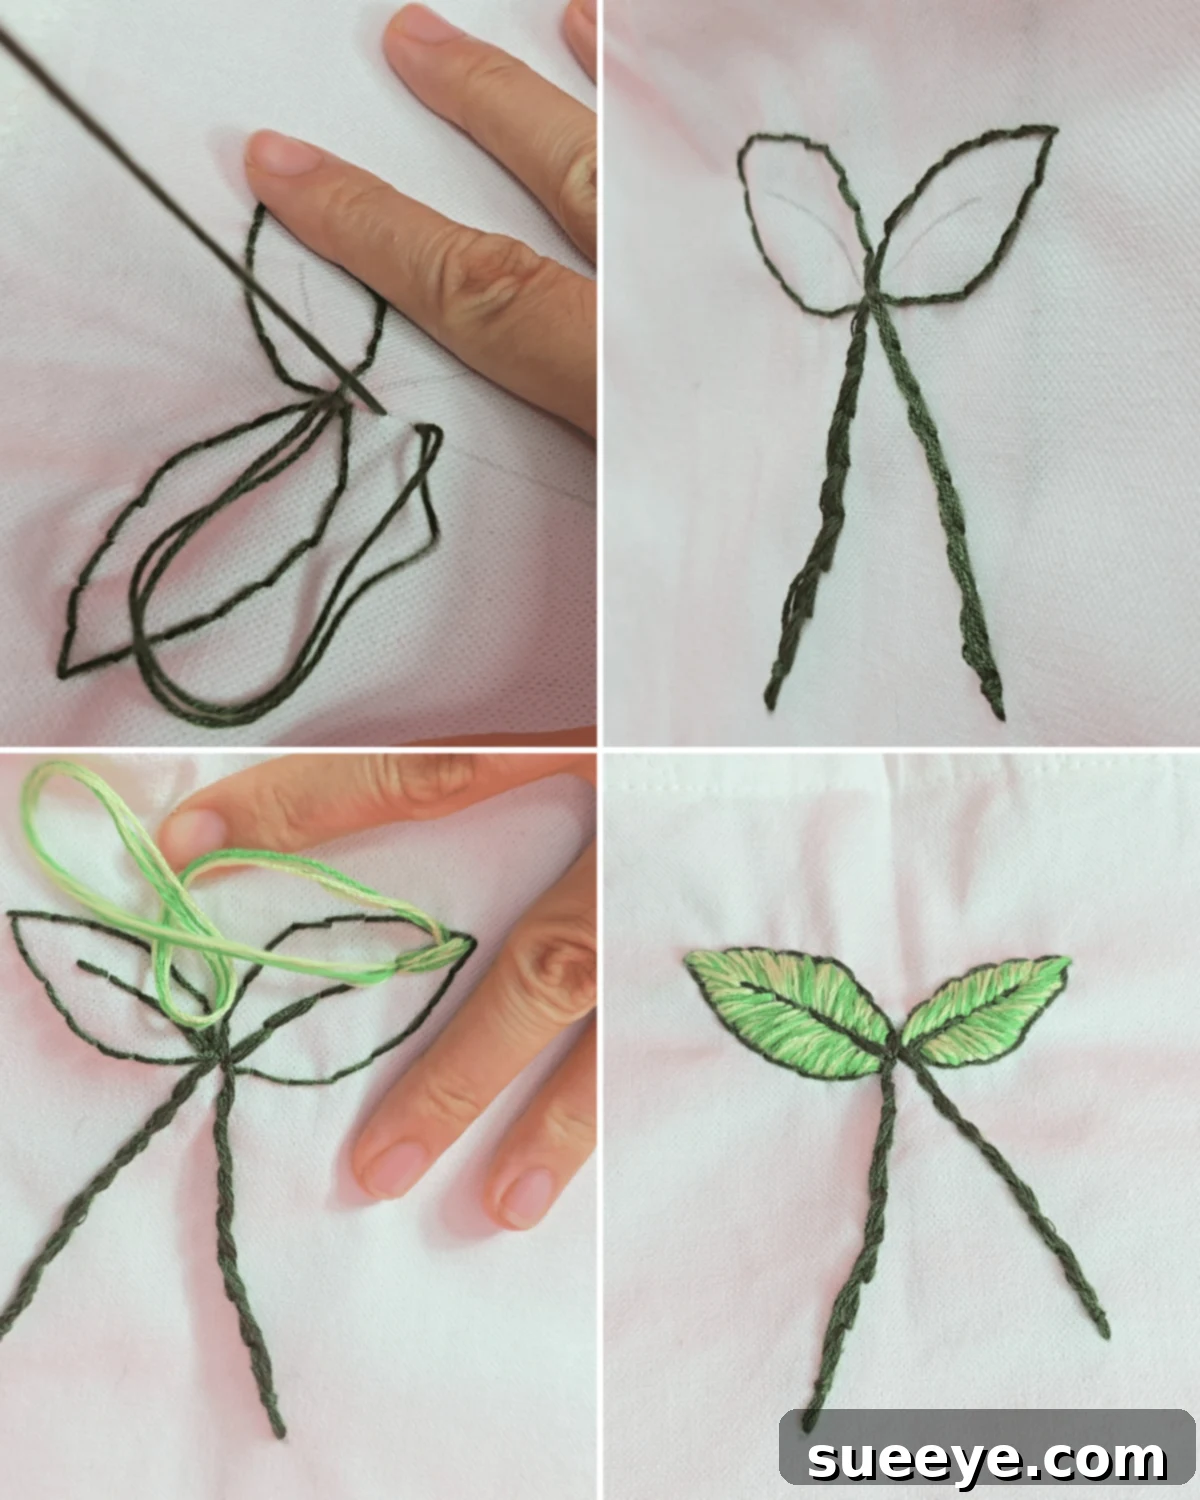
Using embroidery floss in a color that complements your fruit design (typically green for leaves), begin outlining the shapes you’ve drawn, such as the leaves. The backstitch is ideal for creating clean, defined lines. To perform a backstitch, bring your needle up from the back of the fabric, make a stitch forward, then bring the needle back up a short distance in front of your previous stitch, and then go back down into the end of the previous stitch. This creates a solid, continuous line that will make your design truly stand out. -
4. Fill in Embroidered Shapes
Now it’s time to add dimension and texture to your embroidery. Using a stem stitch, embroider the thin stems connecting your fruit to the leaves. For the leaves themselves, the satin stitch is perfect for creating a smooth, filled-in appearance. To do a satin stitch, make long, straight stitches close together, covering the entire shape you’re filling. Ensure your stitches lie flat and parallel for a neat finish. If you’re feeling adventurous, you can explore other filling stitches like long and short stitch for a more textured look. -
5. Attach Pom-Poms and Add Final Details
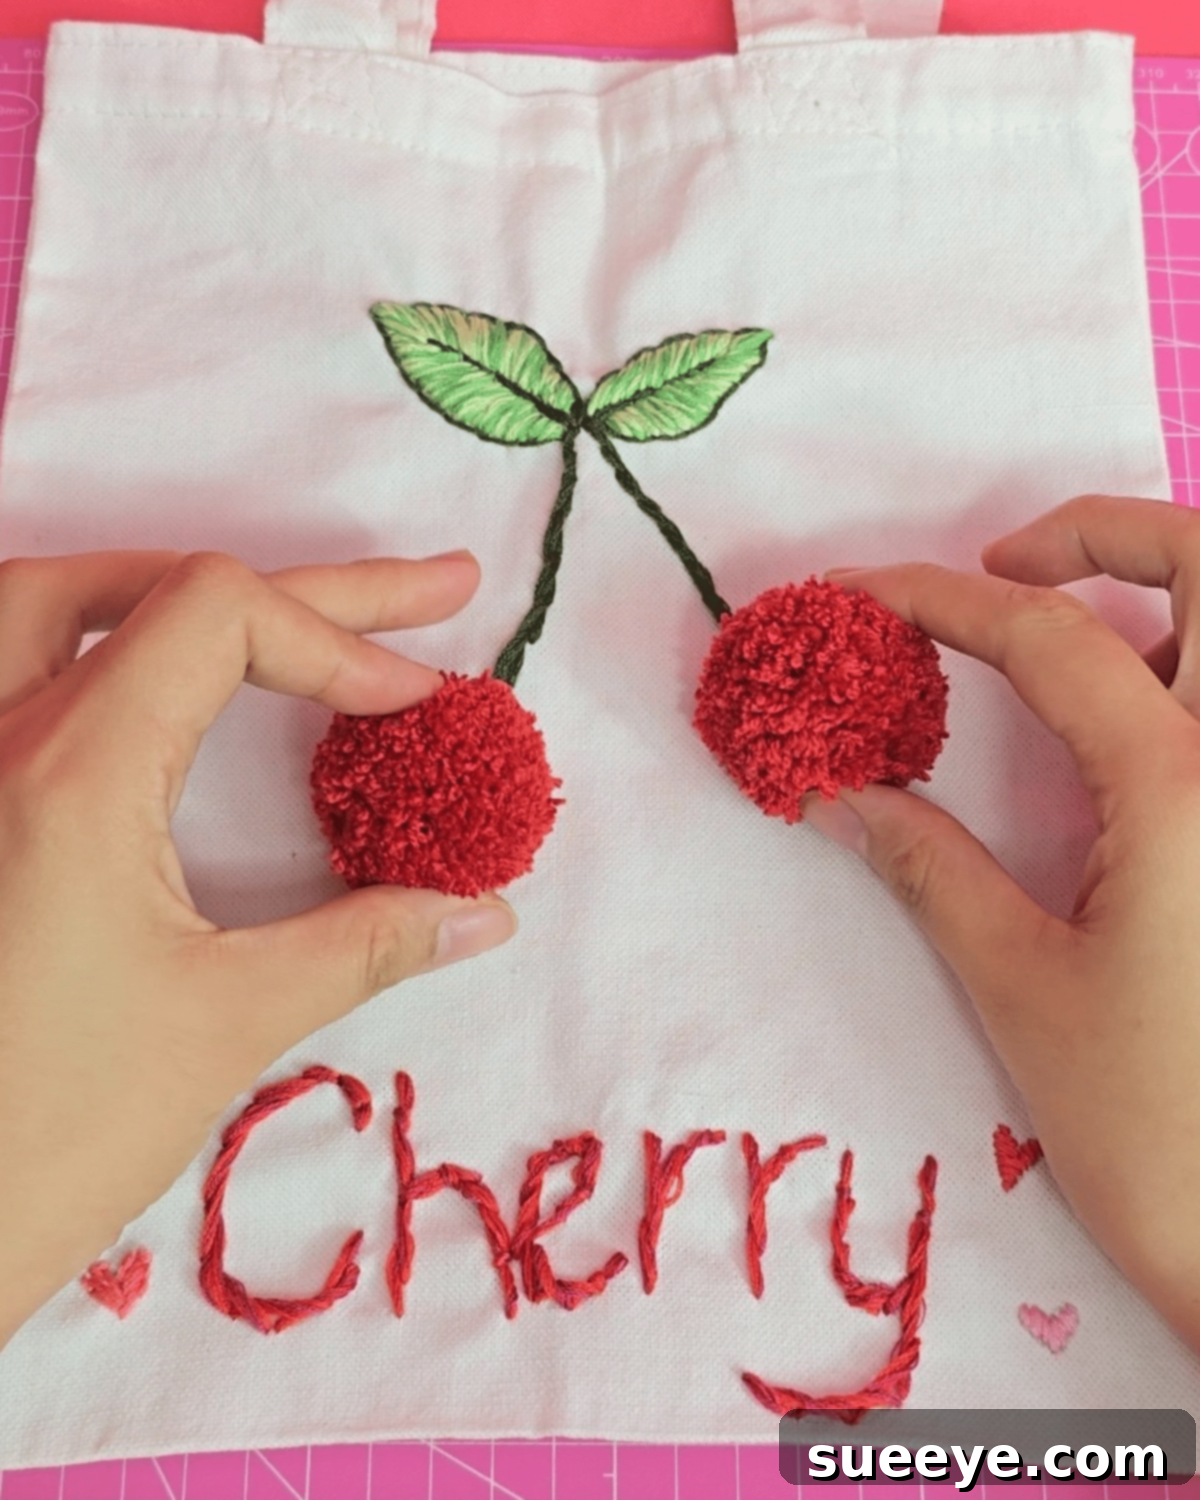
Once your embroidery is complete, it’s time to add the adorable pom-poms. Carefully use a hot glue gun to attach each pom-pom to the ends of the embroidered stems, ensuring they are securely fixed. Apply a small amount of glue to the base of the pom-pom and firmly press it onto the fabric. If your design includes text, embroider the letters using a simple backstitch or stem stitch – choose a style that complements your overall design. Take a moment to inspect your work, trim any loose threads, and admire your beautifully personalized fruit embroidered tote bag!

Pro Tip: Elevate Your Embroidery
For an even more captivating and striking visual effect, consider combining two different colors of embroidery floss when stitching your elements, just as demonstrated with the leaves in this tutorial. This adds depth and a subtle gradient that truly enhances the design. If you find your combined threads are too thick to easily pass through the eye of your needle, a simple solution is to divide the embroidery floss into half or even into three individual strands. This makes stitching smoother and prevents frustration.
Additionally, always consider using an embroidery hoop, especially for intricate designs. It keeps your fabric taut, prevents puckering, and ensures your stitches are consistently neat and even. A little preparation goes a long way in achieving professional-looking results!

Why You’ll Absolutely Love This DIY Tote Bag Project
This isn’t just another craft; it’s the ultimate summer tote bag project that promises both immense fun in the making and a highly functional, stylish accessory at its completion. Its versatility makes it truly special – perfect as a heartwarming personalized gift for a loved one, a chic statement piece to elevate your everyday outfits, or simply a delightful creative endeavor for an afternoon. This DIY embroidered tote bag is designed to be a must-try for crafters of all skill levels, from absolute beginners to experienced artisans. You’ll gain new skills, unleash your creativity, and end up with a beautiful, practical item you’ll be proud to carry!
Care Instructions for Your Embroidered Tote Bag
To ensure your beautiful, handmade tote bag lasts for many summers to come, proper care is essential:
- Spot Cleaning: For small spills or dirt, gently spot clean the affected area with a mild detergent and a damp cloth.
- Hand Washing: If the entire bag needs cleaning, hand wash it in cold water with a gentle, color-safe detergent. Avoid harsh scrubbing on the embroidered areas.
- Air Dry: Always air dry your tote bag by laying it flat or hanging it to prevent shrinking or damage to the embroidery and pom-poms. Avoid direct sunlight.
- Avoid Machine Washing and Drying: The agitation of a washing machine can damage delicate stitches and flatten pom-poms. High heat from a dryer can also cause shrinkage or distortion.
Expand Your Crafting Horizons: Other DIY Projects You’ll Love!
Sewing Projects
15 Basic Embroidery Stitches for Beginners: Master the Fundamentals
Sewing Ideas
How to Make a Cute Bow Embroidery on Jeans: Add Charm to Denim
Sewing Ideas
4 Simple Flower Embroidery Stitches: Create Beautiful Floral Patterns
Crafts
Easy Crochet Yarn Bow Tutorial: Simple and Stylish Accessories
We hope this guide inspires you to unleash your creativity and craft a beautiful, personalized fruit embroidered tote bag! It’s a project that brings joy, style, and a touch of handmade charm to your summer. If you loved this craft, be sure to visit our official website for more exciting DIY projects, follow our Facebook page, and subscribe to our YouTube channel for regular updates and new tutorials!