
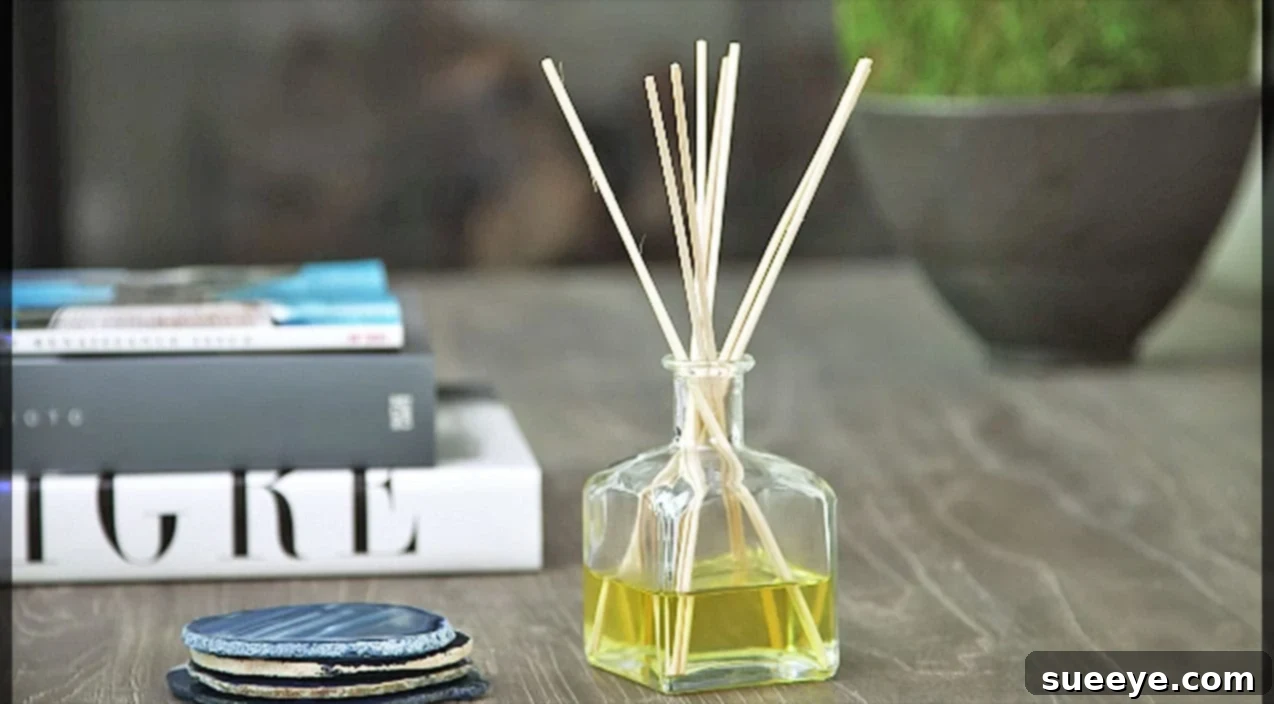
In every home, the atmosphere is profoundly influenced by its scent. A fresh, inviting aroma can instantly transform a space, making it feel more welcoming, comfortable, and reflective of your personal style. Whether you’re an avid cook, an enthusiastic pet owner, or simply someone who appreciates a consistently pleasant ambiance, the need for an effective and attractive air freshener is undeniable. While the aroma of a delicious meal is wonderful during dinner, nobody wants their home to perpetually smell like garlic or last night’s stir-fry. This is precisely where the elegance and efficacy of a reed diffuser shine. More than just a source of fragrance, a well-chosen reed diffuser acts as a subtle yet significant piece of decor, enhancing the visual appeal of any room while continuously releasing a delightful scent.
Reed diffusers have long been celebrated for their ability to deliver continuous, flame-free fragrance without the need for electricity. They are gorgeously designed, often featuring sleek bottles and natural reeds that effortlessly complement any interior design scheme, from minimalist modern to rustic farmhouse. The continuous diffusion mechanism means your space is consistently infused with your chosen aroma, eliminating the sudden bursts and eventual fading often associated with aerosol sprays. However, the allure of these beautiful fragrance dispensers often comes with a hefty price tag. Commercial reed diffusers can easily cost upwards of $60, and sometimes even more, which can be a little steep for an item that needs regular replenishment. The good news is, you don’t have to break the bank to enjoy the luxury of a beautifully scented home. Crafting your own reed diffuser is surprisingly inexpensive, incredibly simple, and offers unparalleled customization! With a few common ingredients and a touch of creativity, you can achieve the same sophisticated effect at a fraction of the cost, ensuring your home always smells fantastic without compromising your budget or your personal aesthetic.
Why Choose DIY for Your Reed Diffuser? Unlocking Customization and Savings
The decision to make your own reed diffuser goes beyond just saving money; it’s about embracing creativity, control, and sustainability. When you opt for a homemade reed diffuser, you gain complete autonomy over every aspect of its creation. You decide on the aesthetic of the bottle, the exact blend of essential oils that will waft through your home, and the type of carrier oil that forms the base of your fragrance. This level of customization is simply unattainable with store-bought options.
Beyond the personal touch, the financial benefits are substantial. Commercial diffusers often come with premium pricing due to branding, packaging, and specific fragrance formulations. By sourcing your ingredients individually, you can drastically reduce the overall cost. For instance, a small bottle of high-quality essential oil can be used to create multiple diffusers, making each subsequent refill even more economical. Furthermore, opting for natural ingredients gives you peace of mind, allowing you to avoid potentially harmful chemicals or synthetic fragrances that might be present in some commercial products. This makes DIY diffusers an excellent choice for households with sensitivities, pets, or small children.
Making your own diffuser is also a wonderfully rewarding project. It’s a simple craft that yields immediate and tangible results, filling your home with a personalized aroma that you’ve created yourself. This guide will walk you through each step, making the process straightforward and enjoyable, ensuring you can confidently create a stunning and functional piece of DIY home decor.
Essential Ingredients for Your Custom Reed Diffuser
Creating your perfect reed diffuser begins with gathering the right components. Each element plays a crucial role in the diffuser’s functionality, aesthetic appeal, and the quality of its scent. Here’s a breakdown of what you’ll need to make your own natural home fragrance solution:
1. The Bottle: A Vessel of Fragrance and Style
The bottle is not just a container; it’s a significant decorative element. The ideal diffuser bottle will have a relatively narrow opening. This design feature is crucial for two reasons: firstly, it helps to control the evaporation rate of your fragrance oil, making your diffuser last longer. Secondly, a narrow neck allows the reeds to stand upright and spread out elegantly, maximizing their ability to wick the oil and diffuse the scent effectively. While you can certainly purchase new bottles from craft stores or online retailers, exploring thrift stores or antique shops often yields unique and beautiful finds that add character and a vintage touch to your decor. Look for glass or ceramic bottles with a sturdy base to prevent accidental tipping. Consider the overall aesthetic of the room where the diffuser will be placed – do you want a sleek, modern look, or something more rustic and charming? The bottle choice sets the tone for your entire diffuser.
2. The Carrier Oil: The Foundation of Your Scent
The carrier oil forms the base of your diffuser liquid, diluting the concentrated essential oils and enabling them to be drawn up the reeds. The key characteristics to look for in a good carrier oil are a light or neutral scent, low viscosity (to ensure smooth wicking), and a relatively slow evaporation rate. Brooke, in her tutorial, suggests using safflower oil, which is an excellent choice due to its light texture and minimal scent. Other fantastic carrier oil options include:
- Sweet Almond Oil: Widely available and very light.
- Avocado Oil: A bit thicker, but still effective and very mild in scent.
- Canola Oil: A budget-friendly and easily accessible option.
- Fractionated Coconut Oil: A popular choice for its lightweight, non-greasy, and completely unscented nature.
- Grapeseed Oil: Very light and absorbs quickly.
- Sunflower Oil: Another readily available and neutral-smelling option.
- Jojoba Oil: While a bit pricier, it’s very stable and has a long shelf life.
You’ll typically need about 3/4 cup of your chosen carrier oil for a standard-sized diffuser bottle, but this can be adjusted based on your bottle’s capacity. The goal is to fill your bottle approximately two-thirds to three-quarters full, leaving enough space for the reeds without overflowing.
3. The Scent: Essential Oils or Fragrance Oils for Aromatic Bliss
This is where the magic happens – choosing the perfect aroma for your home. You have two primary options: essential oils or fragrance oils. For those seeking a more natural and therapeutic experience, essential oils are the superior choice. Extracted from plants, essential oils offer not only delightful aromas but also potential aromatherapy benefits, influencing mood, energy, and well-being. Brooke uses a beautiful blend of lavender, sweet orange, jasmine, and freesia, showcasing the potential for custom scent creation.
Consider the mood you want to evoke in each room:
- For relaxation: Lavender, Chamomile, Sandalwood, Bergamot.
- For energy and focus: Lemon, Peppermint, Rosemary, Sweet Orange.
- For purification and freshness: Tea Tree, Eucalyptus, Lemongrass, Grapefruit.
- For warmth and coziness: Cinnamon, Clove, Vanilla (often an absolute or synthetic), Cedarwood.
You can use single essential oils or create custom blends. Experimenting with combinations is part of the fun! Start with a generous amount, typically 30-60 drops for 3/4 cup of carrier oil, and adjust to your preferred strength. If using a thicker essential oil (like vetiver), you might want to add a few extra drops to ensure the scent diffuses well.
Alternatively, fragrance oils offer a wider range of scent possibilities, including many complex and unique aromas that cannot be replicated with essential oils (e.g., “fresh linen,” “ocean breeze”). They tend to be stronger and last longer than essential oils. However, they are synthetic and do not offer the natural therapeutic benefits. If you opt for fragrance oils, ensure they are high-quality and designed for diffusers.
4. The Reeds: The Heart of the Diffusion Process
The reeds are the mechanism through which the fragrance is drawn from the bottle and released into the air. They work via capillary action, absorbing the oil and allowing it to evaporate from their porous surfaces. The more porous the reeds, the better they will soak up the oil and diffuse the scent. Rattan reeds are the most commonly used and highly effective due to their natural channels that run the length of the reed. Fiber reeds are another excellent option, often designed for superior wicking and consistent scent release, sometimes requiring less frequent flipping. While bamboo sticks are sometimes marketed as diffuser reeds, they often have dense nodes that impede absorption, making them less effective as true diffusers and more for decorative purposes.
You’ll typically need 6-10 reeds for a standard diffuser, depending on the size of your bottle and the desired intensity of the scent. More reeds mean a stronger fragrance. You can find diffuser reeds at craft stores, home decor shops, or online. Ensure they are specifically designed for reed diffusers to guarantee optimal performance.
Crafting Your Custom Reed Diffuser: A Step-by-Step Guide
Now that you have all your essential ingredients, it’s time to assemble your beautiful and fragrant DIY reed diffuser. This process is straightforward and incredibly satisfying.
Step 1: Gather Your Tools and Prepare Your Workspace
Before you begin, ensure you have all your materials laid out: your chosen bottle, carrier oil, essential or fragrance oils, and reeds. It’s also helpful to have a small funnel for pouring, a measuring cup, and a spoon or stirring stick. Set up in a clean, well-lit area where you can work comfortably.
Step 2: Measure the Carrier Oil
Using a liquid measuring cup, pour about 3/4 cup of your chosen carrier oil (e.g., safflower, sweet almond, fractionated coconut oil) into the measuring cup. This quantity is a good starting point for most standard diffuser bottles. Adjust if your bottle is significantly larger or smaller, aiming to fill your bottle approximately 2/3 to 3/4 full when done.
Step 3: Add Your Scented Oils
This is where your home’s signature scent comes to life! Carefully add your essential oils or fragrance oils to the carrier oil in the measuring cup. Start with approximately 30-60 drops of essential oils for 3/4 cup of carrier oil. For fragrance oils, you might need slightly less, depending on their concentration. If you’re creating a blend, add drops of each oil until you achieve a fragrance you love. For example, to replicate Brooke’s lovely combination, you might add 15 drops of lavender, 15 drops of sweet orange, 10 drops of jasmine, and 10 drops of freesia. Stir the mixture gently with a spoon to ensure the oils are well combined.
Step 4: Pour the Mixture into Your Bottle
Carefully transfer the scented oil mixture into your chosen diffuser bottle. Using a funnel can help prevent spills, especially if your bottle has a very narrow opening. Fill the bottle, leaving about an inch or two of space from the top to prevent overflow when the reeds are inserted.
Step 5: Insert the Reeds
Arrange your reeds aesthetically in the bottle. Start with 6-8 reeds, and add more later if you desire a stronger scent. Ensure they are submerged in the oil mixture. The more porous the reeds, the better they will absorb the oil and diffuse the fragrance. For the first few hours, allow the reeds to soak up the oil. You’ll notice the oil slowly wicking its way up the reeds.
Step 6: Initial Activation and Placement
After a few hours, carefully flip the reeds so the saturated ends are exposed to the air. This immediately releases the fragrance into your room. Place your newly created diffuser in your desired location. Consider areas with good air circulation but away from direct heat sources (like radiators or direct sunlight) which can cause the oil to evaporate too quickly. A hallway, living room corner, or bathroom counter are excellent spots. Your home will soon be filled with your custom, delightful aroma!
Maximizing Your Diffuser’s Performance and Longevity
To ensure your homemade reed diffuser consistently provides a wonderful scent and lasts as long as possible, a little ongoing care and attention can go a long way.
Flipping the Reeds Regularly
The primary way to refresh the scent in your room is by flipping the reeds. As the oil travels up the reeds and evaporates, the ends exposed to the air can become less potent over time. Flipping them every few days, or once a week, exposes fresh, oil-saturated ends, revitalizing the fragrance release. Simply take the reeds out, flip them over, and reinsert them into the bottle. Be mindful of dripping oil during this process; it’s a good idea to do this over a sink or a paper towel.
Replacing the Reeds
Over time, the natural channels within the reeds can become clogged with dust or saturated with the oil, reducing their ability to wick effectively. If you notice a significant drop in fragrance strength even after flipping the reeds, it’s a good indication that they need to be replaced. Depending on the quality of your reeds and the dustiness of your environment, this might be every 1-3 months. Investing in a good supply of quality fiber or rattan reeds will ensure consistent performance.
Refilling and Cleaning Your Diffuser
When the oil level in your bottle gets low, it’s time for a refill. You can simply pour in more of your custom-blended diffuser oil. If you decide to change scents, it’s best to clean the bottle thoroughly beforehand to prevent mixing old and new aromas. Wash the bottle with warm, soapy water, rinse well, and let it dry completely before adding a new batch of oil and, ideally, new reeds. This ensures the purest scent experience.
Optimal Placement for Scent Dispersion
Where you place your diffuser significantly impacts how well its scent circulates. Areas with some air movement, such as an entryway, a corner of a living room, or a bathroom, are ideal. However, avoid placing it in direct drafts (like next to an open window or directly under an air vent), as this can cause the oil to evaporate too quickly. Similarly, keep it out of direct sunlight or near heat sources, which can also accelerate evaporation and potentially alter the scent profile of your essential oils.
Troubleshooting Common Issues
- Scent is too weak: Add more essential oil to your mixture. Increase the number of reeds in the bottle. Flip the reeds more frequently. Move the diffuser to a location with better air circulation.
- Scent is too strong: Remove one or two reeds. If still too strong, you can dilute the existing oil mixture with a bit more plain carrier oil.
- No scent at all: Your reeds might be completely saturated or clogged. Replace them with fresh reeds. Ensure your essential oils are of good quality and haven’t lost their potency.
The Holistic Benefits of Embracing Homemade Diffusers
Beyond the immediate gratification of a beautifully scented home, creating your own affordable home decor through DIY reed diffusers offers a wealth of benefits that extend to your well-being, your wallet, and the environment. The most significant advantage is the ability to use natural ingredients. By opting for pure essential oils and natural carrier oils, you steer clear of the synthetic fragrances and potentially harmful chemicals often found in commercial air fresheners, which can contribute to indoor air pollution and trigger allergies or sensitivities. This makes your home a healthier and safer sanctuary for everyone, including children and pets.
The act of creating itself is also incredibly satisfying. There’s a unique sense of accomplishment in crafting something beautiful and functional with your own hands. This simple project can be a wonderful creative outlet, allowing you to experiment with different scent combinations and bottle styles, reflecting your evolving taste and the changing seasons. Imagine a refreshing citrus blend for summer, a warm cinnamon and clove mix for autumn, or a calming lavender and chamomile aroma for the bedroom – all perfectly tailored by you.
Furthermore, DIY reed diffusers make absolutely wonderful, thoughtful, and personalized gifts. Handcrafting a diffuser for a friend or family member, choosing a scent that you know they’ll love, or a bottle that matches their home decor, adds a truly special touch that store-bought gifts often lack. It’s a gift that speaks volumes about your care and attention to detail, providing a lasting reminder of your thoughtfulness.
Embrace the Art of DIY Home Fragrance
As you can see, transforming your home’s aroma doesn’t have to be an expensive endeavor. The journey of creating your own DIY reed diffuser is not just about making a functional item; it’s about embracing creativity, making conscious choices for your health and environment, and adding a unique, personal touch to your living space. From selecting the perfect bottle to blending your ideal scent, every step is an opportunity to infuse your home with personality and warmth. These gorgeous and incredibly effective aroma diffusers make a fantastic addition to any room, offering continuous, subtle fragrance that enhances comfort and ambiance without the need for flames or electricity.
Everyone desires a home that smells good, a space that welcomes and invigorates, or soothes and relaxes. With this comprehensive guide, you now have all the knowledge and inspiration needed to embark on your own reed diffuser crafting journey. So, gather your materials, let your creativity flow, and prepare to delight in the beautiful scents you bring to life. Be sure to share this incredibly simple and rewarding tutorial with your friends and family so they too can discover the joy and affordability of making their very own homemade air fresheners!