
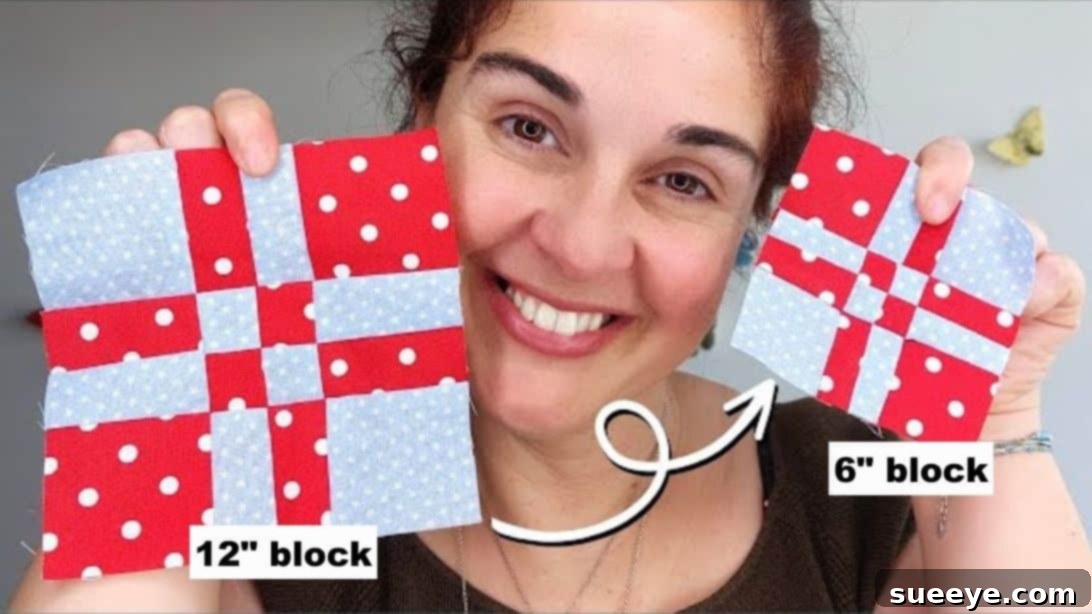
Mastering Quilt Block Resizing: Your Essential Guide to Perfect Proportions
Are you a passionate quilter looking to customize your projects with precision and flair? Do you often discover a beautiful quilt block pattern but wish it were a different size – either larger for a grand statement or smaller for a delicate accent? The ability to confidently resize quilt blocks is an invaluable skill that unlocks a world of creative possibilities, transforming how you approach every project. While the mere mention of “math” in quilting might seem daunting to some, especially if numbers aren’t your strong suit, fear not! This comprehensive guide, drawing inspiration from expert techniques like those shared by Sew Easy by Sandy, will walk you through a simple, step-by-step method to effortlessly change the dimensions of any quilt block, ensuring your creations always fit your vision.
Many quilters find themselves in a situation where a pattern’s block size isn’t quite right for their desired outcome. Perhaps you’re adapting an old pattern to modern fabric widths, creating a unique sampler quilt, or making coordinating accessories like pillows and wall hangings. Mastering resizing allows you to take control, ensuring your fabric pieces align perfectly and your finished quilt is exactly as you envisioned. It may take a little practice to become fully confident with this method, but with each block you resize, you’ll gain speed and accuracy, making the process second nature.
RELATED: If you’re new to quilting or looking for foundational knowledge, explore these 3 Basic Beginner-Friendly Quilt Blocks to build your skills before diving into resizing complexities.
Why Mastering Quilt Block Resizing Matters
Understanding how to resize quilt blocks offers numerous benefits that can elevate your quilting journey:
- Unleash Creative Freedom: No longer are you bound by the rigid dimensions of a pattern. Resize blocks to fit specific project requirements, from bed quilts to intricate miniature designs.
- Optimize Fabric Usage: Adjust block sizes to make the most of your fabric stash, preventing waste and ensuring you have enough material for your desired layout.
- Personalize Your Projects: Tailor patterns to your unique aesthetic. Want a bolder look? Make the blocks bigger. Prefer something more subtle? Shrink them down.
- Adapt Patterns Effortlessly: Easily convert a quilt pattern designed for one size of block to another, allowing you to use beloved designs in diverse projects.
- Achieve Perfect Proportions: Ensure all elements of your quilt are in harmonious proportion, contributing to a visually pleasing and professional-looking finished piece.
Essential Tools for Accurate Resizing
Before you dive into the calculations, gathering the right tools will ensure accuracy and ease throughout the resizing process:
- Rotary Cutter and Mat: Essential for precise, straight cuts.
- Quilting Rulers: Clear acrylic rulers in various sizes (e.g., 6″x24″, 12″x12″) are crucial for accurate measuring.
- Fabric Marker or Pencil: For marking cutting lines or reference points.
- Calculator: While the math is simple, a calculator can prevent errors and speed up the process.
- Iron and Ironing Board: For pressing fabrics flat and setting seams, which is critical for accurate measurement.
- Practice Fabric: Scraps of fabric are perfect for making test blocks.
The Core Principles of Resizing Quilt Blocks
Resizing a quilt block successfully boils down to three fundamental steps. Follow these carefully, and you’ll be well on your way to perfectly scaled blocks every time.
1. The Critical Role of Seam Allowances
One of the most common pitfalls in quilt block resizing is mishandling seam allowances. For accurate results, always consider the finished size of your block first, then factor in the seam allowance. The standard quilting seam allowance is 1/4 inch, but some patterns might use 1/2 inch, especially for appliqué or when working with thick fabrics. It’s vital to know what seam allowance your pattern (or your intended final block) uses.
The golden rule for resizing with seam allowances is: “Remove, Calculate, Add Back.”
- Remove: Subtract the seam allowances from the original, unfinished block size to find its “finished” or “design” size (the size it would be if sewn into a quilt without seams).
- Calculate: Perform all your resizing calculations based on these finished dimensions.
- Add Back: Once you have your new desired finished size, add the necessary seam allowances back to each unit or piece to determine the actual cutting size.
Example: If you have a block that measures 4 inches *unfinished* (meaning including the seam allowance), and it uses a 1/2-inch seam allowance around its perimeter, its *finished* size is actually 3 inches (4 inches – 1/2 inch for top/bottom seams – 1/2 inch for left/right seams, if considering the block as a whole unit, or simply remove 1/2″ from each edge’s cutting dimension). If you want this block to become 6 inches *finished* in your final quilt:
- Start with the desired *finished* size: 6 inches.
- Now, add back the seam allowance for the *new* pieces you’ll be cutting. If you’re cutting individual units for this 6-inch block, and each unit needs a 1/2-inch seam allowance on each side that will be sewn, then your total seam allowance consideration for the *cut size* of each piece will depend on how many sides are sewn. For overall block dimensions, you generally add the total seam allowance that defines the outside edge of the block.
- Let’s simplify this with a unit-based approach in the next section, which is often clearer for complex blocks.
2. Start with Simplicity: Choosing Beginner-Friendly Blocks
When you’re first learning to resize, it’s best to stick with quilt blocks that are easy to break down into smaller, uniform units. Blocks like the Nine-Patch, Four-Patch, or Half-Square Triangles are excellent choices because their components are usually symmetrical and straightforward. The key is to think of each individual square or segment within the block as a “unit.”
For blocks composed of multiple units, like a nine-patch, you want to pick a target size that is a multiple of the number of units across (which is usually three for a nine-patch). Good target finished sizes for a nine-patch include 9, 12, 15, 18 inches, and so on.
A Practical Nine-Patch Example: Resizing from 6″ to 12″
Let’s take a common scenario: You have a 6-inch finished nine-patch quilt block, and you want it to become a 12-inch finished block. We will assume a standard 1/4-inch seam allowance for this example, which is the most common for piecing.
- Determine the original unit size (finished): A 6-inch finished nine-patch block has three units across. So, 6 inches / 3 units = 2 inches finished per unit.
- Determine the desired unit size (finished): You want the new block to be 12 inches finished. Again, it has three units across. So, 12 inches / 3 units = 4 inches finished per unit.
- Calculate the new cutting size for each unit: Each unit needs to be 4 inches finished. To cut this, you must add the seam allowance to each side that will be sewn. For a square unit in a nine-patch, this means adding 1/4 inch to each of its four sides, which effectively means adding 1/2 inch to both its width and height for cutting.
- Therefore, each unit should now be cut at 4 ½ inches. (4 inches finished + 1/4 inch top seam allowance + 1/4 inch bottom seam allowance = 4 1/2 inches, and similarly for width).
Since you already know the finished size of each square unit (4 inches) and the standard seam allowance (1/4 inch), simply add the seam allowance for each side that will be sewn. For a simple square, this means adding 1/2 inch to both the length and width for your cutting dimensions. So, each individual unit should be cut at 4 ½ inches x 4 ½ inches.
3. Never Skip the Test Block
This step is non-negotiable for successful resizing. Always, always, always make a test block using inexpensive scrap fabric before cutting into your precious project fabric. A test block allows you to:
- Verify Your Math: Confirm that your calculations for the new unit sizes are correct.
- Check Seam Accuracy: Ensure your 1/4-inch (or other) seam allowance is consistent and accurate.
- Assess Overall Design: See if the scaled-up or scaled-down design looks as good in reality as it did in your head.
- Adjust Before Committing: Catch any errors early, saving you time, frustration, and valuable fabric.
Sew your test block exactly as you would the final block, press it, and then measure its finished size. If it matches your desired finished size, you’re ready to proceed with your main fabric!
Advanced Tips for Flawless Quilt Block Resizing
To ensure your resizing efforts yield perfect results, consider these additional tips:
- Measure Twice, Cut Once: This age-old adage is especially true in quilting. Double-check all measurements before making any cuts.
- Consistent Seam Allowances: Use a consistent 1/4-inch seam allowance (or whatever your pattern dictates) throughout your project. A scant 1/4 inch is often recommended, meaning just a thread width shy of a full 1/4 inch, to account for the fabric taken up by the thread itself.
- Pressing Matters: Press seams carefully and consistently. Pressing to one side or pressing seams open can subtly affect block size.
- Stay Organized: Label your cut pieces, especially when working with multiple sizes or colors, to avoid confusion.
- Use a Quilt Calculator App: Many apps and online tools can help with quilting math, including resizing blocks or calculating fabric requirements.
- Patience is Key: Don’t rush the process. Take your time with calculations, cutting, and sewing. Precision leads to beautiful results.
Common Resizing Scenarios and Applications
Knowing how to resize blocks opens up many creative avenues:
- Adapting Patterns: Found a gorgeous pattern for a throw quilt, but want to make a king-size quilt? Resize the blocks!
- Sampler Quilts: If you’re creating a sampler quilt with blocks from various sources, resizing them to a uniform dimension ensures a cohesive finished project.
- Coordinating Items: Resize a block from a quilt pattern to create matching pillow covers, tote bags, or placemats.
- Using Scraps: Scale blocks down to make use of smaller fabric scraps you might have thought were unusable.
Troubleshooting Common Resizing Challenges
Even with careful planning, sometimes things don’t go exactly as planned. Here are quick tips for common issues:
- Blocks Are Mismatched: This is almost always due to inconsistent seam allowances or inaccurate cutting. Re-measure your cutting guides, practice your seam allowance, and make another test block.
- Fabric Distortion: Handling fabric too much, especially on the bias, can stretch it. Use a starch or fabric stabilizer if needed, and handle pieces gently.
- Calculations Seem Off: Re-write your math step-by-step, focusing on separating finished block sizes from cutting sizes (which include seam allowances).
Your Journey to Perfectly Sized Quilt Blocks
Changing the size of a quilt block, while initially seeming complex due to the math involved, is a skill that becomes incredibly intuitive with practice. By understanding the fundamental principles of seam allowances, breaking down blocks into manageable units, and always utilizing test blocks, you gain the power to customize any quilting project to your exact specifications.
Take it one step at a time, embrace the learning process, and soon you’ll find yourself effortlessly adapting patterns and creating truly unique, perfectly proportioned quilts without a guide. Your quilting journey is about to become even more flexible and rewarding!
For a visual and detailed explanation of these techniques, we highly recommend watching the full tutorial by Sew Easy by Sandy on YouTube.