
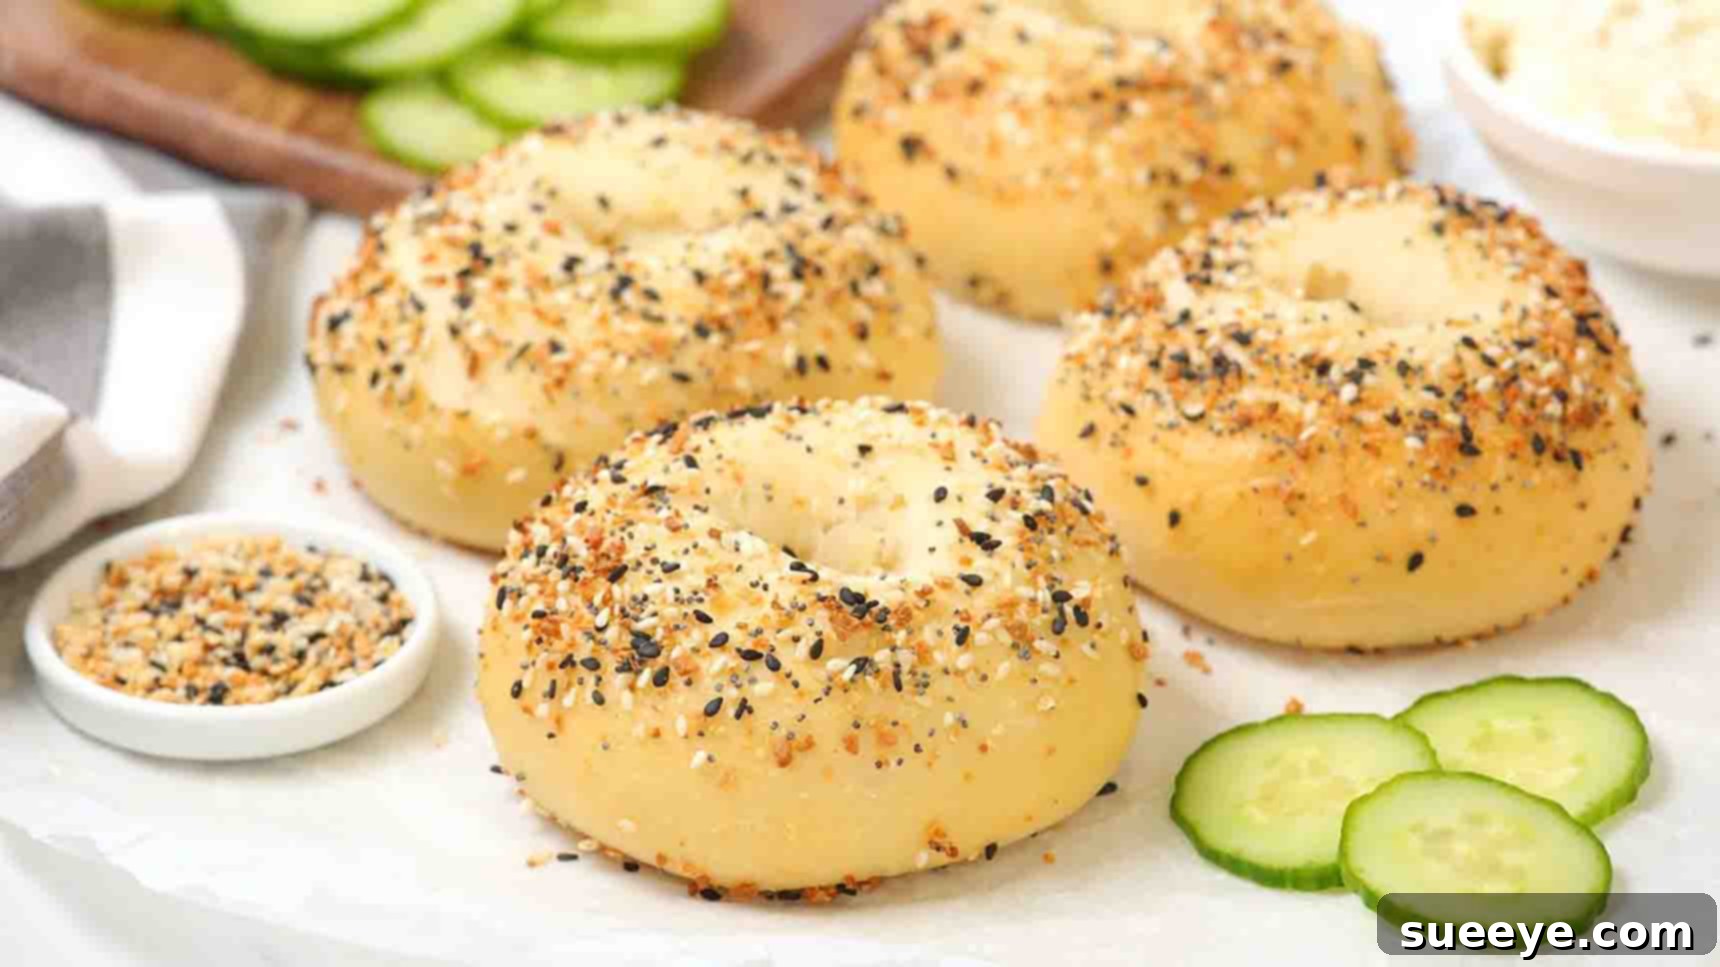
Transform your mornings with an incredibly simple yet utterly delicious recipe: 2-ingredient bagels. Inspired by the brilliant culinary creators at The Domestic Geek on Youtube, this recipe has taken the home baking world by storm, proving that you don’t need a pantry full of ingredients or hours of effort to enjoy fresh, chewy bagels. Forget the complex yeast proofs and lengthy waiting times; these bagels are surprisingly easy to make, requiring just two fundamental ingredients that you likely already have on hand. They are destined to become a staple in your home cooking repertoire, offering a satisfying and versatile option for breakfast, brunch, or even a light snack. Get ready to embark on a baking adventure that promises homemade goodness without the fuss.
Effortless 2-Ingredient Bagels: Your New Breakfast Obsession
Imagine waking up to the aroma of freshly baked bagels, golden brown and perfectly chewy, ready to be slathered with your favorite spread. What if we told you that this dream could become a daily reality with just two simple ingredients and minimal effort? This revolutionary 2-ingredient bagel recipe, popularized by culinary sensation The Domestic Geek, redefines homemade baking. It’s a game-changer for anyone seeking a quick, healthy, and incredibly satisfying alternative to store-bought options. Whether you’re a seasoned baker or a complete novice, these bagels are foolproof and guaranteed to impress, making them a perfect addition to your collection of easy homemade recipes.
Why These 2-Ingredient Bagels Are a Must-Try
The appeal of this recipe extends far beyond its simplicity. Here’s why these Greek yogurt and self-rising flour bagels are winning hearts globally and are quickly becoming a favorite for busy individuals and families alike:
- Unbeatable Simplicity: Truly, only two core ingredients are needed to create these delightful bagels. There’s no complicated yeast activation, no extensive rise times, and no need for specialized equipment. It’s baking at its most accessible, making it perfect for beginners and seasoned bakers looking for a quick fix.
- Quick & Efficient: From the moment you start mixing your ingredients to the time you pull warm, fresh bagels from the oven, the active prep time is remarkably short. You can have fresh, homemade bagels on your table in under 45 minutes, making them an ideal choice for busy weekday mornings or spontaneous weekend brunches.
- Healthier Alternative: Traditional bagels can often be calorie-dense and lack significant protein. By using Greek yogurt as a primary ingredient, these bagels offer a wonderful boost of protein and often less fat compared to their conventional counterparts. This contributes to a more balanced breakfast option that keeps you feeling fuller and more energized throughout your day.
- Incredibly Versatile: While delicious on their own, these easy homemade bagels are a blank canvas for customization. Whether you crave sweet or savory, the possibilities are endless for toppings, mix-ins, and how you choose to serve them.
- Cost-Effective: Making bagels from scratch at home is significantly cheaper than purchasing them from a bakery or grocery store, allowing you to enjoy gourmet taste and quality without breaking the bank. It’s a smart way to enjoy fresh bread products regularly.
Essential Ingredients for Your Simple Bagels
Gathering your ingredients for this recipe is the easiest part. For the core recipe, you only need two absolute staples. The optional additions, while not strictly necessary, can significantly elevate the flavor and appearance, helping your homemade bagels mimic the professional look and taste of classic bakery bagels.
- 1 & 3/4 cups of Self-Rising Flour: This is the backbone of our bagel dough. Self-rising flour is specifically formulated with leavening agents (baking powder and salt) already incorporated. This eliminates the need to add them separately, simplifying the recipe immensely. It reacts beautifully with the acidity in the Greek yogurt to create that signature rise and chewy texture that defines a great bagel.
- 1 cup of Plain Greek Yogurt: This is the magic ingredient that makes this recipe so innovative and effective! Greek yogurt provides essential moisture, helps to build the dough’s structure, and imparts a subtle tang that complements the flour. Its thick, creamy consistency is crucial for the dough’s texture, so it’s important to opt for full-fat or low-fat plain Greek yogurt. Regular yogurt is typically too thin and contains too much water, which would result in a sticky, unworkable dough.
- 1 large egg (optional, for egg wash): Lightly beaten, an egg wash provides a beautiful, glossy, golden-brown sheen to the finished bagels. It also acts as a natural adhesive, helping any toppings you choose to sprinkle on (like sesame seeds or everything seasoning) to stick firmly to the bagel surface during baking.
- 2 tbsp Everything Seasoning (optional): For that quintessential, popular bagel shop flavor, everything seasoning is highly recommended. It’s a savory blend typically containing sesame seeds, poppy seeds, dried garlic, dried onion, and sea salt flakes. Feel free to substitute with other preferred toppings such as plain sesame seeds, poppy seeds, flaked sea salt, or even a delightful cinnamon sugar mixture for a sweet variation.
Step-by-Step Directions for Crafting Your 2-Ingredient Bagels
Follow these straightforward steps to create your perfect batch of homemade bagels. The process is intuitive, enjoyable, and yields incredibly rewarding results!
Step 1: Prepare the Dough and Shape Your Bagels
Begin by combining your two core ingredients. In a medium-sized mixing bowl, add 1 & 3/4 cups of self-rising flour and 1 cup of plain Greek yogurt. Start mixing the ingredients thoroughly with a sturdy spoon or a firm spatula. Initially, the mixture will appear dry, crumbly, and quite scraggly. This is perfectly normal and part of the process, so don’t be discouraged! Continue to mix until the flour begins to absorb the moisture from the yogurt. As the dough starts to come together and becomes too difficult to manage with a utensil, it’s time to switch to using your hands. Gather the dough and gently work it within the bowl, pressing and folding it until it forms a cohesive and unified ball.
Once you have a dough ball, transfer it from the bowl to a lightly floured surface. Knead the dough for approximately four to five minutes. This kneading process is vital; it helps to develop the gluten in the flour, which is what gives bagels their characteristic chewy texture. Aim for a dough that feels smooth, elastic, and no longer overly sticky. Be careful not to over-knead, as this can result in tough bagels. After kneading, divide the smooth dough into four equal pieces. This will yield four generously sized, standard bagels. If you prefer slightly smaller bagels or wish to make more, you can divide the dough into six equal pieces instead.
Take one piece of the divided dough and roll it gently between your palms until it forms a nice, even sphere. Next, using your thumbs, gently press a hole directly through the center of the dough ball. Gradually widen this hole, stretching the dough carefully, to create the classic bagel shape. Aim for a hole that’s roughly 1 to 1.5 inches in diameter, keeping in mind that the hole will slightly shrink during the baking process. Once shaped, place the bagel onto a baking sheet that has been lined with parchment paper. This prevents sticking and makes cleanup a breeze. Repeat this shaping process with the remaining three (or five) pieces of dough, ensuring that each bagel is evenly spaced on the baking sheet to allow for proper airflow and baking.
Step 2: Apply Toppings and Bake to Perfection
This is the exciting step where you can truly personalize your homemade bagels and add that professional finishing touch. If you desire a beautiful golden-brown, slightly glossy crust and a surface for toppings to adhere effectively, it’s time to prepare and apply an egg wash. In a small bowl, lightly beat one large egg until the yolk and white are just combined. Using a pastry brush, gently and evenly brush the entire top surface of each shaped bagel with this egg wash. This not only contributes to that coveted bakery-style sheen but also helps any seasonings you apply to stick firmly during baking.
Now, it’s time to sprinkle your chosen seasonings! For a truly traditional and savory touch, generously sprinkle everything seasoning over the egg-washed bagels. The blend of sesame, poppy, garlic, and onion creates an irresistible aroma and flavor profile. Alternatively, you can opt for other popular choices such as plain sesame seeds, poppy seeds, coarse sea salt flakes, dried garlic flakes, or even a combination of these. If you prefer a simple, plain bagel or are looking to save a step and reduce ingredients, you can absolutely skip the egg wash and seasoning altogether. The bagels will still bake up wonderfully delicious, just less golden and without the added textural and flavor elements from the toppings. The choice is entirely yours!
Once topped (or left plain), carefully transfer the baking sheet with your prepared bagels to a preheated oven. Ensure your oven is set to 350 degrees F (175 degrees C). Bake for approximately 20 to 24 minutes. Keep in mind that baking times can vary slightly depending on the calibration of your specific oven and the exact size of the bagels you’ve shaped. Look for visual cues: the bagels should achieve a beautiful golden-brown color and feel firm to the touch, indicating they are cooked through. Once baked to perfection, carefully remove the bagels from the oven and transfer them immediately to a wire rack. Allow them to cool slightly before serving to improve their texture and make them easier to slice.
Pro Tips for Perfect 2-Ingredient Bagels Every Time
While this recipe is incredibly forgiving and designed for simplicity, these additional tips will help you achieve consistently delicious, bakery-quality results with your homemade 2-ingredient bagels:
- Use Cold Greek Yogurt: Starting with cold Greek yogurt makes the dough significantly thicker and less sticky, which in turn makes it much easier to handle and knead. This simple trick can prevent a lot of frustration, especially for beginners.
- Don’t Over-Knead: Kneading for 4-5 minutes is generally sufficient to develop enough gluten for that desirable chewy bagel texture. Over-kneading can lead to a tough and dense bagel, so trust the process and stop once the dough is smooth and pliable.
- Flour Your Surface Lightly: When transferring the dough to your work surface for kneading and shaping, use a very light dusting of flour. Too much extra flour can dry out your dough, while too little will cause it to stick. Find that perfect balance.
- Experiment with Hole Size: Remember that the hole you create in your bagel will shrink during baking. It’s often a good idea to make the hole slightly larger than you desire for the finished bagel to ensure it remains visible and distinct after baking.
- Ensure Even Thickness: Try your best to make your bagels uniform in thickness all the way around. This ensures that they bake evenly, preventing some parts from being undercooked or overcooked.
- Preheat Thoroughly: Always ensure your oven is fully preheated to the specified temperature before placing the bagels inside. A properly preheated oven is crucial for consistent baking results and helps the bagels rise correctly.
- Cool Before Slicing: While it’s tempting to slice into a warm bagel right out of the oven, allowing the bagels to cool slightly on a wire rack improves their internal texture and makes them much easier to slice without tearing or becoming gummy.
Creative Variations and Serving Suggestions for Your Bagels
The true beauty of these 2-ingredient bagels lies in their incredible adaptability. Once you’ve mastered the basic recipe, you can unleash your culinary creativity and customize them to suit any craving or occasion!
Flavorful Topping & Mix-In Ideas:
- Sweet Delights:
- Cinnamon Sugar: For a sweet morning treat, brush your bagels with melted butter (instead of egg wash) and then generously sprinkle them with a delightful mixture of ground cinnamon and granulated sugar before baking.
- Blueberry: Gently fold a handful of fresh or frozen (do not thaw them first) blueberries into the dough during the initial mixing stage. This adds a burst of fruity flavor and a lovely aroma.
- Raisin: For a classic sweet and chewy bagel, simply add about a quarter cup of plump raisins to the dough while you are mixing it.
- Savory Sensations:
- Cheesy Goodness: During the last 5-10 minutes of baking, sprinkle some shredded cheddar, mozzarella, or a blend of your favorite cheeses on top of the bagels. The cheese will melt and become golden and bubbly.
- Garlic & Herb: Infuse your bagels with aromatic flavors by mixing dried garlic powder, onion powder, and Italian herbs directly into the dough. Alternatively, sprinkle these seasonings on top with a little grated Parmesan cheese before baking.
- Jalapeño Cheddar: For those who love a bit of a kick, fold finely diced fresh or pickled jalapeños and shredded sharp cheddar cheese into the dough before shaping.
Perfect Serving Pairings:
These homemade bagels are incredibly versatile and can be enjoyed in countless delicious ways, whether for breakfast, lunch, or a hearty snack:
- Classic Cream Cheese: The timeless and quintessential pairing! Explore different flavored cream cheeses such as chive, strawberry, veggie, or even a spicy jalapeño cream cheese for added excitement.
- Avocado Toast Twist: For a satisfying and trendy breakfast or lunch, toast your bagel and top it with creamy mashed avocado, a sprinkle of everything seasoning (if your bagel isn’t already topped), and a dash of red pepper flakes for a subtle heat.
- Elegant Lox & Capers: Elevate your brunch experience with a gourmet combination of toasted bagel, a generous layer of cream cheese, delicate slices of smoked salmon (lox), thinly sliced red onion, and briny capers.
- Hearty Breakfast Sandwich: Slice, toast, and fill your homemade bagel with scrambled eggs, crispy bacon or savory sausage, and a slice of your favorite cheese for a delicious and filling start to the day.
- Simple Butter or Jam: Sometimes, the simplest accompaniments are the best. A pat of good quality butter or a dollop of your favorite fruit jam can perfectly highlight the bagel’s natural texture and subtle flavor.
- Peanut Butter & Banana: For a quick, energy-boosting snack or a simple breakfast, spread peanut butter on a toasted bagel half and top with sliced bananas.
Storage and Reheating Your Homemade Bagels
To ensure your delicious 2-ingredient bagels remain fresh and enjoyable for as long as possible, follow these simple storage and reheating tips:
- Room Temperature Storage: Once your bagels have completely cooled, store them in an airtight container or a large, sealed zip-top bag at room temperature. They will maintain their freshness and best texture for up to 2-3 days.
- Refrigeration: If you anticipate not consuming all your bagels within a few days, it’s best to refrigerate them. Place them in an airtight container or bag in the refrigerator, where they can stay fresh for up to a week.
- Freezing for Longer Storage: For extended freshness, freezing is an excellent option. Allow the baked bagels to cool completely. For convenience, you can slice them in half before freezing. Place parchment paper between the sliced halves (to prevent them from sticking together), and then transfer them into a freezer-safe bag or container. Bagels can be stored in the freezer for up to 2-3 months, allowing you to easily grab a single half-bagel whenever a craving strikes.
Optimal Reheating Instructions:
- Toaster: The quickest and most common method for refreshing a bagel. Simply slice your bagel in half (if not already sliced) and toast the halves in a toaster or toaster oven until they are warmed through and slightly crispy to your liking.
- Oven: If you are reheating a whole bagel or multiple bagels, preheat your oven to 350°F (175°C). For the best results, lightly sprinkle a little water on the bagels before placing them in the oven. This helps to create some steam, mimicking a fresh bake and restoring their soft interior. Warm for approximately 5-7 minutes.
- Microwave (for speed, not crispness): If you’re in a real hurry, you can microwave a bagel for 15-30 seconds. Be aware that this method will warm the bagel quickly but will not provide the same crisp exterior as toasting or oven reheating. It’s best for a soft bagel when time is of the essence.
Conclusion: Your Journey to Homemade Bagel Bliss
There you have it – a straightforward, incredibly delicious, and immensely satisfying way to make homemade bagels with just two simple ingredients. This ingenious recipe from The Domestic Geek truly demystifies the art of bagel making, proving that gourmet flavors and textures are accessible to everyone, regardless of their baking experience. Say goodbye to relying solely on store-bought bagels and hello to the unmatched freshness, warmth, and pride that comes with baking your own. Experiment with an array of toppings and mix-ins, enjoy them plain, or transform them into elaborate and delectable sandwiches. Your mornings, brunches, and any snack time just got a whole lot tastier and more exciting!
Don’t wait any longer! Gather your self-rising flour and plain Greek yogurt today, and embark on the delightful experience of baking these fantastic 2-ingredient bagels. We encourage you to share your creations, experiment with your favorite flavor combinations, and let us know your most beloved ways to enjoy these easy homemade treats!