
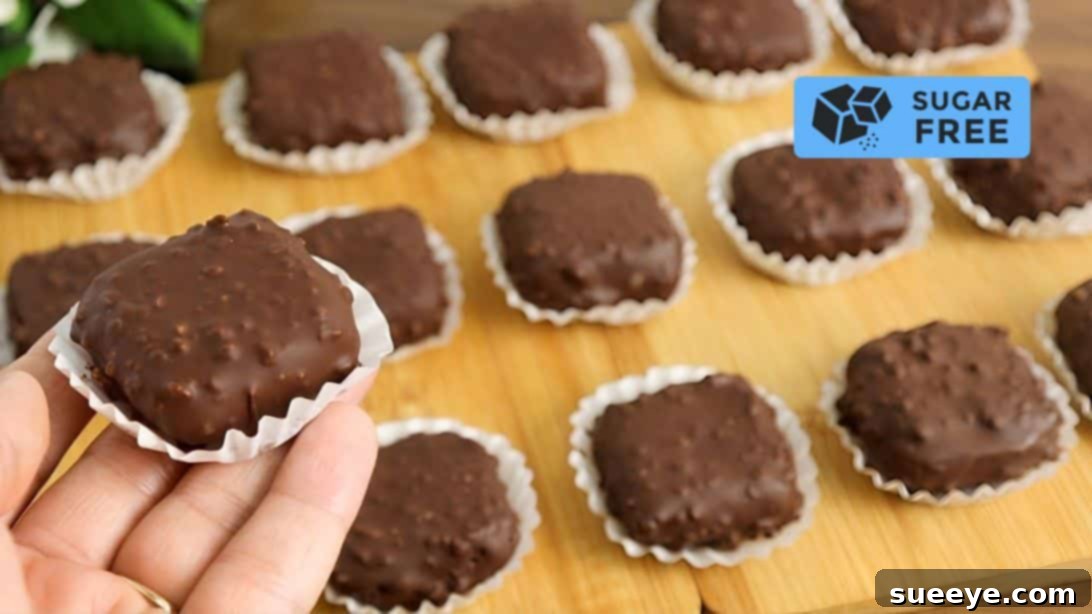
Indulge Guilt-Free: The Ultimate Quick & Easy No-Bake Sugar-Free Chocolate Dessert
Are you a devoted chocolate enthusiast yearning for a sweet treat without the guilt of added sugars or the hassle of baking? Look no further! This incredible no-bake chocolate dessert, inspired by the culinary experts at Quick Simple & Delicious, is a game-changer. It’s an ideal choice for anyone looking to reduce their sugar intake while still savoring the rich, satisfying taste of chocolate. Crafted with wholesome ingredients and requiring absolutely no oven time, these addictively delicious treats are bound to become a staple in your home. Get ready to impress your family and friends with a dessert that’s both healthy and incredibly flavorful. Read on for the full instructions and discover your new favorite sugar-free indulgence!
Why Choose This No-Bake Sugar-Free Chocolate Dessert?
In today’s health-conscious world, finding desserts that satisfy your cravings without compromising your dietary goals can be a challenge. This no-bake chocolate squares recipe offers a perfect solution, combining ease, health benefits, and exquisite taste into one delightful package. Here’s why this recipe stands out as a must-try:
Health-Conscious Indulgence
- Naturally Sweetened: Instead of refined sugar, this recipe harnesses the natural sweetness of dates. Dates are not only delicious but also packed with fiber, essential minerals like potassium and magnesium, and antioxidants, offering a healthier way to satisfy your sweet tooth.
- Wholesome Fats: Hazelnuts contribute healthy monounsaturated fats, protein, and fiber, promoting satiety and supporting heart health. Coupled with cocoa powder’s potent antioxidants, this dessert offers more than just empty calories.
- Gluten-Free and Easily Adaptable: Naturally gluten-free, these treats are suitable for those with celiac disease or gluten sensitivities. With minor adjustments (like swapping honey for maple syrup or agave), this recipe can also be made completely vegan, catering to a wider range of dietary needs.
Unbeatable Convenience and Speed
- No Baking Required: The biggest advantage is the “no-bake” factor. This means no preheating the oven, no waiting for cakes to rise, and no worries about over-baking. It’s perfect for hot summer days or when you simply don’t want to turn on your oven.
- Quick Preparation: From start to finish, this recipe comes together relatively quickly. Most of the time is spent soaking dates and allowing the finished treats to set in the refrigerator. The active prep time is minimal, making it an excellent option for last-minute cravings or entertaining.
- Simple Steps: The instructions are straightforward and easy to follow, even for novice cooks. You don’t need any specialized culinary skills to achieve perfect results.
Irresistible Flavor and Texture
- Rich Chocolatey Goodness: Despite being sugar-free, this dessert delivers a deep, satisfying chocolate flavor, enhanced by a touch of instant coffee (optional) that really makes the cocoa sing.
- Delightful Textural Contrast: The soft, chewy date and hazelnut base is perfectly complemented by the crisp, slightly bitter sugar-free dark chocolate coating and the added crunch of chopped hazelnuts. Each bite is a symphony of textures and flavors.
- Versatile and Adaptable: While delicious as is, this recipe also serves as a fantastic base for experimentation. You can easily introduce different nuts, spices, or even citrus zest to customize the flavor profile to your liking.
By opting for this no-bake sugar-free chocolate dessert, you’re choosing a treat that’s not only incredibly delicious but also mindful of your health and busy schedule. It’s truly the best of both worlds!
Essential Ingredients for Your Healthy Chocolate Squares
Creating these delightful no-bake chocolate squares starts with gathering high-quality ingredients. Each component plays a crucial role in achieving the perfect texture and flavor. Here’s a detailed look at what you’ll need:
- 1 cup of dates (preferably Medjool for their softness and sweetness)
- 1/2 cup of roasted hazelnuts (for the base)
- 1/2 cup of desiccated coconut
- 1 teaspoon of instant coffee or 1 tablespoon of water (optional, to enhance chocolate flavor)
- A pinch of salt (to balance sweetness)
- 2 tablespoons of cocoa powder (unsweetened, high quality for best flavor)
- 2 tablespoons of honey or date molasses (for extra binding and sweetness)
- 4.2 oz of sugar-free dark chocolate (high-quality, at least 70% cocoa solids)
- 1 tablespoon of vegetable or coconut oil (to make chocolate smooth for coating)
- 1/4 cup of chopped hazelnuts (for the chocolate coating, adding crunch)
A Closer Look at Key Ingredients:
- Dates: The star sweetener! Medjool dates are highly recommended due to their soft, chewy texture and rich, caramel-like flavor, which blends beautifully. Ensure they are pitted before use.
- Roasted Hazelnuts: These nuts provide a wonderful crunch and a distinctly nutty flavor that pairs exquisitely with chocolate. Roasting them beforehand intensifies their taste.
- Desiccated Coconut: Adds a subtle tropical flavor and helps bind the mixture, contributing to a pleasant chewy texture. Make sure it’s unsweetened to maintain the sugar-free profile.
- Cocoa Powder: Opt for a good quality unsweetened cocoa powder. Dutch-processed cocoa powder often offers a darker color and milder flavor, while natural cocoa is fruitier and more acidic. Either will work, but the quality makes a difference.
- Instant Coffee (Optional): A small amount of coffee doesn’t make the dessert taste like coffee; instead, it remarkably deepens and intensifies the chocolate flavor, making it richer and more complex.
- Sugar-Free Dark Chocolate: This is crucial for the coating. Look for brands that use natural sweeteners like stevia, erythritol, or monk fruit, and ensure it has a high cocoa percentage for a truly decadent taste.
Selecting fresh, high-quality ingredients will undoubtedly elevate the final taste and texture of your no-bake chocolate dessert. Don’t skimp on these essentials!
Essential Kitchen Tools for Seamless Preparation
While this recipe is incredibly simple, having the right tools on hand will make the process even smoother and more enjoyable. Here’s a list of the essential kitchen equipment you’ll need:
- Food Processor: This is the most crucial piece of equipment. It will do all the heavy lifting for grinding nuts and dates to achieve the perfect dough-like consistency for the base.
- Mixing Bowls: Several bowls will be handy for soaking dates, preparing the dry ingredients, and eventually for the melted chocolate.
- Measuring Cups and Spoons: Essential for accurate ingredient measurements, ensuring consistent results every time.
- Spatula: Useful for scraping down the sides of the food processor, mixing ingredients, and handling the chocolate mixture.
- Heatproof Bowl: Needed for melting the dark chocolate. Glass or ceramic bowls work best.
- Double Boiler Setup or Microwave: You’ll need one of these methods to gently melt the dark chocolate without burning it. A double boiler involves a heatproof bowl set over a saucepan of simmering water.
- Baking Sheet Lined with Parchment Paper: This provides a non-stick surface for chilling your chocolate squares and prevents them from sticking to the rack.
- Wire Rack: Ideal for allowing excess chocolate to drip off and for the treats to set evenly.
- Sharp Knife: For chopping the dark chocolate and for any final adjustments to your square shapes.
Having these tools ready before you begin will streamline your preparation process, allowing you to focus on the fun part: making delicious chocolate treats!
Step-by-Step Instructions for Your Perfect No-Bake Treats
Now that you have all your ingredients and tools ready, let’s dive into creating these irresistible no-bake chocolate desserts. Follow these detailed steps to ensure a perfect batch every time.
Step 1: Prepare the Dates
Begin by placing your 1 cup of dates into a medium-sized bowl. Cover them completely with warm water. Allow the dates to soak for approximately 10 minutes. Soaking softens the dates, making them easier to process and ensuring a smooth, pliable dough for your dessert base. This step is crucial for achieving the right texture.
Step 2: Process the Dry Ingredients
While the dates are soaking, prepare your dry base mixture. In a food processor, add the 1/2 cup of roasted hazelnuts, 1/2 cup of desiccated coconut, a pinch of salt, and 2 tablespoons of unsweetened cocoa powder. If you’ve opted to use instant coffee, first dissolve the 1 teaspoon of instant coffee powder in 1 tablespoon of warm water in a small bowl, then add this liquid to the food processor along with the other dry ingredients. Process everything together until the hazelnuts are finely ground and the mixture resembles a coarse meal. You want a consistent texture, but not a paste, at this stage.
Step 3: Combine with Dates and Sweetener
After 10 minutes, drain the water from the soaked dates. Rinse the dates briefly under cool water and carefully remove any pits. Add the pitted dates to the food processor with the ground hazelnut mixture. Follow this with 2 tablespoons of honey or date molasses. Process the mixture again, scraping down the sides as needed, until it transforms into a sticky, uniform dough-like texture. It should be firm enough to hold its shape when pressed. Once achieved, transfer this rich, chocolatey dough to a separate mixing bowl.
Step 4: Shape the Mixture into Squares
Now comes the shaping! Using your hands, firmly press the dough into a compact mass. You can then flatten it onto a parchment-lined tray or cutting board to an even thickness, typically about 1/2 to 3/4 inch (1-2 cm). Once flattened, use a sharp knife to carefully cut the mixture into uniform square shapes. Aim for bite-sized pieces, as this dessert is quite rich. Precision in cutting will make for more aesthetically pleasing final treats.
Step 5: Prepare the Sugar-Free Chocolate Coating
Break or chop the 4.2 oz of sugar-free dark chocolate into small, manageable pieces. Place these chocolate pieces in a heatproof bowl. Add 1 tablespoon of vegetable or coconut oil to the bowl. To melt the chocolate, you have two main options: either use a double boiler method (placing the bowl over a saucepan of simmering water, ensuring the bowl doesn’t touch the water) or melt it in a microwave in short 20-30 second bursts, stirring well after each interval, until completely smooth and glossy. Once melted, stir in the 1/4 cup of chopped hazelnuts. This will add fantastic crunch and flavor to your coating.
Step 6: Dip, Coat, and Set
Carefully take each pre-shaped square and dip it completely into the melted chocolate and hazelnut mixture, ensuring it’s fully coated. Lift the square out, allowing any excess chocolate to drip off for a smooth finish. Transfer the coated square to a wire rack that has been placed over a baking sheet lined with parchment paper (to catch drips). Repeat this process for all the remaining squares. Once all squares are coated, place the entire rack into the refrigerator for at least 5 minutes, or until the chocolate coating is completely set and firm. This rapid chilling ensures a crisp, satisfying chocolate shell.
Pro Tips for Perfect No-Bake Chocolate Squares
To ensure your no-bake chocolate dessert turns out perfect every time, consider these professional tips:
- Date Quality Matters: For the best results, use fresh, soft Medjool dates. If your dates are dry, soak them in hot water for a slightly longer period (up to 20 minutes) to ensure they become very soft and blend smoothly.
- Don’t Over-Process Nuts: When grinding the hazelnuts and coconut, pulse rather than continuously blend. You want a fine meal, not a nut butter, before adding the dates.
- Achieve the Right Dough Consistency: The date and nut mixture should be sticky enough to hold together when pressed but not overly wet. If it’s too dry, add a tiny bit more date molasses or a few drops of water. If too wet, add a tablespoon of extra desiccated coconut or cocoa powder.
- Even Thickness for Shaping: When pressing the base mixture onto your surface, ensure it’s an even thickness. This guarantees uniform squares that will cool and set consistently.
- Tempering Chocolate (Advanced Tip): While not strictly necessary for this recipe, understanding basic chocolate tempering can lead to an even glossier, snappier coating. However, simply melting with oil as instructed will yield excellent results for home bakers.
- Prevent Chocolate Blooming: Store your finished treats in an airtight container in a cool, dry place or the refrigerator. Drastic temperature changes can sometimes cause chocolate to “bloom” (develop white streaks), which is harmless but can affect appearance.
Variations and Customizations for Your No-Bake Delights
This recipe is wonderfully versatile, offering plenty of room for creative customization. Feel free to experiment with these variations to tailor the treats to your taste preferences:
- Nut Alternatives: Swap hazelnuts for almonds, walnuts, pecans, or even a mix of your favorite nuts for a different flavor profile and texture. Just be sure to roast them lightly for enhanced flavor.
- Spice It Up: Add a pinch of cinnamon, cardamom, or even a tiny dash of cayenne pepper to the base mixture for a warm, exotic twist. Chili chocolate is a classic pairing!
- Citrus Zest: Incorporate the zest of an orange or tangerine into the base mixture for a refreshing, bright contrast to the rich chocolate.
- Extracts: A few drops of vanilla extract, almond extract, or even peppermint extract can dramatically change the flavor. Add these when you combine the dates with the dry ingredients.
- Different Coatings: Instead of dark chocolate, you could use sugar-free white chocolate for a different aesthetic and taste. Alternatively, omit the chocolate coating entirely and roll the squares in extra desiccated coconut, cocoa powder, or finely chopped nuts.
- Add-ins: Fold in some sugar-free chocolate chips, dried cranberries (ensure they are sugar-free), or goji berries into the date mixture before shaping for extra bursts of flavor and texture.
- Vegan Adaptation: If you’re using honey and want to make this recipe strictly vegan, simply substitute the honey with an equal amount of pure maple syrup or agave nectar. Date molasses is already a great vegan option.
Don’t be afraid to get creative and make these no-bake chocolate squares uniquely yours!
Storage and Serving Suggestions
Once your exquisite no-bake sugar-free chocolate desserts have set, they are ready to be enjoyed! For optimal freshness and texture, it’s important to store them correctly.
- Storage: Store the finished chocolate squares in an airtight container in the refrigerator. This will keep them firm and fresh for up to one week. If you need to stack them, place a piece of parchment paper between layers to prevent sticking. They can also be frozen for up to a month; simply thaw them in the refrigerator before serving.
- Serving: These treats are best served chilled or at cool room temperature. They make a perfect accompaniment to a cup of coffee or tea, a delightful after-dinner treat, or a healthy snack any time of day. Arrange them elegantly on a platter for guests, or pack them in a lunchbox for a wholesome on-the-go snack. They also make a wonderful homemade gift for friends and family!
Your New Favorite Sugar-Free Indulgence Awaits!
There you have it – a comprehensive guide to crafting a truly spectacular no-bake chocolate dessert that is as healthy as it is delicious. With natural sweetness from dates, the satisfying crunch of hazelnuts, and a rich, sugar-free chocolate coating, these treats prove that you don’t need excessive sugar to enjoy an indulgent dessert. This recipe is a testament to the fact that healthy eating doesn’t mean sacrificing flavor or pleasure.
We encourage you to try this simple, quick, and utterly delightful recipe. It’s perfect for satisfying chocolate cravings, catering to dietary needs, or simply enjoying a guilt-free sweet moment. If you enjoyed this recipe and found the instructions helpful, make sure to check out more fantastic culinary ideas from our inspiration, Quick Simple & Delicious on Youtube. Happy making!